Specifications
According to physical properties, warm air masses rise upward, and even in a steam room, where it is hot, the floors are cold.
But such a dissonance between the heat from above and the cold from below makes bathing procedures uncomfortable. Modern technologies make it possible to improve the microclimate in the bathhouse by installing different types of heated floors under the floor covering:
- cable - are a heating cable laid under the finishing coating, powered by electric current;
- infrared - a film with infrared plates inside that heat up when energy is supplied, the simplest structure in terms of self-installation;
- water - a pipeline located under the floor in the bathhouse, the coolant is heated water.
However, the bathhouse has high humidity, so many building owners do not risk installing electric heated floors themselves.
In this regard, water heated floors are considered more popular. After all, the bathhouse is equipped with a stove, and it is possible to heat the coolant from it, so this combination is also economically profitable.
Preparatory work
The device is a pipeline with a coolant inside, which is powered by a sauna stove heated with wood or other fuel. The stove must be converted to heat underfloor heating.
After ignition, it warms up the system, full heating is achieved by the time the steam room is ready. Water circulates using an installed pump; it is included in the mixing unit. Warm pipes heat up the screed and flooring, which in turn transfers it to the room.
Before starting work on the construction of a heated water floor in a bathhouse, you need to draw up a detailed diagram, indicating the size of the heated room, the length of the circuit, the location of the pump insertion, the area where the mixing unit and heat exchanger are connected. In accordance with this drawing, the amount of material required for the heating structure is determined.
After which, you can proceed to the installation work itself, which begins with preparing the base and draining:
- Remove the soil between the foundation walls and compact the surface. Before this, lay sewer pipes for wastewater. Through them, water will go into the sewer.
- Pour a layer of sand and crushed stone (15 cm) and compact it well.
- Lay expanded clay insulation, its thickness is 150 - 200 mm. It is required to make a slope in the direction of the drainage.
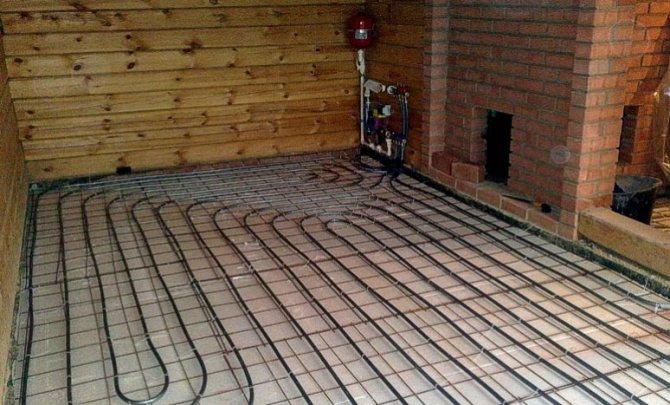
Like any construction, the beginning was made from the foundation. First, they removed a small layer of soil and made a gravel backfill. The foundation was planned and made monolithic (slab). Concrete steps were laid around the perimeter, reinforced lining was made in the corners, and sand was poured inside. The sand was well leveled, compacted and expanded polystyrene slabs were laid on it, the joints between them were foamed with polyurethane foam.
monolith foundation for bathhouse foundation - polystyrene foam
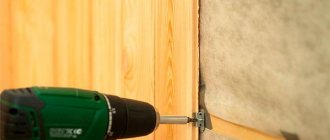
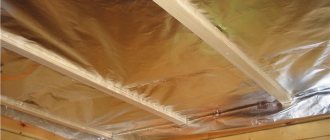
Expanded polystyrene also had to be laid vertically along the inner perimeter of the foundation in order to repel the cold bridge from the walls. A sewerage system (water drainage) was pre-made so as not to damage the plastic floor pipes later. After this, we laid out a roll of foil insulation - ecofol, which is specially designed for heated floors. The joints were taped with foil tape.
How to install heated floors
The progress of work on installing heated floors is as follows. A diagram is being prepared that shows the location of the floor heating system, including all elements of the heated floor and the drainage system. Work begins with the implementation of a rough screed:
- Level and compact the soil.
- Install pipes to carry water into the sewer system.
- Organize a cushion of sand and crushed stone (15 cm), compact it.
- Add 20 cm of expanded clay insulation.
- Fill the screed.
Organize waterproofing:
- Lubricate the rough screed with molten bitumen or waterproofing mastic.
- If bitumen was used, cover it with sheets of roofing material, taking into account an overlap of 10 cm.
- Repeat these layers again.
Install the insulation:
- Use slab insulation with a thickness of at least 50 mm: penoplex, extruded polystyrene foam.
- Control the inclination to the drain hole.
Next, the reinforcing mesh is laid, and a damper tape is attached around the perimeter.
The circuit is fixed to the grid according to the diagram, the equipment is mounted and all elements of the heating system are connected.
Fill the screed while maintaining pressure in the circuits. The system can be started after the screed has completely dried.
When operating, the following must be taken into account:
- In winter, water is drained from the circuits every time. This will help protect the pipes from bursting due to the increase in water volume during frosts.
- The shut-off equipment and pump are repaired in a timely manner. This does not happen often, only when necessary, but it is important to respond in a timely manner and not delay repairs.
If you ignore timely maintenance of your floor heating system, repairs will not be easy.
How densely should the contour be laid on the floor? The smaller the pitch, the warmer it is; on the other hand, the longer the pipe. Most often, a pitch of 100 mm is chosen if this is the only source of heating for the entire room, and 300 mm if the heated floor complements the main heating system.
A pitch of less than 100 mm is technically impossible, because we will get a bend in the pipe, at which the system will not be able to function normally, and a step of more than 300 mm is undesirable, because we will get a noticeable alternation of floor areas of different temperatures and uncomfortable differences in heat and cold.
The pipe length and costs are calculated based on the selected step width, pipe diameter and taking into account bending.
If the length of the circuit exceeds 80 m with a pipe diameter of 16 mm or 120 m with a diameter of 20 mm, several circuits are organized, otherwise we will get the effect of a closed loop - when the pump will not be able to service the circuit and the movement of the coolant through the pipes will stop.
Types of underfloor heating systems
In the bathhouse, all the same systems are used as in ordinary housing.
Water
Its design, consisting of a closed loop, is laid below floor level. It involves pipes in which hot water or antifreeze circulates under pressure pumped by a special pump.
The coolant is heated to a set temperature using an electric or gas boiler.
Electric
This system is better known as a “warm floor”, which consists of special heating sections. The expenses for arranging such a floor with daily use will return after 6 years, but for a bathhouse they will pay off much earlier.
Installation of such a coating will take only a week.
Infrared
This option is distinguished by its electrical safety and airtight design; infrared mats are laid on the sauna floor. Their gentle operating mode allows the use of such floors in wooden structures, such as baths.
At the same time, the height of the room is not lost, since laying such a floor will only require a couple of centimeters.
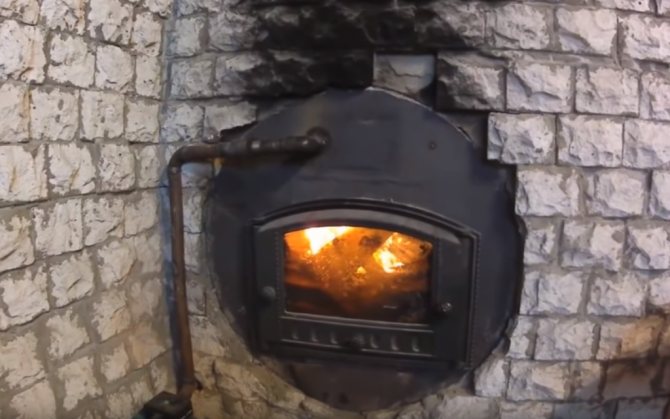
When installing a heated water floor in a bathhouse powered by a wood-burning stove, there is no need to install a boiler. However, a heat exchanger needs to be built above the firebox. Any stainless steel tank that is not prone to corrosion is suitable for this. A circuit extends from it into the room where the heated floor will be installed.
To return the waste liquid to the tank, you will need to install a small pump. Without it, the design will only work when the stove is located below the level of the floor covering. The diameter of the pipe with this scheme should be taken equal to 16 mm; the usual 24 mm ones will not work.
The main feature of the stove floor design is the inability to adjust the temperature level. The recommended temperature of heated floors in the bathhouse is 40 degrees, but the heat carrier from the stove will heat up to boiling water.
Therefore, it is necessary to make a mixing block in which hot water will be mixed with already used water, thereby reaching the desired temperature level.
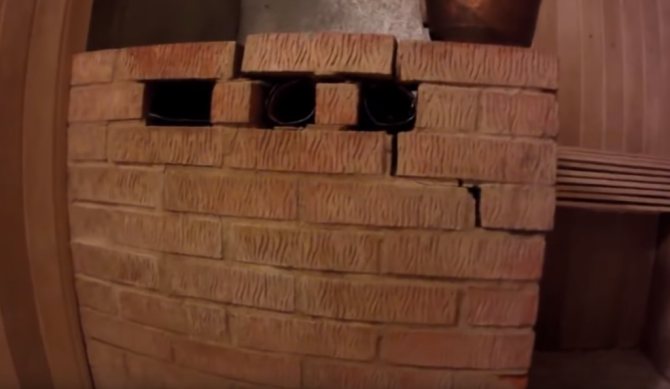
Since it is not possible to install a large container in the furnace, you can place a battery tank near it and stretch steel pipes from it to the heat exchanger.
General information about the system
The water in the water circuit pipes will be heated by the stove
For a heated floor in a bathhouse, there is no need to install a boiler, since the heating will come from the stove. To do this, a heat exchanger should be made from a metal tank above the firebox.
From it it will be possible to install water heating on the floor in those rooms where it is necessary. Additionally, you will need to install a pump to circulate water in the pipes.
Since it will not be possible to install a volumetric heat exchanger in the furnace, you should additionally place an accumulator tank next to it and connect it to the heat exchanger using steel pipes. To reduce heat loss, insulation is laid on the floor so that it can properly reflect it and the rooms will have the required temperature.
The main problem with a water-heated floor from a stove is the inability to regulate the temperature. For heating, it is recommended to heat the floor to 40 degrees, but in the bath the water gets hotter and you will need to additionally install a mixing unit.
| № | Advantages | Flaws |
| 1 | There is no electromagnetic radiation, unlike the electrical system. | In winter, it is necessary to drain the water so that the pipes do not burst from frozen water or the stove must be constantly heated. The best option is to change the water to antifreeze. |
| 2 | Environmentally friendly and harmless to health. | Heating the battery tank will require a lot of heat, making the furnace less efficient for its main purpose. |
| 3 | Comfortable conditions are maintained in the bathhouse, the floor remains warm. | To heat floors in several rooms, you should install a large coolant, which will increase the warm-up time. |
| 4 | Economical. |
We suggest you read why you need a broom in a bathhouse
| Name | Advantages | Flaws |
| Concrete screed is an ideal option for a bathhouse. Filling is simple and does not require special skills. | Saves money on building materials, and due to cement, the floor will be resistant to moisture. | You can use the floor a month after pouring, but if the pipe is damaged, you will have to remove the entire screed to be able to determine the location of the leak. |
| Polystyrene boards are easy to use. | Each plate already has a layer of foil, which allows it to reflect heat, and they are also equipped with places for fixing pipes. | It is necessary to additionally fill the screed. |
| Heating pipes in a wooden floor. | High maintainability. | Accurate calculations are needed to determine the laying of the pipeline. |
A concrete screed is poured on top of the laid materials and pipes.
The warm floor in the bathhouse from the stove according to the scheme is made from the following layers:
- A layer of waterproofing that will protect the floor covering from condensation collection.
- The thermal insulation layer will retain the heat that can pass through the ceilings.
- To protect the insulation, a reinforcing mesh is laid.
- A layer of reflective materials with foil that will reflect heat into the room.
- A pipeline laid in the form of a spiral to uniformly heat the area.
- Screed for leveling surfaces with small slopes towards the drain hole.
- Laying the final floor covering.
Before any work, preparation is necessary. For a floor that will be heated by a stove, you should prepare a base and make a drain. The work is carried out as follows:
- It is necessary to remove the soil between the foundation, under the washing room and compact the surface. You will need to first lay a pipe in the wall to drain water into the sewer.
- A backfill of sand and gravel 15-20 cm high is made, after which the cushion is compacted.
- The base is insulated using expanded clay. The layer of material is 15-20 cm depending on the climate.
The scheme of water heating of floors from a sauna stove, which was not initially suitable for this purpose, works provided it is equipped with additional equipment. In addition to the stove and pipes, you will need to install a mixing unit, a heat exchanger (hot water accumulator) and a circulation pump.
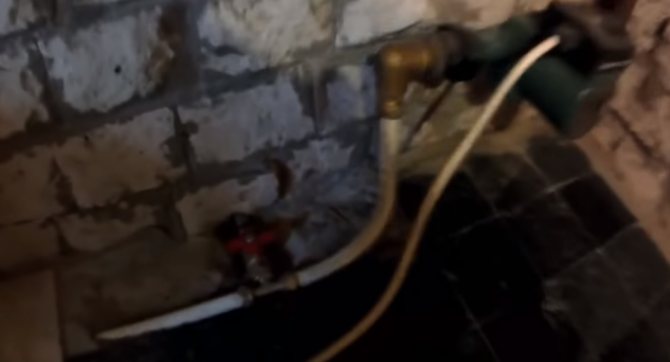
Sauna stove with external heat exchanger
Outlines
The choice of pipes that form the thermal circuit is the first important step, since not every pipe is suitable. For water heated floors, you can use copper pipes or metal-plastic, corrugated stainless steel. But preference is given to pipes made of cross-linked polyethylene with increased heat resistance, the warranty period of which is up to 30 years, and polypropylene, with a warranty of up to 50 years.
Mixing unit
The area where the coolant, reaching the temperature of boiling water, is mixed with the cooled return flow for cooling, since boiling water cannot be put into the circuit. Adjusting the temperature of the liquid supplied to the circuit is a function of the mixing unit.
Mixing unit for heated floors with pump and expander
Heat exchanger
The coil, register or container where the coolant is accumulated are the main elements of the heat exchanger. Water enters the circuit through the coil through the heat exchanger. If the stove is equipped with a tank of water for washing, it can be used as a storage tank for heating floors. If antifreeze is poured into the system, then it will be necessary to equip a separate heat exchanger so that antifreeze does not get into the water supplied to the sink. If the distance from the stove to the brick wall does not allow installing a hot water storage tank nearby, then it is installed upstairs, above the stove.
The circulation pump will ensure uniform distribution and movement of coolant throughout the system. Water heated floors will not be able to function without additional pressure in the circuit, so options without connecting a pump are not considered in principle.
Circulation pump
When choosing a pump, pay attention to performance. It should be higher, the larger the heating area and, therefore, the longer the circuit. To heat 80-100 m², a device with a capacity of 1.5 m³/hour is sufficient. The operating temperature range of pumps for the heating system should extend to sub-zero temperatures if periodic operation of the system in winter is planned. Many models are capable of pumping coolant at temperatures up to 110°C. Household circulation pumps operate from a network with a voltage of 220 volts.
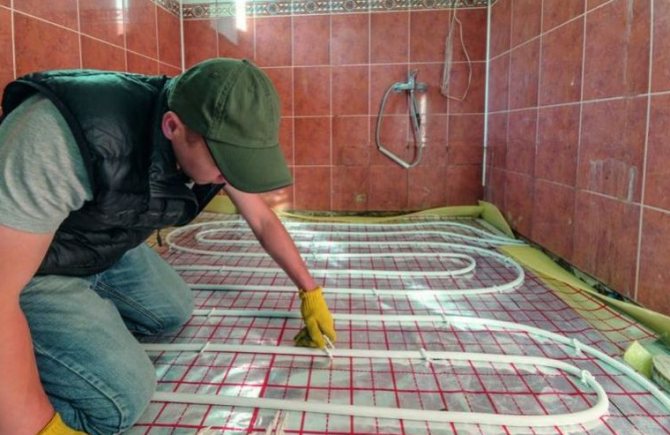
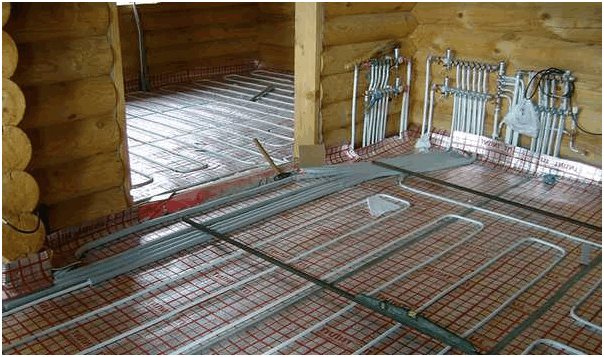
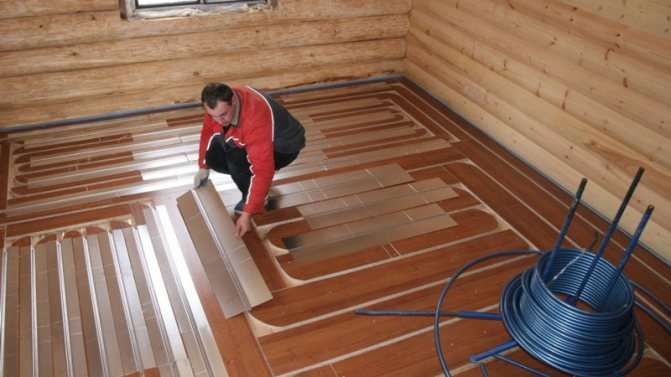
Installation of a pipe for a warm water floor
Then a reinforced mesh was laid on this eco-fol through gaskets (reinforcement). A special plastic pipe made of cross-linked polyethylene, which is intended for heated floors, was spread out on top and secured with a snake. For fastening, simple plastic clamps were used, which are widely used in electrical applications.
How to make warm water floors in a bathhouse foundation with a heated floor
After this, we ordered a mixer (concrete mixer) and 4 cubes of concrete brought by KAMAZ were poured onto the prepared base. It should also be noted that a special plasticizer, warm floor, was added to the concrete in order to subsequently prevent its cracking. All the concrete was well “pierced” with sticks to allow air to escape, and water was sprayed on it for several days. Covered with cardboard from the sun. This way it gains its strength better.
Preparing the base for the floor
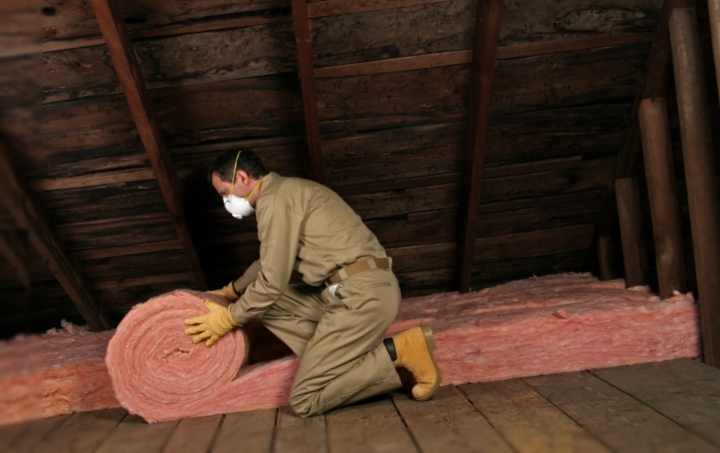
Most often, a wooden covering is placed on the floor in the bathhouse, because it maintains a comfortable temperature. Sometimes the floor in the bathhouse is finished with tiles, under which there is a concrete screed that cools the coating. Before laying heated floors, it is necessary to lay heat-insulating material on the base.
Thermal protection can be achieved using:
- felt
- glass wool.
- expanded clay.
- polystyrene foam
If the flooring in the bathhouse is made of wood, the material is laid between the joists, and the top layer is covered with waterproofing material. This layer is most often laid with a waterproofing film.
Before laying the heat-protective layer, lay a vapor barrier layer using:
- roofing felt
- glassine.
- a film that is more than 0.2 millimeters thick.
If the floor in the bathhouse is laid with tiles, then the insulation is laid between the concrete layers. In order not to reduce the height of the room, the outermost layer of concrete is placed much thinner than the first.
Attention! All elements of the base under the heated floor, including logs, should be treated with water-repellent, antiseptic solutions.
There are two types of floor heating: water and electric.
Disadvantages of a water floor
- Long and painstaking installation.
- Decent financial costs.
- Increased heat tariff.
Well, that's probably all. The result of the work done leaves only positive emotions and when entering the bathhouse you do not regret the effort and finances spent (almost a quarter of the total cost of construction).
After reading this article, you can now imagine how to make warm water floors in a bathhouse. Always strive for the best, never stop there. And a warm water floor with your own hands will not seem like an impossible project to you.
READ MORE: Do-it-yourself self-leveling floor screed - stages of preparation and pouring
Wisdom Quote: A strong imagination creates an event.
A heated water floor in a bathhouse, heated by a stove, is a complex structure that has its positive and negative sides.
The main advantages of the “warm floor” system:
- equalizes the temperature level, there are no hot or cold places, thereby increasing the comfort of bath procedures;
- the screed with which the circuit is filled has the ability to accumulate heat and release it over a long period of time;
- the presence of a stove allows you to save on heating water for the procedure without using additional sources;
- environmentally friendly heating device - there is no electromagnetic radiation, as when using electric heating, which has a positive effect on human health;
- the ability to heat large houses;
- the absence of a favorable environment for the formation of fungus and mold - this will extend the service life of the bath.
In addition, the bathhouse is heated from two sources: stove heating and heated floors, which increases the rate of exchange of warm air masses and reduces the time required to prepare the bathhouse. And uniform heating of the steam room leads to the absence of drafts.
The main disadvantages of heated floors in a bathhouse from a stove:
- It is quite difficult to do the installation yourself; you will also need special equipment;
- Carrying out repair work yourself is also not easy;
- the “pie” of the water structure significantly lowers the ceiling level;
- there is a need to re-equip the furnace;
- the need to drain the coolant from the system so that it does not freeze and destroy the pipeline, or constant heating of the furnace;
- complex process of temperature regulation;
- you cannot install leaking floors, as the insulation will get wet and the functioning of the system will be significantly reduced;
- When heating the coolant tank, a lot of thermal energy is consumed, and less is left for heating the steam and washing compartments.
It is worth noting that making any heated floors in a bathhouse yourself costs a lot of money, but over time it will pay off.
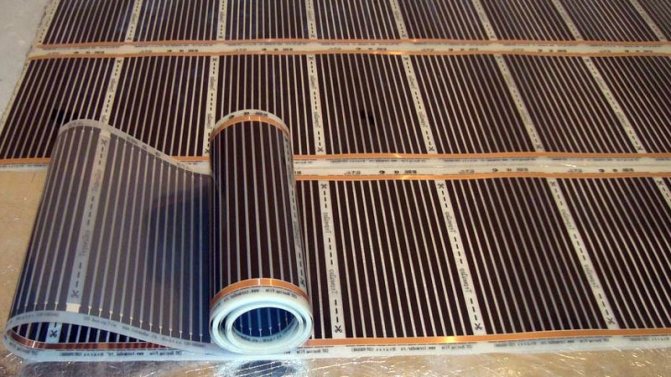
Installation of infrared film floor
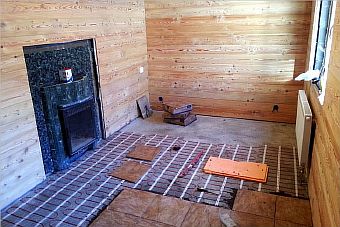
An infrared floor can be made using thermal film, which is sold in rolls and is easy to install. The maximum heating temperature of such a floor is 45º C, which is beneficial for health.
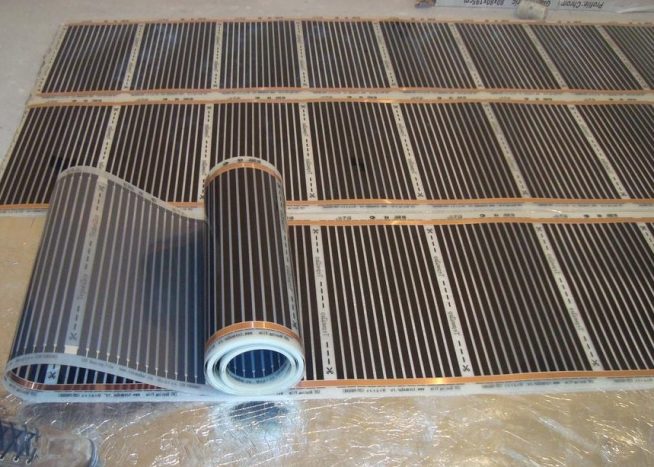
Film infrared floor is easy to install and use
Advantages of film flooring:
- efficiency - warmth is felt immediately after switching on;
- the air in the room heats up much faster than when using cable and water types of heated floors;
- safety - if you follow all the rules, IR flooring is completely safe;
- You can lay such a floor quite quickly;
- ease of adjusting the floor temperature.
Flaws:
- quite high cost;
- The plates quickly fail due to humidity, so this type of heated floor is more suitable for a dressing room.
- prepare grooves in the floor for temperature sensors;
- lay a layer of thermal insulation (for example, polystyrene foam);
- install temperature sensors (see diagram) and attach them with tape to the thermal insulation;
- Lay the film on the work surface and connect it to the thermostat.
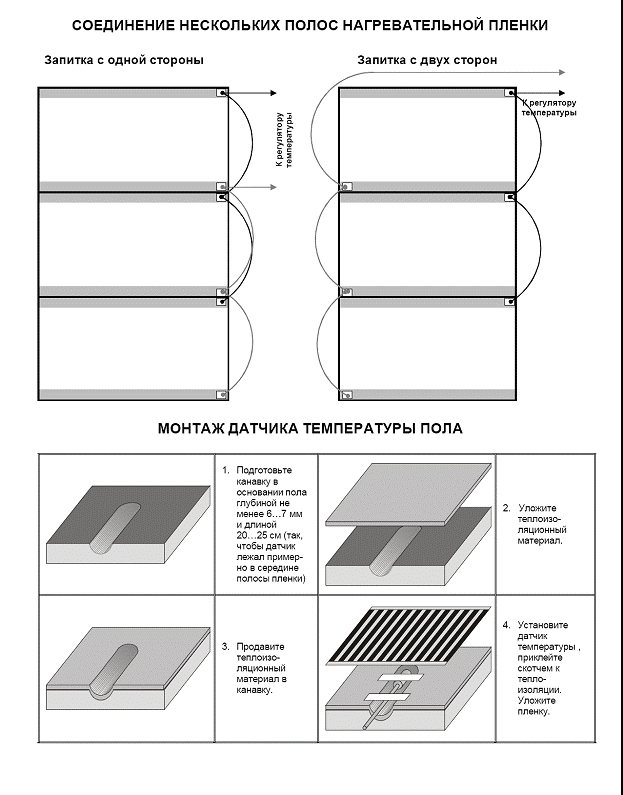
Instructions for installing a temperature sensor when laying a film floor
An infrared film floor does not require a screed; sometimes the floor covering is laid directly on the film. However, the best option would be to lay an insulating leveling layer - tiles made of clinker or porcelain stoneware, which are attached with glue.
The next stage of installation of the “exotic” floor began after the frame was placed under the roof. And it consisted of installing a thermal unit. “What is it for?” - you ask. Everything is simple here. If the temperature in the heating plant is 70-80 degrees, then you will have to walk on such a floor in Japanese geta or French clogs; barefoot will not work. And this device produces the desired and comfortable temperature for the feet.
The price for a water floor collector is decent, but it’s worth it: there are all kinds of protections, a pump is provided, and in general there are a lot of bells and whistles. All you have to do is set the desired temperature, in a word, it’s very convenient. During the summer, you can turn everything off.
Thermal unit of a water heated floor Warm water floor under the tiles
Having installed this “smart unit”, we began connecting the heated floor to the central heating. We crashed into the system with a metal pipe with a cross-section of 32 mm. All pipes that run along the street are insulated with mineral wool. There is practically no heat loss to the bathhouse in open areas of the street.
Installation of a water floor from a sauna stove

Initially, water heated floors were not intended for installation in a bathhouse. Therefore, when laying such a “pie” in a bathhouse, it is required to equip it with additional elements.
The installation of a water heated floor from a sauna stove includes several components:
- The heated floor contour is the main working element, which is laid evenly across the entire floor of the room with a certain pitch, filled with a concrete-cement mixture screed. You should choose the right pipe model; in this situation, not every one will be suitable. It is best to use copper, metal-plastic or stainless steel corrugations. However, many people prefer cross-linked polyethylene pipes with increased heat resistance, with a service life of at least 30 years, or polypropylene pipes, with a warranty period of at least 50 years.
- The mixing unit is an important part of the system, since the stove is not capable of heating the coolant to the required level. It heats the water almost to the boiling stage; in this state it cannot be supplied to the circuit. Therefore, a mixing unit is needed, in which boiling water will be mixed with the waste coolant to the required 40 degrees, and in this form it will be sent into the pipeline. It is used to regulate, configure and automatically maintain the temperature level of the heated floor in the desired mode.
- Heat exchanger - a container, coil or register located above the firebox, where the liquid from the furnace is heated. When using antifreeze as a coolant, you will need to equip a separate heat exchanger, then the antifreeze will not be able to get into the washing water.
- A circulation pump is necessary to ensure that the coolant is evenly distributed and moves through the pipeline. Without it, a warm water floor cannot function, as it provides the circuit with additional pressure for fluid circulation. When selecting the pump power yourself, you need to take into account the area of the heated room; the larger it is, the higher its performance should be.
To reduce the load on the pump, it is recommended to divide the pipeline into several parts of equal length.
- Drainage is necessary to remove excess liquid from the steam room and washing room of the bathhouse. You can equip it with your own hands, taking into account the following two points: by constructing a water outlet - a drainage hole, through which the water will flow into the pipe and be discharged into the sewer pit; fill the screed with a slope in the direction of the drain hole - then all the water will flow towards the slope.
Single-circuit heated floor in the bathhouse
If the area of the heated room in the bathhouse is small, up to 15 m², you can install a single-circuit heated floor. The supply pipe is located in the firebox, there is no heat exchanger. The advantages of this method are minimal consumption of materials, components, and lower labor costs. It can be implemented in a ready-made bathhouse, since a minimum of alterations will be required. An exception is the installation of underfloor heating pipes. Read how to insulate a floor here.
When is it recommended to use a single-circuit circuit:
- small floor area;
- wood boiler power – up to 10 kW;
- need to save space.
The layout of pipes and installation of components depends on the design of the bathhouse - the location of the boiler, dressing room. It is compiled individually, but taking into account technical requirements and standards.
Scheme
A difficult task for such a scheme is installing the supply pipe into the boiler furnace. In metal or cast iron models, you need to drill a hole with a diameter equal to the cross-section of the pipe. In a brick oven, part of the firebox is disassembled to install the pipe. It is important to ensure the tightness of the connection; there should be no gaps between the pipe and the wall of the furnace.
The order of the components.
- Coolant supply pipe.
- Thermometer, pressure gauge (optional).
- Air vent and water release valve.
- Circulation pump.
- Laying pipes in the floor.
- Connection to expansion tank.
- Return of cooled water for heating.
The pipes for connecting to the boiler are metal, diameter – 12-20 mm. It affects the heating area, and as a result, the rate of increase in coolant temperature. If the layout allows, you can make a mixing unit. This will allow you to automatically regulate the degree of heating of the coolant. But for this, the supply and return lines must be located nearby.
Advantages and disadvantages
The difficulty of such a warm bath floor is the inability to control the temperature of the water in the pipes. Due to the small area of the line in the furnace, heating occurs slowly; it can only be regulated by a circulation pump. It is forbidden to use an open heating system, as there is a possibility of air pockets. This will cause overheating and damage to the pipeline.
Advantages of single-circuit floor heating:
- Low consumption of pipes and components.
- No special tools or additional units are needed for mixing or automatically adding water to the system.
- Easy maintenance and repair.
To quickly increase the air temperature in the steam room, part of the pipeline can be located under the shelves. It should not come into contact with wooden elements.
The final stage: warm floor under tiles
A small screed was poured with a rough floor leveler, leveling the horizon. Floor porcelain tiles from the “kerama marazzi” collection were laid on it. Very high quality material, I recommend it for use. We had to lay out a mosaic in the sink because a slope was needed to drain the water. I also enjoyed working with mosaics; the result turned out better than expected.
It's time to take stock. Express all the pros and cons about such an interesting invention. Conclusions are drawn specifically from this project.
READ MORE: How to make a floor Make a floor with your own hands Types of floors Instructions
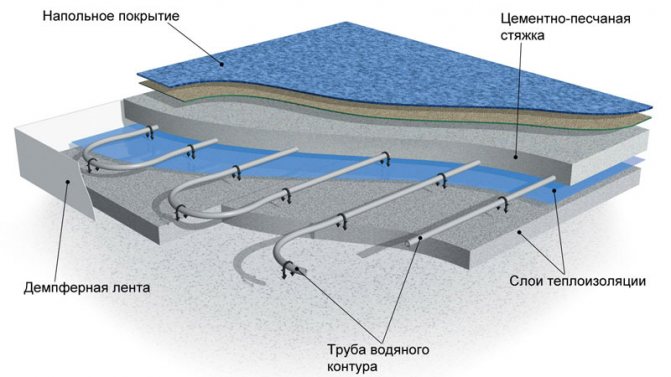
How to properly lay a floor pie

A characteristic feature of a bathhouse is high humidity. Warm floor systems are unpretentious in this regard. Properly equipped heated floors can work effectively in rooms with any humidity levels. In order for the entire system to work longer, as a rule, more attention is paid to waterproofing during installation. An additional waterproofing layer of thick polyethylene film laid on top of the water circuit pipes would be a reasonable solution.
When planning the installation of heated floors, first of all, you should take care of increasing the thermal insulation characteristics of the room itself. You should not neglect the technology of installing heated floors. It is important to follow a clear sequence of laying each element. Your heated floor should resemble a layer cake, in which each layer plays its own specific technological role.
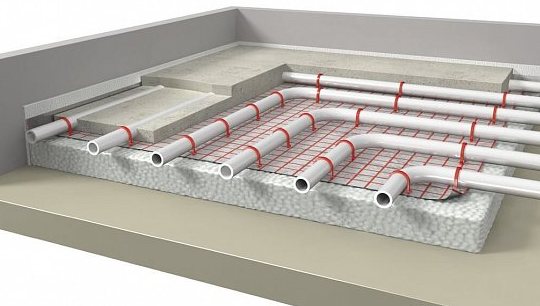
Typically, a layer cake consists of the following elements:
- waterproofing layer (water barrier);
- thermal insulation layer;
- heat-reflecting element (foil);
- water circuit pipes;
- metal reinforcing mesh as the basis of a concrete screed;
- concrete mortar (for water pipes, the desired screed thickness is 50 mm.
For a bathhouse, installing a concrete screed would be the best option. In addition, if the building is permanent and you are confident in the strength of the structure, installing the screed will not be difficult.
After laying the pipes and reinforced mesh, beacons are made, located in such a way that they would be poured with concrete. The required slope was observed.
The minimum permissible thickness of the screed at its thinnest point is 50 mm. For those rooms where the rough surface is made without a slope, the thickness of the screed will be different in different places. Without taking this factor into account, you can end up with uneven heating of the floor in different places. Where the concrete layer is thicker, the floor will be less warm. Conversely, in thin areas of the screed the floor surface will be hot.
It is better to immediately make a rough surface with a slope during preparatory work. A rough screed with a slope is made on top of the layer of waterproofing and thermal insulation. On top of which the water circuit is already mounted. Then everything is done in the same order. Another way out of this situation is as follows.
In order to install a liquid floor in a bathhouse yourself, without the need to reduce the height of the ceilings, you should provide for the installation of a heating system in the early stages of construction, namely when pouring the foundation in the future building.
Installation work proceeds as follows:
- The foundation for work is being prepared. A preliminary sample of soil is taken at the site where the screed is poured. Sand is added. The soil is compacted. A plastic film or roofing felt is laid on top and thus ensures waterproofing of the future floor.
- Thermal insulation. Concrete steps are placed along the perimeter, and reinforcing strapping is made. Polystyrene boards are laid on top of the waterproofing layer. To fix the joints, the locks are covered with polyurethane foam. To ensure effective insulation of the bathhouse floor with water heating, polystyrene foam is additionally laid vertically along the inner perimeter of the screed. This will prevent the formation of a cold bridge.
- Ecofol is spread on top - a heat-insulating material used in the construction of heated floors, in bathhouses or other rooms. Ecofol joints are taped with tape.
- A layer of reinforcing mesh is laid, raised from the floor level by 3-4 cm. A pipe is laid out over the reinforcement, which will be used as a contour. It is possible to use plastic or metal material. If necessary, you can use special floors on mats. The underlay helps to lay the pipeline with minimal difficulty. Laying is done in two ways. Snail - looks like an unwinding spiral, or snake. The snake method is more labor-intensive, but allows you to heat the room more evenly. The layout of the water floor heating system in the bathhouse is selected depending on the technical characteristics of the room and the total heated area. Pipe bends are raised above the level of the main floor by 50 cm.
- Filling the screed. The thickness of the concrete base is about 10 cm. The pipeline should be approximately in the middle of the screed. To avoid cracking, special plasticizer additives for heated floors are added to the solution. After pouring, the screed is covered with cellophane film and regularly watered until completely dry.
- After all the finishing work has been completed, collectors are installed in the bathhouse and thermostats are connected. The water circuit is fed from a sauna stove or boiler.
The system of warm water floors in a bathhouse has many advantages, one of the main ones is the absence of cold zones after installation. A heating system with heated floors can also be effectively used in a sauna steam room.
The design of a water bath floor has one significant drawback. Compared to a similar infrared or electric heating system, a water heating system is quite difficult to install. For this reason, it is best to entrust the installation of water floors in a bathhouse to a professional construction team.
What are the most common mistakes made during installation?
- The outlet of the taps must be in the place where it is planned to install the water collector. Usually the collector is mounted in the dressing room. Before pouring the screed, the bends must be brought as close as possible to this place. The ideal option is in which, even before the start of construction, a design for water heating of the floor of the bathhouse is prepared.
- Lack of ability to adjust floor temperature. With an intensive firebox, especially an iron sauna stove, the heating of the coolant in the floor will easily reach 80-90°C. It is almost impossible to walk on such floors in a steam room. The problem can be solved by installing a mixing unit (collector) for heated floors. The unit automatically regulates the heating of the coolant and also allows you to turn off the heating system in the summer. Also, with the help of a collector, it is possible to create individual heating in zones, powered by one stove.
- Lack of thermal insulation. Trying to cut costs, some owners save on the use of thermal insulation materials. As a result, the floor freezes, takes a long time to warm up, and large heat losses are observed.
- Independent production and installation of a water heat exchanger in a furnace. Any violations can cause the circuit to break and create a dangerous emergency situation. It is best to choose ready-made sauna stoves with a water heating circuit for connecting the floor. Most modern manufacturers offer consumers multifunctional models of heating equipment.
To reduce possible errors during installation, it is recommended to order a bathhouse design taking into account the installation of the water circuit. Ready-made project documentation will help you complete all work quickly and efficiently.
The final coating of a warm water floor must meet several basic requirements:
- Have high thermal conductivity.
- Be resistant to moisture and temperature changes.
An additional requirement is wear resistance and the ability to withstand mechanical and other loads. If we take all these aspects into account, it is best to lay ceramic tiles or porcelain stoneware in the washroom and steam room.
When choosing tiles, you should choose products with an anti-slip coating. A material with a textured surface is suitable. The construction of floors and the choice of material for the sauna follows the same principle.
Each option has both its advantages and disadvantages. Thus, water-heated floors require a long time for installation work. And also a certain qualification from the one who will do the installation. But during operation, all costs will be fully recouped by the efficiency of the heating system and high heat transfer.
READ MORE: Do-it-yourself water-heated floors in a private house
Electric floors are faster to install, but there is a risk of electric shock. Installation work in wooden buildings should be carried out especially carefully to eliminate the possibility of fire due to a short circuit.
You should also pay attention to the complexity of repair work, but problems exist in both eclectic and water heated floors.
The rest of the choice remains with the owner of the bathhouse. In any case, visiting a bathhouse with heated floors is much more pleasant than stepping on a cold surface after bathing procedures. Therefore, the costs will be fully recouped due to comfort and the creation of special conditions in the room.
If we consider the installation of a warm water floor in a bathhouse from a stove in the form of a “pie,” then it consists of:
- subfloor - concrete or wood;
- waterproofing layer - it prevents the formation of condensation;
- insulation - reduces heat loss;
- reinforcing mesh - protects insulation;
- foil reflector - directs heat in the desired direction;
- heating element - pipes laid in a spiral;
- concrete screed - having a slope in the direction of drainage;
- finishing coating.
When laying a heated floor on the ground yourself, you need to equip a sand cushion, fill it with expanded clay on top, and spread a waterproofing layer on it.
In addition, additional installation of a mixing unit, heat exchanger and pump will be required.
Warm floors for baths: types and some of their features
When installing floor heating systems in a house or apartment, the consumer is always guided by economic feasibility, but, in addition, the complexity of installation work and the maintainability of the structure during operation are also taken into account.
For a bathhouse, these criteria also work, but some other factors are also added related to the different functionality of the premises, the features of the floor, which must be laid with a mandatory slope for water drainage (the only exception may be the rest room).
Also, choosing the type of heated floor requires not only an economic approach to the issue, but also a rational one, related both to the mode of operation of the bathhouse (regularly or from time to time), as well as to the technical feasibility of implementing such a decision.
So, in the bathhouse you can install and operate:
1. Water heated floors . In this case, the source of heating the coolant can be either a boiler or a stove installed in the steam room.
A big disadvantage of these floors can be the difficulty in providing conditions for laying pipes that are mounted on a flat surface, as well as the need to install expensive distribution equipment, although operating costs are low.
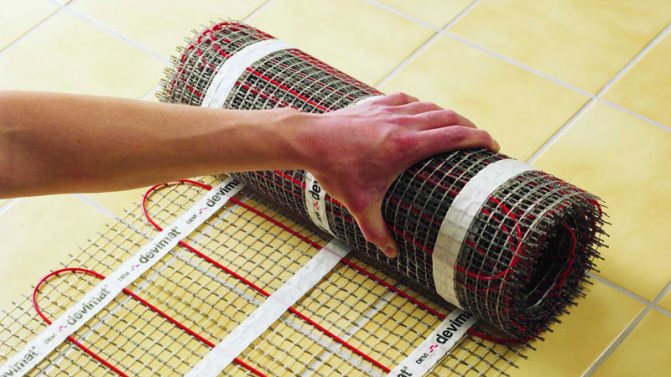
2. Electric floors , represented by cable systems or mats. This type can be considered the best option if you do not take into account the cost of electricity consumed (and they consume a lot).
In addition, a revision of the wiring will be required, which must cope with high loads.
3. Infrared film elements . Such warm electric floors are the easiest to install, quite affordable, and undemanding in terms of quality and evenness of the base.
You can also make air-heated floors in the bathhouse, represented by a specially installed structure of pipes located under the floor, through which warm air circulates, for heating which several sources can be used.
This type can be considered the most expensive both at the installation stage and during operation.
In addition, you should think about their design at the bathhouse design stage, since adjusting the plan is almost impossible.
General rules for installing floors in bathhouses for heating systems
Regardless of whether you plan to lay pipes under a heated water floor in a bathhouse with your own hands or install electric heating, you first need to take care of the construction of the floor structure itself, which in such cases can be wooden or concrete.
The latter option is preferable, given practicality, but a wooden one, arranged along joists, can be considered more organic for such a room.
The choice, of course, is up to the owner, but even he will have to follow several rules and requirements when installing floors with a heating circuit in a bathhouse.
So, despite the fact that the construction of modern baths is carried out with the construction of a foundation (unlike steam baths built earlier), such a foundation, as a rule, is either shallow, or generally represents a columnar structure. That's why:
- measures must be taken to insulate the floor and protect it from freezing, as well as from moisture and other negative factors;
- if you plan to pour a concrete floor, then it is recommended to select soil slightly below the freezing point and make a coating waterproofing; it would also not hurt to install a clay castle;
- Next, a thermal insulation layer must be laid, the materials for which can be expanded clay or perlite. In addition to insulation, the layer of bulk material also plays the role of a damper;
- further, an additional insulating layer made of modern materials (mineral wool, expanded polystyrene, polyurethane foam and others) should be laid under the heated floors, but it should be taken into account that their use in such structures has some limitations associated with the specific operation of such an object;
- the next stage is pouring the screed, which can be performed in two stages, and in some cases even involves reinforcement.
The installation of wooden floors in a bathhouse begins with the construction of a clay castle and the installation of special cabinets, for which it is recommended to use ceramic bricks. The height of the cabinets is on average 1.5-2 bricks, and then:
- the pedestals are treated with coating waterproofing;
- thermal insulation from bulk materials is being laid;
- vapor and waterproofing is arranged, for which special membranes can be used. The latter are fixed with their edges on the pedestals and must have a minimum approach to the walls equal to 100 mm. All joints must be treated with mastic;
- Before laying logs on the pedestals, it is recommended to treat them with moisture-resistant and antiseptic impregnations. For electric floors, it is mandatory to treat lags and fire retardants.
Next, the subfloor is installed with the creation of a thermal insulation layer.
Warm floors in the bathhouse. Video:
Overview of methods
How to make a “pie” of a water heated floor from a stove in a bathhouse yourself? We will show how all the work can be done in different ways.
Into a concrete screed
A base with a concrete screed is the best option for a bathhouse, since the cement mortar has increased moisture resistance and allows for high-quality heating of the bathhouse. In addition, this method makes it possible to save on materials and equipment.
But when pouring screed yourself, there is an important condition - this must be done in compliance with the instructions and technological process.
The disadvantages of this method include the difficulty of repair in case of breakdown, and the possibility of using the structure only after the solution has completely dried, which will take about a month.
The process consists of the following steps:
- The base is being prepared - it must be smooth and clean; if significant irregularities are found, then a thin screed can be made.
- Double waterproofing is carried out - the concrete surface is covered with hot bitumen, sheets of roofing felt are laid on it with an overlap of 10 cm. Then the bitumen is poured again and the roofing felt is laid.
- Insulation is laid - preferably rigid and moisture-proof (EPS, penoplex), and at least 5 cm thick. Be sure, when placing thermal insulation, you must not forget about the drainage slope.
- The reinforcement mesh is installed - the pipe will be attached to it.
- A damper tape is glued around the perimeter, at the junction of the walls and the floor - it compensates for temperature expansion.
- The heating circuit is placed and fixed with clamps to the mesh.
- The screed is poured - this work is done after connecting the system and checking its functionality. Filling must be done when there is pressure in the circuit. After it hardens, you can lay the flooring.
Polystyrene slabs are a high-quality material that perfectly combines water floors with a bathhouse. Their surface is equipped with a layer of foil that can reflect heat, which provides good thermal insulation. In addition, the plates have grooves into which it is convenient to lay the contour.
Installation work on the construction of a water floor in a bathhouse from a stove with your own hands must be performed sequentially:
- cleaning and leveling the subfloor;
- installation of waterproofing - roofing felt is laid in two layers;
- gluing damper tape around the perimeter;
- placement of heat-insulating mats with bosses - it is better if they have a reflective surface;
- installation of the water circuit - it is placed according to the diagram in the grooves between the bosses;
- connecting the system - checking operation and absence of leaks;
- screed - it is better to pour concrete along the installed beacons, the surface should be with a slight slope towards the drain;
- installation of the floor covering - after the concrete has completely hardened, the covering is laid down and the floor can be used.
This method is suitable if the base is not strong and cannot withstand the weight of the concrete-cement screed. The pipes are laid directly on the rough wooden covering. But this design is less effective, since the floor is not in direct contact with the contour.
However, it is often used when installing heated floors on your own, because the majority of baths do not have sufficient strength.
Work should begin by cleaning the rough wooden floor.
Then a polyethylene film is laid as waterproofing, and a damper tape is installed.
The logs are installed on the wooden floor, they are fixed with self-tapping screws. They must be laid across the main boards.
The next stage is thermal insulation; for this, insulation is laid between the joists, and another layer of film is stretched to protect it from moisture.
Wooden slats are installed across the logs, foil is laid in the grooves between them or a metal profile is placed.
The pipes are laid - they are placed on foil or in a profile according to the diagram. The heating system is connected and its functionality is checked.
A substrate for the finishing coating is made of plywood or chipboard sheets.
The flooring is laid; tiles or wood are more often used.
This method of heating a bathhouse yourself using a warm water floor is a labor-intensive process, but will cost less.
When independently powering the water floor from a sauna stove, it is necessary to make a separate heating line for heating the coolant. To do this, you will need to install a heat exchanger above the combustion chamber, or build a pipe system that will be used to tie around the firebox.
Watch the video
In addition, in order to provide the water floor with the required amount of coolant, it is necessary to equip the structure with an additional tank near the stove.
You should not forget about the mixing unit, in which hot water will be mixed with waste water and enter the circuit at the required temperature.
In order for the cooled water from the pipes to be sent back to the heat exchanger for heating, a pump is connected to the system, which circulates the coolant.
Installation
Installation of a water floor heating system is carried out according to a scheme in which each stage is of fundamental importance. Failure to follow the sequence of work can result in an ineffective investment of effort and resources.
Installation begins with putting the work area in order: debris and stones should be removed. If there is soil underfoot, then first fill and compact a sand and gravel cushion with a layer of about 15 cm. In regions with a harsh climate, an additional insulating layer of expanded clay is added - 15-20 cm.
The purpose of this stage is to ensure a smooth surface without cracks, depressions, or cavities. If a rough leveling screed is made over a sand-gravel bed or expanded clay, then there should be a film under the backfill: it will hold the cement laitance, which ensures adhesion of the materials. Leveling screed on the ground can be done without film. The height of the rough leveling screed is up to 5 cm.
The concrete base is filled with hot bitumen, on which two perpendicularly directed layers of roofing material are laid. The seams between the strips are shed with bitumen or overlapped by 10 cm. This is enough for reliable waterproofing.
The easiest way to provide thermal insulation is penoplex. Lay the slabs about 5 cm thick close together - without gaps. If possible, use insulation with a foil layer. Otherwise, penofol will cope with the task: by laying it with a shiny layer facing up, we ensure that heat is reflected into the room.
Warm floor design
We suggest you familiarize yourself with How to properly place beacons on the wall
It is most convenient to lay underfloor heating pipes using mounting mats or meshes with a cell size of 100x100, 150x150. Perpendicular lines are excellent guidelines for laying out the contour evenly. The pipes are attached to the mesh bars with clamps. The use of mats provides both thermal insulation and fixation of pipes in special grooves between the bosses.
The most important thing at this stage is not to forget about the damper tape. No matter how strong and monolithic the concrete thickness of the floors may seem, under the influence of temperature the sand-cement screed can expand up to 0.5 mm per linear meter. The mass of concrete will rest against the walls, crack, and collapse.
Laying damper tape
Popular contour laying schemes are snake and snail (spiral). It is more difficult to make the contour of warm floors in a bathhouse with a snake - the pipes will have to be turned 180°. But there is an opinion that such a distribution of pipes is more effective for small rooms: warm floors with such a circuit layout warm up more evenly.
Having connected all the elements of the system, water is supplied to the circuit: it is important to check the tightness of the connections and correct all defects before the floor is poured with concrete.
Water heated floor circuit
Drainage
The arrangement of drainage, which ensures the removal of excess moisture from the steam room and washing room, involves two points:
- Installation of a water drainage system: through the drain hole, the liquid enters a pipe through which it goes into the general sewer or into a drain well.
- Preparing beacons for pouring screed, taking into account the slope of the entire floor surface towards the drain. All moisture will flow down the inclined floor to one point - into the drain hole.
Filling the screed
For finishing screed of heated floors, concrete M150 - M300 is required. When preparing the mixture yourself, it is recommended to add plasticizers, thanks to which the solution “spreads” evenly over the surface, fills all the cracks, and displaces air chambers.
Pouring heated floor screed
If finances allow, you can purchase a special mixture for screeding warm water floors. All the necessary components are already there in the required ratio; all that remains is to dilute the dry composition to the desired consistency according to the instructions. True, each meter of such a floor will cost about 500 rubles, if you calculate that one bag (25 kg) is enough for 0.5 m2, and such a volume of material costs about 250 rubles.
Finishing screed on heated floors performs the additional function of accumulating, preserving and releasing heat, so making a layer less than 5-7 cm is not recommended: the thinner the layer, the faster the floors will cool.
Some experts recommend filling water floors with screed when the circuit is filled with water so that the pipes are under pressure. But hot water can be supplied no earlier than a month after the floors are poured.
Final works
The final stage is laying the tiles. For the floors of the steam room and washroom, choose tiles with a matte surface.
Laying tiles on the floor
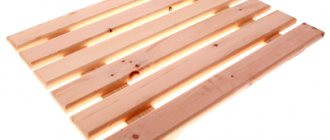
It is easy to slip on wet tiles with bare feet, so the texture of the cladding should ensure safety. But no matter how beautiful the tiled floor is, it still wouldn’t hurt to cover it with wooden bars, which provide safer movement, especially if there are children and elderly people in the family.
Operating conditions place increased demands on consumables (tiles, glue, grout):
- resistance to temperature changes, especially in winter;
- frost resistance;
- resistance under high-temperature operating conditions.
When laying tiles, you must observe the slope towards the drain hole, specified during the pouring of the concrete screed.
Slope of laying tiles towards the drain
Building “water” floors in a bathhouse from a wood-burning stove is a labor-intensive task and costly at the installation stage. But the costs are offset by increased comfort and savings during operation.
Heating the floor in the bathhouse using the heat of the stove is a profitable step