The bathhouse is a capital structure, so it must be built in accordance with a certain technology. A properly constructed roof is of particular importance. It must be strong enough to withstand snow and wind loads. It is also worth paying attention to the construction of the roof frame - the rafter system. To figure out how to install rafters on a bathhouse, you should read the detailed instructions and take into account the advice of professionals.
Deciding on the type of roof structure
So we come to how to install rafters on a bathhouse.
In order to choose the optimal configuration for the roof of your bathhouse, you need to take into account many factors that will subsequently influence it:
- The need for an attic or attic space;
- In order to determine the required angle of inclination of the bathhouse roof, it is necessary to calculate the average amount of precipitation that falls in winter;
- If strong winds prevail in the construction area, the angle of inclination should be as small as possible. This will provide wind resistance;
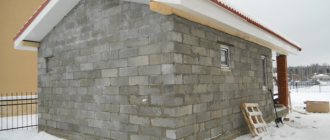
- Bathhouse location: extension or separate building. If the bathhouse is planned to be built as a free-standing structure, then the roof configuration will be more complex.
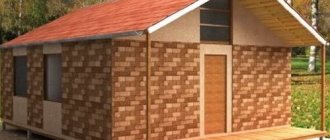
To build a small bathhouse and to avoid high costs in the process, it is recommended to choose a pitched roof.
This type of construction is optimal in terms of economy, since roofing materials and the repair work themselves do not require large investments. It is also worth noting that a pitched roof does not imply the presence of an attic, only a small room for storing various bath accessories.
In addition, a pitched roof has low thermal insulation.
Important! When installing a pitched roof, it is necessary to carefully calculate the required slope angle in order to avoid the accumulation of precipitation on the roof.
The gable roof type allows you to equip the attic space as a recreation room, billiard room or other living space.
Of course, with this design, the bathhouse can be used year-round, but the financial costs for construction will be significant.
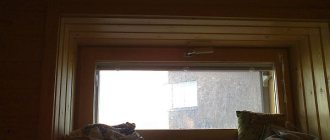
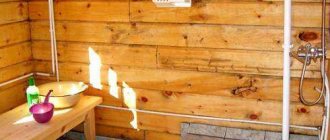
Features of ceiling waterproofing in a bathhouse
Regardless of whether a Russian bathhouse is equipped with a steam room equipped with a wood-burning stove, or a sauna with a firebox using electric heating elements, a high level of humidity and heat will be constantly maintained in the room.
To effectively retain heat over a long period of time, such rooms are equipped with thermal insulation. However, there are also some nuances here. The need to equip a vapor barrier layer in a bathhouse appears in a situation where mineral wool is used. In a dry state, this structure is endowed with increased thermal insulation properties, which will significantly decrease when wet. When using foam plastic or penoplex, a vapor barrier layer is not equipped.
There are several main types of suitable vapor barrier materials available for sale when equipping a bathhouse:
- Film. This is the simplest type of vapor barrier layer, which is a dense canvas of white or blue colors. Depending on the brand, the material may be smooth or slightly rough. More expensive models use reinforcement that can look like a cage;
- Membranes are non-woven materials that provide sufficiently high-quality protection of insulation from condensation and steam;
- Foil. This is the most optimal vapor barrier material for bathhouse equipment, since it retains thermal energy quite effectively due to its coating.
The insulation system for a bath ceiling provides protection for its insulation from moisture penetration from both sides - from the steam room and the attic space. In the first case, a vapor barrier layer of protection works, and in the second, external waterproofing works. If the insulation work is carried out without proper quality, then hot steam from the steam room, rising upward, will enter through the ceiling into the attic.
This will cause the insulation to become wet, with the loss of its protective properties and the appearance of condensation on the wooden elements of the roof. The settled moisture will inevitably cause them to rot. The loss of precious heat in the steam room and the excessive consumption of fuel material to maintain it can become additional problems caused by careless work.
Protecting the heat insulator with foil is done as follows:
- The vapor barrier layer is the first in the bathhouse ceiling protection system. It is secured to the ceiling beams using a stapler. Each subsequent strip of material overlaps the previous strip with a distance of 15 cm, and their joints are taped. The material used is foil, which is lowered slightly from the ceiling onto the walls of the room to connect with their insulation, thereby creating a continuous layer.
- Slats are attached to the ceiling beams for future installation of “finishing” ceiling cladding on them. Their thickness determines the air gap between the foil and the sheathing material. It is necessary to create the heat-reflecting effect of the vapor barrier foil layer.
- Then, from the attic side, insulation with a layer thickness of at least 15 cm is laid on the vapor barrier membrane between the ceiling beams. The material for it is basalt wool.
- The last layer of protection against moisture coming from the roof is a waterproofing polyethylene film. It is laid on the insulation and secured to the ceiling beams.
- To prevent mechanical damage to the entire protective system, it is covered with a plank floor in the attic.
If the process is properly organized, the ceiling system should work according to the following scheme. Hot air from the steam room, passing through the outer lining of the ceiling, enters the space that remains behind the back side of the lining. Air is retained in it, since the foil vapor barrier layer prevents its movement towards the ceiling structures and insulation.
If the ceiling structure of a bathhouse under construction is planned to be of a panel type, then before installation each panel is equipped with insulation and only after that is lifted up for fastening. A 10 cm wide “pocket” is formed at the panel joints, which also needs to be insulated to prevent steam from passing through the seam. Then insulation is placed in the panels and the joints between them.
By following the recommendations for proper waterproofing of the bathhouse ceiling and adhering to the required procedure, you will most likely get a decent result. Good luck!
We suggest you familiarize yourself with: Laying wires in the bathhouse
Manufacturing
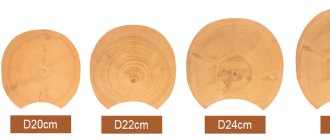
The best option for making all the components of the roof is dried coniferous wood. The size of the timber for the rafters is calculated as follows: 100:50 x 50:60.
The advantage of parts made from coniferous wood is that the needles are quite light in weight, so the rafter system will not be too heavy.
This will avoid pressure on the walls and subsequent destruction.
The presence of resin in the pine needles gives it the ability to resist moisture, which is also an advantage of this material.
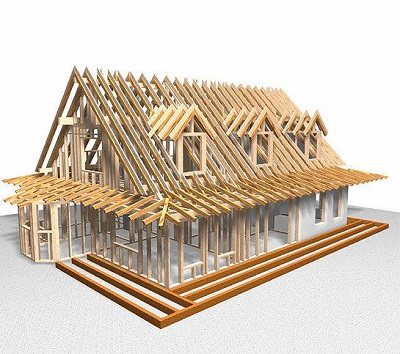
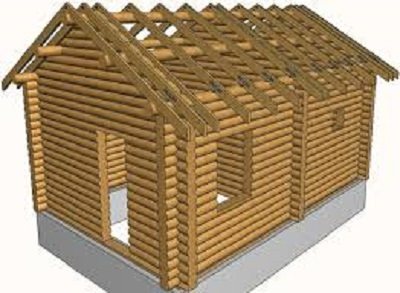
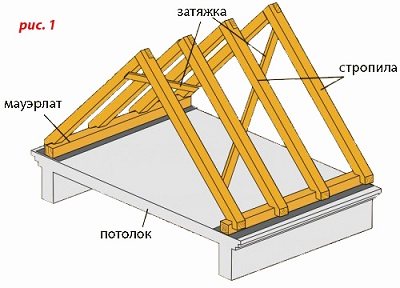
The shape most often used to make a gable roof truss system is a triangle. This system consists of several triangles, which include two rafter legs, ties and supports. Each of these triangles is called a rafter.
Important! The rafters should be at an equidistant distance from each other - 50-80 cm.
The triangular shape was not chosen in vain. It provides the structure with strength and reliability.
Let's draw conclusions: the rafters are one triangular section, which includes:
- Two rafter legs that connect in the ridge area;
- Spacers, the function of which is to ease the load on the rafter legs, supporting them;
- Vertical supports that perform the same function as spacers;
- A board that fastens both rafter legs and is called a crossbar;
- A block installed in the middle of the triangle strictly vertically and called the headstock;
- Parallel to the wall there is a purlin that connects the separate rafters into one system;
- The puffs close both rafter legs, forming a complete triangle;
- A dense block called a mauerlat is installed at the top of the wall. The components of the system are attached to it.
Material selection
The roof of a bathhouse with your own hands can be covered with different materials. In most cases, practical and economical solutions are chosen in the form of turf and wood chips, but such coverings are gradually becoming a thing of the past. Modern buildings are best covered with roofing felt, metal tiles, corrugated sheets or slate. Each of these materials has its own characteristics, which affect the performance properties of the surface.
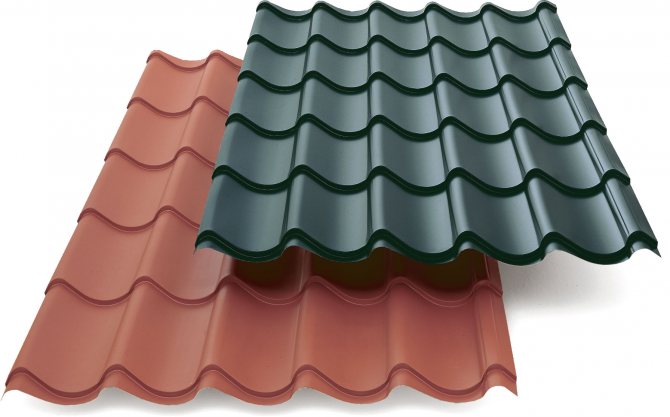
Most often, the roof of the bathhouse is made rigid. In the old fashioned way, it can be covered with slate - in this case, you will need to install a sheathing on which the material will be attached. If you have the means and want to make the roof aesthetically pleasing and presentable, you can cover the roof of the bathhouse with metal tiles. Since the material is too heavy, you will need to think about installing the sheathing and frame.
Soft roofs are no less popular. To cover such systems, roll materials, for example, roofing felt, are used. Such a roof is a dense carpet, in which there are several layers of material glued together. Roofing felt is placed on a wooden flooring laid in a continuous layer; laying an underlying layer based on glassine or roofing felt is required. A soft roof for a bathhouse is a beautiful, and most importantly, practical solution for any building. With a competent approach to installation, it will last for more than one year.
Determining the angle of the roof
In order to create the required angle of inclination, one of the following methods is usually used:
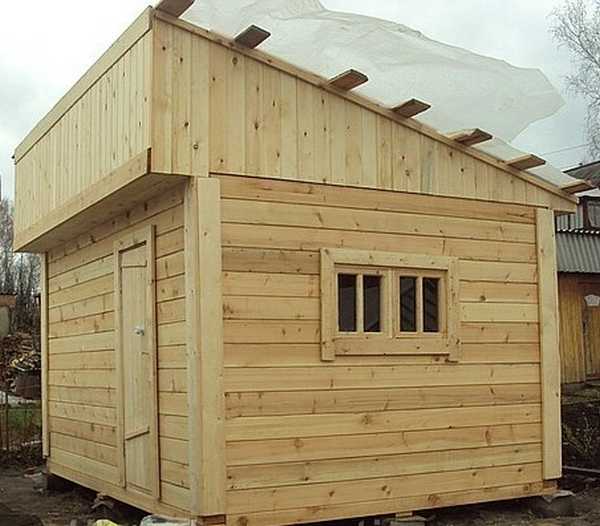
- Make the heights opposite the standing walls different, that is, one of the walls should be higher than the other;
- A special support structure is mounted above one of the walls.
The second option is the most popular because it is easier and cheaper to implement.
Important! The optimal step distance for installing rafters is 60 cm! In cases where the distance between two load-bearing walls exceeds 450 cm, additional rafter struts are used. The ends of the struts must be attached to the support beam.
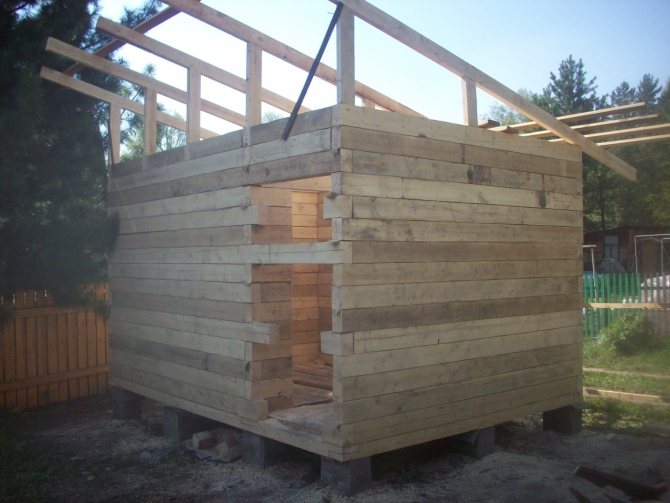
Installation of a pitched roof
How to make a rafter system for a bathhouse roof? Before starting work, it is worth considering several nuances. To ensure that water is quickly removed from the roof surface during heavy rains, a certain slope angle must be maintained. This will also help during snow accumulation in winter. The minimum roof angle is 20 degrees. If the bathhouse is being built in a region with a lot of precipitation in winter, it is necessary to increase it to 45.
To create a certain angle, you will need to install supports of the required height. The work can be done in several ways:
- if one wall is higher than the other, the rafter legs simply rest on them;
- When constructing walls of the same height, it is necessary to place a supporting structure on one of them.
The first method is usually used in cases where the walls of the bathhouse are built from brick or concrete blocks.
The support structure can be created for any type of structure. In any case, you get a pediment that needs to be sewn up with sheet material. It can also be plank. The rafters completely cover the span between the long walls of the bathhouse. Rafters are installed without supports only if the distance between the walls is 4.5 m. For the reliability of the roof, it is better that the rafters are installed every meter. If the distance between the supporting walls increases by more than 4.5 m, the rafter system should be supplemented with struts.
For more reliable installation of the rafter legs on the support beams, cutouts are made in them. Such structures are attached to nails and metal plates. When installing a pitched roof, the legs of the rafter system are moved beyond the frame of the building by half a meter. This will protect the walls of the bathhouse from precipitation.
The process of installing ceiling beams
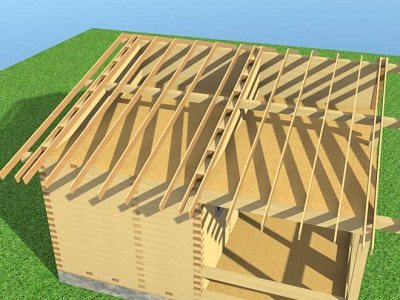
After the walls are built and before the rafters are built, the ceiling beams are installed. The two crowns that are on top will act as the basis for installation. There are two ways to install ceiling beams:
- Through holes in the crowns. This method involves the ends of all beams facing the street, which makes the wall open;
- Blind holes in the crowns. In this case, the opposite is true, since the ends of all the beams are inside the logs, which makes the wall blank.
The second method is more popular than the first, because in the first case, beams located on the street are exposed to precipitation, which significantly reduces their reliability.
Location options
The way in which the rafters will be installed to the bathhouse ceiling also depends on which method of attaching the ceiling beams is chosen. There are two ways to install them:
- You can use the first method only when a blank wall has formed during the installation of ceiling beams. In this case, the rafters are connected to the upper crown of the walls;
- The second method can be used if, during the installation of the ceiling, an open wall was formed with the ends of the beams facing the street. In this case, the rafters are connected precisely to the ceiling beams.
What kind of insulation?
Any wooden elements of a bathhouse must be treated with special means that will protect the surfaces from rotting and fire. Antiseptics and fire retardants are used for this. Insulation of the roof of a bathhouse involves the use of waterproofing - in this capacity you can use membrane films that will prevent water from entering the premises.

Most often, roof insulation is performed with basalt fiber or mineral wool. It is environmentally friendly and has good thermal insulation properties.
In addition to laying the waterproofing layer, a vapor barrier is also required.
Device process
In the process of preparing for the installation of rafters, it is necessary to adhere to some rules and tips, which can then protect the roof of the bathhouse from microorganisms, pests and the rapid spread of fire.
The main assistants in this matter are antiseptics and fire retardants.
Important! Wooden rafters must be coated with antiseptics and fire retardants!
The rafter system can be assembled either directly on the roof or on the ground. It is certainly easier and faster to assemble on the ground, but if the elements that will be part of the rafter system are heavy, then it is better to assemble such a structure at the top of the building.
There are only two types of rafter systems:
- Hanging;
- Layered.
Let's look at each type in more detail.
Briefly about the main thing
So, the question of how to cover the roof of a bathhouse inexpensively is quite relevant for owners of private houses, cottages, and summer cottages.
With all the abundance of roofs and technologies that the modern market of finishing and building materials offers, it is not difficult to determine the right one.
The main thing is to take into account all the most important factors in advance. These include: the purchase budget, weather conditions and personal preferences of the land owner.
Ratings 0
Hanging systems
Rafters of this type are used for those baths in which there are no walls, but only solid partitions. Due to this type of construction, the load is concentrated mostly in the upper crown of the bathhouse.
Such a system is being assembled on earth. Stages of assembling a hanging rafter system:
- Using bolts, the ends of the rafters are connected to each other from above;
- The lower ends are sawn off at an angle;
- The crossbar must be installed between the upper and lower rafters;
- The finished structure is moved to the top of the building;
- At this stage, jibs are used to secure the outer trusses. The jib can be removed only after checking for verticality;
- Next, it is necessary to install central trusses in the same way, the distance between which must be at least 1 m;
- Next, the rafters need to be fastened together using lathing.
So we find out how to attach rafters to a bathhouse.
Layered systems
This type of rafter systems is more relevant than hanging systems. In this case, the entire load goes either to the walls or to the ridge area.
The hanging system is better than the hanging one because it is easier to install.
The process of constructing a layered rafter system is best left to a professional, since errors in the process are fraught with serious consequences.
- Before starting construction, a project must be completed, including all the necessary calculations. These calculations should include the cross-section and pitch of the rafters;
- Next, all supporting components are installed;
- In order to create a rafter template, you need to take a board of the length and width indicated in the calculations. The thickness should be less than the calculated data. The board is applied with one end to the place where the ridge is run, and the other to the mauerlat;
- At the very top of the rafter template, an upper cut is marked in such a shape that the board is positioned evenly and passes through the ridge girder;
- Next, the bottom cut is marked according to the same pattern;
- The template is applied to the places where each of the rafter legs will be located. If the template fits, rafter legs are made;
- The rafters are installed, after which a rope is pulled between them and leveled.