Today, not a single country house can be imagined without a bathhouse. In the traditions of our people, love for bath procedures occupies one of the leading places. It is an indispensable attribute of a summer cottage or country house.
A good steam room will allow you to have a great rest after a hard day, help get rid of colds and joint pain, and have a wonderful cosmetic effect. The main thing is not to make a mistake when choosing a construction option, think through everything in detail and choose.
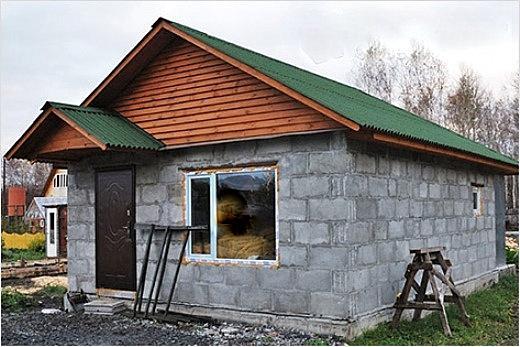
>
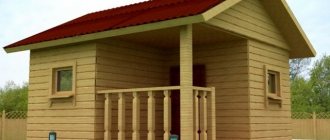
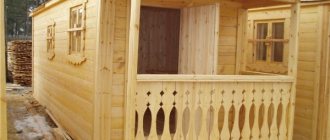
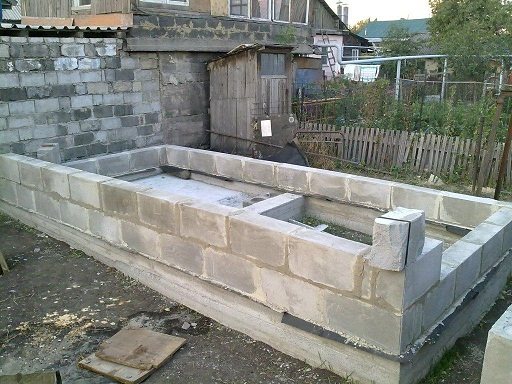
The photo shows an example of a constructed foam concrete bathhouse.
Features of foam blocks
This building material is inexpensive and lightweight. Foam blocks retain heat 2/3 times more efficiently than brick. Their characteristics are close to wood, but they are fire resistant.
The blocks are light in weight and large in size - this is convenient for transporting and installing the material. Bathhouses made of foam blocks are quite easy to build, because they can be cut, sawed and planed perfectly with a hacksaw and an ax. The only disadvantage of the material is its porosity, i.e. - instability to moisture. Based on this, the blocks must be protected with moisture-resistant materials.
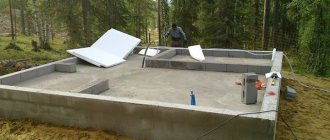
Foundation for a bathhouse made of foam blocks
The foundation for a bathhouse made of foam blocks must be a monolithic slab . A pit is dug under it, 60/70 cm deep. First, using a laser, it is necessary to mark the area and drive pegs along the perimeter of the future foundation, in increments of 2 m, the wedges must also be located at the corners of the marking. Next, the cord is pulled over the pegs.
Next, a reinforcement frame is installed in the pit, the metal thickness of which should be 12 mm. Then the formwork is made from edged boards, 2.5 cm thick. After this, concrete is poured.

The resulting foundation height of 70 cm will be sufficient if the project is a bathhouse made of foam blocks, which is small in size and weight.
Do-it-yourself bathhouse from foam blocks - building a roof
Preparing the base
We invite you to familiarize yourself with the washing room in the Russian bath
Before starting the construction of a bathhouse made of foam blocks, it is recommended to draw up a project for the future structure. To do this, based on the characteristics of the site, all the necessary calculations and drawings are drawn up. The weight of the finished structure, regardless of its size, will be small. That is why for such a structure a small-thick base will be sufficient. To build a bathhouse made of foam blocks, a regular strip foundation is suitable, for the construction of which you will need to do the following:
- carry out markings on the ground using pegs, tape measures, construction threads and geodetic instruments;
- dig a pit. In our case, in the form of a trench;
- install formwork;
- lay reinforcement or reinforcing mesh;
- prepare a concrete mixture and pour it into the previously installed formwork;
- After the concrete has hardened, the formwork is removed.
After the strip foundation gains strength, you can begin pouring the concrete base under the furnace. At this stage it will also be necessary to install utilities. They will be needed to organize the drainage of water.
Advice: in order for the structure being built to be level, it is necessary to use a level and plumb line for control at all stages of construction.
The concrete base for the firebox must exceed the dimensions of the bottom of the stove. To do this, you need to take appropriate measurements, then install the formwork and pour the concrete. Also at this stage, a cushion is installed over the entire floor area. Crushed stone of a small fraction is suitable for these purposes.
At the final stage of constructing a foam concrete bathhouse, horizontal waterproofing is installed. For these purposes, you can use roofing material. A layer of waterproofing is laid between the plinth and the first row of foam block masonry.
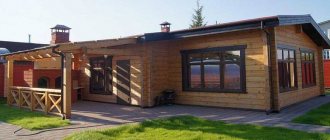
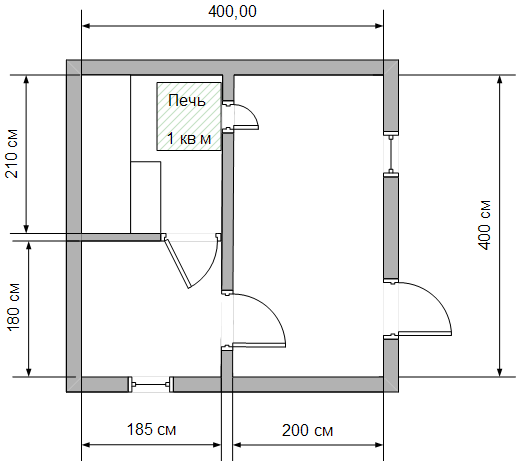
On your personal plot you can build a bathhouse from gas silicate blocks. Next, we will consider the construction of a structure measuring 5x5.3 m. The ceiling height in this project is 2.25 m. Gas silicate was used for laying the walls and fronts of the attic. For the interior decoration of the recreation room and attic, lining was used, and tiles were used for the washing room.
Gas silicate has the following advantages:
- construction speed. This is due to the large size of this building material;
- high thermal insulation properties;
- high level of fire safety, since gas silicate is a non-flammable material;
- this material is not subject to rotting;
- the relatively low cost of this building material.
Construction of a strip foundation with two layers of roofing felt waterproofing.
Do-it-yourself bathhouse made from gas silicate blocks. Photo report
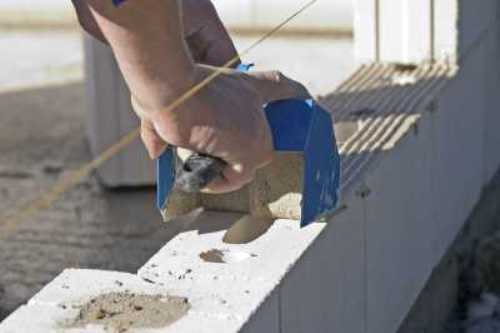
Blocks measuring 20x30x60 cm are suitable for laying walls. They must be laid on edge. The thickness of the walls should ultimately be 20 cm. To lay the blocks, a cement-sand mortar is used in a ratio of one to three. The process of laying walls is as follows: laying the first blocks must begin from the corners. On the layer of roofing felt, which was used as waterproofing of the foundation, it is necessary to apply a layer of mortar five millimeters thick. This is done using a construction trowel.
Recommendations: the first row plays a big role. That is why it should be as even as possible. In order to check the evenness of the structure, it is necessary to apply a level as often as possible.
Subsequent rows must be laid with a shift of 15 cm. This way the seams will be ligated. During the construction process, it is also necessary to determine the location of window and door openings. In this way, the walls are laid until the height of the structure reaches 2.25 m.
After this, you can begin installing the gables of the attic room. The height to the roof ridge should be 1.9 m.
Laying insulation in a steam room from heat-insulating material, vapor barrier and finishing materials.
Interior decoration of the premises. For these purposes, an edged board 20 mm thick and 125 mm wide was used.
At the first stage, it is necessary to fill the slats onto the walls. In our case, slats with a cross section of 5x5 cm were chosen for these purposes. The slats are secured vertically with self-tapping screws.
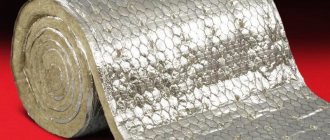
Next, you need to lay the thermal insulation material. For these purposes, you can use Paroc mineral wool with a thickness of 50 mm.
Recommendations: it is necessary to lay the material in such a way that there are no gaps. For these purposes, just before laying, you can compress the cotton wool a little. After such manipulation, it will well fill all the space in the cells.
A layer of vapor barrier material must be laid on top of the thermal insulation. This project provides for two types of building materials: foil and Metaspan film. Before laying the material, it is necessary to nail the film onto the slats. Each piece must be laid on top of the other in an “overlapping” manner. 15–20 cm will be enough. Place foil on top of the film. It is also laid with an overlap. The joints between materials must be taped with foil tape.
Next, you need to build a sheathing on which the lining will be installed.
Installation of cladding made of wood lining. Nails can be used as fastening material.
To protect the surface from rotting, you can coat the lining with a special oil, which will give the wood a matte effect.
In the washing room, tiles can be used to decorate the walls. Durable 8mm thick tiles were used for this project. The installation was done using frost- and moisture-resistant tile adhesive. The thickness of the glue layer was about 10 mm.
For the decorative finishing of the remaining rooms, lining made from aspen was used. The lining was attached to the previously installed wooden frame.
Advice: to protect wood from the harmful effects of moisture and pests, it is necessary to treat it with antiseptic compounds in two layers.

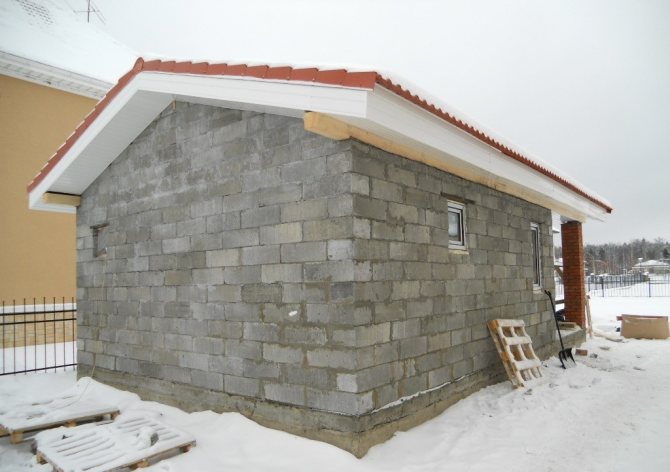
When decorating the outside of a building, in addition to making it beautiful, it is also necessary to carry out external hydro- and thermal insulation work. Moreover, the principle of action here is the same as inside. Using a wooden frame, a heat-insulating layer is formed around the building box and waterproofing is created. Variations are possible in the use of materials that will directly determine the appearance of the bathhouse.
It can be finished with plastic or metal siding. This is a very common way to give a building a nice, elegant look.
It is based on galvanized steel or aluminum. Such material always decorates the facade.
We begin finishing and arrangement with the steam room as the main goal of our construction. The work is carried out in stages:
- furnace installation;
- installation of windows and doors;
- waterproofing of premises;
- façade waterproofing;
- finishing.
After this, the porch, shelves and lighting are made. The wiring is installed during waterproofing of the walls.
Furnace installation
We install a metal stove - a heater - on a monolithic base. On the heater we provide space for stones to generate steam and heat water in the bathing container. The stove in the firebox area is lined with bricks to avoid contact with foam blocks. We paint the stove with non-flammable paint. The chimney is covered with a cap.
The door and hatch to the steam room are made of wood. We provide wide edges on the loot to retain heat and steam. The remaining doors and windows are made of any material, preferably plastic.
At the last stage of work, the most important thing is waterproofing the premises. The steam room is covered entirely with wood, preferably hardwood, including the floor. Tiles in a steam room heated to 100 degrees can burn your feet. Laying tiles and adding wooden gratings on top is disrespect for your work.
An additional waterproofing film or roofing felt is laid on the rough cement floor. The floor is pre-treated with bitumen mastic. Only after this the logs are laid and the floor is assembled from the board.
Waterproofing walls and ceilings is carried out in the following sequence:
- a beam or board 40 millimeters thick is attached horizontally to the walls;
- insulation is laid in the gaps of the sheathing. Mineral wool is compressed before installation. When straightened, it leaves no gaps;
- the walls are covered with construction foil. Fastening is done with a stapler;
- joints are sealed with aluminum tape;
- The lining is secured with nails.
The steam room is ready, the next stage is finishing the remaining rooms.
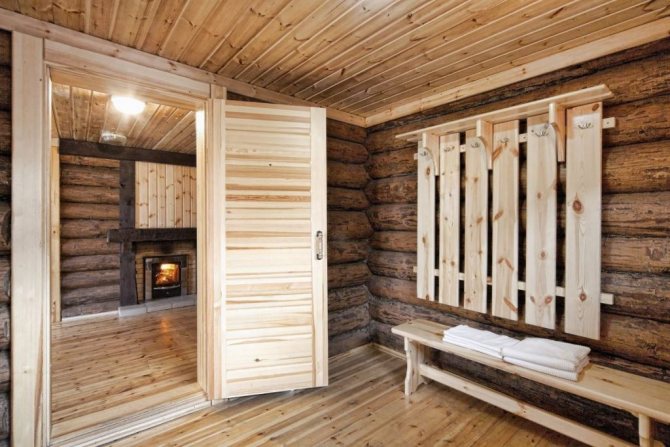
Waiting room.
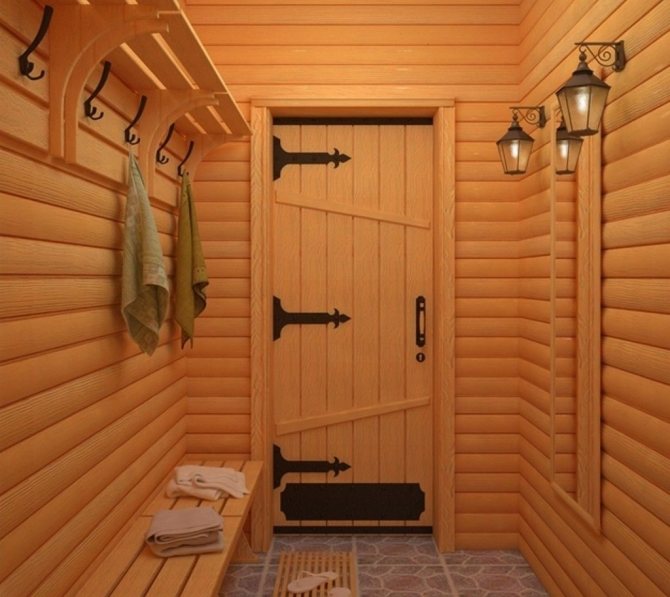
Waiting room.
Waiting room.
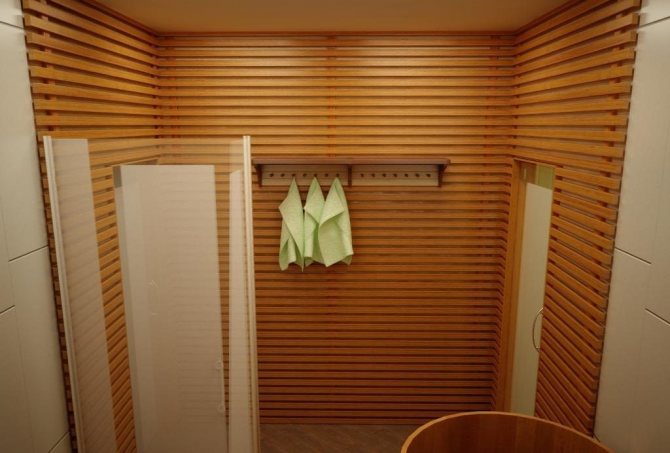
The shower room is completely tiled, with the exception of the ceiling. A layer of putty, glue and tiles will serve as a reliable waterproofing coating against moisture. The seams of the floor tiles are sealed with water-repellent putty, otherwise there is a risk of moisture getting into the cracks and destroying the floor, and subsequently the foundation. Ventilation openings must be provided.
We suggest you familiarize yourself with the correct placement of trees on the site
The dressing room is equipped to your liking, just like an ordinary room. Following the general concept, we cover it with clapboard, including coniferous wood. We treat the lining with impregnation and antiseptic. Ceramic tiles are perfect for arranging the floor and the furnace firebox area.
The outside walls, if nothing else is planned, must be puttied to prevent precipitation. Next, decorative plaster or siding is applied.
Cellular concrete has high strength and durability
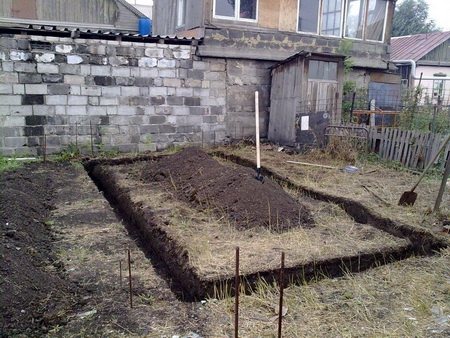
The foundation for a bathhouse is carried out in several stages:
- Digging a strip pit with a depth of at least 0.6 meters and a width of at least 0.3 meters.
- Marking and installing pins in the corners and perimeter at a distance of 1.9 meters. The correct placement of the pins is done using a stretched cord.
- Assembling the reinforcement frame and wooden formwork (the width of the boards is at least 0.25 meters).
- Pouring concrete with the previous laying of the receiver and sewerage.
- Laying the mesh, pouring the screed.
- Waterproofing using roofing felt.
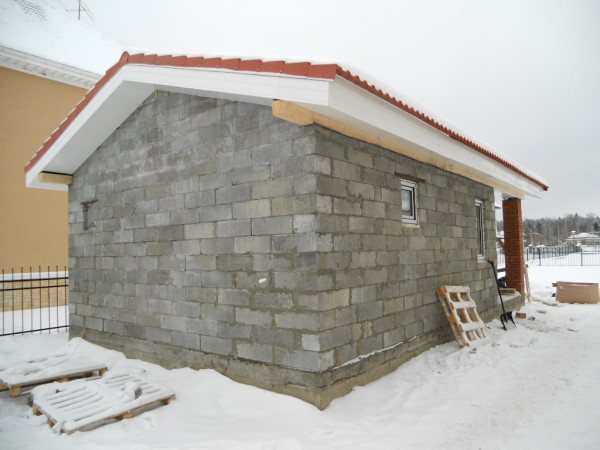
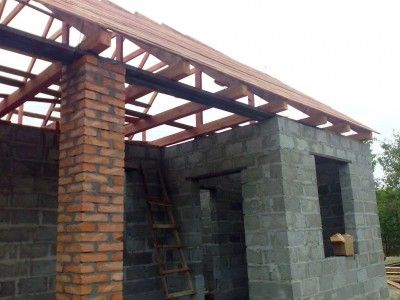
Walling
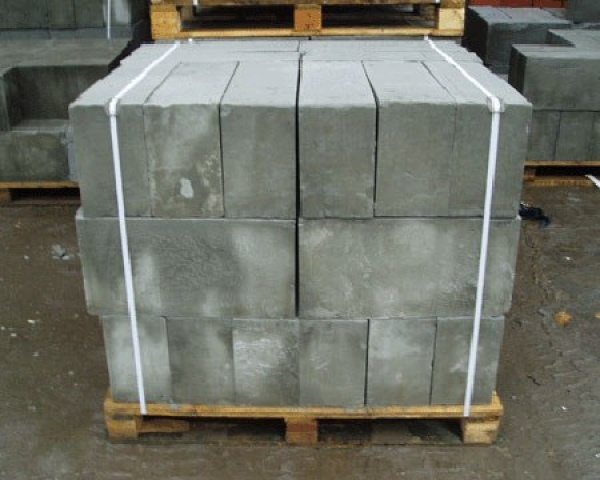
After the waterproofing has been laid on the foundation, you can begin to build the walls of the bathhouse. For their construction, in this case, blocks of the M25 brand with a density of D700 are optimal. Their dimensions are 10x30x60cm.
First, use a level to find the highest corner of the building. This is where the installation of walls begins. Foam blocks must be placed on their edges. Make the seams between them as thin as possible, this way you will avoid heat loss.
The most important point is laying the first row. The blocks in it are held together using ordinary cement mortar. When the row is laid, its surface must be carefully leveled using a metal roller, compensating for all height differences.
The quality of laying the first row determines how easy the work will be in the future. Based on this, use the level constantly, and plant the blocks in their place with a rubber mallet. To make it convenient to build walls, stretch the control cord between the corners of the building.
Starting from the second row, a bathhouse made of foam blocks is built with your own hands in stages and using special glue. It is sold in the form of a dry mixture and mixed with water at the construction site. The consumption of the mixture is minimal, because The thickness of the seams between the foam blocks is 5mm.
The blocks are placed in 3 rows, then a reinforcing layer of steel mesh with small cells is laid between them. Window and door coverings are made using ready-made additional parts.
WE BUILD EVERYTHING FROM SCRATCH
In principle, this is not as difficult as it might seem, we are not faced with the task of building a two-story house, completely different scales and parameters, so we can easily calculate a bathhouse made of foam blocks.
Where do we start?
In our minds, a bathhouse should not differ from the construction of a full-fledged house; at least, we will approach all aspects seriously, so the first thing we will do is calculate the necessary materials.
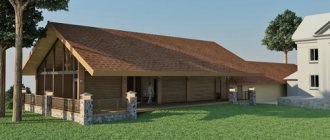
To do this, let's look at some drawings of bathhouses made of foam blocks in order to have an idea of the expected parameters of the structure, and, based on this, we make a decision on our own project.
Example drawing
Any calculations for materials are always based on:
- The exact dimensions of the building area.
- On the volumes of concrete required for the foundation of a building (bathhouse, house) made of foam block.
- On the amount of material per piece, if we are talking about foam blocks, which are several times larger in size than, for example, a brick.
Let's look at a bathhouse measuring 5x4, and using an example we will step by step carry out all the work on its construction.
Important! We chose a fairly simple option, where there is no pool, and this is a classic bathhouse, but you can offer your own options; in the calculations we use basic principles that are suitable for any project.
Foam block baths: step-by-step construction instructions
Preparation and foundation
- In the preparation process, we perform several basic actions:
- We prepare the area and remove the grass.
- We provide communications, water, electricity.
- We install a drainage hole a few meters from the building.
- We make markings.
Now we will calculate the strip foundation, and this is exactly the foundation for a bathhouse made of foam blocks that we will be pouring today.
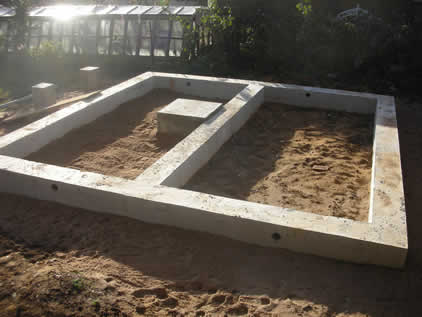
Example of a strip base
We have 5x4, structural parameters, recess depth - 0.4 meters, width - 0.3 m, in total we get 2.16 cubic meters of concrete.
We need this calculation in order to understand how much material we should buy.
Important! Let’s say right away that 2.16 cubic meters of concrete can be poured independently, at least there is no point in ordering a mixer for such a foundation, it will be irrational.
Next, we arrange trenches and begin work directly with the base:
- We pour sand to the bottom, 5-10 centimeters deep, and compact everything thoroughly.
- We install the fittings. It can be metal with a cross-section of 8-10 mm, the load on the foundation will be insignificant.
- We arrange the formwork.
All this is easy to do with your own hands, the main thing is to follow certain tips and recommendations!
Advice! When fastening parts of the formwork, it is always convenient to use screws rather than nails; they make the structure much stronger and dismantling is easier.
Masonry
Let's do the same as with the foundation, let's start with calculations. Our wall area is 54 meters, so we prepare 300 pieces of material, or 5 pallets. Believe me, the calculation will help you quickly navigate when purchasing foam concrete.
To work we will need:
- Level, tape measure, corner, twine.
- Glue. We will carry out the laying with this very solution.
- Drill with mixer, spatula with teeth, hammer.
- 8 mm reinforcement for laying in masonry.
We will start by removing the formwork and waterproofing the concrete. For this we use a simple mastic, which we simply coat the concrete with several times.
After the waterproofing has dried, we can begin laying the foam blocks.
Masonry with glue
The principle here is really very simple, and, as in the case of bricks, it requires care and even maintenance of the row.
Our instructions assume that we start from the corner and lay the first row level, trying to eliminate any deviation. The seam, thanks to the glue, is 3-5 mm, which allows us to minimize heat loss.
Lintels on the windows and above the door can slow us down a bit, but here we can use either ready-made concrete products for the ceiling, or assemble formwork and pour our own reinforced concrete lintel.
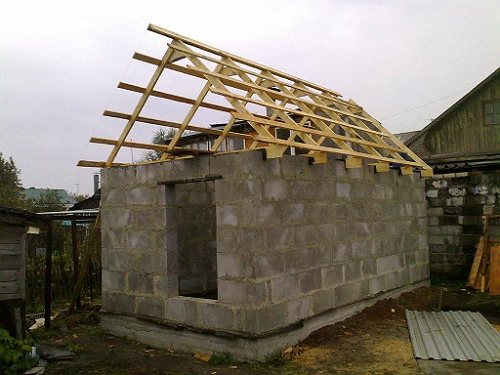
Roof
Let's be honest, when the question arises, how to make a bathhouse from foam blocks , few people think about the roof, and this is one of the most difficult stages of construction.
Lathing, choice of roofing material, waterproofing, insulation, aeration, here is a list of issues that need to be addressed.
Roof sheathing
Of course, you can raise the roof yourself, but it is best to invite a roofer, at least for a consultation.
You can go through the following steps yourself:
- We select dry timber for the roof, with a cross-section of 50 or 75 mm.
- We create a rafter system.
- The backing is made of moisture-resistant plywood.
- We lay mineral wool mats in the space between the rafters.
- We fill the sheathing, it is a beam with a cross section of 50 mm.
- Cover everything with another layer of plywood.
- We apply roofing felt.
- We are installing the roofing material; we chose bitumen shingles.
Such a roof takes place when there is a pediment, so don’t forget about it.
Finishing
When choosing a foam block for a bath, you need to understand that this material is capable of absorbing moisture in large quantities, therefore, after the walls are erected, great attention is paid to the issue of waterproofing.
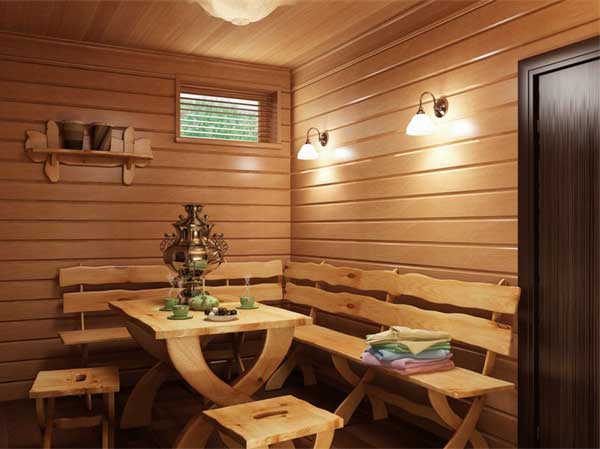
Wood finishing
There is nothing complicated in the process, otherwise foam block baths would not be so popular! For waterproofing, we will choose water-repellent compounds with which we completely saturate the foam blocks. Plus, we use insulating polyethylene coatings.
After waterproofing, you can choose any type of cladding for the interior.
Bathhouse made of foam blocks: building a roof
After the construction of the walls, a rafter system for the roof is installed from boards with a section of 10x4 cm and support beams with a section of 15x5 cm. Next, a sheathing of timber is installed, in increments of 50cm.
The rough ceiling, made of unedged boards, 2.5 cm thick, is fixed between the mats, and insulation is laid on it. Then the finished floor of the second floor, attic or attic is laid.
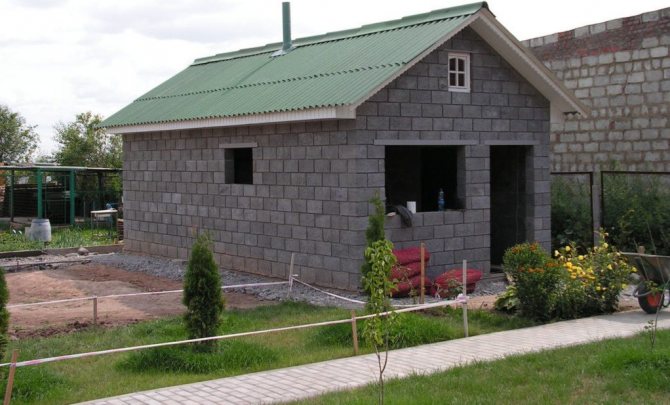
Projects of bathhouses with an attic 5×5
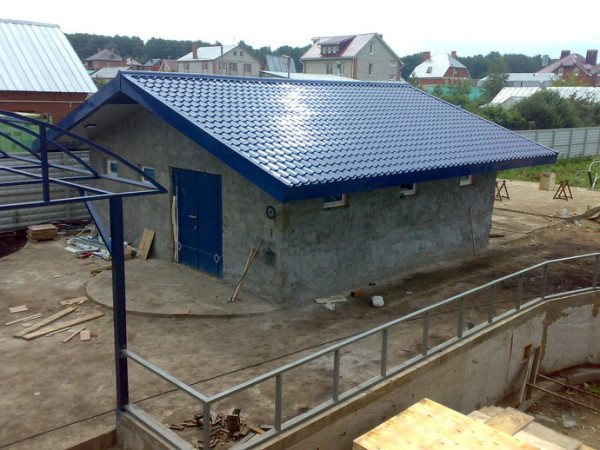
Build a sauna project from foam blocks with your own hands. Photos, videos, reviews will help you decide on the type of roof. It can be covered with any material - tiles, metal tiles, corrugated sheets, etc.
Specifics of construction from foam concrete blocks
Despite all the positive aspects of this material, it should be noted that in order to build a bathhouse with your own hands, its selection must be done especially carefully. Due to the fact that foam blocks will be in an environment with high humidity, they must have a moisture-resistant structure. In addition, you will need to carry out a number of additional waterproofing measures that will reduce the risk of destruction of the building (see Bathhouse made of foam blocks - Reviews).
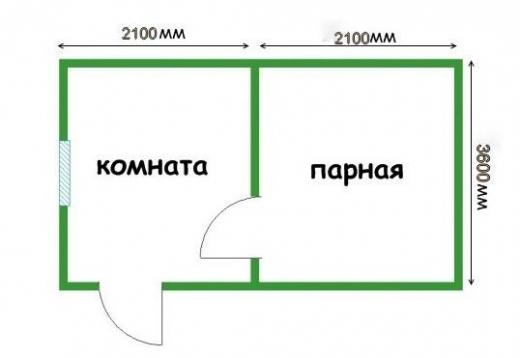
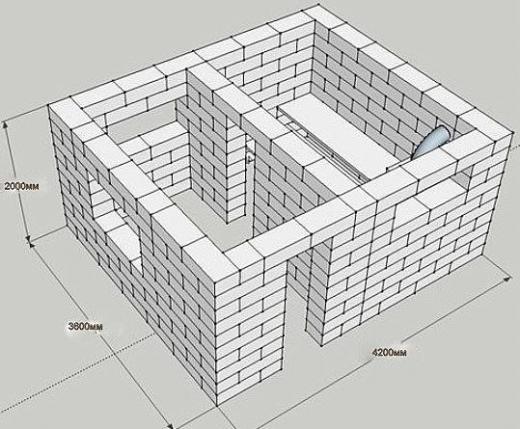
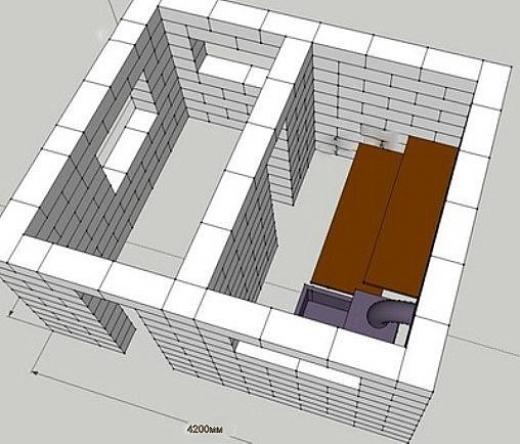
It is advisable to take into account all the nuances of this material at the design stage. So, on the Internet you can find a large number of different photo projects of bathhouses made of foam blocks, but we will focus on one of them measuring 4200 × 3600 mm. Due to the fact that the weight of the foam block is relatively small, the foundation under its base cannot be laid very wide. Considering that the building will be one-story, a foundation width of 30 cm will be sufficient. The main thing that needs to be taken into account is the depth of soil freezing.
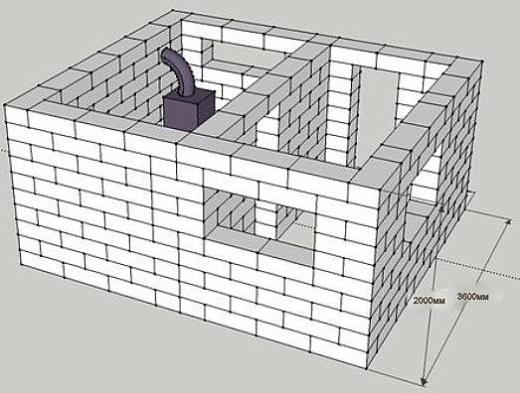
If the bathhouse has a permanent brick stove, then it will need to be built on a separate foundation, not connected to the main one. Moreover, the stove can be placed either in a paired compartment or built into a wall to supply fuel from another room. The ability to do this with your own hands without any risk to life gives foam concrete such a property as resistance to fire. The threshold for exposure of a foam block to fire, after which it begins to deform, is 8 hours.
In general, the design of any bathhouse is always drawn up in accordance with the number of people who will visit it at the same time. Therefore, the more people there are, the larger the building should be. Foam blocks also have very real possibilities for this approach. And if you want to build a bathhouse on 2 floors, then for this you only need to make a more powerful foundation. And in other respects, this material fully complies with all standards.
Although it should be noted that not only a two-story bathhouse, but also any other structure made of foam block, with all its safety margins, requires additional treatment with a special hydrophobic impregnation and exterior wall finishing. As a rule, walls made of foam concrete blocks are placed on a certain adhesive mixture, which is prepared in small portions (see DIY foam block bathhouse). The only exception is the first row; its laying is done with sand-cement mortar. The order of laying the walls is almost the same as with ordinary bricks only taking into account the dimensions of the foam block.
After the walls are ready, after some time it will be possible to proceed to the construction of the roof. First, you need to lay horizontal beams, and then rafters are erected, which are connected into a tenon or half a tree. The best option would be a gable roof with a central ridge, the slope of which is best made at 50 or 60 degrees, which will significantly extend its service life. In addition to its protective functions, the attic can be used for an extension, that is, to create a bathhouse with an attic.
Also, such a bathhouse may well be equipped with a plunge pool or even have a swimming pool, it all depends on the preferences and capabilities of the owner. If desired, you can combine these two options, that is, build not just a bathhouse with a swimming pool, but add an additional room in the form of an attic, which will serve as a relaxation room or to create wellness procedures there in the form of a gym.
Finishing the bath inside
Next, the block walls of the steam room are waterproofed. On the outside they are impregnated with a water-repellent compound, and an insulating film is laid on the inside.
The optimal choice for exterior finishing of foam block walls is a ventilated curtain wall. This will allow excess moisture to escape into the atmosphere. The best building material for a ventilated facade is vinyl and plinth siding assembled on a frame. The interior of the steam room, depending on its purpose, is lined with wood, painted or tiled.
When building a bathhouse with your own hands, it is best to line the steam room with linden or aspen; they do not heat up very much at high temperatures.