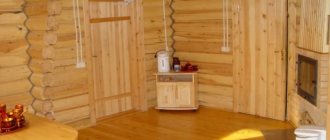
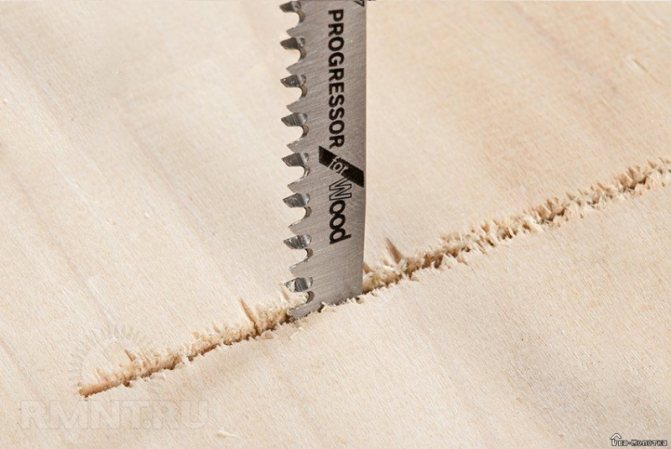
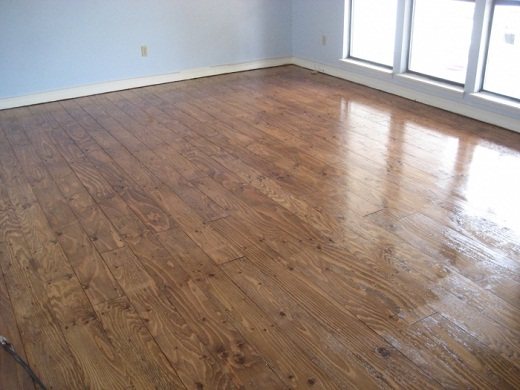
A wooden floor is a beauty, varnished and a feeling of nature. But over time, such a floor develops disadvantages: it begins to sag, creaks when walking. This is due to the fact that during use the boards begin to lose their properties, wear out and dry out. You can, of course, hide these imperfections by covering the top with fluffy flooring or laminate. But in order for your coating to serve for a long time and not bother you with all kinds of repairs, you should level the surface of the base. In this article we will tell you how to level a wooden floor with plywood.
Why do you need to level the floor?
Alas, many modern coatings are very capricious to the base of the floor, which is why in many repair work, leveling the floor has already become a mandatory preparatory step.
Parquet or laminate do not tolerate uneven floors well, since these coatings are joined by a lock. If a floor covering of this type is placed on an uneven floor, the lock will soon lose its strength and a crack will appear in the place of the lock, into which water and dirt will enter. The crack will grow over time and produce even greater deformation of the floor.
How to determine differences in floor height?
You can determine the level:
- Laser level.
- Water level.
If you determine the height by the water level, then it is better to use a two-meter one. First of all, measure the room and mark with a pencil strokes on the walls of the room, at the same distance from the corners (in the middle of the walls) and in the center of the floor covering. Each section of the floor is measured with a level and recorded. This is how we have a complete picture of the differences in floor height.
If the height differences are only one millimeter, then the floor can be considered flat if it is not a recess, but a slow decrease and increase in the level of the coating. If the floor height ranges from 1 to 3 mm, then this can be easily repaired with a minimum set of materials and tools. To do this, you need to coat the floor with an acrylic-based sealant or cover it with a mixture to level a wooden floor. You can also remove the old boards, sand them and put them back again. Boards that are loose should be secured with nails or screws.
If you have a floor with large unevenness or damage, you should lay sheets of plywood on the floor covering, which will help level and secure the base of the floor.
The use of plywood sheets is perhaps the easiest and fastest way to level the floor covering.
Floor leveling using self-leveling systems
If you are thinking about the question of how to level the floors in an apartment under laminate, then you can use another solution that involves the use of self-leveling systems. This coating can be applied to ceramic tiles, wooden bases, cement screed or concrete. However, any of the listed surfaces must be flat. This can be checked using a leveling rod in all directions. A deviation that does not exceed 4 millimeters is considered acceptable.
Schemes for leveling a wooden floor with plywood
There are 4 most popular schemes:
- The easiest way without installing logs (additional boards). Installation of support bars is not required due to the fact that their function is performed by the tubercles of curved floorboards. We make indentations from the walls 2 cm wide. We place sheets of plywood at intervals of half a centimeter. If the installation will be in two layers, then it should be laid using the bricklaying method. The fastening goes to the highest points; these points should be distributed evenly.
- The method consists of constructing a grid of longitudinal logs and transverse boards; the logs are laid at a distance of 3 cm from the walls. And sheets of plywood are laid on top.
- Leveling using mini-lag installation. This scheme is used in case of large differences in floor height (up to 8 cm). It is difficult to install and is made by installing slats and wooden boards to create a single network of supports. For this scheme, you need to make an accurate calculation, without it it will be even more difficult to complete this task. First of all, you need to measure and draw lines, then using the lines you should carefully calculate the height and size of each element.
- Lathing made of turned supports. This scheme involves installing individual supports cut from boards or plywood. The thickness of the supports depends on the difference in floor height; in the end, you should end up with a single mesh - with squares ranging from 30 to 45 cm in size, which are then covered with sheets of plywood.
Features of the work
Fixation to the base is carried out using anchor bolts, having first checked the horizon. If the old logs had to be completely removed, then new ones are installed at a new horizontal level. To learn how to level the floor for the finishing coating, watch this video:
Related article: Grout for tile joints in the bathroom: which is better
Dry pieces of coniferous wood are used as new logs. Another point that is of great importance is that the plywood sheets are laid and fixed in such a way that the edge of the sheet does not hang freely, but lies firmly on the joists.
It is important that the 4 sheets do not converge at one point
Laying is done so that the 4 corners of the four sheets do not meet at one point. This means that plywood is laid in a staggered manner. There is a gap of at least 2-3 mm between the panels; only self-tapping screws are used for fixation.
Starting installation from the middle of the room, we must not forget that the distance from the edge of the sheet to the wall should not be less than 2 cm. First, lay one strip from one wall of the room to the opposite one.
After this, taking into account everything said earlier, they begin laying the second strip. When purchasing self-tapping screws that will secure the leveling layer, you should choose their length correctly. To do this, you need to multiply the thickness of the plywood sheet by 4.
Leveling the floor with plywood without joists is possible in cases where differences in the base do not exceed 5 mm. The distance from the walls is at least 3 cm, the gap between the plates is at least 5 mm. This method allows you to tidy up your floor without installing a support beam.
Small differences are evened out by fine adjustments when fixing the plywood sheets to the floorboards.
Plywood will become an additional soundproofing layer
If necessary, the sheets are laid in several layers, and during this work it is worth taking care of the correct laying of the sheets. The intersection of 4 joining seams in one place is unacceptable.
Leveling a concrete floor with plywood has become widespread due to the possibility of providing additional thermal and sound insulation. All work is carried out after the construction of the logs, between which insulation will be laid. Before starting work, it is necessary to check the condition of the subfloor and eliminate any detected screed defects in the form of cracks, depressions, and bumps.
Related article: How to make a wooden fence: step-by-step instructions (3 photo reports)
The cleaned surface is treated with a primer mixture and after it has dried, installation of waterproofing begins, on top of which the lathing is assembled and fastened.
After the entire structure is leveled, you can begin laying plywood sheets. We must not forget about the need to create deformation gaps from 5 to 10 mm. To learn how to level crooked floors with plywood, watch this video:
Their absence will lead to the fact that the new floor will soon go in waves. The distance between the screws is from 20 to 25 cm, the distance from the walls is 2-3 cm.
It is better to drill all holes in plywood sheets in advance. This will make installation easier and faster. It is equally important to take care of creating ventilation in the underground. To do this, even before fixing the baseboards, you need to drill holes in certain places that are covered with ventilation grilles. The main distinguishing feature of this leveling is the raising of the floor by only 3-5 cm, which has a slight effect on the height of the ceiling in the living room.
Choosing plywood to level the floor
You need to choose a specific plywood for a specific floor covering.
If the covering is made of linoleum or carpet, then thin plywood sheets can be used, but in this case there will be only little leveling of the floor.
If the covering is for laminate or parquet, then you should lay plywood on the wooden floor under the laminate 1 cm thicker than for linoleum.
There are two grades of plywood that are most suitable for flooring in residential premises: FK and FSF.
FK brand plywood is made without harmful substances (phenols) and is a harmless material. Unlike other coatings, it has average water resistance and is quite resistant to mechanical damage.
FSF plywood is made with phenol-formaldehyde resins (these resins are toxic). Although wear resistance and water resistance are significantly higher than FC.
There are 4 types of plywood on sale:
- First grade. The best quality, there are no defects on the plywood, and slight deformation and small cracks are allowed.
- Second grade. already worse , there may be glue, dents and wood inserts.
- Third grade. The plywood already contains knots and traces of wormholes.
- Fourth grade. The lowest quality, plywood has many defects that formed during the creation process.
As for the use of grades for leveling, the first is certainly the most suitable, but also the most expensive. The second is an ideal floor solution. The fourth grade cannot be used when leveling the surface.
There are different types of plywood sanding:
- polishing on one side;
- polishing on both sides;
- unpolished.
Leveling the subfloor with plywood - analysis of several methods
Every person who has started a renovation dreams of seeing their apartment after it’s finished, just like in the picture. This is unthinkable without a beautiful floor, and laminate, parquet and other hard coverings require that the base underneath be level. This can be achieved in different ways, but the simplest is to level the floor with sheets of plywood.
How to level a floor with plywood
What is good about the method? The most important advantages are:
- no need to wait for the screed to dry;
- relatively inexpensive;
- simple;
- You can take long breaks during work;
- when leveling with plywood, there is no such dirt as when pouring a cement-sand screed;
- light weight structure;
- environmental Safety;
- resistance to loads;
- long service life;
- This way you can level both wooden and concrete floors.
Plywood selection
Plywood selection
Before starting work, you need to stock up on plywood.
It is divided into different classes depending on its purpose, moisture resistance and quality, which is determined by the number of knots, cracks and other defects per unit area. There are 5 degrees.
“E” quality plywood does not have any imperfections, so it is very expensive. The next grade I has small knots, and the last grade IV is of the lowest quality.
In this case, you can save on quality by choosing degrees II or III. After all, this is a rough coating that will not be visible.
When purchasing a material, it is better to pay attention to how suitable it is for use in residential premises. To do this, you will have to ask the seller for a hygiene certificate.
It is desirable that the plywood is moisture resistant. Before starting repairs, it will need to be additionally treated with an antiseptic.
All plywood sheets come in the same standardized sizes:
- 1525 x 1525 mm;
- 1220 x 2440 mm;
- 1500 x 3000 mm;
- 1525 x 3050 mm.
It is very comfortable. Knowing the perimeter of the room, you can plan in advance a layout of sheets and choose those that will leave the least amount of waste. After purchasing plywood, you need to bring it into the room where the renovation will take place and give it a couple of days to get used to the temperature and humidity. The further fate of the plywood will depend on the quality of the base, whose irregularities it will have to hide.
We invite you to familiarize yourself with Ventilation in the bathhouse - 105 photos of special ventilation systems for saunas and baths
There are three methods of leveling: unsupported with glue, adjustable plywood and floor on joists.
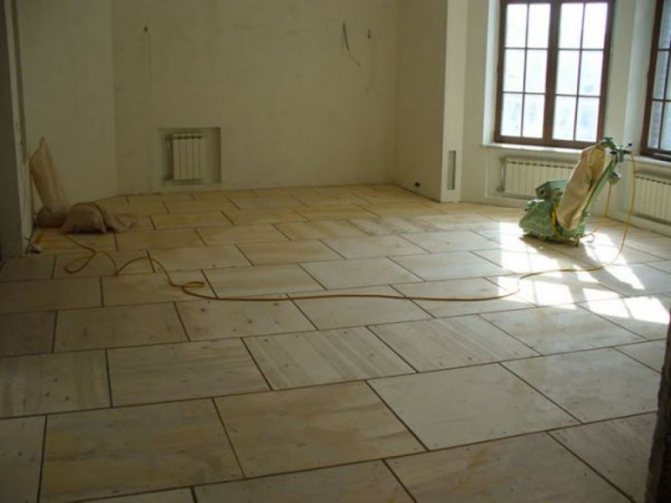
Regardless of which way the floor is leveled, the final stage will be checking for slope and horizontality, and then sanding with a special machine or sandpaper.
This option is used when the height differences are small, 5-10 mm. To level them, sheets with a thickness of 10-12 mm are suitable.
Concrete base
Concrete base
It should be fairly smooth and dry. It’s easy to check the degree of humidity - you need to take a piece of film 1x1 m and apply it to the surface, pressing the edges. If no condensation has formed on it within three days, then the concrete is dry. Another option is to place a glass jar upside down on the base and also check whether perspiration appears inside.
If you are planning to lay linoleum or laminate, the subfloor must be perfectly level. However, concrete screed is not always the best option.
If you value your time, you can level the floor with plywood. This method has some advantages.
Preparing the wooden floor for leveling
For the preliminary stage you need:
- jigsaw;
- roulette;
- level;
- screwdriver;
- self-tapping screws;
- dowels
Before starting work on leveling the floor, we check the pipes that are located above the floor, check their suitability and general condition, since after installing all the flooring for leveling, access to the pipes will be closed.
After this, you should check all boards and creaking areas, replace rotten and cracked boards.
We recommend placing plywood sheets in the room in which the leveling will be carried out for a couple of days. What will it give?
This will give the same level of humidity in the room and on the material, and will reduce the level of deformation of the sheets after installation. If leveling takes place in winter and the room is heated, then you need to put the plywood on its edge and leave it like that for a couple of days. If the room in which the renovation will be carried out is heated intermittently, then you need to slightly moisten both sides of the plywood.
Technology for leveling wooden floors with plywood
The installation itself is divided into three stages:
- Trying on plywood.
- Installation of logic.
- Fastening plywood to the floor.
Trying on Plywood:
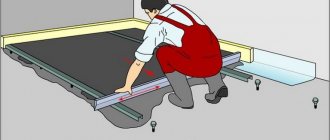
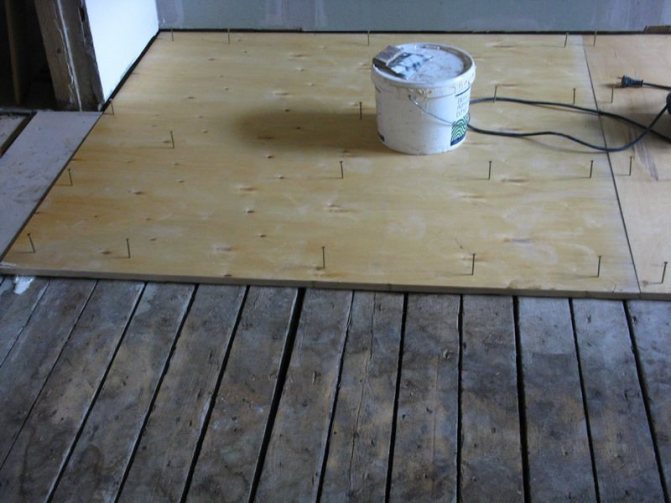
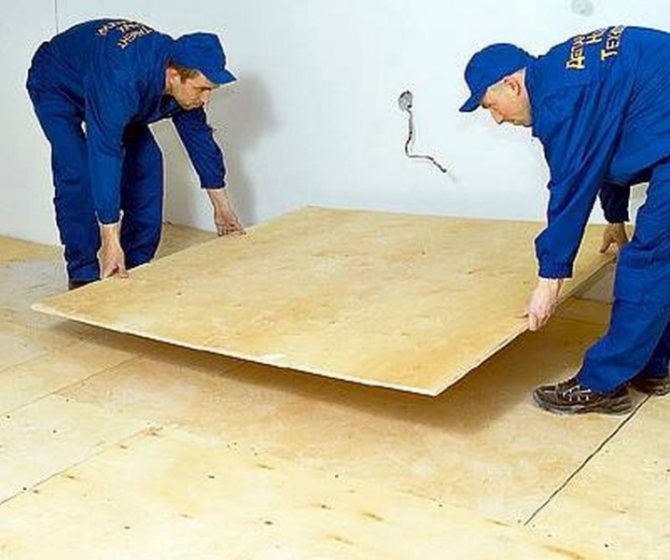
First of all, we measure the dimensions of the room and cut the plywood according to the given measurements. Also, do not forget about the seams: 1 cm from the walls and up to 5 mm between the alignment elements. If this is not done, the plywood may become deformed due to changes in moisture and temperature. After the cut is made, you need to carefully inspect the ends of the plywood. If defects or delaminations are found, then it is better not to use such pieces for installation.
After cutting, you need to lay the pieces of plywood in the order in which you will attach them; for convenience, you can write a serial number on each piece. Sheets of plywood must be laid out with a shift based on the joints. The next step is to mark the places for the joists (the joints of the pieces of plywood should be located in the middle of the joists), and after that you can remove all the blanks.
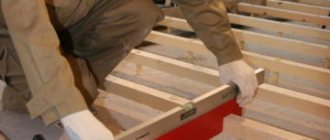
Installation of logs:
Logs are plywood boards, 3-4 centimeters wide. They must be laid exactly according to the outline. The joists can be secured using glue or self-tapping screws.
The horizontal position of the boards is checked using a level , and the evenness of the future floor covering depends on this position. The distance between the joists must be filled with a compacting substance.
Attaching plywood to the floor:
After installing and fastening the logs, you can begin the actual leveling with plywood.
Plywood is fastened in accordance with one of four schemes. It is recommended to treat parts of plywood with an antiseptic before installation . The fastening itself occurs using self-tapping screws with plastic dowels. To prevent the plywood from cracking when driving dowels, it is recommended to drill holes in it .
After completing the fastening work, the surface must be covered with several layers of varnish.
So, using these techniques, you can level any floor. And after precise and careful installation, you will get a flat surface that is ideal for parquet or laminate. And, as a result, you will not only have a perfectly flat surface with the appropriate floor covering, but also the realization that you did it all yourself.
Instructions for laying plywood on a concrete floor
Plywood is considered a durable material that can cope with any load. Therefore, it is used not only for leveling floors, but also for all other surfaces in the room - these are walls, partitions and ceilings. You can find a guide to installing a concrete floor here.
Characteristics of plywood
Plywood has the following characteristics:
- high strength;
- tolerance and resistance to moisture;
- long service life;
- resistance to various external influences;
- has good sound insulation;
- able to retain and conserve heat;
- provides a reliable design.
Experts recommend choosing plywood with a thickness of at least 9–12 mm for covering concrete floors. In this case, it will retain all its quality indicators and will be a reliable and functional coating for many years. Read instructions for insulating a concrete floor on this page.
Laying
Plywood allows you to perfectly level the floor surface, improve the shock-absorbing and insulating functions of the laminate flooring, and also help increase the life of the flooring. Before directly laying plywood on a concrete floor, you should prepare the surface:
- remove all irregularities on the concrete floor, clean them;
- sweep or vacuum the floor;
- Any depressions or cracks in the concrete floor are repaired using a primer.
The plywood itself is placed on the concrete floor subject to certain rules:
- special plywood for laminate in the form of squares is sold, it is advisable to purchase it;
- cut the selected plywood into four equal parts, thanks to which in the future it will be possible to avoid various deformations of the floor;
- Gaps must be left at the recommended width, but not less than 5 mm. Experts recommend strictly following this recommendation;
- It is recommended to choose a water-dispersed PVA-based glue or a two-component one; it is necessary to strengthen the concrete screed under the plywood. After gluing, the plywood sheets must be secured with self-tapping screws;
- Care should be taken to ensure that the entire space under the plywood is filled with glue. To accurately determine this, you can knock on the plywood - if the sound is dull, then the sizing is done well. Instructions on how to properly lay laminate flooring are here: https://howfloor.ru/laminat/podgotovka-i-ukladka/instrukciya-kak-pravilno-klast-laminat.html.
Plywood is the most optimal solution for leveling a concrete floor
- Plywood is also laid on a concrete floor under linoleum to level the floor. An important point here is the choice of plywood sheets: first of all, you should pay attention to the thickness of the boards. For a concrete floor, you should choose plywood with a minimum thickness of 12-15 mm. It is the thickness of the plywood sheets that determines the reliability of the base for linoleum;
- Before actual installation, the plywood is checked for deflection under the weight of a person. If you stood on a sheet of plywood and it even sagged a little, then you should choose thicker slabs of plywood or additionally install support logs;
- plywood must be dried before laying under linoleum. It should also be treated with plywood sheets with an antiseptic and a moisture protection agent.
- installation of a concrete screed to level the floor. A cement mixture is applied to the original floor base and carefully leveled. It is worth noting that this mixture will take a long time to dry. Professionals recommend letting the concrete screed dry for about 45 days.
- After the cement mixture has completely dried, a layer of waterproofing is applied to the surface in the form of a standard polyethylene film, which is secured with tape at the joints. Read the guide to preparing floors for laminate flooring;
- Next you should start cutting the plywood. As a rule, plywood sheets are laid according to the “brick” principle in order to avoid four seams at one point;
- plywood cut into sheets is sanded to get rid of various irregularities. Next, the surface of the plywood is primed with glue-mastic;
- Next, adhesive mastic is applied to the concrete surface, and plywood sheets are laid on top in the manner indicated above. Plus, the plywood will need to be secured to the base with dowels and screws;
- The last step is sanding the plywood to obtain a perfectly smooth coating. As a rule, a standard tool with coarse sandpaper is used for sanding.