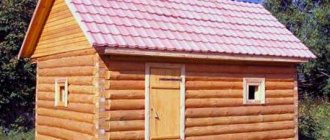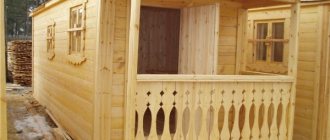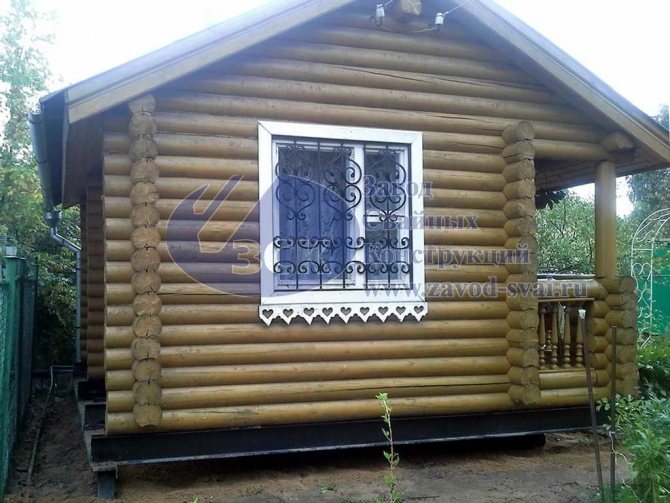
If you decide to build a bathhouse, then the first task you will face will be building a foundation. Many questions will arise and you will have to make a choice in favor of one type of foundation or another. Today, the most common type is a screw foundation for a bathhouse. The cost of such a solution is affordable, and the use of screw piles is preferable for installation on unstable soils. The choice of a particular option is greatly influenced by the size of the building and the surface on which it will be built. Construction of baths on screw piles is one of the popular methods today.
| Example 1 | Example 2 |
| The foundation for a 2-story bathhouse is made of rounded logs. Price - 32,400 rubles. | Foundation for a small steam room for 2 - 3 people. Price - 18,900 rubles. |
CHECKOUT
CALCULATE THE FOUNDATION
Advantages
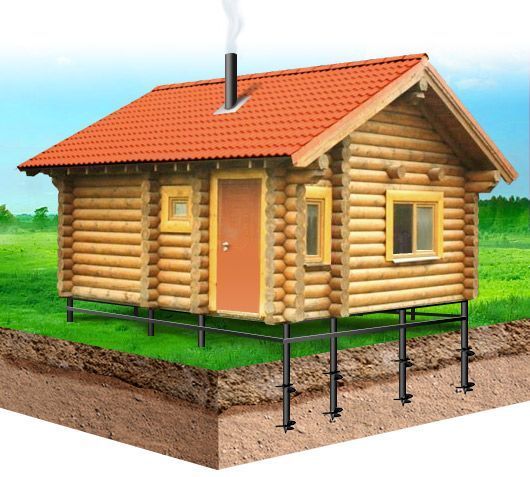
Raising the bathhouse on screw piles above the ground makes it possible not only to break the connection with freezing soil and storm water, but also to allow the natural flow of used water through cracks and drains. A concrete tray is installed in the space under the required rooms to collect and drain liquid into a drainage pit.
The slotted structure is called a flowing floor. The gap between the boards is maintained at 0.7 cm, then when the wood swells, the gap will not overlap. The necessary ventilation and access for cleaning in the underground are structurally solved by a pile foundation with a height from the zero level of at least 0.5 m.
Leaking floors
A poured floor in a bathhouse on stilts is the simplest and most inexpensive to implement. To organize it, you will need a base with a height of at least 50 cm.
The installation method for such a floor involves laying joists on a grillage without a slope. The logs are covered with a flooring made of edged boards with 7 mm indentations, so that as you use the bathhouse, water can easily pass through the cracks, even if the wood swells.
What to pay attention to
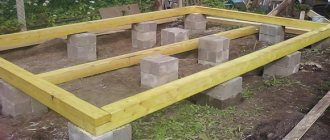
Lighter bath structures are usually built on screw piles with your own hands. You can build brick walls on a concrete grillage or slab, but this will require a rigidly tied pile field. Construction with wood materials reduces overall weight and thermal conductivity.
The piles are screwed in with a clearance of 2÷3 m, depending on the rigidity of the base beams. It is advisable to tie the central pillars with a channel to support the lag.
When designing the number and location of support points, you need to take into account the location of the bathhouse equipment. A stove, water tanks, and other equipment that creates variable thermal and weight loads over the mounting area need to be installed on a securely fixed base.
Organization of drainage
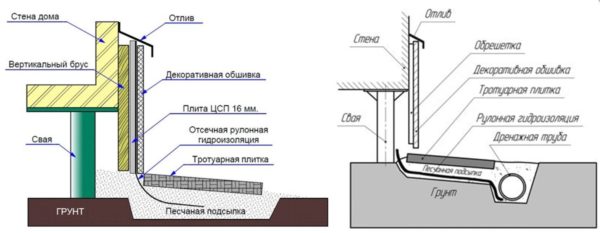
The rise of moisture from the post is prevented by laying a layer of roofing material on the head, protruding a couple of centimeters at the edges.
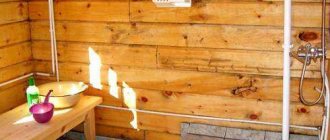
There must be a drain in every room. Where water is not used for washing, it is used for cleaning and disinfection. If you plan to visit the bathhouse once a week or less, do not install drains with a water seal. They will dry out and smell like sewage. In this case, it is better to install a dry shutter.
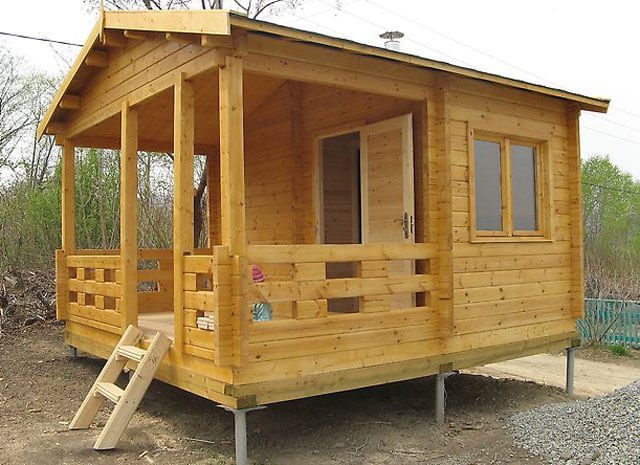
Installing a sauna on screw piles
When each of the screw piles reaches its stop, you need to cut it with a grinder to the desired level. For frame houses this is a horizontal plane. The log house has a difference between the longitudinal and transverse logs of the crown. It can be selected with pads or different cutting heights for posts (150 mm).
Making a frame

Installation of the frame on piles.
The base is made of timber with a 150 mm edge. For heavy structures - 200 mm. Assembly order:
- We lay it out on the heads, mark the cutouts in the “floor of the tree” or “in the paw”;
- We fold the frame onto the heads along the cutouts, fasten 1 screw in each corner;
- We achieve a right angle at intersections by measuring the diagonals;
- We fix it with a second screw at each intersection;
- We fasten from below with bolts to the heads;
- We cut the inner beam into the floor of the tree.
The wall posts will be located at a distance of 0.6 m, so the clearance between the piles must be calculated taking this into account. In addition, you should carefully approach the choice of wood material and the installation of vapor barriers in frame buildings intended for bathhouses.
Assembling the log house
For a log house with a small area without loaded internal walls, installation is often performed directly on its crown instead of a grillage. The log of the first row should always be thicker than the next. It is not laid directly on the head, but on a lining made of larch or beech boards, pre-treated with resin (except for the ends). The difference between the longitudinal and transverse logs is compensated by the thickness of the board. The corner is additionally secured with a staple.
Next, the log house is assembled according to serial numbers with gaskets made of hemp, tow, and felt, according to the instructions. The number of walls and the presence of a protruding porch make it clear how many support points are needed.
The frame is also placed on a grillage made of channel bars. Holes are drilled in the crown from below, under which vertical pins are welded to the steel frame. The log is “put on” the rod. Get a tight grip. Watch the video on how to mount a log house on piles.
Ready option
If you need to install a ready-made building on a foundation, then its corners are additionally secured and, with the help of jacks, linings, and an I-beam, they are lifted into place.
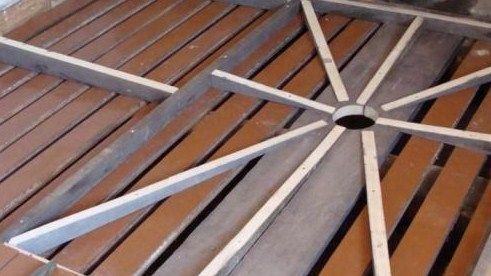
Installation of a pile foundation for a bathhouse
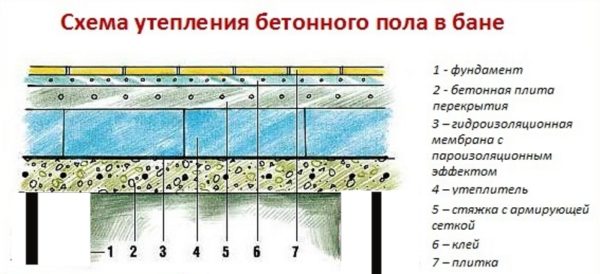
Scheme of floor insulation on a pile foundation
One of the advantages of this foundation is that it protects the building from penetration of rain and melt water from the ground into the walls. Places for installing piles are determined at the corners and walls of the bathhouse; to do this, they should be marked with stakes.
The pile is screwed into the ground by workers using a lever installed in a pipe parallel to the ground. Concrete solution is poured into the metal cavity formed by the piles.
When screwing in a pile, after every four turns it is necessary to check the vertical position of the pile. If a deviation is detected, you must not unscrew the piles in an attempt to level them, as this will lead to shrinkage of the bathhouse due to loose soil. Having measured the position of the piles, it is necessary to weld the heads to them. Then apply liquid waterproofing, which will protect the metal structure from corrosion.
A wooden beam or a metal channel is used as jumpers between the piles. Jumpers must be treated with antiseptics or bitumen mastic. The installed foundation should be given a noble appearance and the structure should be properly insulated. Before cladding and insulation, you should figure out what negative factors the exterior finishing will have to deal with.
In order for the installation of screw piles for the foundation to be carried out as correctly as possible, a number of basic rules should be followed.
It is necessary to pay attention to the following points:
- The distance between separate piles should not exceed 3 meters, otherwise the floor in the bathhouse will begin to sag due to excessive load.
- If the distance between adjacent joists exceeds 3 meters, additional supports must be installed in the central part of each beam so that the floors do not spring when walking.
- Since a pile-screw foundation requires a sparser placement of supports than, say, a strip foundation, it is advisable to tie the central row of piles with a channel.
- If wooden beams are used for piping, the height of the central piles should be made 15 cm lower than the rest.
- Where the fifth wall adjoins the building, two additional supports should be installed.
The standard height of screw piles for a log bathhouse is 6 m. When installing supports, care should be taken to ensure that there is as little waste as possible.
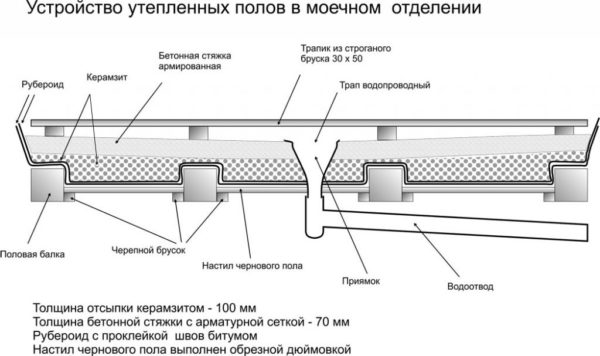
Floor construction
When building this type of bathhouse with your own hands, it is very important to provide the correct floor design, the construction of which directly depends on the foundation. Hot steam condenses and tends to flow down, just like water from a shower. Therefore, the design of a non-leaking bathhouse floor, located on a raised platform of screw piles, is more complex:
Draft level
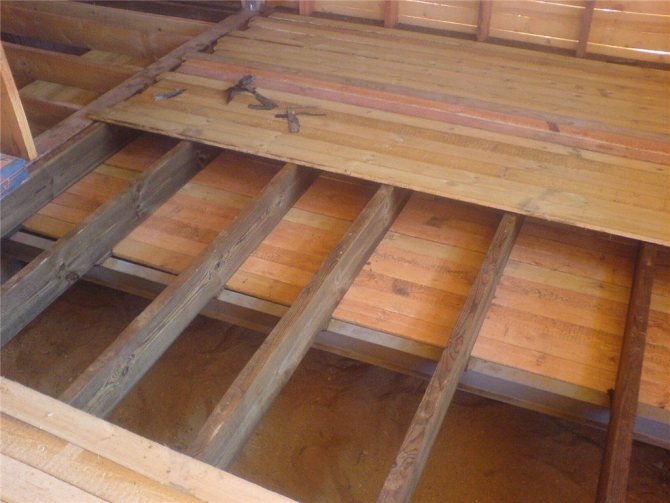
Subfloor equipment:
Plank covering, without cracks, treated with antifungal impregnations. It is lined with film materials to protect it from moisture from below, and filled with expanded clay.
The top is also covered with film. The use of roofing felt and other bitumen-containing coatings in the future can complicate life with the unpleasant smell of resin. The height of the drain pipes and passages under them at all floor levels are marked immediately.
Thermal insulation
Insulation is made from available material:
- Mineral wool (stitched mats, roll) – 0.25 m thick;
- Foam polymer, polystyrene foam (slab) – 0.15 m.
Top protection from moisture is required. Expanded polystyrene is resistant to this effect. Other insulation materials reduce their properties. Membrane coatings have proven themselves to be excellent protection. They are produced in sufficient length and width (maximum 61×15.5 m) to be covered in one piece, with an overlap up the walls. In a frame house, vapor barrier is also done on the walls, with condensate being released onto the membrane to drain by gravity.
Protect and decorate
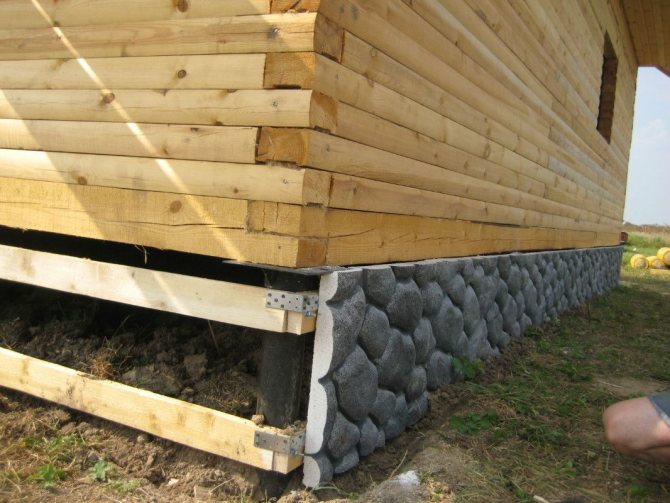
Closed bathhouse base
Installing a bathhouse on a raised platform using screw piles with your own hands will be completely completed after installing the base. It will protect against the accumulation of debris under the house, in winter - from snow drifts, create an additional barrier to heat loss and decorate the view. Depending on the height above ground level, floor design, and the concept of the entire building, you can use siding, artificial stone, and decorative coverings.
We must not forget to equip technological manholes for inspecting the foundation. Clear the interior space of the fertile layer and fill it with crushed stone and sand.
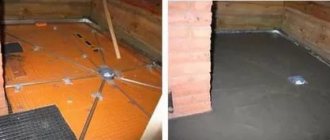
Pouring concrete screed
Floors in a bathhouse on a pile foundation can also have a concrete base.
The preliminary stage before pouring concrete includes the following work:
- Installation of communications - water supply and sewerage.
- Laying a ladder for water drainage so that after finishing the grate is located in the lowest section of the floor.
- A layer of sand and gravel cushion, the thickness of which will vary depending on the type of insulation material. As a rule, when insulating with expanded clay, the gravel layer does not exceed 4 cm.
- Laying a layer of waterproofing in each section of the foundation. As an option, roofing felt will be acceptable, but it is best to use a vapor-permeable film.
- Installation of insulating material.
Correct arrangement and insulation of the base along the perimeter of the building allows you to increase the degree of floor insulation with a pile foundation. The purpose of the plinth is that it insulates the space under the bathhouse and does not allow cold air to enter there, and also helps to improve the aesthetics of the appearance of the building.
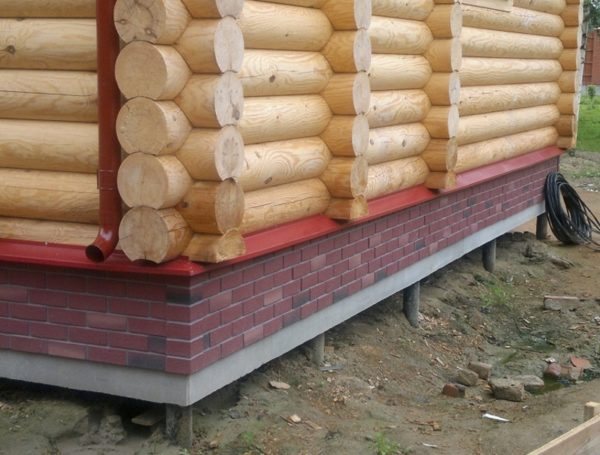
Cladding with DSP and panels with imitation masonry

The cladding is made using thermal insulation boards and decorative panels that imitate various materials - wood, stone, brick. Slab insulation materials (foam plastic, penoplex) are used as thermal insulation materials.
Base design options
Before starting work on pouring a concrete floor, it is necessary to carry out a number of preparatory measures:
- Install water and sewer pipes.
- Install a drain ladder.
- Prepare the base - compact it and prepare it for pouring concrete.
The principle of constructing a concrete floor
Table 1. Floor arrangement
We suggest you read: How much does it cost to build a log bathhouse?
| Illustration | Description |
| Concrete mortar, about 5 cm thick, is poured onto a compacted base on the ground. | |
| Insulation is laid over the waterproofing layer and covered with film. | |
| Pour a second layer of concrete screed reinforced with metal mesh. | |
| The surface is leveled. | |
| CREATOR: gd-jpeg v1.0 (using IJG JPEG v62), quality = 90 | The finishing material is laid, often tiles. |
Sequence of preparing concrete mixture
Floor insulation is carried out using expanded clay, perlite, extruded polystyrene foam or mineral wool.

Types of insulation
Before laying the insulation, the rough screed is cleaned of debris, dust-free and covered with rolled waterproofing. If fractional insulation is used, then it is applied in the form of a special mixture, after drying, which can be used to begin pouring the second layer of concrete mortar.
Insulation of concrete floor
When using insulation in the form of slabs, the joints that are formed during their installation will need to be sealed with polyurethane foam. A second layer of waterproofing is laid on top. The second layer of concrete screed must be reinforced with metal mesh.
Insulation with expanded clay