Any construction of a house begins with the construction of a foundation. A solid foundation will become a reliable foundation for a house - this is an axiom that does not need to be proven. It's a different matter when it comes to types of foundations. For each specific case, a specific type of foundation must be selected. The choice directly depends on the composition and structure of the soil on your site. In particular, on its ability to hold and absorb water and, mainly, on the level and force of groundwater pressure in relation to the surface of the earth. With the help of high-precision geodetic instruments, it is very easy to determine all the indicators necessary for the construction of a foundation. However, you don’t have to spend money on expensive examinations.
After all, what is the groundwater level? This is the distance from the ground surface to the water surface, which can be easily measured in wells in the areas closest to you. In the end, all the information important to you can be obtained from your neighbors in the area. And the most important thing is to determine at what depth the water is and to what level it rises in a given season.
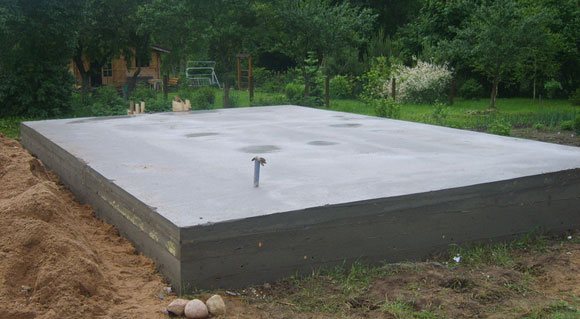
In our area, groundwater was in close proximity to the surface of the earth. That is, in this situation, the most suitable option would be a floating foundation.
How to make a floating foundation with your own hands, what is its advantage over other types of foundations - you will learn about all this from this article.
Floating foundation - what is it?
The word “floating” does not mean that the plate is actually moving somewhere (floating). This means that, unlike static foundations (for example, piles), which resist loads due to high resistance, it compensates for destructive forces with its own plasticity and shock absorption. When the soil subsides, the slab makes vertical vibrations along with the building.
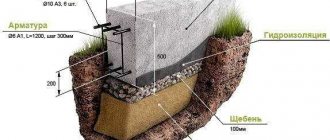
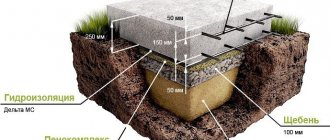
The slab is placed in a pre-prepared pit. Foundation structure on floating soil:
- sand cushion;
- waterproofing layer;
- layer of reinforced concrete.
The thickness of the pillow can reach 2/5 of the total thickness of the foundation.
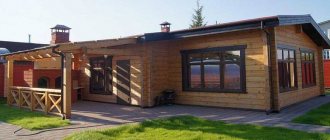
House on a floating foundation
If you decide to build your house on a floating foundation, then you must follow the technology. We list the main mistakes that should be avoided when constructing it:
- you should not build a foundation above the freezing depth;
- Filling work should not be carried out in the cold season when the soil is frozen, this can lead to sagging of the slab;
- You should not skimp on waterproofing, otherwise the foundation will begin to actively absorb moisture, which will freeze in winter and lead to its destruction.
Taking everything that has been said into account, you will build a high-quality foundation and the house will stand on it for decades.
This article talks about floating foundations. Attention is paid to its strengths and weaknesses. Recommendations are given for preparing and pouring the slab. Using the information in the article, you can make this foundation yourself and build a house on it. published
PS And remember, just by changing your consumption, we are changing the world together! © econet
Disadvantages of a floating foundation
The main disadvantages of this technology are economic and organizational:
- high price;
- labor intensity – large volumes of concrete and earthworks;
- the need for heavy equipment. Depends on the scale of the work: for a small house, you can make concrete yourself and dig the pit by hand. But a concrete mixer will be required in any case, because... It is recommended to fill the slab in one go;
- long construction times. It only takes a month for the concrete to mature. That is, another month after the completion of the main work.
DIY floating foundation
If you install a floating slab yourself, you can save a lot of money. When preparing a pit, keep in mind that, in accordance with regulatory requirements, the distance between the house and the neighboring property must be at least three meters. A minimum of five meters is left to the frontal boundary.
First you need to mark the site. For marking you will need:
- hydraulic level;
- roulette;
- marking cord or fishing line;
- pegs;
- a right triangle with legs of 30 and 40 centimeters, you can make it yourself.
A triangle is placed on the starting corner peg and both directions are marked along it. When marking the length and width of the pit, use a cord and pegs.
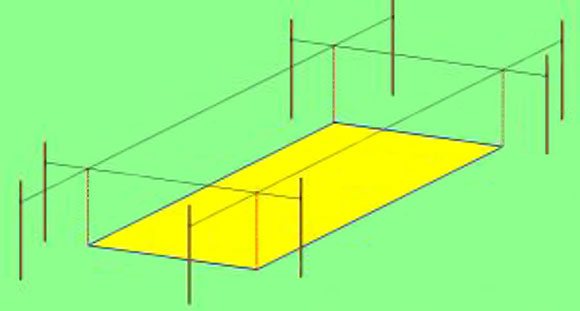
Control measurement - along the diagonals of the resulting rectangle: they should be equal, the difference is no more than two centimeters.
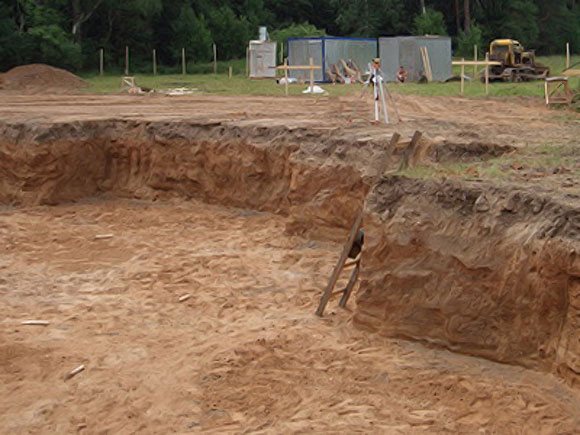
The next stages are cleaning and excavation. Remove dirt, remove turf. In addition to the area inside the perimeter, the turf around it is removed with an indentation of about a meter to create a blind area. When digging a pit, you need to monitor the depth and control the level.

If a dig has formed somewhere, the excess is covered with sand. The walls of the pit are made with a slight slope so that they do not crumble in the future.
When the preliminary work is completed, proceed to the installation of a floating foundation:
1. Pour a layer of crushed stone. Compact.
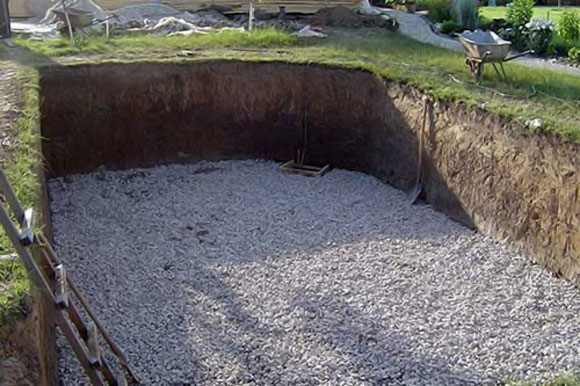
2. Layer of sand. Compact and pour water on top to settle and compact. Dry.
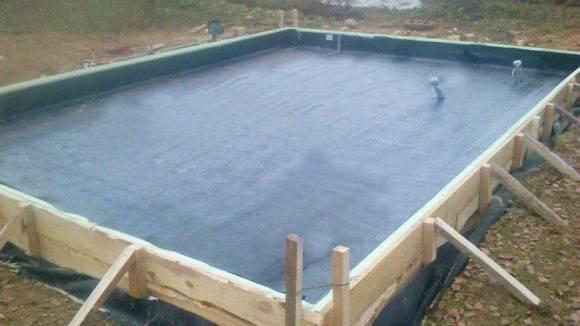
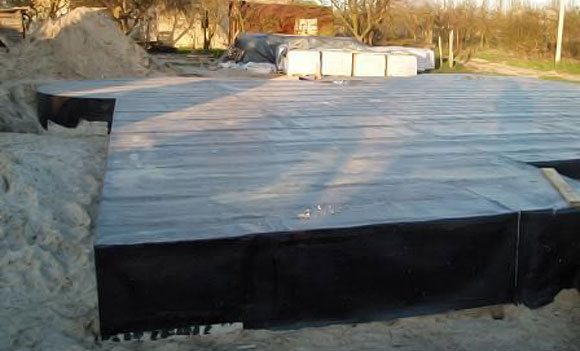
3. Waterproofing. Thick polyethylene will do.
4. Thermal insulation, if provided for by the project.
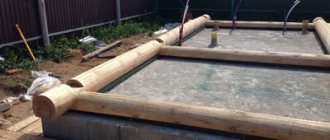
5. Footing. Some cheap brand of concrete will do.
6. Formwork. If the soil is dense and the slab does not protrude above the walls of the pit, you can do without formwork. Otherwise, walls made of boards (plywood, expanded polystyrene, etc.) are installed vertically along the perimeter of the pit and carefully fixed inside and outside with supports. Fixation is needed from the inside so that the walls do not deviate from the vertical, and from the outside so that they are not bursting with concrete. The board for formwork is chosen 2.5 cm thick.
7. The walls can be sealed from the inside with waterproof cardboard or roofing felt.
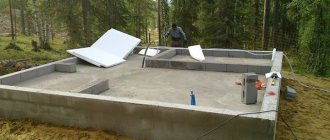
8. Reinforcement. The reinforcement cage should end a few millimeters below the top cut of the slab.
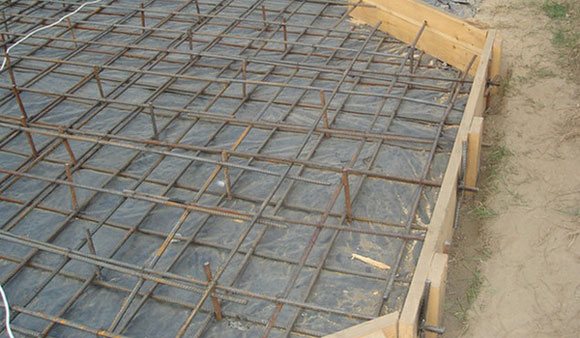
To create an unbreakable connection at the wall locations, vertical rods are positioned so that they protrude above the concrete. They will act as pins. The frame is knitted with wire: welding is undesirable, because At the same time, the foundation loses its plasticity.
note
The cell width of the reinforcement mesh is 20-25 centimeters (maximum 30). The thickness of the rod is from 8 to 16 millimeters.
There should be no perpendicular joints at the corners; rounded solid rods are laid here and placed on both joining walls.
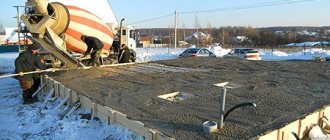
9. Concrete is poured in several layers 15 cm thick, leveled with a rule or a wooden lath, and pierced with a bayonet shovel to remove air. The optimal time for pouring a layer is no more than an hour.
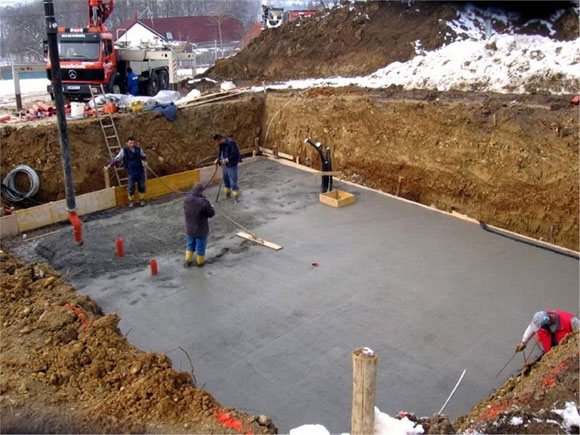
10. For the first few days, the finished slab is regularly moistened with water to avoid rapid setting and cracking. Time intervals: the first day - after 5 hours, the second - three times, the third - two (in the morning and evening). The wetted foundation is covered with polyethylene.
11. Before the construction of walls begins, the slab is kept for 1 month. The formwork can be removed earlier.
The main violations of the floating foundation technology, which can lead to rapid destruction:
- laying the slab above the soil freezing line;
- pouring a foundation on frozen ground: when thawing, the slab will sag;
- poor quality waterproofing or lack thereof. Concrete is a porous material and actively absorbs water. When it freezes/defrosts, it is destroyed, the reinforcement frame is corroded by water, moisture rises by capillary action into the walls, dampness forms in the basement, resulting in rot and fungus, etc.
For complete waterproofing, one layer is laid between the slab and the cushion, one layer is placed on top of the slab, the side walls are treated with coating or lining materials.
Reinforcement of the floating foundation frame
Now that all the preliminary work and supporting layers are ready, the main construction of the floating foundation can begin. The first thing you should do is make a reinforced frame for your foundation. It should be made from ribbed reinforcement. This will ensure the highest quality connection between steel and concrete. If you forget about this rule, you won’t have to wait long for depressing consequences: during soil movement or subsidence, the foundation slab may simply crack, because there will not be sufficient limitation on the stretching of the internal structure of the concrete. And the presence of ribs on the surface of the reinforcement bars can reduce the effect of stretching the slab.
never try to save money on building a frame, because the normal condition of both the foundation and the entire house as a whole depends on its quality.
Installing the frame is not difficult; everything is very easy to do yourself. After all, the frame is an ordinary cage made of reinforcement. Typically, the distance between the reinforcement bars should be no more than 30 centimeters. If the distance between the rods is made larger, then the strength characteristics of the foundation will decrease by an order of magnitude.
The frame must be made of two layers of gratings with the dimensions of the base of the future country house. The rods are tied at the crossing points with special steel wire for knitting. This can be done with improvised means, for example, with a hook rotating on a handle or pliers.
It is better to have a special gun for tying wire. He makes three turns of wire in a few seconds.
Other types of floating foundations
In addition to the slab, there are two more types of “floating” bases: lattice and pillars. Both are not designed for high loads.
The grid is a modified shallow-depth tape. The usual tape is located around the perimeter of future walls and under load-bearing partitions, if any. The “floating” tape has a cross in the center with the same dimensional characteristics as the perimeter.

Like a slab foundation (the so-called Swedish stove), the grate can be made insulated:
- A cushion of ASG is poured into the trench.
- Lay waterproofing. A plastic film of 0.15 millimeters or thicker is suitable.
- PPS blocks are placed on top of the film at intervals of half a meter.
- The reinforcement frame is installed and concrete is poured.
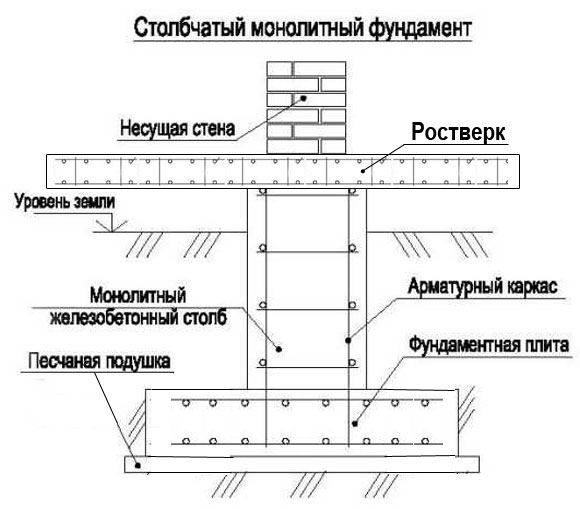
Columnar floating foundations can only be installed on dry soils (sand, rocks) under light buildings (log houses, frame houses). They differ from conventional columnar foundations: the base of a brick or concrete pillar is located on a reinforced concrete slab that is twice its size.
The slab is laid on a sand cushion.
What is good about a floating foundation?
This type of foundation is famous due to the fact that it is perfectly preserved and guarantees the stability of the house even on very unsettled soils.
Some may argue and argue that pile foundations last much longer. The price for installing a pile foundation is also considerable; it can be used on hilly and difficult terrain. But the floating slab foundation practically does not need repairs. Such a base can withstand enormous loads and is characterized by high spatial rigidity. It is also not afraid of the forces of frost heaving, which is a fairly common phenomenon in Russia. Loams, clay, sands become a good base, as do rocky terrain. Only now the house “moves”, in the fall it rises evenly and still gradually falls back, returning to its usual position. When many people require excavation of a site, a floating slab base becomes the solution. Many are confused by its relatively high cost - the price for working with a monolithic foundation is significantly higher than what is usual when installing other types. You will not have to subject the house to tests or repairs in the future - you will feel confident and protected in the building. For additional stability, special stiffening ribs are also used, making the reliability of the foundation even higher.
An excellent solution is to choose a floating base on clay soil. After all, it is the clay deposits that are close to the surface and are easily eroded, which over time “opens” the foundation, making it susceptible to various types of damage. And this is where a floating slab base will come to the rescue, which will move along with the soil.