Carrying out a floor assessment
A professionally made wood floor should consist of five layers, starting from the ground or concrete floor:
- Substrate and waterproofing.
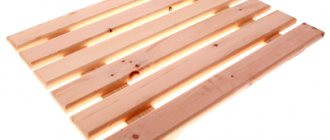
- Logs are beams made of wood (beams or logs) that act as a base. Expanded clay can be poured between them or mineral wool can be laid for insulation.
- The lower subfloor is chipboard or boards laid on joists.
- Leveling substrate made of plywood or gypsum fiber or cement-bonded sheets.
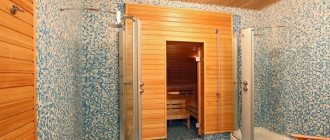
- The top finishing floor covering is parquet, linoleum, laminate, or, in our case, tiles.
Ceramic tiles will be laid on a leveling substrate. Anything on top of it should be removed. For an initial assessment, you just need to walk on a wooden floor and jump on it.
If you hear the floorboards creaking or the covering sag, then there are significant problems with the joists and the subfloor. In this case, before laying the tiles on a wooden floor, you will have to disassemble the base, look for the cause, and then partially or completely replace the entire wooden base.
Structure of porcelain stoneware coatings
Any construction work must begin from the design stage. It is clear that laying porcelain tiles on a wooden floor must be done after careful preparation.
When working with porcelain stoneware, there are several criteria that must be taken into account at the stage of selection and preparation for installation:
- Selecting porcelain tiles based on the types of designs, colors and geometric proportions offered by the seller.
- Next, you need to decide how to install porcelain tiles on wooden floors, based on the following installation schemes: brickwork with bonding, covering with a carpet pattern or edging, mosaic, etc. The wood option can be laid according to the principle of parquet or deck boards.
- Installation can be carried out traditionally with seams, as well as using a seamless method. All the criteria listed above directly affect the number of porcelain tiles purchased. As for the chosen installation method, it affects the type of porcelain stoneware purchased: regular or rectified. Experts recommend purchasing material in quantities 10% more than determined during measurements in order to avoid shortages. These may arise due to defects or defects formed during the installation process. Also, some of the tiles will not be completely used, and they will need to be cut to perfectly fit the covering in accordance with the proportions of the room.
- Before laying porcelain tiles on a wooden floor, you need to stock up on an adhesive that will reliably hold the coating. The main conditions regarding the use of this product are: the thickness of the adhesive applied, as well as the chosen direction and dimensions of the seams when laying in this way. In this case, cement is not used, which is traditional when laying conventional tiles. Today, there is more than one type of unique composition with characteristics that dominate over conventional cement. And the installation conditions when using such compositions can be observed down to the smallest detail.
What critical problems might you encounter?
- Moisture rot. If waterproofing is not carried out professionally, water gets onto the joists or condensation forms, as a result of which they simply begin to rot.
- Dry rot is a more serious complication. Barely noticeable thin threads of fungus that need to be removed immediately. Otherwise, it will attack all the wood on both the floor and the walls. Mandatory fungicide treatment is required.
- Wood borer and other wood pests. Treatment with special solutions against these insects is also required.
If the damage is minor, then it will be enough to treat the wood with special antifungal compounds. Otherwise, you will have to replace entire logs and sections of the floor.
You should carefully inspect and carefully analyze the condition of the wooden base. It is often easier, and in many cases preferable, to completely replace the underlying layers before laying ceramic tiles over a wood floor.
How to lay tiles on a wood floor
Hello dear homemade people.
I have already touched on the issue of laying tiles on a wooden floor in the article Laying tiles on a floor. Now let’s look at it in more detail.
There are now many materials on the market, such as one and two component mastics, adhesive mixtures, and sealants, which are designed for laying tiles on a wooden surface.
All of them cope well with their functions, but only under certain conditions, which include changes in the humidity of the wooden base, temperature changes, the permissible load on the floor and a very limited thickness of the adhesive layer.
If any of these conditions do not coalesce during installation and further use, then hopes that the tile will hold up well and for a long time will not be justified.
Another strict requirement when using mastics is the requirement for the evenness of the base, which, you see, is not easy to achieve on a wooden surface, especially on large areas.
To make it clearer, the permissible thickness of the mastic layer varies within 0.5-2 mm, and at 2 mm. It is already very difficult to adjust the tile on the front surface, so the base must be very even, approximately like a mosaic.
There is one more nuance - mastics and sealants are several times more expensive than tile adhesive, so any overspending will hit your pocket very hard.
Do we need all this hassle? Of course not. Therefore, let's see how tiles are laid on a wooden base using tile adhesive.
This is especially true for floors, since they, compared to walls, are subject to greater loads, and the strength requirements for them are increased.
As an example, I offer an unheated veranda, subject to all the climatic quirks characteristic of the middle zone.
The essence of the method: a cement-bonded particleboard (CSB) or gypsum fiber board (GVL) is laid on a wooden floor, on which the tiles are then laid.
On the presented veranda, I recommended the owner of the DSP, which I recommend to you, but he was stuck on gypsum fiber board, since he had this material in stock. Remained after making the partitions.
The owner is a gentleman. GVL is easier to work with, although it is primarily used for interior decoration.
By the way, a year has already passed, that is, a complete change in operating conditions - the flight is normal, nothing swelled or flew off.
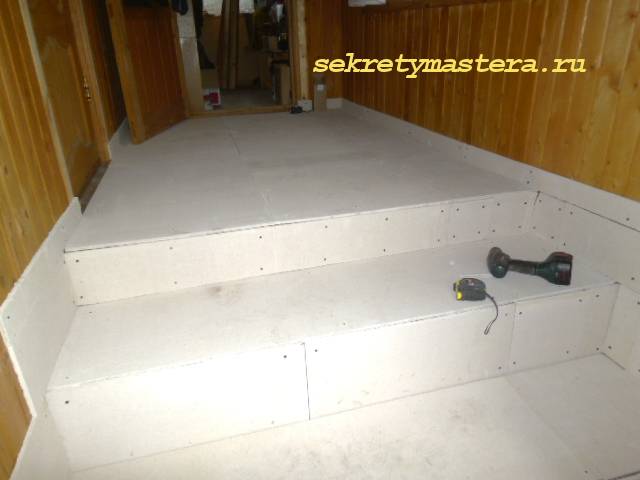
So, two layers of gypsum fiber board, 10 mm thick, are laid on the boards. each, and are attached to the boards with self-tapping screws. The sheets of the first layer are arranged in a running direction, and the sheets of the second layer overlap relative to each other, that is, the transverse seams of the first layer should not coincide with each other, and the seams of the second layer should not coincide with the seams of the first.
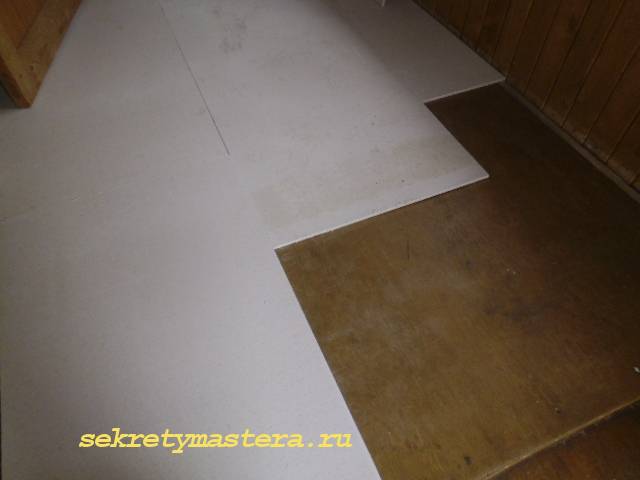
GVL covers the entire surface on which the tiles are planned, including boots. For boots, 1 layer is enough.
Before laying tiles, gypsum fiber board or fiber board, it is necessary to prime them. This is especially true for gypsum fiber board, since there are fiberglass microhairs on its surface, thanks to which moisture rolls off the sheet like off a goose.
It is necessary that the primer glues them together and saturates the surface of the sheet.
Now you can safely start laying tiles with tile adhesive.
First, the layout is done from the entrance.
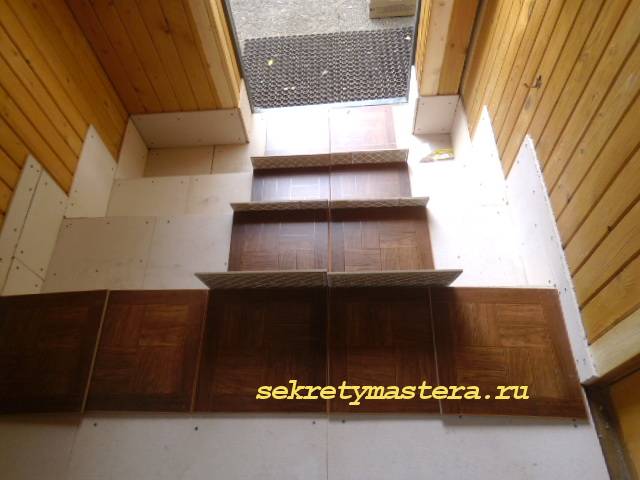
Then all horizontal surfaces are laid out.

Then vertical.
GVL glue sets relatively quickly, so you can grout the seams immediately after installation.
The only drawback of this method is the increase in the layer under the tile.
As for floors, raising them by 2 cm usually does not cause problems, but in some cases, gypsum fiber board will not fit on walls, so you can’t completely abandon mastics.
That's all. Now you know how to lay tiles on wood floors.
I wish you success in your work.
Section Construction >>>Subsection Laying tiles, mosaics>>>
Come on, what else is interesting?
Laying tiles on walls Secrets of laying tiles on the floor, all the nuances How to cut tiles without a tile cutter Laying glass mosaics
Six steps to laying tiles
If the coating is durable and does not cause any concern, then you can immediately move on to the fourth point. But only after cleaning the wooden floor from paint and varnish. You cannot glue tiles on them.
The glue's adhesion to such a surface will be weak and the tile will soon fall off. You should also not stick ceramic tiles onto laminate or linoleum. The result will not last long.
- The logs and rough covering are partially or completely replaced. To avoid problems in the future, they will need to be treated with protective impregnations. For insulation, mineral wool or fine expanded clay is laid between the logs.
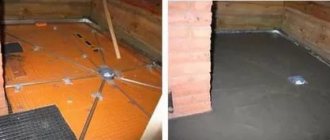
- A new rough layer is laid. It is best to use a rough board for this, which is attached to the joists with self-tapping screws. It is advisable to leave small 5-10 mm gaps between these boards for ventilation of the substrate.
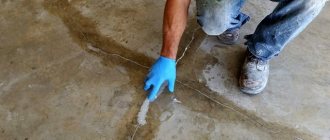
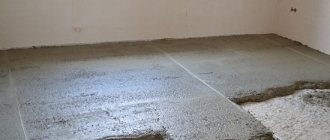
- A leveling substrate made of gypsum fiber board, DSA or plywood is laid. The remaining gaps in the joints of the sheets and near the walls are filled with ordinary mounting foam. And after it hardens and removes excess, the resulting surface is primed. The wooden floor under the tiles is ready.
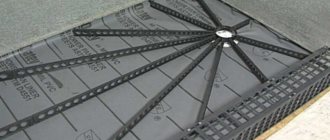
- Primer. Before laying tiles on a wooden floor, be sure to prime it. You can use heated drying oil or latex impregnation. A molar mesh should be laid on top of them. This must be done before the primer layer dries. The result is a strong and even monolithic base.
- As such, laying tiles. Tile is purchased with a margin of 10% of the floor area. There are now many different adhesive compositions, you can take any of them - the one with which it will be easier and more convenient to work. The main thing is that it is compatible with the rough coating (different adhesives are required for DSA, gypsum and plywood sheets). You can prepare the cement mortar yourself, but it is better to choose a ready-made mixture (as a rule, it already contains antibacterial and other additives against mold and mildew).
- Cutting tiles is carried out with a grinder, glass cutter or special tile cutter. The adhesive is applied to the tiles and floor using a notched trowel. To ensure that it lies flat and all the gaps between the tiles are the same, special plastic dividers should be used. Finally, all these seams will need to be sealed with the same adhesive solution.
There are many design solutions and colors of the tiles themselves. Only the owner of the house can decide which option to choose. But before gluing the tiles, you should lay them “dry”. View the resulting drawing and possibly correct it.
Results
In laying tiles, the most difficult and time-consuming, and also the most important, stage is preparing the base. It will directly determine how long the ceramic tiles will last. It’s not cheap and it’s simply expensive to constantly shift it.
Well, before you lay tiles on a wooden floor, you should weigh everything carefully. If you make mistakes with waterproofing during installation, the wood will begin to rot and sag. In the end, all the work will go down the drain.
Also interesting: if you are interested in other floor coverings, then you should look here https://olimp-parketa.ru/companies/tarkett/. A huge selection of different materials at attractive prices. Good luck!