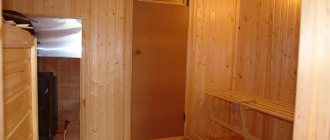
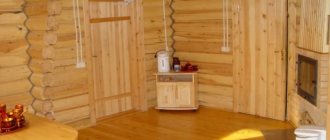
Modern baths are significantly different in aesthetic qualities from those that existed before. The modern market offers a lot of design solutions for creating an original interior that promotes maximum relaxation and harmony. The color scheme of the design can be very different, depending on the preferences of the owner.
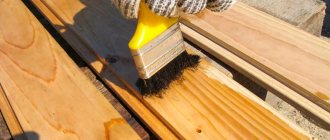
Considering the specifics of such premises as baths, saunas and hammams, the quality of facing materials must be impeccable. Under conditions of constant changes in temperature and humidity levels, many materials lose their original aesthetic qualities. Therefore, for cladding such rooms, materials with a minimum coefficient of moisture absorption and high resistance to temperature changes are used.
Options that are most common
The most difficult thing is not laying the tiles, but creating a level and, most importantly, very strong, rigid base.
Let’s say: a tiled floor is a fixed idea and must be implemented, there is no concrete base under the floor, and the boards creak or simply bend under load. The reasons may be different: a large distance between the lags, the lags are not strictly in the same plane, and do not have the required rigidity.
The easiest case is when everything is in order with the joists, but the board nailed with nails has cracked, bent and moves up and down along with the nails if it is pressed. In this case, the easiest way out is to pull out all the nails, even those that hold well, and press the board with wood screws.
If the screws are ordinary, black, without a drill at the end, then first you need to drill holes 1–1.5 mm smaller than the diameter of the screws. Otherwise, some of them may break or it will simply be impossible to screw them, especially into oak or larch. All screws must be recessed, without protruding heads.
If after this everything is in order, then the performer is lucky. The same should be done with all suspicious boards. A smooth floor made of good boards is almost ready for laying tiles. If it is painted, then you can use a hair dryer and immediately scrape off the paint with a spatula , which has not completely peeled off due to the high temperature.
Prime a clean wooden floor, and small depressions can be filled with the same tile adhesive for complex substrates (the adhesive data sheet must indicate that it is suitable for wood). We lay the tiles on the wooden floor. With plywood, as in the case of joist repairs (see below), it’s even better.
How color affects the atmosphere
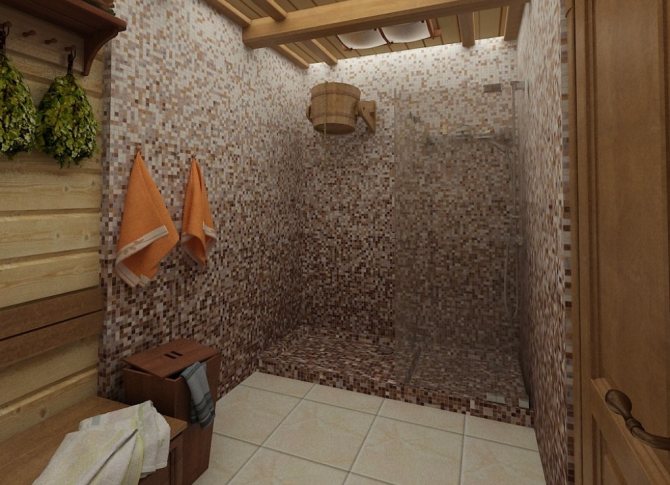
Decorating a bathhouse with mosaics allows you to create real masterpieces. For these types of premises, colors are used that symbolize the water element (blue, cyan, violet, green, white, etc.). A series of mosaic tiles in natural shades such as brown, beige, peach and others can also be used advantageously.

It is very important to remember the purpose of the room and try to create the most relaxing atmosphere possible. In the interior of baths, saunas, swimming pools, and hammams, bright, colorful shades are rarely used, which can cause tension. It is imperative to ensure that the interior is not overloaded with color.
Mosaic in the bathhouse can be presented both in single-color compositions and in all kinds of mixes. Single-color series will serve as an excellent background that can highlight important interior details. Mixes can contain chips of different colors, textures, and shapes. Popular are gradient transitions, which look very advantageous in any type of room.
A mixture of chips of different shapes and sizes look truly original, which is why they are actively used in the practice of interior designers. In order to create the effect of a variety of textures, manufacturers use chips from different materials, such as metal, stone, ceramics, smalt, glass, etc. Such mixtures attract attention and fascinate with their originality.
The colors of such mixes can be very different, since modern technologies allow high-quality coloring of any of the materials. Whatever option you choose, decorating the bathhouse with mosaics will create an atmosphere of luxury and wealth. The mosaic surface will create a magnificent atmosphere in your interior, emphasizing the excellent taste of the owner. This type of cladding is used for finishing both public and residential premises.
Wooden floor
If the gap under the 2-meter rule is no more than 4 mm in all directions, and it does not hang on the tubercles, then everything is in order - you can lay the tiles using the appropriate elastic adhesive , allowing a layer thickness of 2-6 mm.
In order not to have to worry about laying the tiles, holes up to 4 mm can be leveled in advance with glue, smoothing them with a spatula, and the excess can be removed with a long lath. The surface ruffled by the lath does not need to be smoothed too much with a spatula - the main thing is that in the end there are no large gaps under the lath.
In the case where the difference in floor height is within 30 mm and the thickness does not meet with objections, then it is possible to make a self-leveling self-leveling floor . In this case, the cracks in the base should be sealed, and the corners between the floor and walls sealed with waterproofing tape.
With an interval of about 1.5 m you need to tighten the screws at the level of the screed - they will be good beacons when pouring the floor (then you need to unscrew them). You can put a fiberglass mesh on a dry, clean floor and spread small piles of glue over the mesh - it will pass through it well and stick it to the floor. The doorway must have a threshold at or above the screed.
How to choose glue?
When working with tiles, you should use a high-quality cement-based adhesive. It not only holds the tile well, but also allows you to attach it even to an uneven surface, since its leveling occurs directly during installation, and this is very convenient and even allows you to control the level of inclination.

Craftsmen often prepare the adhesive composition themselves. It's not difficult if you know all the proportions. Most often, 4 parts sifted sand is used for 1 part cement. Sometimes the amount of the latter can be increased to 6 parts, but this depends on the type of tile laying. Most often, craftsmen lay facing tiles seam by seam, diagonally or in a running pattern.
Leveling the floor
The floor can be leveled in two steps:
- First fill in the low spots - they can be seen by the height of the screws. It’s good if by the second pour there is an almost flat surface under the screws below the caps by 5–9 mm.
- The second stage must be done very carefully and quickly: the first pour of the solution can be helped to spread with a wide spatula (along the height of the beacons). And immediately pour in the next portion.
- When the line of solution is about 1.5 m wide, you need to roll its beginning with a needle roller, it replaces the vibrator - it helps air bubbles escape and levels the surface, increasing the fluidity of the mixture (it itself will not spread, contrary to the name).
You need to be well prepared for such work - from the first pouring to rolling it out with a roller, no more than 30 minutes should pass (the faster, the better). You need to work together: one levels the surface, the other stirs the mixture with a mixer, with a speed of 600–800 rpm. Everything must be prepared in advance: in particular, you need to have a measuring container for water.
If there is less water than normal, the solution will be insufficiently fluid when poured on the eye, this can end in complete failure: some mixtures are very sensitive to excess water - the screed will crack , sometimes you can even hear it.
Stirring the mixture by hand is almost impossible. It will either turn out very thick, or it will take a very long time, and the amount of water should be strictly according to the norm. On a dry, level floor, tiles can be laid in the usual manner.
Preparing to lay tiles
If the quality of the wooden floor is not satisfactory, but there is a concrete base , then this is an excellent case - there will be some difficulties, but the tiles can be laid correctly and almost perfectly.
- First you need to clean everything down to the concrete. Then determine the level of the screed - this is the level of the finished floor minus the thickness of the tiles with glue. Then drill 4 holes around the perimeter (30–50 cm from the wall), hammer in plastic dowels and screw large self-tapping screws into them at the level of the future screed.
- To do this, it is best to use a regular water level. A cheap laser level misleads many people - its accuracy is even lower than that of a good staff with a level (if the bubble of a cylindrical tube reacts poorly to the slightest tilt, then it is better not to use such a level, especially without checking).
- So, there are 4 points on a horizontal plane. It is better to screw all the intermediate screws along the cord - place a match on the outer ones under the cord, and make the intermediate ones lower by the thickness of the match (if the area is small, then you can level everything with a level).
- Along the height of the screws (around them), you need to make small horizontal platforms from a solution with plaster (beacons). When making beacons, you need to ensure that they are horizontal in both directions; for this, there are adjacent beacons in the same direction and in a direction perpendicular to it.
- If a U-shaped profile for drywall is used as a guide, then the beacons that begin to set must be cut directly with this profile, placing its middle in the center of the screws and pressing on it. Its thickness is 0.4 mm and it will go into the solution until it hits the screw and the beacon itself with its flat part.
a square profile as a guide ; in this case, they cover it on the sides with mortar so that it does not dangle when the slats move left and right, when they are directly making the screed. In this case, the level of screws and beacons must be made lower by the thickness of the profile.
The same applies to pipe guides. If the thickness of the screed is up to 5 cm, all that remains is to apply the mortar and align it according to the guides.
Screed and tile laying
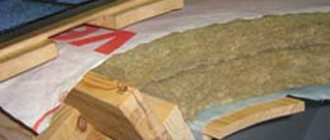
The best result for tiles is obtained when the guides themselves are made of mortar (this is not done often, because you need to wait until it sets and gets stronger). If the thickness of the screed turns out to be very large, then the concrete base should be poured with a liquid, greasy solution and expanded clay doused with the same solution should be poured, so that there is 3-5 cm left to the guides.
For better strength, the screed can be made with a mesh of reinforcement . Before installing the screed, the joint between the walls and the floor should be sealed with waterproofing tape.
Tiles are laid on a flat surface in the usual way:
- The screed must be dry. Many instructions on bags of glue indicate a drying time of 28 days for the new base. In fact, 28 days is the time that concrete or mortar samples are kept to determine strength, and a regular screed becomes strong enough after 3-4 days.
- How dry the screed is is most often determined by eye: 1–2 weeks is quite enough. Remove dust from the screed and prime it. It is better to apply the glue to both the floor and the tiles, and the grooves from the notched trowel on the floor and on the tiles should be directed transversely to each other.
An even screed is the key to success; leveling with a thick glue is not only a pain: a thick layer of glue under the tile can take weeks to dry and give a very poor result.
On a good screed, the 2-meter rule should lie with virtually no gaps. And then it is enough to maintain a standard layer of glue and only sometimes on a small bump on the tile you will have to knock a little harder.
Nuances when working with the floor
When tiles are laid on the floor of a washing room or shower, the first thing to do is to observe the slope. This is very important, otherwise the water will stagnate in the room and will not leave on its own through the drain.
It is advisable to make markings using a strip or lacing before starting work. This will help you see the required slope more clearly visually.
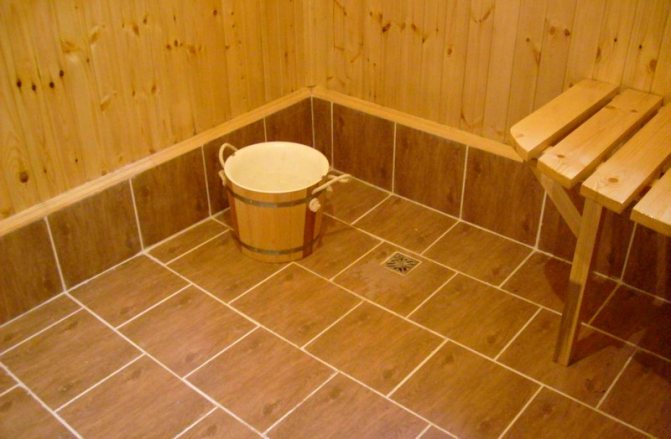
To maintain the seams, which are a prerequisite for floor tiles, it is necessary to use special crosses 3 mm thick. If you ignore this rule, then over time, due to strong temperature changes and high humidity, the tiles will simply crack and begin to peel off.
Log repair
If, after opening the wooden floor, it turns out that the joists have reliable support, but are not aligned in the same plane, or some have dried out and bent, then the matter can be corrected with even overhead boards. They can be attached to joists with nails, self-tapping screws, and for those who find this not enough, then with bolts and large washers.
Everything can be leveled at the highest point by pulling the cords in a horizontal plane. If there is a large gap between the lags, then you will have to install additional lags .
The end result is a great timber floor which can be enhanced by adding 15-20mm moisture resistant plywood In this case, it needs to be cut crosswise into 4 parts and screwed with self-tapping screws at intervals with a gap of 3–5 mm. We lay the tiles in the usual manner using elastic adhesive on primed plywood.