How to make doors from boards with your own hands: simple ideas for DIY
It is believed that it is almost impossible to make wooden doors without special equipment, so to speak, at home, and even if possible, their appearance will certainly leave much to be desired. To some extent this is true, but if you carefully look for solutions, you can find several technologies that allow you to solve the problem of how to make doors from boards with your own hands of very good quality, and most importantly, an attractive appearance. We will talk about these technologies in this article on the pages of the website dveridoma.net.
Door adjustment
Quite often, after installation is completed and after some time, the projection of the movement of the door leaf changes, which leads to creaking or the inability to close. In this case, it is necessary to regulate them.
To carry out the adjustment, it is necessary to lubricate the fittings, all hinges, adjust the height, tighten or replace all elements.
Regardless of the type of door chosen, the product should be checked and adjusted annually using special means.
How to make a door from boards with your own hands: canvas frame
What exactly is a classic door leaf made of boards? Of course, this is a frame assembled from a board 40 mm thick and about 150 mm wide, inside which other boards are placed. It is the way of installing these boards and fastening the frame that in most cases causes a problem when making a door leaf yourself. In the factory, a so-called tongue-and-groove joint is used for this purpose, which is very difficult to make even with a hand milling machine. You can, of course, try this approach to the matter, but there is a simpler option - the groove can be sharpened, but the tenon does not need to be cut. Thus, the number of such connections is reduced to a minimum - they remain only on the frame, but even there everything can be reduced only to grooves. Let's start in order.
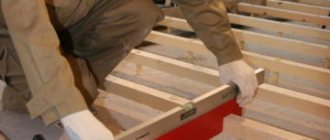
- We are preparing the frame. You will need a board measuring 20 by 100 mm - preferably dry and smooth, and also planed. Less will have to be processed and brought to condition. Four fragments are needed - 2 boards of 2000 mm and 2 boards of 600, 700, 800 or 900 mm (depending on how wide you need the doors).
- To begin with, we reduce the thickness of the ends of these boards - we make them half as large. The purpose of this operation is to stack the planks with each other without increasing the thickness of the product as a whole. It is better to perform this operation with a hand router, but if you have enough skill, you can do it with a hand saw, which is very difficult and does not guarantee that the connection will be tight. And it must be dense and uniform over the entire surface, otherwise the doors will turn out flimsy.
- Next we connect the boards into a frame. The most important nuance at this stage of deciding how to make an interior door with your own hands is to keep the angles in the frame within 90 degrees. Naturally, we should not forget about high-quality fastening of the boards - at least three self-tapping screws will have to be installed in each corner.
That's all for now with the frame. Then it’s a matter of internal filling. In principle, there are other options for making doors from boards, and you can see one of them in this video.
What to look for when choosing veneer?
There's not much to say here. Check out the ingredients: the fact is that some substitutes are made from plastic and are very short-lived. There is also eco-veneer - a material obtained from wood waste and special glue. Yes, it is artificial, but it is environmentally friendly.
That's all, good luck with your work!
How to make a wooden door: what to fill the canvas with
There are several options for filling the door leaf. It's no secret that it can be made deaf or equipped with a glass insert. Let's look at these two options.
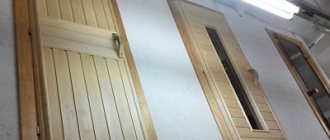
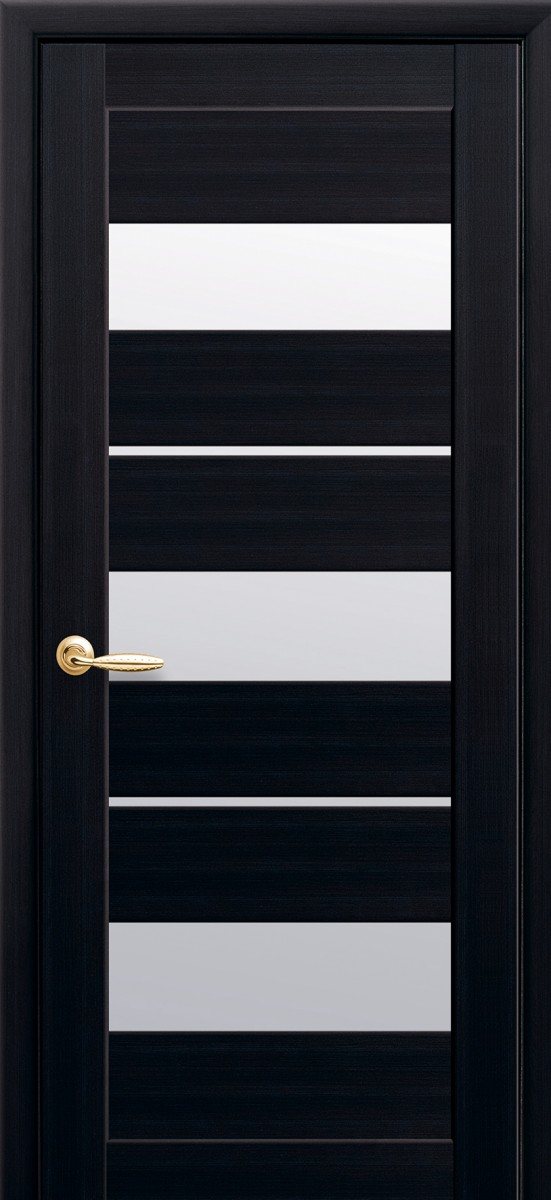
- Glass insert. To install it in a glass frame, the 20 mm cavity will need to be reduced to just 5 mm wide. Again, you will need a 7.5 mm thick rail. Alternatively, you can take a strip of the same thickness as the rough frame and select a groove of the required width in it using a hand router, which will be much better. Then place it together with the glass into the frame and install the platbands on the other side of the canvas. This way you will get glass that spans the entire height of the door - on the one hand this is good, but on the other it is not so good. If there are small children in the house, then there is a risk that such glass will break. In the classic version, glass occupies two-thirds of the height of the leaf, and in order to install it in this way, the lower part of the door will have to be made blank.
- Blind door leaf. Everything here is much simpler than with a glass insert, and there are two options for solving this issue. The most basic of them is to purchase laminated chipboard and install it between two trims. There is one nuance here - chipboard will have to be purchased with a thickness of 10 mm and installed in two layers. Or you can adjust the thickness of the rough frame to standard sheets of furniture chipboard, which is 16 or 18 mm. The second option for filling the canvas, as close as possible to wood, is lining. Its minimum thickness is 12.5 mm, and it will have to be installed in two layers, since it has only one front side. This means that the thickness of the rough frame will have to be increased to 25 mm, and the thickness of the platbands will have to be reduced to 7.5 mm.
And finally, a combined version of the door leaf - the lower part is solid and the upper part is glass. Additionally, here you will need to insert a transverse jumper into the rough frame, which will entail a series of re-tubes. First of all, this is an insert for installing glass - in this case it will also act as a separator between the blank and glass parts of the doors. There is no need to make it too wide - 20 mm less than the width of the casing used will be just right. Secondly, the process of assembling the canvas, or rather its upper transparent part, will change somewhat - glass in such a situation will be somewhat more difficult to install. You will have to tinker with this moment. But an additional lintel will add rigidity to the door leaf, which will certainly affect the strength and durability of self-made doors.
Door blocks
When purchasing a door in a showroom or making an individual order, the set includes, in addition to the door leaf itself, a door frame or block.
It should be noted that the greater the range of temperature differences, the thicker the timber frame is used.
Important! Each entrance door must have a bottom bar that acts as a threshold that increases the thermal insulation inside the room.
Interior doors do not have a lower threshold, as it creates unnecessary inconvenience when moving between rooms.
Fastening door blocks
If the door block is installed in a wooden room, it is necessary to use nails or self-tapping screws, the heads of which must be puttied and decorated with special plugs.
Installation features:
- Fastening of door blocks is carried out only using a building level and special fixing wedges.
- At least 3 nails should be used along vertical beams to ensure greater stability.
- When installing a block in a stone house, you should use embedded beams, reinforcement pins or anchor bolts.
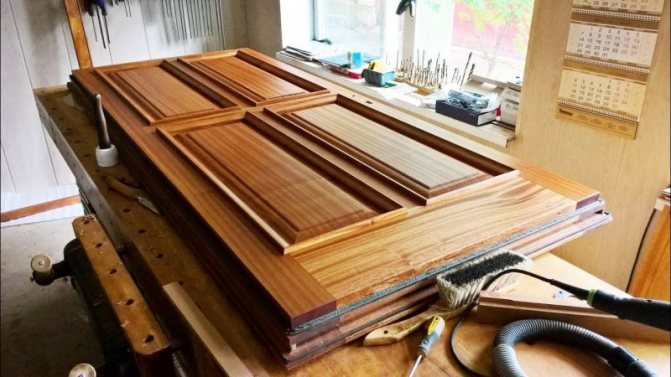
The final stage of making a wooden door
By and large, the final stage of work is the most important task - we are talking about decoration, on which the appearance of the final result fully depends. At this stage of work, three main stages can be distinguished.
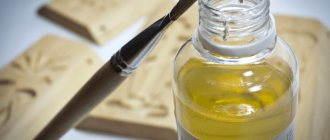
- Antiseptic treatment. The door leaf will have to be completely disassembled and thoroughly coated with antiseptic on all sides. In principle, all this can be done even before starting work on making a wooden door leaf with your own hands.
- Grinding. This is done after the wood has dried after antiseptic impregnation. Only the visible parts of the door leaf will have to be processed - each part will need to be cleaned with fine-grained sandpaper, so that it becomes velvety to the touch.
- Painting. At home, it is best to use water-based paints and varnishes. You should not be biased towards them - in terms of their characteristics, they may not be inferior even to nitro paints, only unlike them, products of this type are able to preserve the structure of the wood. It is better to apply water-based paints and varnishes with a brush, thoroughly rubbing the coloring matter over the surface of the wood.
As a result, if you do everything correctly and, most importantly, take the question of how to make wooden doors yourself seriously, you should end up with a very nice product.
And to conclude the topic of how to make doors from boards with your own hands, there is only one thing left to add - or rather, to say that, using almost the same principle, a door leaf made by yourself can be equipped with a door frame. The principle of its manufacture is even simpler - all that is needed in order to obtain a profile beam is to twist a board of selected thickness with a beam. Subsequently, they are connected to the door frame in the most standard way.
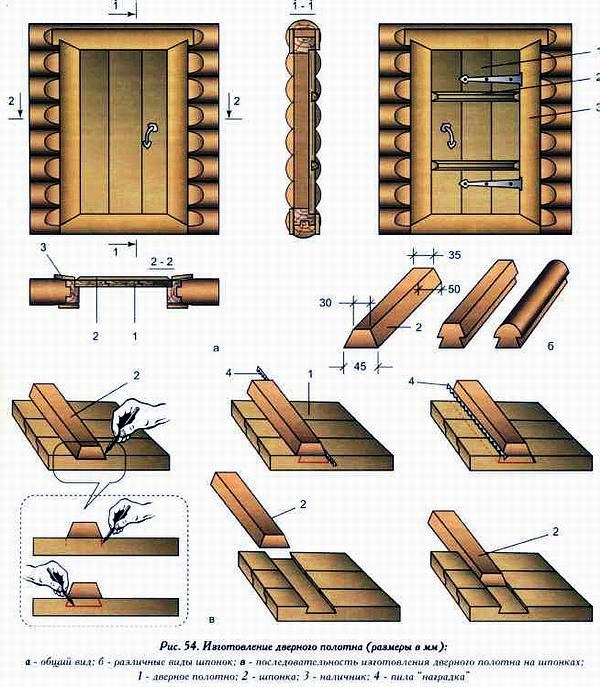
Door with keys
These doors have been in use for over a hundred years. A veneer door is an ordinary door assembled by joining vertical slats onto a horizontal veneer. Almost anyone with no special experience can make such a design.
Such wooden doors do not have great aesthetic characteristics, however, they can quite cope with the tasks of retaining heat, protecting from environmental influences and unwanted guests.
Important! The main purpose of such doors is to protect sheds, barns and other utility rooms from penetration and natural influences.
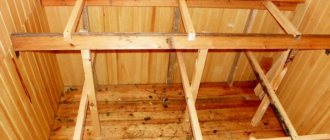
The main material for the manufacture of such doors is the use of solid wood, boards, two keys and a diagonal brace, which ensures that there is no distortion.
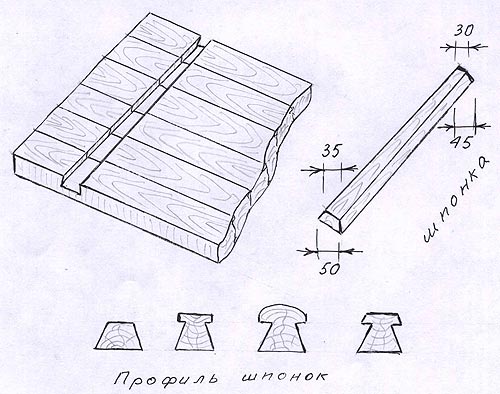
The simplest option for making such a door is to nail a strut with dowels to the door leaf. A more modernized and durable option involves cutting keys into the door boards.
In earlier times, the manufacture of such doors was carried out manually using a saw, which was used to trim the boards to a uniform size. The subsequent steps in creating a door structure are marking, fixing and securing the block, the end of which is filed at 45°. Next, grooves the size of half or one-fourth the size of the board are sawed along this block, into which dowels the size of the entire length of the blade are driven using a chisel.
Important! It is preferable to install the dowel over the entire width of the canvas. Let us note this feature: the thicker the key, the more reliable the door will be.
For perfect alignment of the braids, their angle should be carefully measured before they are finally secured.
Currently, the production of such doors is carried out using modern tools and almost autonomously.
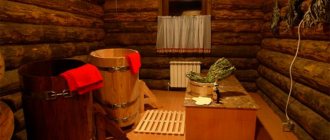
Doors of this kind without gaps are ideal for installation in a Russian bathhouse, barn, summer kitchen or cottage.
Tools and materials
4. Emery cloth.
5. Edged board, two pieces. Width 15 centimeters, thickness – 2.5.
7. Wood glue.
8. Fiberboard sheet or boards (you can make doors from solid birch) - the door manufacturing technology is similar.
9. Fittings: hinges for a swing door, rollers and guides for a sliding door. Handles, lock, stops, closer.
10. If you plan to replace the door along with the frame, use timber for the frame.
11. You can make platbands yourself if you have carving skills. If not, buy ready-made ones.
12. Insulation, if needed.
Attention: boards must be smooth and well dried, fiberboard must be free of defects.
Fabrication
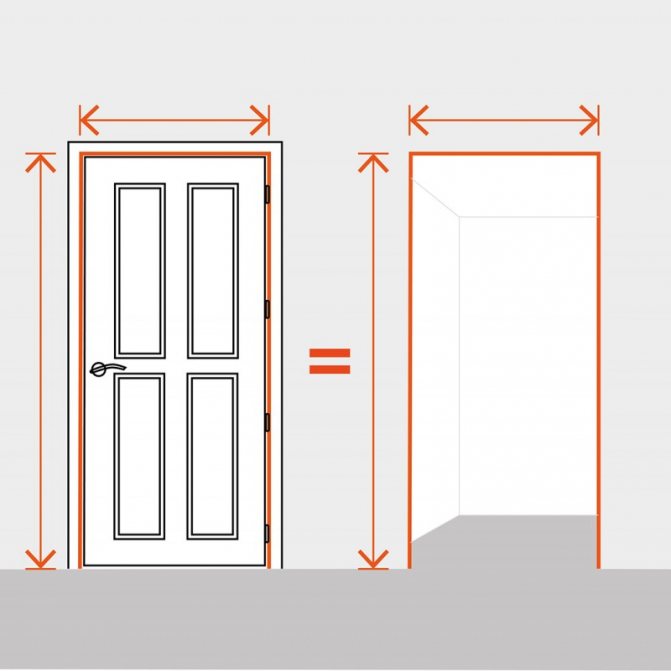
Before making a door with your own hands, you need to take measurements:
Video “How to make a wooden door from fiberboard”:
1. Measure the opening. In accordance with this, calculate the dimensions of the canvas. If there is no threshold between the canvas and the floor, a gap of 1 centimeter should be left. If you are planning a sliding door, the width of the door should be a couple of centimeters larger than the opening.
2. Cut two fiberboard blanks according to the width of the canvas and 5 blanks for the frame: two in height, three in width. Sand it.
3. Place the fiberboard on the floor, face down. First, vertical blanks are placed on it, and horizontal ones are placed on top. The boards should be at right angles to each other. The middle one should be placed on the site of the future castle.
Video “How to make a door with your own hands from boards”:
4. Mark on the boards the places of future connections (grooves and tenons).
5. On the top and bottom crossbars, mark 3-4 points at equal intervals and drill holes for self-tapping screws.
6. Cut out the edges for the tenons to half the thickness of the board. Clean with a chisel.
7. Lay on the sheet, adjust the joints.
8. Spread the vertical boards with wood glue and place them on the sheet.
9. Lay the horizontal crossbars, adjust them, and secure them with self-tapping screws.
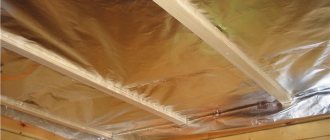
10. Put insulation.
11. Spread the frame with glue and attach a second piece of fiberboard. Press down with weights or secure with clamps.
12. Dry (about three days).
13. Paint or varnish.
Installation of a door frame in an opening
The finished door structure is mounted in the doorway and positioned along all planes. A laser level will allow you to get the most accurate installation; if you don’t have one, you can use a regular plumb line.
With the help of wooden spacers, the box is securely fixed in the wall opening. The resulting voids between the wall and the frame are filled with foam for installation work.
Before you start filling the voids, you need to check and fix the gap between the posts and the door leaf; it should be three mm around the entire perimeter of the frame.
The gap is fixed using wooden planks of equal thickness. After the polyurethane foam has dried, its remains are cut off with a utility knife, in the same plane as the doorway. The final stage of installation work will be the installation of platbands.
Assembly work on installing doors does not involve any difficulties. By spending a little time watching a video on how to install an interior door frame, you can learn the basic steps for installing it. By using this article, you can avoid major mistakes when installing it.