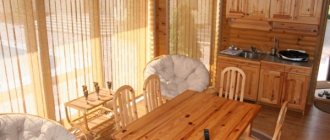
It is difficult to imagine a Russian bathhouse without a place to sit and relax. Sauna benches are an indispensable attribute that can be found in every steamy place. Their appearance and shape depends on the imagination of the creator and can be very diverse. The style may also be different. The most important thing to remember is that their main property is convenience.
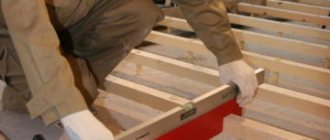
The photo shows the process of making a bench for a bath
You can buy a bench for a bath, order it from a master, or make it at home yourself using available materials. The most affordable option is the latter, as it does not require large expenses and skills. If you wish and know some of the nuances, you can make everything with your own hands quickly and efficiently.
Material for production
The choice of material should be taken seriously. Since the lifespan of the finished product will depend on its quality. As well as the quality and safety of the product.
It is important that the material is:
- durable;
- quality;
- resistant to large amounts of humidity and high temperature.
It is desirable that all the listed points correspond to the selected material.
In addition, it should not conduct high temperature. Otherwise, such a bench will be unsuitable for sitting. Since in the bath the degrees can be very high.
The presence of knots and irregularities is also not desirable.
It is best to use natural raw materials and materials to make a bathhouse bench with your own hands. The most commonly used trees are birch, pine, linden, oak or aspen. In addition, there are also rare plants such as meranti or abash.
Pine bath bench
Exotic trees are very expensive as they are imported from distant countries. Moreover, if you have the proper funds, they are an excellent option for a bath.
An oak seat will add beauty to a steamy room. But they are highly expensive.
Pine has a low cost, but is not very durable. Releases resin. Clothes may stick to the bench. And there is also a chance of getting burned. If there is a lot of moisture in the room, the material may change shape.
Birch is a very dense material. At the same time, it does not change shape when the temperature changes. The room with such a bench should be well ventilated.
The most affordable and advantageous materials are linden and aspen. They are durable and quickly absorb moisture. At the same time, finished products made from them are easy to clean. In addition, they are environmentally friendly. At high temperatures in the room, beneficial substances evaporate into the air.
But aspen can rot, so you should choose only high-quality wood. It costs much more.
It is worth noting that the choice of material for the bench depends on its location.
How to make a canopy for a trestle bed with your own hands
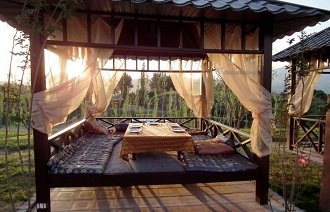
The option with a canopy is especially suitable for those trestle beds that are planned to be placed on the street. Let's consider several options for installing a canopy on a trestle bed with your own hands:
- A removable awning is perfect for summer residents who use a trestle bed only in the warm season;
- You can stretch an opaque film over the high supports, which will serve as protection for the trestle bed during rains;
- To create a solid trestle bed, a canopy made of corrugated sheets is suitable, which is usually used for canopies in parking lots, roofs of open balconies, etc.;
- Thick fabric or tarpaulin stretched over a wooden frame is a more aesthetically pleasing option, but in this case there will be no protection from moisture and gusts of wind;
- The most original option is to grow climbing plants along a wooden or plastic frame. In just one or two seasons, your trestle bed will become the most picturesque part of the site, and all guests will admire your ingenuity. But in this situation, you will have to suffer with rainwater and insects;
- If you decide to place the trestle bed in a living room or at least in a covered gazebo, then to decorate it you can hang a canopy made of light translucent fabric from the ceiling. In addition, long pieces of material can be thrown over the upper frame of the trestle bed. Such decoration will give it oriental notes, and you will feel like you are in a fairy tale on the trestle bed.
In this simple way you can solve several problems of organizing a recreation area both in an apartment and in a garden at the dacha. We hope that the above options and ideas will help you realize your unique ideas, and your trestle bed will turn out to be comfortable and spacious in a Russian way, and chic in an oriental way.
Restroom
The temperature here is quite acceptable, but temperature changes can still occur. Therefore, in such a room you can use aspen or linden. In addition, maple, oak or birch work well. Any material must be treated before use. Linden is economical.
Dimensions of a portable bench for a bath
Measurements
The bathhouse bench should be medium in size. It should not be too large and block the entire space. But at the same time, a bowl of water or a broom should be placed on it. It should be remembered that benches have different purposes. They are used for:
- lying down;
- seats.
You can also take a reclining or half-sitting position on them.
When designing seat sizes, it is important to calculate the average number of people visiting the seat.
When planning dimensions, it is important to consider:
- room size;
- sizes of other items located in the bathhouse;
- number of persons;
- purpose of the product.
The length of bath benches should not be less than 175 cm, so that a person of average height can lie on them. The height and width can be anything.
Please note that different locations will require different sizes. The main thing is that the bench is comfortable.
DIY bath furniture: shelves, footrest and bench
The steam room should not be cluttered with unnecessary accessories, since it is important to ensure free circulation of hot air in it. The most important attribute of this room is the shelves.
The design of the lounger can be either single-stage or consist of several tiers.
The advantage of a multi-tiered shelf is that each of the guests in the steam room can choose a level that is safe for health.
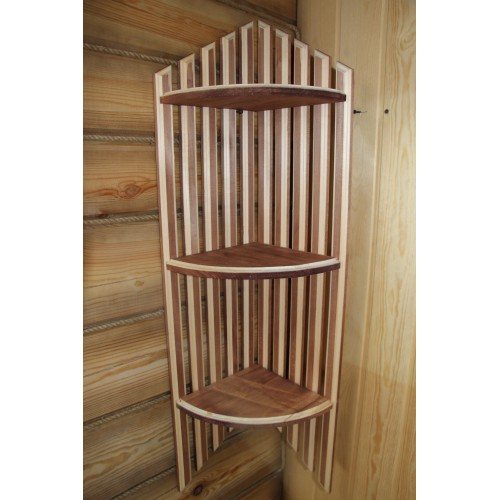
The product should be wide (about 100 cm) and long (about 200 cm).
The shelves are manufactured according to the following algorithm:
- At the first stage, a timber frame is installed. The racks are placed at a distance of no more than 50 cm. Metal screws are used for fixation.
- The finished frame is attached to the walls of the steam room.
- Seats made of clapboard or well-polished boards are attached to the frame. To ensure that the boards dry quickly, they are placed at a distance of 1 cm from each other. The function of fastening elements is performed by wooden dowels, since you can get burned on steel nail heads.
Helpful advice! The space under the shelf should not be sewn up, as this will lead to rotting of the wood as a result of poor drying.
For added convenience, a footrest is placed near the sun lounger.
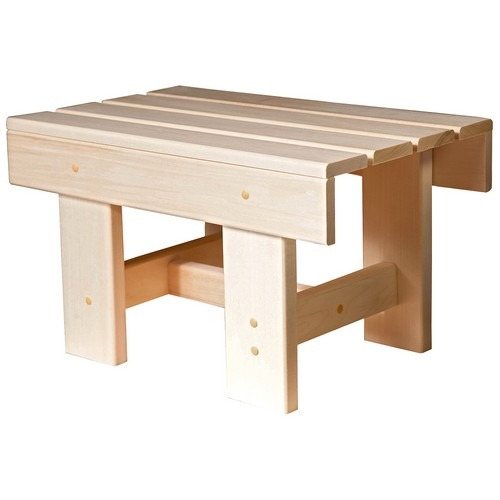
To make this piece of bath furniture you need to prepare 2 strips 40 cm long, 5 slats 60 cm long and a block with a cross section of 50x50 mm:
- Slats 60 cm long are laid out on a flat surface, leaving gaps of 1 cm.
- Place 2 transverse boards on top, placing them along the edges of the slats. Screws are used for fixation.
- The legs for the stand are made by cutting the block into pieces about 4 cm high. Then they are applied to the transverse planks and secured with screws.
- The finished stand is treated with a colorless primer or stain.
A bench is another popular element for a sauna. It's not only comfortable to sit on. Often tubs, buckets and tubs are placed on the bench.
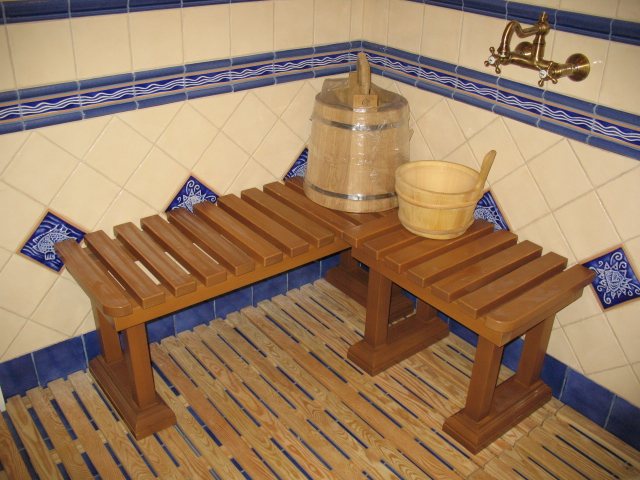
To make a bench you will need a block of the required size, 2 struts and 4 legs:
- The boards are fastened together with slats.
- The legs are fixed and attached to the seat using nails or screws.
- One side of the struts is attached to the bottom of the base, and the other to the leg spacer.
- The product is coated with an oil composition to prevent the wood from drying out.
Helpful advice! Before you start making bath furniture, you need to carefully sand the surface of the wood to avoid splinters.
Types of structures
Depending on the room, there are different types of benches. In steam rooms you can often see a multi-tiered structure. This allows a person to choose the most comfortable place for themselves. There are benches without backs. They are comfortable to lie and sit on.
It is best if the top and bottom tier are removable for easy cleaning.
Homemade benches for the steam room
If the steam room allows, then you can install a three-tier bath bench. In this case, the distance between each tier should be at least a meter.
In smaller rooms, a two-tier structure or one bench will be sufficient. The bench in such a bathhouse can be portable. This way, it will be easier to care for it and repair it if necessary.
It is important that:
- the benches were not varnished;
- Products should be processed only with environmentally friendly means;
- products must be well polished to avoid injury;
- built-in items were not located near windows;
- The seats should not be located directly against the wall.
There should be a small space between the bench and the wall so that water can flow there.
The bench can be portable or stationary. The choice depends on the area of the room and convenience.
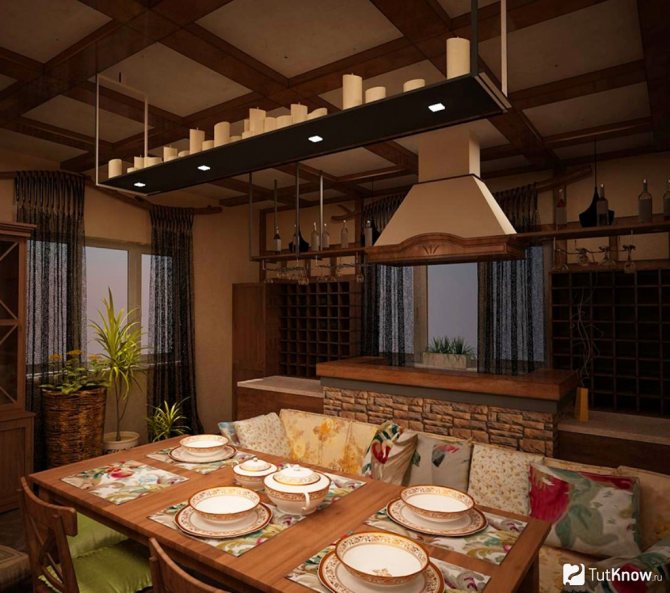
Features of arranging a kitchen in a bathhouse
Such projects are very popular for the following reasons:
- General heating system and oven
. If you have a small steam room, then the kitchen can be arranged in the dressing room. At the same time, the wood-burning stove for heating the steam room will also be used for cooking. - Diversity of arrangement
. When equipping a kitchen area on the terrace, it is possible to build a small barbecue. In small rooms you can limit yourself to a refrigerator, microwave and kettle. - Versatility
. Having made a kitchen-living room, you can invite a large group of friends and set the table right in the bathhouse. - Comfortable location
. Having arranged a kitchen area under the same roof as a bathhouse, you can immediately return from the steam room to the feast without going outside. If the dimensions do not allow you to equip a full-fledged kitchen in the relaxation room in the bathhouse, then you can add it additionally in the form of a veranda or terrace.
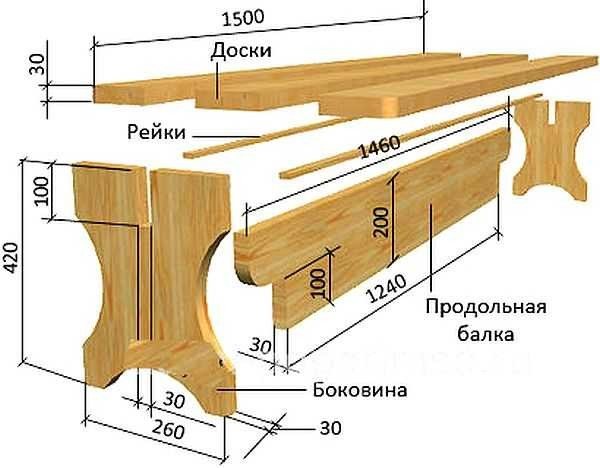
Detailed instructions for a portable bench
First, you need to write down the measurements of the future product, namely width, length and height. After which you should draw a drawing. The diagram should be convenient and understandable. Measurements can be indicated above the picture. For making a bench with your own hands, drawings are an important element.
Afterwards you need to decide on the location of the bench. It should be near the wall. There should be no windows nearby.
Necessary materials for work:
- two boards;
- planks;
- bars;
- self-tapping screw;
- screwdriver
All materials should be sanded first. After which the beams need to be cut into several parts for the legs and horizontal holders.
Make two frames. The legs and top posts should be fixed at the same height.
This video shows how to make a bench for a bathhouse with your own hands.
The boards should be installed one by one on the frames using self-tapping screws. There should be a space of one centimeter between the frames.
For better stability, two thin strips should be installed at the bottom.
The finished product should be coated with a special solution. At the same time, it must be environmentally friendly and not emit harmful substances. You can improve your results.
Assembly and production of components
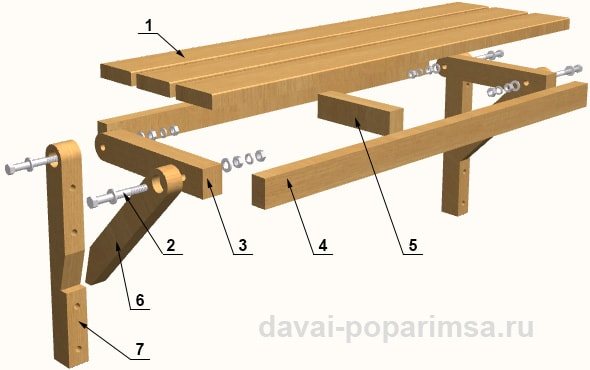
Stand composition:
- Board – 3 pcs.
- Fasteners (rotation axis) – 4 units:
- Bolt M12x95 – 1 pc.
- Nut M12 – 2 pcs.
- Washer 12 – 2 pcs.
- Grover washer 12 – 1 pc.
The footrest is assembled directly in the steam room in the following order:
- Attaching holders to the wall.
- Assembling the frame from parts 3, 4, 5.
- Fastening the frame to the holders using fasteners (see item 1).
- Attaching rotary fixing strips to the frame.
- Fixing the shelf in a horizontal position.
How to make component parts will be discussed in the following articles:
- Manufacturing of the support frame.
- Making the holder.
- Manufacturing of turning strips.
Dear friends! If it’s not difficult, share it on these social networks with your friends. Thank you!