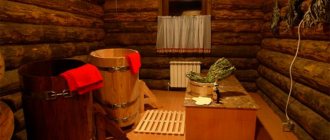
Bathroom ceiling design
The ceiling in the bathhouse must be insulated and insulated from moisture
How to make a ceiling in a bathhouse depends on the height of the rooms in the bathhouse complex, on the type of roof - trussed or rafterless, and on the size of the steam room. The requirements for the ceiling are very high:
- You can use a steam room only if the microclimate is maintained in it without special expenses. To do this, the structure must be sufficiently insulated to maintain the temperature in the room.
- The humidity in the steam room can reach 90%. The ceiling, as well as the ventilation system of the bathhouse, should prevent the penetration of steam into the attic.
- Finishing the ceiling in a bathhouse under the influence of temperature and moisture should not emit harmful substances, therefore any options for synthetic cladding are excluded.
- Materials chosen are as fireproof as possible. In fact, we are just talking about fire retardant impregnations.
- The ceiling finishing, as well as the base material, must be sufficiently resistant to moisture and steam to last at least 10 years.
- The design of the structure is also worth paying attention to.
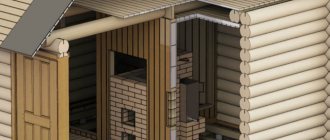
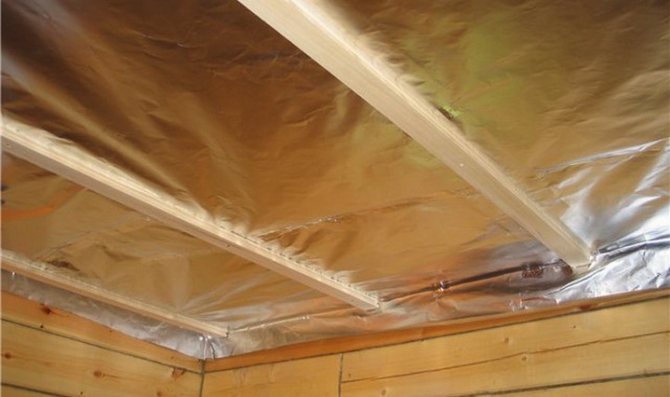
The construction of the ceiling is quite complex and includes several layers: finishing, vapor barrier, insulation, waterproofing, attic floor.
Flat ceiling
This option is also quite simple. Here boards about 5 cm thick will be held in place by the walls. After laying them, everything is treated with vapor barrier materials and mineral insulation. Next you need to lay the waterproofing, and after that you can move on to the wooden flooring.
Working with this type of ceiling is much more difficult, since the wooden slabs that will be attached to the walls inside the building are quite heavy. It will simply be impossible for 1 person to lift and install them. Experts recommend a flat type of ceiling in those baths where the length of the walls of the rooms does not exceed 2.5 m. It will also be inconvenient to work with high walls.
The advantage of this type of ceiling is its low cost. However, this option is suitable only for those structures that do not have an attic.
Material selection
Coniferous wood is resistant to moisture due to its high resin content
For a bath room, especially for a steam room, you need to select a special tree. No less attention is paid to the choice of other materials:
- The wood for the frame is most often coniferous. They contain a large amount of resins, and this makes the material resistant to water and steam. In addition, pine and spruce are much cheaper than hardwood, and the ceiling frame requires fairly massive beams.
- What the ceiling in a steam room or dressing room is made of depends on the same parameters. The room takes the brunt of hot air, moisture and condensation. Conifers are not suitable here: they release resin when heated, which is unacceptable indoors. They take hardwoods that are resistant to steam and heat: linden, alder, aspen. Linden is preferable: the wood is very beautiful and exudes a pleasant aroma.
- Vapor barrier is the layer in front of the insulation. Thermal insulation must be protected from water. Vapor barrier - membrane, glassine, foamed polyethylene - prevents condensation and steam from entering the insulation layer.
- The choice of thermal insulation layer is determined by the design of the ceiling. In a bathhouse, it is almost impossible to insulate it from below, so the layer is placed on the attic side between the floor joists. Mineral and basalt wool are used more often: it is fireproof, retains heat well, and dampens sounds. She is afraid of water, but is protected from the action of steam by a layer of vapor barrier. You can also use cheaper materials, such as expanded clay. The pebbles are poured in a fairly thick layer, and the floor in the attic is laid on top. Straw, dry leaves and sawdust are allowed, but not recommended: the materials are flammable.
- Waterproofing - non-woven coverings or film prevent water from entering the insulation layer.
Fasteners are chosen from galvanized steel. Finishing nails are best made of copper or brass.
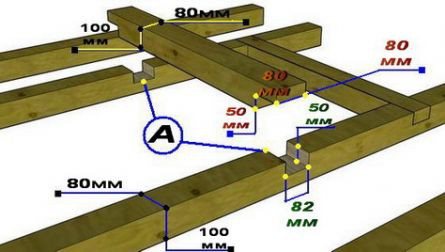
How to vent a chimney through a mounted suspended ceiling
How to vent a chimney through a mounted suspended ceiling
Step 1. Find out where the stove maker plans to install the chimney. You must set a condition for the master - the distance between the walls of the chimney and the ceiling beams must be at least 20 centimeters. Let him think about how to mark out the stove and its components in order to meet fire safety requirements.
Step 2. Draw a square on the ceiling to match the dimensions of the chimney; the parameters of the square must exceed the parameters of the chimney by at least 20 cm around the entire perimeter.
Step 3. Cut a hole on the side of the bathhouse. This is much easier to do with an electric jigsaw. In the corner of the square, drill a hole for the jigsaw knife, insert it into this hole and cut the sheathing boards along the line.
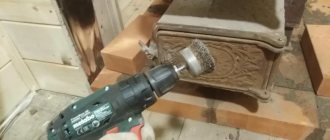
If you don’t have an electric jigsaw, it’s quite convenient to work with a cylindrical grinder (grinder), just instead of a stone, insert a disk with pobedite teeth. Use a small, lightweight grinder; the disc diameter should be no more than 250 mm. The rest of the work needs to be done from the attic side. Bring your tools and materials up there.
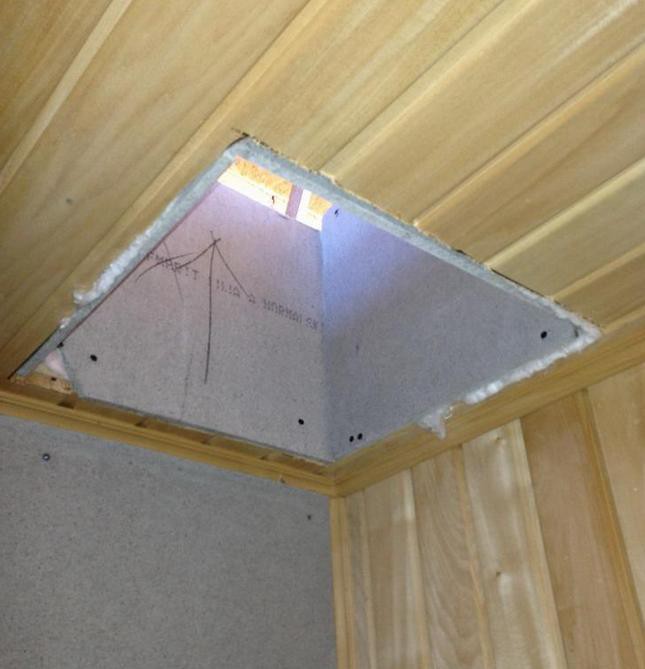
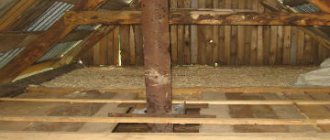
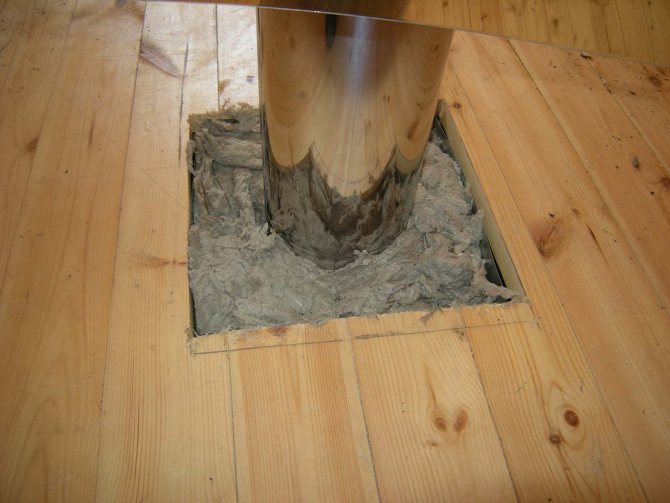
We are preparing a place for the chimney passage through the ceiling. This is what the opening will look like
Step 4. It is necessary to transfer the dimensions and location of the hole for the chimney to the attic flooring. This is done simply. Using a drill, drill four holes in the flooring at the corners of the opening. Drilling should be done from the inside; try to keep the tool in a vertical position. Before starting work, you need to carefully cut off and remove the mineral wool around the perimeter of the opening. From the attic side, using the existing corner holes, draw the size of the opening and cut out the boards.
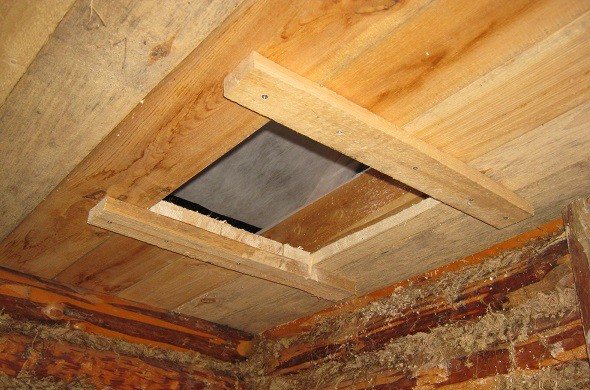
Prepared hole
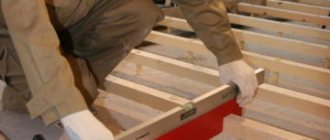
Step 5. Now you need to secure the ends of the cut boards, otherwise they will always sag. You should especially carefully fix the cut ends of the boards in the attic, because that’s where you plan to make a room for use. To do this, you will have to make a supporting frame from 50x150 mm boards around the perimeter of the opening.
Beam installation diagram
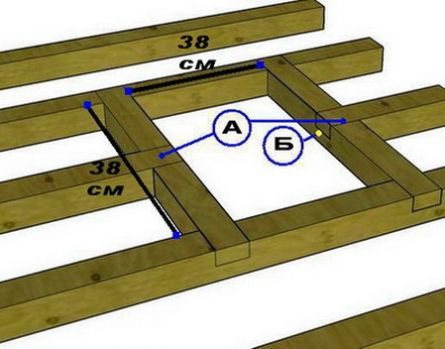
Chimney passage dimensions
Step 6 . Remove the distances between the ceiling beams adjacent to the opening, cut two pieces of 50x150 mm boards to these dimensions.
Step 7: Attach the pieces to the beams. You will have to work a little, because the frame has to be made with the existing finishing coating. To fix it, use long self-tapping screws and put an extension on the head under the sprocket. This will make it possible to fasten under the covering boards. To make the screws easier to tighten, prepare holes for them in the wooden elements. The diameter of the holes should be a millimeter smaller than the diameter of the screw. When fixing, firmly hold the parts in the desired position, make sure that the sections of the boards do not fall below the level of the floor beams during fastening. Attach two short ones to the installed long jumpers on the other sides of the opening for the chimney.
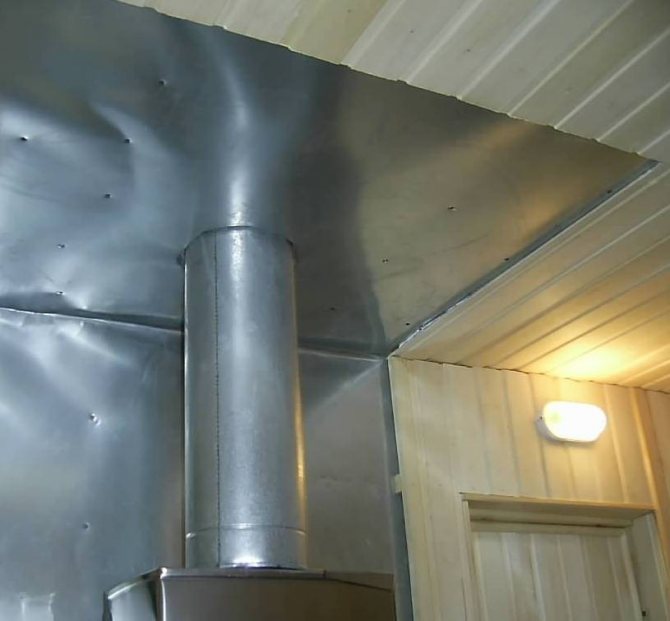
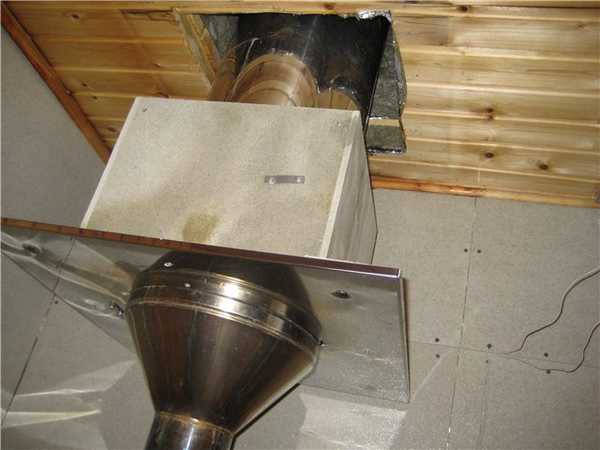
Step 8. After the stove maker finishes the stove chimney, from the rest room side, place mineral wool in place along the entire perimeter of the chimney. Cover the opening with sheet iron, preferably galvanized steel. On the attic side, the holes are also covered with sheet metal.
Installing ceiling trim
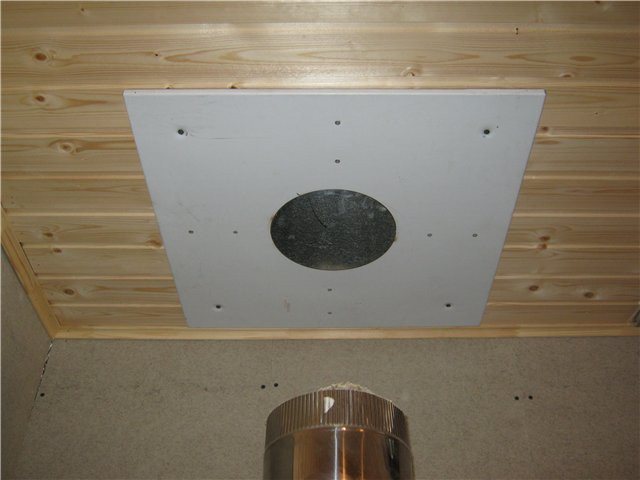
We fasten the cutting with self-tapping screws
Pipe passage, view from the attic
Prices for a disc with pobedit teeth
disk with pobedite teeth
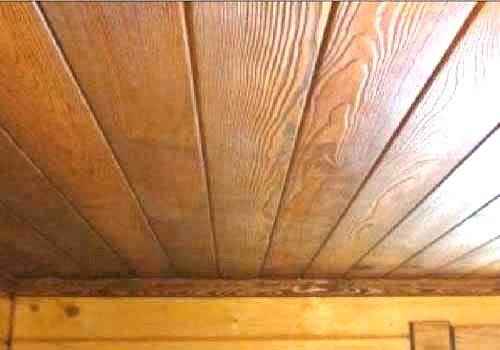
Types of ceilings in the bathhouse
The ceiling is finished in 3 main ways: hemmed, floor, panel. They differ in the technologies and materials used, so the option should be determined at the design stage or at least the construction of walls.
Grazing
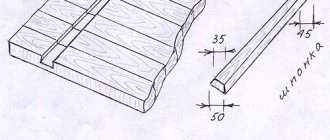
The floor ceiling is laid directly on the wall logs
The simplest and cheapest installation option. The main difference from other models is the absence of ceiling beams. Floor boards are fixed directly into the wall logs. To do this, grooves are made in them - a quarter of the log is cut off. In the attic it is difficult to move on the flooring; in fact, you have to walk on the insulation. This option is only suitable for small baths if the attic serves as a technical room. Sometimes the rough floor is finished with clapboard.
The advantages of this method are its low cost and ease of construction and repair. The disadvantage is limited use and difficulties with insulation.
Hemmed
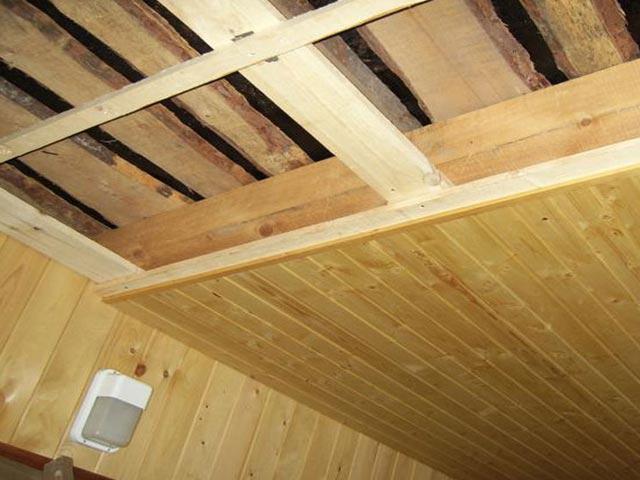
The false ceiling allows for insulation inside the ceiling made of beams
In large bath complexes, high strength is required from the ceiling. A false ceiling is quite suitable even if the attic is used as a living space.
The basis of the ceiling is ceiling beams installed on the last crown of the log house. They serve as support for the attic floor and tighten the walls, strengthening the overall structure. The ceiling is, as it were, suspended from below from a beam system, which is why it received its name.
This option allows for insulation inside the ceiling. To do this, mineral or basalt slabs are fixed between the beams.
The advantages of the frame structure include very high strength and reliability of the structure, durability, and high-quality insulation. The disadvantage is a much higher cost. Additional costs are required for installing beams and for insulation.
Panel
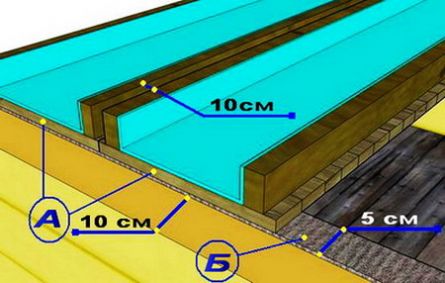
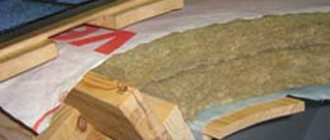
Panels with insulation and vapor barrier are assembled separately and then mounted on the ceiling
A convenient, albeit peculiar solution. It is based on pre-fabricated panels. This is a kind of pallet or box with low sides on both sides, which are assembled from anything: any wood will do. Insulation of any type is placed inside the box, trimmings are also allowed, although it is preferable to use insulating mats. A layer of vapor barrier is placed under the insulation, and waterproofing material is placed on top.
At the floor level, a powerful frame is built from timber, panels are installed on it, tightly joined to each other. The panels are fastened with boards, the gaps between them are filled with jute, and ordinary boards are laid on top to form the floor in the attic.
The advantage of the design is its relative cheapness, since any wood and any quality can be used for the panels. It is easy to repair or replace. The disadvantages include the rather large mass and the need to seal joints and seams well.
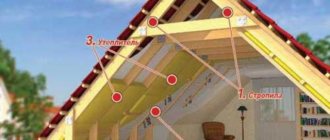
Which one is for a warm (attic) roof and which one is for a cold one?
A warm roof differs from a cold roof in terms of insulation measures