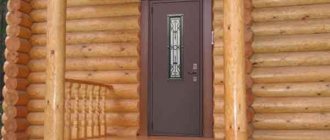
If the walls of the bathhouse are well caulked, they do not need additional insulation. But the ceiling is its “weak” place. In the absence of thermal insulation, a huge amount of heat escapes through it, because hot air always tends upward. But large heat losses are not the only reason to think about insulating it; there are others, no less significant. How to do this correctly and which materials are best to use, these issues should be carefully understood.
The ceiling in the bathhouse must be insulated
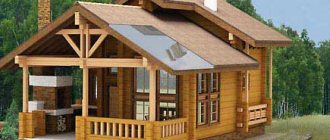
How to insulate a ceiling in a wooden house?
There are several affordable and simple ways to insulate from the inside and outside with your own hands. All of them are divided into two options: insulation outside from the attic and inside the room. When insulating the surface from the inside, you need to understand that the height may decrease. If the attic floor is insulated, after all the work it is necessary to install the floor covering.
When insulating, you need to pay attention to the following indicators: strength, safety, noise insulation, fire resistance
When choosing the right material, you need to focus on the following indicators:
- strength and durability;
- no harm to health;
- fire resistance;
- reliable thermal insulation qualities;
- presence of sound insulation.
What can be used?
- mineral or glass wool;
- sawdust;
- polyurethane foam;
- Styrofoam;
- clay;
- expanded clay
Using sawdust
They are the cheapest and most accessible method of insulating the outside, while their qualities are not inferior to expensive materials. The process itself is simple and does not require much time. Everything can be done with your own hands. First you should prepare the materials:
- several bags of sawdust;
- insulating material. It is necessary to calculate the required amount. To do this, you need to know the surface area exactly;
- cement.
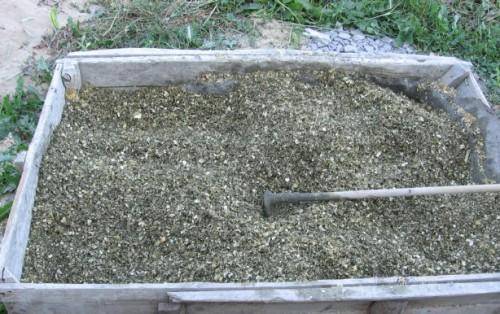
A mixture of sawdust and cement for insulating the ceiling.
The latter is diluted in water in a ratio of 1:10. How to correctly calculate the required number of sawdust? One and a half buckets of water will be needed for ten buckets of sawdust. A wet mixture should form, which will act as insulation . What should sawdust be like? The first ones you come across are no good. The material must meet the following requirements:
- dryness, lack of moisture;
- age at least one year;
- absence of mold and its smell;
- the average size. Small ones are not suitable, otherwise the thermal insulation qualities will deteriorate.
The sawdust mixture should be evenly distributed over the surface of the ceiling.
Sequence of actions:
- Clean the surface from dust and dirt.
- Treat the base with a special solution that protects the room and ceiling from fungi and insects.
- Take the waterproofing material prepared in advance and lay it over the entire floor space.
- Prepare a mixture of cement and sawdust. It should be a rich gray color.
- Distribute the mixture throughout the entire inter-ceiling space.
- You can walk on the thermal insulation layer to compact it. This will allow the mixture to set better and not allow heat to escape.
If you have access to the attic of the room, this method is the most suitable and cheapest. If you have to insulate the ceiling in a wooden house only from the inside, you will have to choose a different method.
What are the benefits of rolled materials?
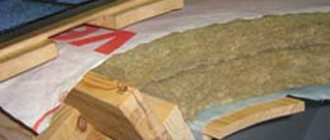
Mineral wool and glass wool, as well as other roll insulation materials, reliably protect the room, but they are difficult to work with: small particles fall off and get into the mouth, nose, and eyes. To avoid injury, you need to take care of yourself and prepare protective clothing and glasses.
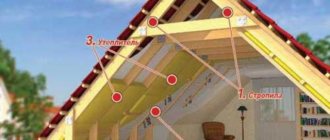
Scheme of ceiling insulation with rolled materials, mats and bulk materials
Sequence of stages:
- Nails are hammered onto the rough surface. In this case, you need to hammer in not up to the head, but so that they stick out slightly. Then the threads are pulled over them using the zigzag technique.
- The insulation itself is installed. It is better to do the work not alone, but with a partner: one will lay the rolls, and the other will pull the thread. This way the glass wool can be inserted better.
- Anti-condensation film is attached.
- Now you can nail the nails harder to press the layer more tightly.
- You can nail sheets of drywall or attach a false ceiling.
Attention: work requires caution and attention. It is necessary to ensure that there are no cracks: they are a source of cold and condensation.
Clay
A widely known material that can retain heat. Only used when adding other materials. Sawdust and glassine are usually added.
Clay retains heat perfectly, so it is used for insulation
Sequence of work:
- lay glassine or any other analogue;
- mix clay and sawdust (prepare a solution);
- Apply the mixture in a 15 cm layer and let dry. If there are cracks, they need to be rubbed with clay.
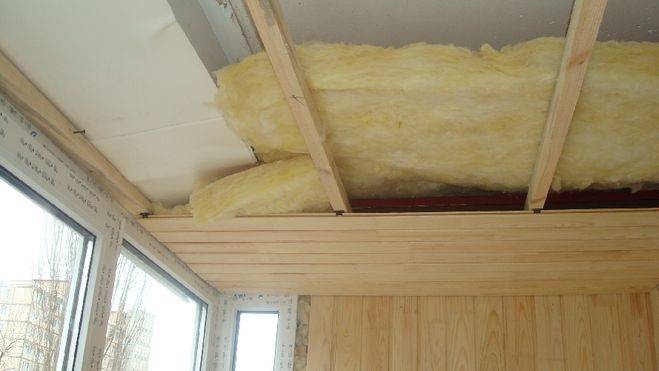
Insulation from the inside
What to do if there is no access to the space above the ceiling? There is an exit. True, you should be prepared for the fact that the height will decrease somewhat. Now the thermal insulation will be on the inside. How to carry out the work?
It's simple: first comes a layer of vapor barrier, then insulation, then another layer of vapor barrier.
Why are two layers needed? They prevent dampness of the rafters, the ceiling from the inside and the insulation. Only after this can the decorative ceiling be hemmed. How to do the work?
Scheme of ceiling insulation from the inside
- The first layer of vapor barrier is attached. The same glassine will do. It can be coated with glue in several places.
- A mounting strip is driven through the vapor barrier. It’s better to take your time and do everything as carefully as possible: holes are drilled in the mounting rails for self-tapping screws, then you need to carefully tighten them with a screwdriver.
- Thermal insulation is fixed. Polystyrene foam is inserted between the slats.
- A second layer of vapor barrier is attached to the rail.
- The entire structure is masked with PVC panels.
Expanded clay
Another simplest and most accessible method after sawdust. Pros:
- ecologically pure;
- unlike sawdust, it does not burn;
- resistant to temperature changes;
- not afraid of rodents, fungi and insects;
- simple installation technology;
- low price;
- easy to do with your own hands.
Expanded clay insulation scheme
All work is carried out outside. First, the already mentioned steam and waterproofing are carried out. Even a simple PVC film will do. It is better not to use roofing felt: it can release harmful toxins. Stages of work:
- The pipe outlet and wiring are insulated with non-flammable materials. Sheets of iron or metal pipes are suitable.
- Waterproofing is rolled out over the entire area. The joints need to be processed. The waterproofing is securely fixed using a stapler or special tape.
- Vapor barrier is installed. The overlap laying technology is suitable. Then everything is secured with a stapler.
- You need to lay 5 cm of crushed soft clay on the vapor barrier layer.
- Expanded clay is already poured onto the clay. How to determine the layer thickness? It can be from 15 cm or more.
- A screed is laid on the expanded clay - a layer of cement and sand. This will protect the material.
How to properly insulate the ceiling in a house, the better to increase thermal insulation
What could be more important for a person than a warm and cozy home where the whole family gathers in the evenings. Making a house cozy is the task of the housewife, but making it truly warm is the duty of the owner. However, very often a situation arises when the window units are replaced, the walls are insulated, the heating system is in perfect order, and the heat flows out of the house like water through your fingers.
What is the reason? But everyone knows well from a school physics course that warm air rises, which means the most likely place for continued heat loss is the ceiling.
And if in multi-storey buildings you should not pay attention to this, because there is another apartment above you, then the owner of a house in the private sector will sooner or later think about how to insulate the ceiling.
Which side to insulate ↑
The ceiling can be insulated both from the living rooms and from the attic. Which of these methods to choose depends on many things. If the house has been renovated and plasterboard structures have already been installed, breaking them for insulation is stupid. But if repairs using suspended ceilings are only in the plans, it is worth taking the moment to place an insulating layer in the interceiling space. However, insulating the ceiling from the attic is much more effective.
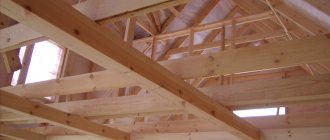
Thermal insulation device from the attic side ↑
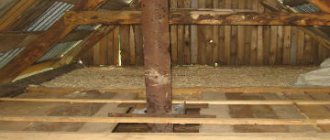
In order to insulate the ceiling from the attic side, you must first throw out all the accumulated rubbish from there and clean the floor beams from the old insulation.
Insulating the ceiling from the attic side
Mineral wool or polystyrene foam is most often used as the main heat-insulating material.
We recommend using both. This will allow you to get maximum effect.
Materials required for ceiling insulation ↑
- Mineral wool in rolls or slabs
- Edged board or USB plate
Tools needed by performers ↑
- Electric jigsaw or regular wood saw
- Hammer or screwdriver (for attaching the USB plate to the screws)
Ceiling insulation: sequence of work ↑
Insulation is carried out in the space between the ceiling beams in several layers.
- First comes a layer of waterproofing, the role of which in our case will be played by a “vapor barrier”. The width of the film should be 10-15 cm greater than the distance between the beams. We lay the insulation and attach it to the beams using strips.
- The next layer is foam. This is where a sharp knife comes in very handy. The foam should be placed as tightly as possible, that is, so that the gap between the insulation and the beam is minimal. Considering the fact that the beams may not be completely level, it is better to leave a small margin and then trim them “on the spot.”
- To improve sealing, we fill the gaps between the sheets of foam with foam and let them dry. Then remove excess foam with a knife. We lay another layer of “vapor barrier”.
- The turn of mineral wool has come. It needs to be laid so that the edge of the insulation coincides with the edge of the beam. If you purchased mineral wool of insufficient thickness, you can lay it in two layers. In this case, the joints of the sheets of the first layer must be in the middle of the sheets of the second layer.
Some useful tips
- There are foam ceiling tiles - they themselves protect pretty well from the cold.
- Don't stop at insulating the ceiling. Walls and floors can also transmit heat.
- If difficulties arise when insulating with your own hands, it is better to turn to craftsmen who will do everything correctly. An unreliably insulated ceiling brings virtually no benefit.
- Fitting with plasterboard requires the use of a galvanized iron profile. Why is this necessary? If you do not do this, you may soon suffer from a fallen structure.
- In a wooden house, it is better to insulate the ceiling in the summer months, so that by autumn and cold weather the excess moisture has time to evaporate.
Insulating the ceiling in a wooden house will protect the room from the inside from heat loss. If the ceiling is not insulated, all work should be done immediately upon moving in.
domzastroika.ru
Tips: how to insulate the ceiling in a garage and bathhouse
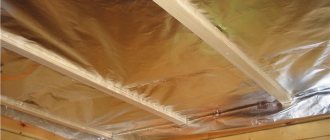
High-quality steam and thermal insulation is the main guarantee of an excellent bath. Steam tends to rise upward, and the cold from the ceiling and walls in such situations will only worsen the situation. The most economical variation is foam insulation.
It is light in weight and easy to install, but still has several disadvantages:
- Destruction occurs at ninety degrees;
- Melting on combustion;
- Virulence.
When insulating with penoizol, you need to take into account the high absorption of moisture. It has low thermal conductivity, is able to return to its original state if distorted, does not support the combustion process, is resistant to rodent attacks, inexpensive and long-term in use. There is an option to use methods of insulating a bathhouse, as in the old days. If you have an attic, using a mixture of sawdust, straw and clay, place the resulting mixture on a layer of thin paper intended for making tracing paper. You can sprinkle oak leaves and earth or sawdust on top.
The use of sawdust is possible only if the attic space is not in use.
In a bathhouse made of timber, the ceiling layer of insulation should be up to fifteen centimeters thick. You can also insulate with a mixture of expanded clay and sawdust, which are laid thirty centimeters thick on a flooring made of boards. When insulating a garage, the choice is most often made of polystyrene foam. Before starting, you need to clean and treat the surface. Measure the sheets and cut them carefully. Cover the surface with a vapor barrier material, glue the sheets and create an outer protective layer. The only downside is that the work must be done regularly. What other material should I use? Thermal insulation when using slag will not disappoint. The material is not popular with rodents, it does not rot, but has an uneven surface, making it a little more difficult to work with than, for example, expanded clay. The main thing is that condensation does not appear. Both rolled and bulk materials should cover all shortcomings that may arise.
Insulating the ceiling in a wooden house with mineral wool
Mineral wool is divided into three types: glass wool , slag wool , basalt or stone wool - all of them have found application in the construction of wooden houses. Glass wool is used for cold attic floors, stone wool is used to insulate ceilings both inside and outside, and slag wool is used to insulate pipelines, septic tanks, and outbuildings.
Before insulating a wooden ceiling in a private house, calculations are made of the thickness of the insulation and the filling area . Each roll or package of insulating boards has an indicator of the geometric dimensions of the insulation, R-value or thermal conductivity coefficient. Determine the required amount of material, then purchase hydro- and vapor barrier materials, insulation, fasteners, which are usually included in the insulation kit, purchase tools and protective equipment.
If the attic is unheated , then a roll of moisture-resistant glass wool will do; it is laid on the attic floor between the floor beams, the distance between the beams is 58 cm, the height of the beam is 100-150 mm. For central Russia, 150 mm of ROCKWOOL Thermal insulation thickness is sufficient.
Moisture-resistant insulation is laid on the ceiling floor without vapor barrier, provided that the room underneath is dry.
Then, if they plan to use the attic for storing things, they lay a vapor barrier film , nail a 20 x 45 mm strip along the joists for a ventilation gap and lay the floor. Sometimes the question arises: what is the best way to insulate the ceiling in a wooden house if it is an attic? The best solution is natural materials : cellulose, sawdust, expanded clay.
Here is a classic do-it-yourself ceiling insulation scheme in a wooden house from the attic side.
Here, insulation work begins with the installation of a waterproofing film (2); you can also use a vapor barrier “Izospan” or a simple polyethylene film.
When planning an attic or additional living space, it is better to insulate the ceiling in a wooden house with basalt , and hydro- and vapor barrier is needed if there is a kitchen or bathroom underneath. Insulation (3) is placed between the floor joists, covered with a vapor barrier film “Izospan” (4), and then a counter batten (5) is nailed to the joists to create a ventilation gap.
Instead of a batten, you can nail a felt sound-absorbing damper strip and lay the floorboard on it. The diagram suggests using a rough plank floor (6), then an underlay for the laminate (7) and then a finished floor.
Recommendations: how to insulate the roof of a private house
Sometimes a house that needs to be insulated does not have an attic, and there is no way to do it from the inside. In this case, there are different ways to work with the roof. Before starting the process, it is necessary to choose the right material. It depends on the type of roof: flat or sloping.
It is also necessary to take into account some roof characteristics:
- Heat conductivity (more effective insulation will be at a lower parameter);
- Long-term ability to resist moisture;
- Decrease in performance properties after a long service time;
- Constancy of shape (the material retains all geometric shapes much longer);
- Specific gravity (the lower the density of the material, the longer the structure will remain in order);
- Frost resistance (the material does not lose its qualities even during sudden temperature changes);
- Non-flammability;
- Harmless (toxic substances will not get inside the room).
The most popular way to preserve heat is with mineral wool. It is exported in the form of plates and rolls, has a high heat-insulating function, is inexpensive, does not need a substrate, and will not catch fire in the event of a fire. It also has high sound insulation and is environmentally friendly. When using this material, special attention should be paid to ventilation gaps, which must be eliminated during operation, ensuring greater thermal insulation properties. Using glass wool is the same as using mineral wool. They are similar, but the first option is cheaper.
During the installation of glass wool thermal insulation, it is necessary to use protective equipment.
Expanded polystyrene is resistant to moisture and has high thermal insulation. When working, you must carefully ensure that the area at the border of the material is firmly adjacent to the attached mechanism. Polyurethane foam sealant will help seal the derailment lines, and reinforced tape will secure the result. The soft type of roof is not suitable for installation. The material is flammable and vapor-proof. Foam concrete, which contains concrete, cement, a steam generator and sand, is most often used for flat roofs. It is durable, fire safe, non-toxic. Expanded clay is also in good demand for this type of roof. Foam glass is resistant to deformation, durable and non-flammable.
The use of foam glass allows you to add elasticity to a soft roof, leveling its surface.
Cellulose raw materials are a product made from industrial waste. Compared to other materials, it is quite inexpensive and practically weightless. Two of its malfunctions, such as rodents and flammability, can easily be avoided by treating it with special components for the purpose of fire protection. Thermal insulation materials that attract moisture should not be placed in the bathroom.
Insulation of the ceiling between floors in a wooden house
Insulation of the ceiling of the first floor in a wooden house is thermal insulation of the interfloor ceiling . Here, the requirements for the thickness of the insulation are not significant, because even if some of the heat penetrates into the rooms on the second floor, it will be useful for heating.
Here the choice of insulation is based on two-component qualities : heat and sound insulation. High-density insulating materials have these qualities. The technology for insulating the ceiling in a wooden house with high-density slabs is somewhat different from the traditional one: laying insulation in the space between the floor joists.
Note. A damper pad (2) is placed under the suspension (3), which dampens impact sounds. “Penoplex” is a dense foam plastic, attached with liquid nails to the wooden ceiling of the ceiling, all cracks and gaps are filled with foam sealant (4), which is also a damper between the wall and the ceiling. Add here a suspended ceiling made of gypsum plasterboard - you get excellent thermal and sound insulation protection. By the way, instead of a gypsum board ceiling, they use suspended ceilings, which greatly simplifies installation.
Thermal insulation of the ceiling of a wooden house is possible both during construction and in operation. If you find that the ceiling is not insulated enough due to voids formed due to shrinkage of the insulation, then you can always fill the voids with bulk material - cellulose , which is light weight and absolutely harmless to health.
Cellulose insulation is resistant to mold and fungal diseases, moisture-resistant and durable. For insulation of interfloor ceilings, it perfectly fills voids, especially in hard-to-reach places, does not caking, and has a high coefficient of thermal resistance . Cover with a layer of 150-200 mm.
How to insulate the ceiling of a wooden house with a basement
Many wooden houses are built on concrete, brick, aerated concrete, expanded clay concrete plinths, covered with lightweight concrete slabs, which are the ceilings of garages and utility basements. A simple way to thermally insulate such rooms is to cover the ceilings with polyurethane foam using foaming components and a special tool for applying a thermal insulating coating.
This type of coating can also be done on wooden floors. The method is advantageous in that it does not require costly preparatory work. Foamed polyurethane fills all voids and cracks. Perhaps the disadvantages of this method are:
- Lack of this technology in remote areas;
- Intolerance to UV rays;
- Expensive compared to other methods.
Although, in monetary terms, this method is not much more expensive than erecting additional logs and laying roll insulation or installing tile insulation. It's up to you, but this method is becoming increasingly popular:
- No costs for preparatory work;
- High speed of work;
- Excellent heat and sound insulation properties.
vseopotolkah.ru
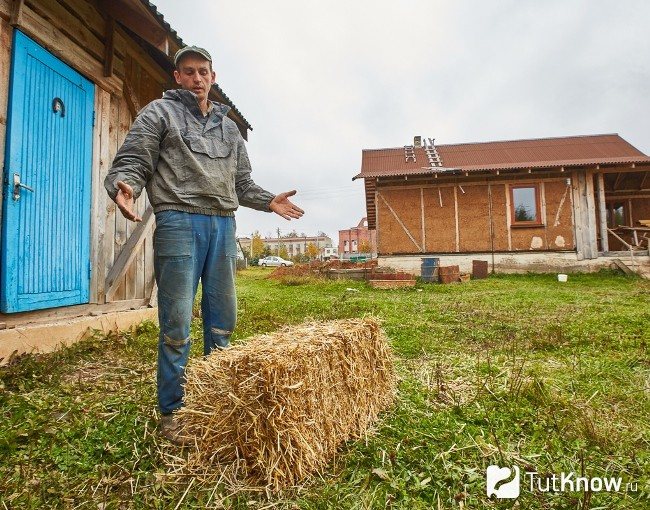
Technology for insulating ceilings with straw
Thermal insulation of floors occurs in several stages. First, the raw material is prepared - pressed into blocks or a solution based on it is mixed, and only then placed in its proper place. It is also important to be able to check the quality of the workpiece.
Choosing straw for the ceiling
The raw materials that are planned to be laid on the ceiling must have special properties:
- Only dry stems without grain are suitable for thermal insulation. They can be dried in special chambers. Heat-treated material compares favorably with field straw - it is free of fungus and insects.
- For insulation, only strong stems are needed. To test the strength, bend a few pieces. Old and caked ones will immediately break and cannot be used.
- Also discard the crushed material.
Be sure to check the condition of the bales. Thermal insulation, fire resistance and other characteristics depend on the quality of the blocks. Before climbing into the attic, carefully inspect the products and select suitable samples:
- Only dry insulation is allowed to be laid. Controlling moisture is easy - pull out a bunch of straw and examine it. The stems should be dry, without signs of rot.
- The block holds its shape well and does not break. It can be lifted with one hand, while maintaining its integrity.
- If bales of the same size have different weights, check their moisture content.
- Products must be tied with a nylon cord that fits tightly to the surface. You can fit a maximum of two fingers under it.
- Metal tying wire is not suitable; it will rust and break over time.
Preparatory work
Thermal insulation of the ceiling begins with preparatory procedures. Perform the following operations:
- Check the condition of the ceiling, pediment, rafters. Replace damaged elements.
- Cover the cracks with construction mesh and seal with putty. Make sure the surface is dry.
- Clean areas with mold and mildew and treat with antiseptics. Impregnate wooden structures with fire retardant.
- Insulate and waterproof the roof. If the roof is covered with a vapor barrier material, the attic should be equipped with a ventilation system. The simplest design is vents in the ceiling. The dimensions of the openings are within 0.001% of the total roof area. If the roof is made of tiles or slate, ventilation is not necessary, because these elements are mounted with gaps.
- Make sure there are no elements that could damage the film. Remove any protruding parts from the attic floor.
Instructions for installing straw on the ceiling
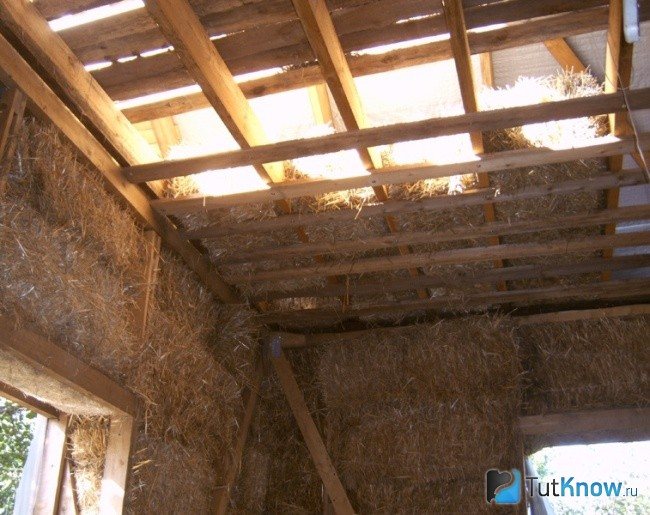
You can insulate the ceiling with straw in different ways - using compressed stems or solutions based on them.
A protective shell made of blocks is considered the most effective method of thermal insulation, because after compaction, the characteristics of the plant-based material are improved many times over. Samples of the same size are placed on the surface and pressed tightly against each other. Place the products so that the joints do not form one line. If necessary, cut the bales. After installation, cover the thatch with waterproofing to protect against possible roof leaks. In used attics, install walking platforms.
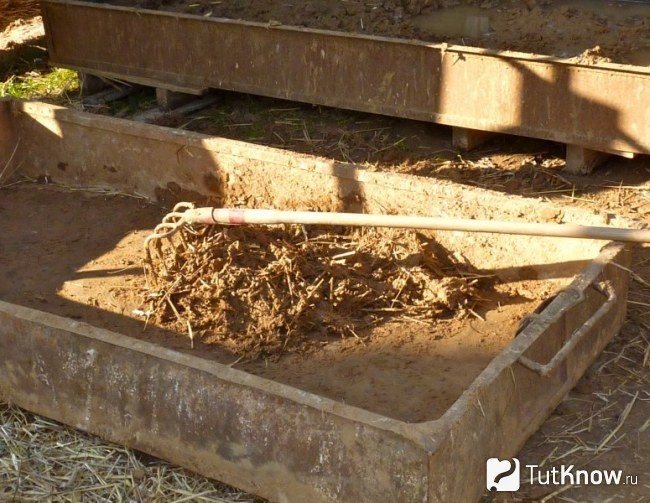
An alternative to block insulation is laying the stems in bulk together with clay. The work is performed in the following sequence:
- Cover the attic floor with a vapor barrier film with an overlap of 15-20 cm on the walls and on adjacent pieces. Seal the joints with reinforced tape.
- Prepare a solution of clay and straw in a 2:3 ratio.
- Pour the ingredients into a large container, add water and stir. Dilute the mixture with water to the consistency of thick sour cream.
- Apply the solution to the base in a layer of 5 cm.
- Wait for it to dry and inspect the surface. If cracks are found, seal them with the same solution.
- Place hay on top in a layer of 10-15 cm. The thickness of the insulation depends on the winter temperature.
- To repel mice, sprinkle the stems with slaked lime with the addition of carbide. Compact the mixture thoroughly.
- Clay is applied to the straw-insulated ceiling with another 2 cm thick layer to protect it from fire.
- For walking in the attic, build a wooden deck that is nailed to the joists.
The ceiling can also be insulated with light adobe - straw impregnated with liquid clay. The mixture is prepared as follows:
- Pour clay into a large container or hole, fill it with water to soak and leave for a day.
- Stir the mixture to the consistency of liquid sour cream.
- Pour raw materials into it at the rate of 8 kg of stems per 1 kg of soil and drown in the solution. Wait until the straw is soaked and place it on a tray to drain. Clay-coated stems are not afraid of fire, do not rot and retain heat well.
- Fill the entire area with a layer of 10-15 cm with the mixture and compact it.
- After drying, cover the floor with waterproofing film.
- Install the wood flooring.
The ceiling can be insulated with heavy adobe.
This option allows you not only to thermally insulate a living space, but also to create a durable floor in the used attic without wooden flooring. In this case, the floor structure must be very strong to withstand heavy weight. To prepare insulation, only certain types of clay are used, which are classified as “fat” rocks. They absorb water well, have plasticity and stickiness. “Dry” contains a large percentage of sand and crumbles over time. The soil extracted from the seabed is saturated with algae and does not stick together well.
To prepare adobe, mix soil and straw in a 3:1 ratio. The work is performed as follows:
- Pour the clay into the concrete mixer, filling half the barrel. Pour in water and mix thoroughly.
- Add straw to the barrel and turn on the device again.
- After obtaining a homogeneous mass, check its density. Pour the mixture into a bucket and stick a stick in. It should be held vertically.
- In this form, the solution can be applied to the surface in a layer of 10-15 cm.
- After drying, you will have a hard surface that you can walk on.
How to insulate a ceiling with straw - watch the video: Using straw as insulation for the ceiling reduces heating costs and preserves the usable area of the room. All procedures can be performed independently, but to achieve the desired effect you need to pay attention to the quality of the material used. Deviation from thermal insulation technology will lead to constant heat leakage through the ceiling.
How to choose insulation for the ceiling
When choosing a suitable material for the ceiling of your home, you should take into account not only its thermal insulation characteristics, but also resistance to extreme temperatures and temperature changes, ease of installation, accessibility, cost-effectiveness, fire and environmental safety.
What the floors in your home are made of is also important. So, for example, for the foundation, so that the basement does not turn into a swamp, it is necessary to do waterproofing in any case, and for the ceiling, vapor and waterproofing is necessary only if the ceilings are wooden.
In addition, it is better to insulate wooden floors with materials similar in their characteristics and structure to wood - for example, “breathable” ecowool or sawdust. In most cases, sawdust and other bulk materials: shavings, expanded clay, slag, foam granules, etc. allow you to achieve the desired effect with minimal labor and material costs.
Minimal material costs involve the use of traditional bulk insulation such as natural sawdust and shavings, but they should be treated with fire and antifungal treatment.
Characteristics of thermal insulation bulk materials
Expanded clay is the most popular bulk material used for insulating ceilings. Its bulk density ranges from 200 to 400 kg/m3, and its thermal conductivity ranges from 0.099 to 0.12 W/mK. This material is preferable to use for insulating ceilings made of concrete floor slabs. It has a relatively large weight and not every wooden ceiling can withstand the recommended thickness of the expanded clay layer, which ranges from 20 to 40 cm.
The layer of expanded clay on top must be protected from moisture; for this, a screed is made on top of it.
To insulate the ceiling, you can use expanded vermiculite; it is obtained by burning rocks. The density of bulk vermiculite is from 70 to 150 kg/cub.m, and the thermal conductivity is from 0.04 to 0.05 W/mK. This material is widely used for insulating ceilings and floors in industrial and civil construction.
Expanded perlite is the result of firing other rocks and has the same physical characteristics as expanded vermiculite. The heat insulator siopor (siotherm) has good thermal characteristics; it can also be used to cover ceilings. Its bulk density ranges from 130 to 200 kg/m3, and its thermal conductivity ranges from 0.05 to 0.06 W/mK.
www.kakprosto.ru
Materials: the better way to insulate the ceiling of a private house
The types of insulation are so diverse, and it is difficult to choose which one will suit you better and will serve you for a long time and of high quality.
It's best to use:
- Expanded clay. Low weight, but you need to fill it in an exact amount; it becomes heavier with a large amount of moisture. Durable and non-flammable, environmentally friendly.
- Ecowool. Good air permeability, environmentally friendly, but, like expanded clay, it strongly absorbs moisture.
- Expanded polystyrene. This substance is durable and does not absorb moisture, but is toxic in case of fire.
- Mineral wool. Does not ignite in case of fire, is non-toxic, safe for rodents and various microorganisms.
- Ursa. Safe material, sound does not penetrate, and the room remains warm.
Having understood the materials, you can proceed to the most important thing - the insulation process.
Methods of thermal insulation of wooden ceiling structures
Numerous technologies for insulating ceilings in wooden houses are divided into two groups according to the location of installation of the insulation:
- from the side of residential premises (from the inside);
- from the attic (outside).
Both approaches have their advantages and disadvantages. Thus, insulating the ceiling in a wooden house from the inside will save money, but will reduce the useful volume of living quarters, and insulation installed outside will require additional protection from mechanical damage and more powerful hydro- and vapor barrier, which will entail an increase in insulation costs.
In the classic version, the thermal insulation layer has the following structure:
- external steam and waterproofing;
- insulation material;
- sheathing;
- internal vapor barrier;
- sheathing
Foam insulation
The easiest way to insulate is to finish the ceiling from the inside with foam plastic. Its advantages include:
- relatively low cost of material;
- light weight;
- unique steam and moisture repellent properties;
- ease of installation;
- environmental friendliness.
Stages of work
First, a waterproofing layer is attached to the false ceiling between the beams. For this you can use glassine or plastic film.
Foam boards are attached on top of the waterproofing using special glue. After applying the adhesive to the insulation, you should wait 1 - 2 minutes and press it tightly to the ceiling. The slabs are mounted end-to-end. If there are gaps between thermal insulation products, they are sealed with polyurethane foam. It is better to additionally fix the insulation on the surface using self-tapping screws with washers of large diameter (10-14 mm).
After installing the slabs, a layer of glassine or other vapor barrier material is laid again. The whole process is completed by cladding and decorative finishing of the ceiling structures.
Modern industry produces foam sheets of various colors and textures. The front surface may contain an abstract pattern, which, if chosen correctly, will enrich the interior of the room.
Sawdust
Sawdust is a natural material and has proven itself for thermal protection of wooden houses. This technology is somewhat more complicated than gluing with foam plastic. The main difficulty lies in the preparation, or more precisely, the manufacture of insulation, which is a cement-sawdust mixture.
Preparation of the composition
It is better to use medium-sized shavings. Thyrsa is not suitable for insulation. Its volume contains very little air. The sawdust should not be fresh. The raw materials are treated with antiseptic and antifungal compounds. The simplest solution to this problem is to soak wood chips in a solution of copper sulfate, after which it should be thoroughly dried.
The required volume of sawdust is equal to the planned volume of the insulating layer, the recommended thickness of which is 20 centimeters.
The process of preparing a cement-sawdust mixture consists of the following steps:
- in a spacious container (a trough with sides 25-30 cm), prepare “cement milk” by mixing water with cement in a ratio of ten to one, and mix thoroughly;
- Sawdust is added to the resulting mixture, which during the mixing process should be evenly covered with a layer of solution.
Surface preparation
Before you begin making insulation, you should prepare the area for its application. This preparation includes the following:
- dismantling the attic floor;
- cleaning the space between the joists from debris and other foreign objects;
- treatment of all available wooden floor structures with antifungal and antiseptic agents;
- laying a vapor barrier carpet (as insulation, you can use thick polyethylene film overlapped on the joists).
Application of insulating composition
Next, the prepared cement-sawdust mixture is scattered over the floor area and lightly compacted. The insulation must be evenly distributed between the floor joists. After complete drying, the resulting coating can be walked on.
One of the main advantages of this method of ceiling insulation is the low cost of materials. First of all, this concerns sawdust, which, with some effort, can be purchased for free.
Mineral wool
A popular method of insulating a wooden ceiling is using mineral wool. In terms of its thermal insulation characteristics, this material is superior to polystyrene foam. The installation process is relatively simple.
Vapor barrier layer
A vapor barrier is laid on the outer surface of the ceiling, freed from the coating and cleared of debris and foreign objects. As with sawdust, thick plastic film will do.
Install it with an overlap of about 10 cm. The seams are taped.
Installation of insulation
Mineral wool is produced in slabs and rolls. When using rolled material, the cotton wool is unrolled along the beams.
The second layer of insulation is laid in the opposite direction, covering the beams and joint areas.
For additional fixation of the insulation strips, you can use nails, the heads of which should be slightly “recessed” into the top layer of the material.
Waterproofing
One of the few disadvantages of mineral wool, but quite significant, is its hygroscopicity. It is very easily saturated with moisture, which has an extremely negative effect on its thermal insulation properties. Therefore, the insulation layer must have reliable external waterproofing.
Lay it on top of the mineral wool, overlapping it and gluing the seams.
x-teplo.ru
How to insulate a ceiling in a residential building: mineral wool
This material is extremely popular in our country. It is quite cheaper than others and easy to use. Mineral wool can safely separate a room from the cold, because it contains glass, rocks and a fibrous structure
Why is it so in demand on the market:
- Has the lowest thermal conductivity;
- Does not prevent steam from escaping and is not saturated with water, protecting against dampness;
- Not prone to destruction upon contact with various acids and alkalis;
- Guarantees air circulation;
- Has acoustic properties;
- Does not contribute to combustion and does not spread fire;
- Utilitarian and durable.

There are different types of mineral wool. Stone can be used for temperatures up to 1000 degrees. Slag has the highest thermal conductivity effect. Glass is used for external insulation.
Option I. Insulation with sawdust
The advantages of this insulation option are that sawdust is a very affordable insulation material that is inexpensive. Therefore, when the problem arises “What is the best way to insulate the ceiling in a wooden house?”, then the solution using sawdust is one of the most common. Insulation is performed using sawdust-cement mortar. Let us consider in detail the process of performing such work.
Preparation of materials
- Purchase sheet glassine. Its amount should be equal to the surface area of the ceiling.
- Sawdust - several bags. It is easy to calculate the required amount of this material. It is necessary to divide the entire ceiling area by 5. As a result, we obtain a number that is the volume of the filler, i.e. sawdust. Requirements for the quality of sawdust used as insulation: - the larger the sawdust fraction, the less cement is needed. Therefore, insulation will be inexpensive in terms of financial costs. In addition, the more cement in such a solution, the worse its thermal insulation properties. - dry to the touch; — complete absence of mold smell; - they must be mature in time (they must be at least a year old);
- Cement - several bags. Calculating this value is also easy. It is taken with water in the proportion of one part cement to 10 parts water. And water is taken at the rate of one and a half buckets of water per 10 buckets of sawdust. Water must be taken in exactly the specified proportion so that the solution does not turn out to be too wet. This may affect the drying time of the solution. In the hot season, excess warm moisture is a source of proliferation of fungi and microorganisms.
- An important point in the question of how to properly insulate a wooden ceiling is the choice of the time of year when this work is carried out. They need to be done in such a way that by autumn all the excess moisture in it evaporates from the solution.
Mortar laying technology
- We spread the waterproofing material over the entire area of the ceiling surface.
- Mix this mixture according to the specified proportions until it turns gray.
- Sprinkle the resulting solution evenly over the entire surface.
- We compact the resulting layer of thermal insulation. For this purpose, you can simply walk around the resulting surface. You can perform the compaction process with a special construction tamper (it is better if its platform is wooden). But the effort required is small, considering that this is the ceiling of a house, and not a concrete path on the street.
- After this solution hardens, a characteristic sign of its readiness will be a slight crunch when pressed.
- It should be noted that this method is used if there is free access to the ceiling from above. If there is no possibility of free movement along the ceiling surface, then it is necessary to perform insulation from the inside of the room.
Insulation with straw and clay mortar
There are also more traditional and cheaper ways to insulate the ceiling in a bathhouse - this is a plastic mixture of straw and clay, or a mixture of sand and sawdust. All these natural materials can be combined with each other in any composition, the main thing is that the solution contains clay or sand with insulation made of straw, wood chips or sawdust. A layer of vapor barrier made of roofing felt, polyethylene or glassine is laid on the ceiling boards. The overlap of rolled materials should be within 5-10 cm. A thick clay-straw (sand-sawdust) solution is laid on the vapor barrier. The composition of the solutions is as follows: two parts of pre-soaked clay and rubbed through a sieve, three parts of chopped straw or sawdust. This mixture is laid in a layer of up to 10 cm, and this layer will dry for about a month. Cracks that appear during the drying process are sealed with a solution of the same composition.
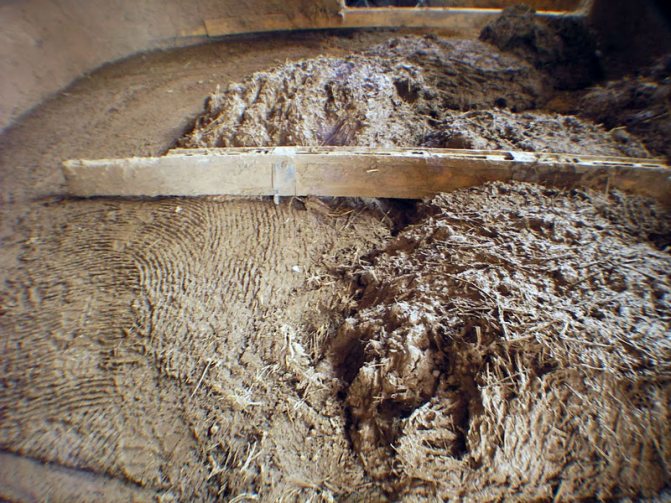
Ceiling insulation with straw and clay
The quality of such insulation can be improved by adding an additional layer of wood chips or sawdust. In this case, the thickness of the entire insulation should not be more than 20 cm. Another 2-3 cm layer of clay is placed on top of the sawdust if you plan to walk on such a ceiling. Such a ceiling in a bathhouse, insulated with clay and straw, will be quite heavy, which is why the thickness of the insulation layer is limited.
The next option for insulation with clay is to add dry oak leaves to sawdust, which serve as an excellent natural antiseptic and antibacterial protection. The leaves can also be covered with a thin layer of clay mortar. This method is the cheapest, but not the most technologically advanced.
Option II. Use of roll materials
Features of working with these materials
When the question arises about how to properly insulate the ceiling in a wooden house using other methods, one immediately thinks of roll insulation. These include glass wool, mineral construction wool and other lightweight technological insulation materials.
Significant disadvantages of these materials are irritation on human skin from contact with them. And if a person is prone to allergies, this can become a significant factor in its manifestation. In addition to irritating the skin, these tiny particles get into the eyes and mouth. When performing such work with these materials, you need to protect yourself with very thick clothing, a respirator and safety glasses.
Technology for laying roll insulation
- An anti-condensation film must be attached to the ceiling. You can use glassine as it. For greater security, you can additionally use plastic film. If this operation is not performed, the glass wool or mineral wool may become significantly wet from condensation, which will negatively affect the thermal insulation. In addition, moisture can become a source of fungal rot on a wooden ceiling.
- Nails are driven into the ceiling so that the head of the nail is not driven into the surface of the ceiling.
- Using these nails, the threads are pulled in a zigzag manner. Hats help these threads not to come off. The purpose of the thread is to hold the unfolded roll material in a fixed position.
- Lay out the insulation in this way: lift the thread, lay the insulation in the space between the ceiling and the thread. The work needs to be done by two people: one person lays out the material, and the second pulls the thread at this time. It is not recommended for one person to perform such work.
- The nails are driven deeper to clearly fix the insulating layer.
Insulating the ceiling from inside the house
Ceiling insulation from inside the house is most often done using foam boards. In this case, slabs of this material with a thickness of 5-10 cm are used. This material is convenient for such work because it can be easily cut with a knife.
Insulation technology from the inside
- It is imperative that before insulating the ceiling in a wooden house from the inside, you need to treat the surface of the wooden ceiling with special chemical anti-flammable solutions. This will prevent it from spreading if a fire occurs.
- Using a stapler, we attach the plastic film. This stops the access of air from the room to the boards.
- We stuff the sheathing over the entire top surface. The best option is a 50x50 block or galvanized profile. We fill it, using a step of 60 cm.
- Carefully fill the resulting squares with mineral wool, glass wool, or polystyrene foam. When working with mineral wool or glass wool, we again take precautions. No strangers should be present while performing this work indoors.
- We use a stapler and again fasten the film on top of the fixed insulation.
- We carry out the final filing with plasterboard or PVC boards. After this we carry out painting work.
One of the disadvantages of such insulation from inside the room is the loss of room height. But you can come to terms with this, realizing that you have done a very important useful thing to preserve heat in the house. Considering how relevant the topic of paying for heat is, we can understand that a loss of height of 5-6 cm is a minor disadvantage of such work.
propotoloks.ru
What is the best way to insulate the ceiling in a house + video?
Most owners of private houses only insulate the walls of the building, but a large amount of heat is lost through the roof of the house. This happens because warm air is lighter than cold air and rises to the top. Therefore, when insulating a house, you need to take care of the ceiling so that the heat does not escape outside. Let's figure out the best way to insulate the ceiling in a house.
Typically, ceiling insulation is performed in conjunction with insulation of the entire room.
If you carefully examine the roof of your house in winter, you will notice that the snow and ice melts faster there than around it. And this happens due to the heat coming out of the room. In order to reduce heat loss, you need to insulate the ceiling. As a result, you will save on electricity and the house will not need to be heated for a long time.
Materials for ceiling insulation
Thanks to an insulated ceiling, you can retain a significant amount of heat in the house. That is why it is necessary to carefully select materials. To work you will need the following:
- insulation material (foam and mineral wool are ideal as such materials);
- edged board;
- waterproofing material (for example, glassine);
- wooden slats, nails;
- polyurethane foam.
To make slats of the appropriate size, you will need to take an electric jigsaw and a hacksaw. A regular knife is suitable for cutting foam sheets.
We insulate the roof using polystyrene foam
Before you start insulating the ceiling, you must insulate the roof. Almost all residential buildings have a gable roof. Such roofs need to be insulated from the inside, and after construction is completed.
Here is another option for insulating the roof of a building:
- First, cover the roof cladding with a thick layer of waterproofing;
- install a wooden sheathing;
- Carefully place the insulation boards between the slats of this sheathing;
- Fill cracks and gaps that inevitably remain with foam;
- At the end of the work, nail the boards - they will fix the insulation.
It is important to leave a small space between the insulation layer and the waterproofing film - ventilation will occur through it. Otherwise, the air will not carry water vapor out of the room, the humidity will increase, and as a result, condensation will appear.
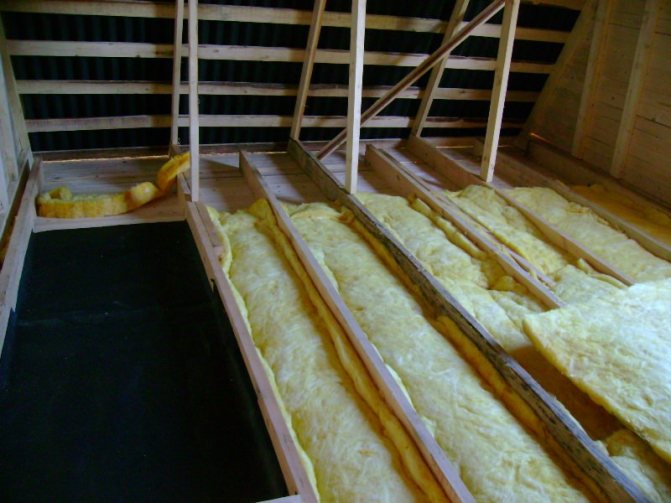
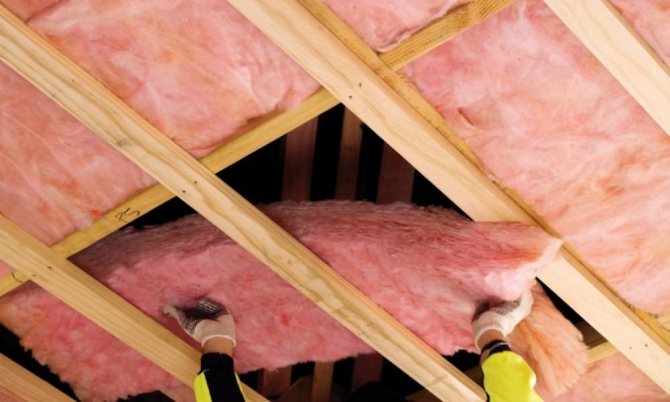
Ceiling insulation with mineral wool
If you have your own private home, it is easier to insulate the ceiling from the attic side. In addition, this method will not reduce the living space. It is very convenient to insulate the ceiling with mineral wool.
First, prepare the surface of the attic floor for insulation. To do this, cover the floor with a vapor-proof film and attach wooden slats. The distance between them should accommodate blocks of mineral wool. In case of very large heat loss, lay the insulation in several layers. The last layer must be placed so that it covers the beams, otherwise heat will leave the house through the wood.
Why do you insulate the ceiling and roof?
Thermal insulation of ceilings in wooden housing will help to achieve comfort throughout the year. All residential buildings have their own heat source and certain heat exchange conditions. The basic principle is the same - when heated by a heating device, warm air rises up to the ceiling, then cools and gradually falls down. The ceiling therefore turns out to be the warmest place in the room. But heat can escape from the house through the ceiling and floor, as well as windows, walls or doors. Therefore, you should take a comprehensive approach to insulating a wooden structure. First, determine exactly where moisture is coming out or the wind is blowing, so that problem areas can be repaired. Finding such areas on the ceiling is much more difficult - the roof covers it and the air becomes heated.
Opinions differ regarding the density of laying the boards when installing the ceiling. Some experts believe that the boards should be laid with small gaps between them. Over the gaps you need to seal them with clay. Moisture will thus escape through the clay and will not accumulate on the ceiling. Thanks to this, the service life of the ceiling boards will be significantly extended. Clay has low thermal conductivity, and heat escape through existing cracks and the roof is excluded. But there are also professional builders who recommend laying the ceiling boards as tightly as possible, and then applying a layer of clay to the entire surface. To properly insulate the roof and ceiling, both methods are used quite successfully. Finally, the ceiling can be sheathed with some finishing materials.
What materials are used to fill the ceiling?
Of course, to ensure good thermal insulation, it will not be enough to insulate a wooden roof of a house using only boards and clay. In order to save as much heat as possible, the ceiling is additionally covered with some kind of heat-insulating material. You can use wood shavings, sawdust, clay or slag for this purpose; sometimes glass wool or polystyrene foam is chosen. The thickness of the insulation layer for thermal insulation of ceilings is determined depending on the climatic zone in which the house is located, as well as on the material. Near the pipe in houses with stove heating, the backfill at a distance of 30 cm is made of fireproof materials; the vapor barrier layer in this case is made of clay coating. Slag and earth retain heat very poorly, therefore, if it is impossible to choose any other material for backfilling, the layer will have to be made at least 30-35 cm.
It is necessary to fill the ceiling in a wooden house after first calculating the load on the floor. For example, expanded clay is much lighter than earth, and other materials vary in weight. And if you fill it with a thin layer, in order to insulate the roof, this may not be enough.
When choosing boards for the ceiling and calculating the distance between beams, this should be taken into account, since the weight of the insulation can be quite significant. Simply pouring a layer of insulation onto the wooden ceiling of a house will be wrong; you will need a vapor barrier device. Roofing felt is used more often than others for vapor barrier, but you can also use other similar material that will need to be sheathed in the room. It is laid not on top of the insulation, but under it. The material from which the roof of the house is made and the height will also matter here. To ensure that the insulating layer is well ventilated, moisture must not be allowed to accumulate in it. For more reliable thermal insulation, the ceiling can be sheathed with something.
Ways to insulate the ceiling in a private house from the inside
If it is not possible to insulate the outside, then you can insulate the inside. Depending on the surface, little preparation may be required. So, if you have a wooden ceiling, an antiseptic primer and sealing of all cracks will help create a more durable insulation layer.
It is necessary to remove the decorative coating from the concrete surface, widen small cracks and treat them with a primer, having previously cleaned them with a brush.
Finish the work with sealant or polyurethane foam and level it over the surface. Basalt wool or polystyrene foam is usually placed under a suspended ceiling. But quite often there are opinions that it is not recommended to lay insulation inside the house. The most environmentally friendly insulation is white agglomerate. Laying a vapor barrier layer is not required, because the agglomerate is not susceptible to moisture. You can also insulate using penofol, which due to its uniqueness has low thermal insulation abilities. When fastening, be sure to leave gaps on both sides for ventilation. The material itself can be easily attached with nails by placing the side with the foil out. Penofol can be used together with penoplex in the same way.
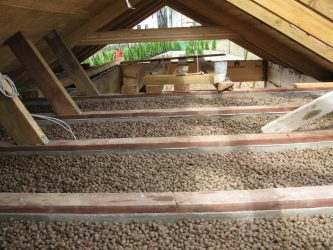
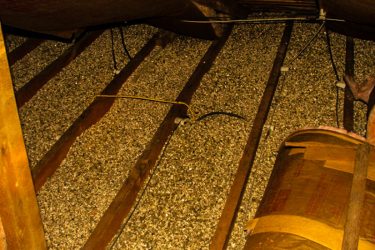
Filling a layer of expanded clay for insulation
You can consider the option of insulating a wooden ceiling using expanded clay. This material is environmentally friendly, so for those who primarily care about the environmental friendliness of their home and for this very purpose choose only natural materials for their home, this option seems to be the most suitable. What sets it apart from other materials of natural origin is that expanded clay is not subject to rotting processes and insects will not live in it.
Thermal insulation of ceilings must be carried out taking into account all the details. It should be remembered that if the ceiling is hemmed to the beams from below, it can only be insulated in this way if it has a large margin of fastening strength. For example, a layer of OSB may not just be hemmed underneath, but also have an additional sheathing underneath, which is sewn to the beams with pins. In this case, the backfill of the floor will look like this.
- The space between the beams is lined with waterproofing film. You can use simple polyethylene, it is quite durable and strong. In this case, it is necessary to ensure that the waterproofing material covers both the space between the beams and the beams too. The overlap of the canvases should be several centimeters; the joints are taped with adhesive tape.
- Next, we fill in the expanded clay - its layer must be leveled. The level of expanded clay should be slightly lower than the level of the future flooring.
- Another layer of vapor barrier is laid on top. You can use here both polyethylene and glassine, and roofing felt, and any of the more modern materials. Here, too, it would not be superfluous to arrange the tightness of the overlaps.
- If necessary, you can finally lay attic floor boards on top.
- Sometimes the interior of the house is planned in a modern style - then additional finishing of the ceiling will be required, for which it must be sheathed, for example, with sheets of plasterboard or similar material.
Thermal insulation helps to achieve a good temperature in the room - living in such a house is comfortable at any time of the year. Careful attention to the insulation of individual parts of the structure is the key to future comfort in housing.
1poteply.ru