Painting the floor in the bathhouse is the final stage of construction work. Often, high-quality and non-toxic materials with high physical and operational characteristics are used to paint flooring.
A bathhouse is a structure characterized by high humidity and sudden temperature changes, which can negatively affect coloring materials.
Modern baths have two types of floors - wooden and concrete. Therefore, when choosing paint and varnish products, it is important, first of all, to take into account the type of floor base.
Why paint the floor
Many bathhouse owners believe that painting the floors in such buildings is unwise from the point of view of durability, practicality and safety. After all, natural flooring material looks much more impressive, and does not harm human health.
According to experts, painting floors in bathhouses is advisable and has many advantages:
- The service life of wooden floors is doubled, and the susceptibility of the boards to rot and mold as a result of exposure to increased moisture is reduced.
- Concrete bases coated with paints are resistant to moisture, sudden temperature changes and intense mechanical loads.
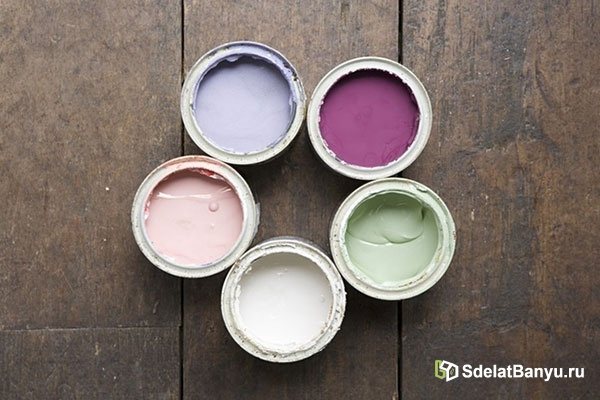
- A wide color palette of modern paints and varnishes allows you to create a unique interior style of premises.
- Paints and impregnations allow you to save on expensive floor finishing.
Wood floor paints: a large and complex choice
The modern construction market offers a large selection of paints and varnishes for wooden surfaces. When choosing paint for wood floors, it is important to consider:
- The type of wood used for flooring;
- Operational features of the premises (humidity, temperature conditions, conditions of use, etc.);
- The need for re-processing;
- Compatibility of paint and varnish coatings with the original decor.
Currently, all wood paints can be divided into two large groups: transparent (impregnations and varnishes) and opaque (oil, acrylic, alkyd, polyurethane, perchlorovinyl).
Transparent compounds
This group includes impregnating agents and varnishes on a transparent basis.
Acrylic impregnations
Such products are practical, reliable and have good absorption.
They provide high protection of wood from mold, rot and destruction, and provide for easy coloring of wood in natural shades.
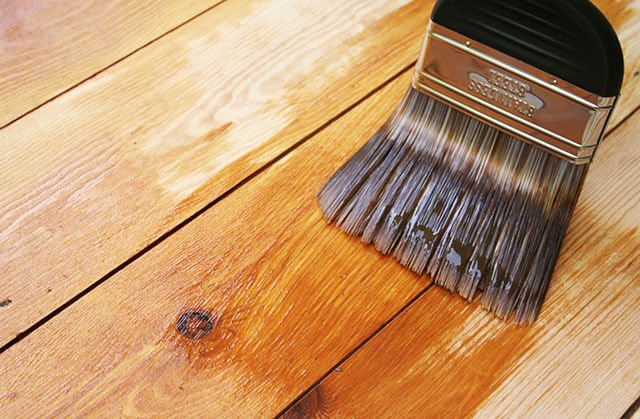
Acrylic-based impregnating compositions are applied with a wide brush or roller, in some cases using a sprayer.
Oil impregnations
Oil-based impregnations are intended for effective and timely protection of wood from destruction due to prolonged exposure to increased moisture and mechanical loads.
They are quickly absorbed and provide resistance to abrasion and sudden changes in temperature conditions. When properly applied, wooden floors acquire an attractive natural shine.
Natural modified oil resins included in the impregnations provide the flooring base with a long service life under special conditions. For this reason, oil impregnations are often used for bathhouses.
Clear varnishes
Varnishes are designed to preserve the natural attractiveness of wood, as well as to protect against the negative effects of humidity and temperature changes.
Transparent varnishes give the wooden floor elasticity and mobility, but do not protect against mechanical damage and intense loads. Therefore, such compositions are used extremely rarely for bathhouses.
Opaque paints
This group includes opaque organic paints, which provide reliable protection of wood from rotting, destruction and exposure to pests and microorganisms.
Oily
The once popular type of paint is now largely giving way to more progressive coloring materials. Oil-based wood floor paint takes more than 24 hours to dry, yet provides a very durable surface finish. In addition, it is resistant to sudden changes in temperature and water.
Acrylic
A fairly popular type of wood paint, made on the basis of water, resins and coloring components.
Such products are distinguished by durability, practicality, frost resistance, inertness to high moisture and rotting.
In addition, acrylic is available in a wide color palette. Wood floor paint is applied with a soft roller or spray.
Alkyd
Painting compounds are intended for painting interior and exterior wooden surfaces. They provide reliable protection from the negative effects of external factors, temperature changes and high air humidity.
Alkyd floor paint comes in rich colors.
A significant drawback of the materials is the presence of a chemical odor that does not disappear even after drying. Therefore, it is not recommended to use a similar composition for painting floors in steam rooms.
Polyurethane
Expensive paints have good performance characteristics of resistance to mechanical abrasion, temperature changes, as well as durability and practicality.
Despite the obvious advantages, polyurethane floor paint has a major drawback.
The special solvents included in the composition make it quite toxic.
Perchlorovinyl
This type of floor paint is intended for painting interior and exterior surfaces.
It is resistant to the negative effects of various factors, easy to use, has a wide range of colors, and low cost.
Disadvantages include toxicity, fire hazard, susceptibility to cracking and fading.
According to many experts, the most effective option for painting materials for treating wooden floors is acrylic paints on an opaque base.
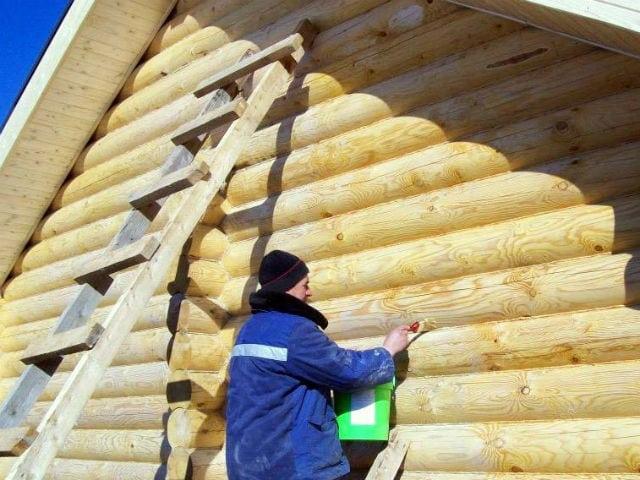
How to paint a bathhouse outside
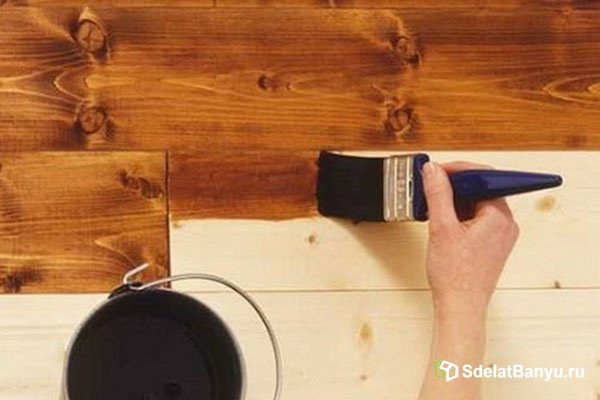
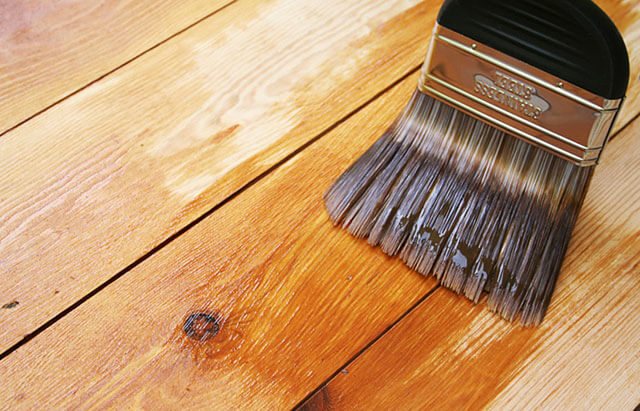
When the bathhouse has already been built and the wood has completely dried, you can start painting it. First of all? You need to stock up on antiseptic primer; this composition will help protect the tree from mold, fungi, blue stains and even insects. Primer is a colorless coating that can penetrate deep into wood. It gives the wood elasticity and prevents it from drying out. After the primer coat, a colored finish can be applied. The highest quality and trusted manufacturers of decorative and protective compounds are Belinka, Tikkurila, Pinotex and Aquatex. These manufacturers offer a wide range of colors that will satisfy any taste. The decorative protective composition is applied with a brush with mixed bristles. Drying is required between coats, which should last at least 12-24 hours.
Choosing paints for concrete floors
There are four types of paints used to paint concrete floors: acrylic, epoxy, acrylic-silicone and alkyd-urethane.

Acrylic
Such paints are resistant to water and temperature. Paint for concrete floors makes the surface matte, semi-matte and glossy.
To dissolve acrylic paints, use plain water and acrylic thinners. The painted surface is ready for use after 48 hours.
This type of floor paint should not be used on concrete floors that have previously been painted with epoxy or polyurethane products.
Epoxy
Two-component paint compositions are mixed with a construction mixer before starting the painting process.
Before using paints, the floor is treated with a primer - an epoxy compound diluted 25% with ordinary water.
Complete drying is achieved after 7 days, but the surface can be used within 24 hours. Concrete floor paint has a limited range of colors.
Acrylic-silicone
The surface is painted with such compositions in several layers with an interval of 4 hours. Plain water is used to dilute paints. The disadvantages of the material include rapid fading and a small palette of colors.
Alkyd-urethane
The materials are distinguished by a high degree of concealment and require painting the floor in several layers. Concrete paint is resistant to rapid abrasion and temperature conditions. White alcohol (15%) is used for dilution.
The paints are distinguished by a wide palette of colors and an attractive gloss of the painted surface.
Tips for painting wood floors
The most important step in painting wood bath floors is preparing the surfaces. It is carried out as follows:
- The floor is cleaned of dust, debris and dirt with mild detergents or light abrasives;
- Next, all unevenness, roughness, and problem areas are eliminated;
- If there is an old coating, it is dismantled;
- The wooden surface is primed. After drying, the cracks are putty;
- The surface is puttied in two layers using a wide plastic spatula;
- The completely dried putty layer is carefully sanded with sandpaper;
- At the end, the surface is cleared of debris and additionally primed.
The preparatory stage can be considered completed and work on painting the wooden floor can begin.
The surface is painted starting from the baseboards. The coloring composition is applied in several layers, observing intervals between each of them for drying. After the top layer has completely dried, the floor is washed with warm water.
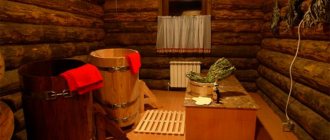
How to treat a wooden bath
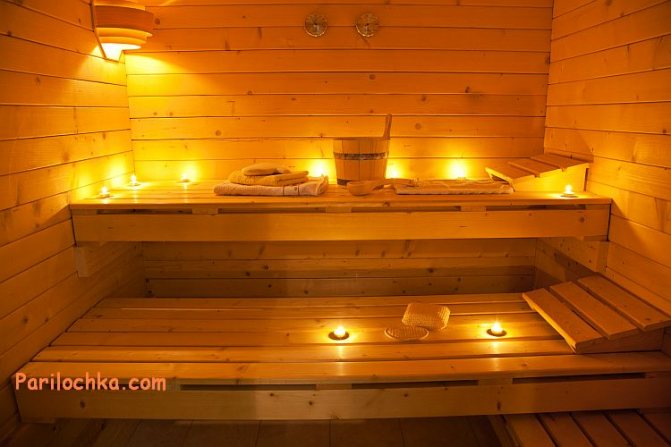
A bathhouse made from a wooden frame most closely matches the spirit of the Russian people. Such a room retains heat and creates a unique atmosphere of comfort and coziness. In order for such a bathhouse to please its owners for a long time, it is important not only to build it correctly, but also to protect it from the outside. It’s worth sorting out the questions of how to cover a log house and whether it needs to be done at all.
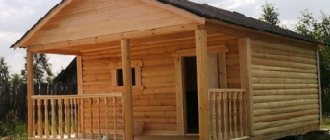
Figure 1 – A beautiful bathhouse will warm not only the body, but also the soul
There are several points that should convince you that painting the outside of the bathhouse is simply mandatory to prolong its life.
- To protect against temperature changes that occur inside.
- Protection from aggressive environmental factors: sun, precipitation, wind, frost.
- To protect against the penetration of biological microorganisms that lead to rapid deterioration of wood.
- To give the building a more aesthetic appearance.
We invite you to familiarize yourself with the Register of heat exchanger on a bath pipe
Before painting, several stages of preparatory work should be carried out, namely the application of a primer, antiseptic and fire retardant. Some modern paints and varnishes contain all the previously mentioned substances in their composition. But experts advise that treatment, especially with a primer, should be carried out in a separate step.
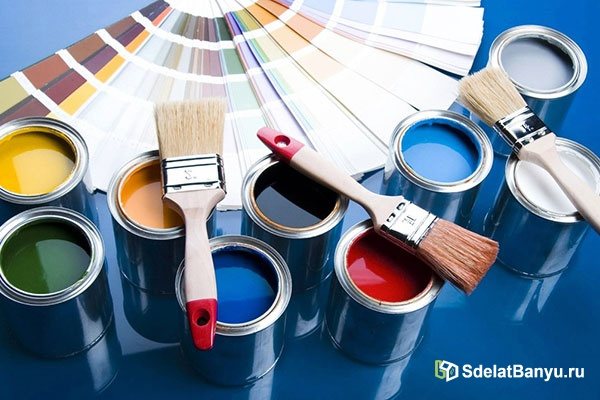
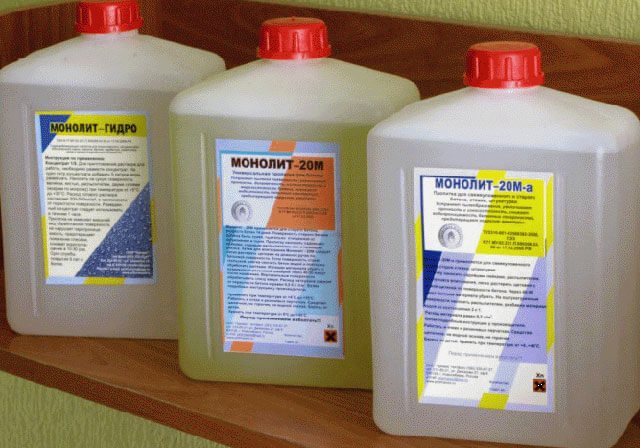
When performing painting work, you can use several types of materials, each of which has its own advantages and disadvantages.
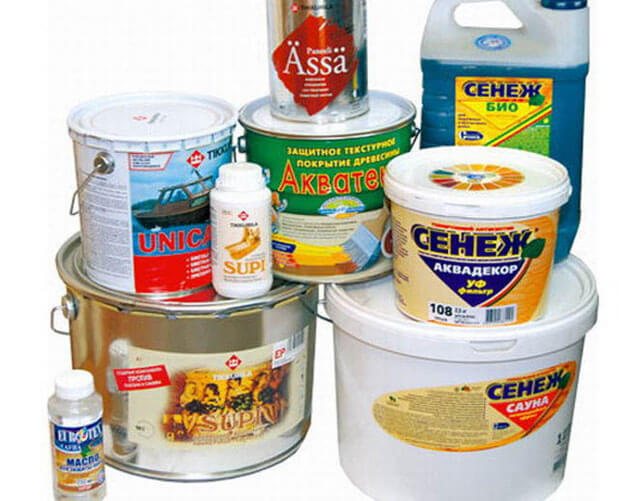
Figure 2 – Large quantities of wood coatings
- Oil paints. This coating option is the most attractive due to its low cost. But they are short-lived and impenetrable to steam, which can negatively affect the log house. Also, this material is very toxic in its composition.
- Alkyd paints. Such paints will help create a good protective film, but they are quite toxic and do not last very long.
- Acrylic facade paints for wood. A very attractive option when used for wooden log houses. This paint does not contain solvents or other toxins. Its advantages are also durability and strength. A wide range of colors will allow you to create a unique design. Such coatings are vapor permeable and do not lose their original brightness.
- Aqua varnishes based on acrylate resins and dispersions. A very attractive option in terms of external beauty and safety. But they show less strength and durability compared to paints.
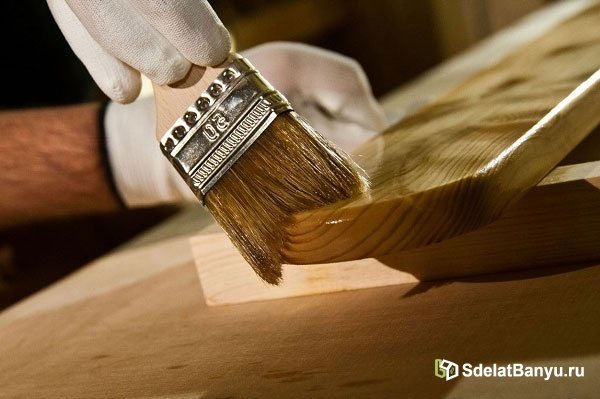
- Transparent varnishes, glazing impregnations and oil-waxes. This material does not have very high protection rates, but helps the wood enhance its natural beauty.
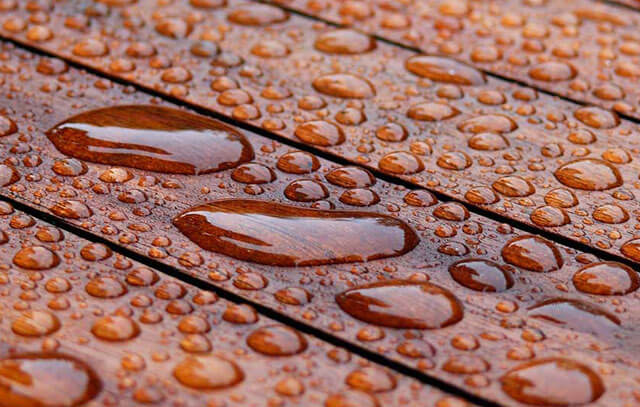
Figure 3 – Treatment of a wooden frame with a varnished protective coating
To paint a wooden bathhouse, you should not use paint and varnish products that are intended for other purposes, for example, metal paints or electrically conductive coatings. Despite their high quality, in the case of wood they will not give the required result.
What to choose?
When choosing products for treating wood outside, you should be guided by the following expert advice:
- When choosing an antiseptic, you should choose compounds that have good permeability into wood. This characteristic is always indicated in the annotation for the composition. To treat the outside of a log house, you should choose an antiseptic that can protect 1/3 of the wood.
- Environmental friendliness. It is worth remembering that when making a wooden log house, the goal was to create a natural room, so there is no place for chemicals even in the exterior decoration. It is important to choose products that have safety labels on them.
- External attractiveness. When finishing the outside, coatings with glossy components will look most attractive: varnish, acrylic or oil compounds.
- Safety. It is best to choose coating products that contain flame retardants (fire retardant chemicals). This will provide the building with even greater fire safety.
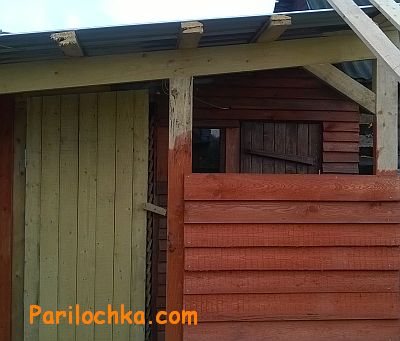
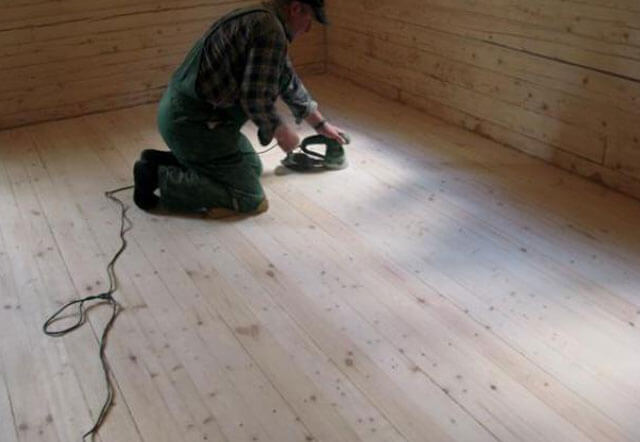
Figure 4 – Painting a wooden frame with alkyd paints
Work order
As it has already become clear, the main goal when choosing a product for painting the outside of a log house is to protect it from various types of influence. But to ensure 100% protection, it is not enough to buy a high-quality coating; it is also important to carry out the painting work correctly. Here are some valuable tips that should help.
It's better to paint it yourself. This will not only save the family budget, but will also provide benefits in the quality of painting. It is important for the construction team to deliver a beautiful object visually, so they will not worry about the thorough processing of each element. Namely, small unpainted places can later cause the appearance of rot, fungus and other troubles.
Proper preparation of a log house for painting. Before painting, it is worth preparing the log house for this stage of finishing work. First, the surface of the wood is cleaned of dust and dirt. It is best to wash the wood and then let it dry. It wouldn't hurt to do some sanding. After this, several layers are applied to the surface of the wood:
- primer;
- antiseptic;
- fire protection agent.
Figure 5 – Painting a wooden frame with sealant treatment
It is best to paint the ends of the logs with lime or a similar composition. This is worth doing so that steam can move along the log along the fibers, as when a tree grows. This is much better than across.
There is no need to leave gaps when painting. To do this, add a little colored tint to the colorless antiseptic. After applying it, let it dry thoroughly. This way you can avoid the presence of even the smallest unpainted areas, which can subsequently lead to quite serious problems.
In conclusion, it should be advised that when choosing, you should focus on the most beautiful options, because a bathhouse should please not only the soul, but the eye.
Features of painting concrete floors
The practicality and reliability of a painted concrete base depends on the quality of the surface pre-treatment, so it is important to know how to paint a concrete floor correctly.
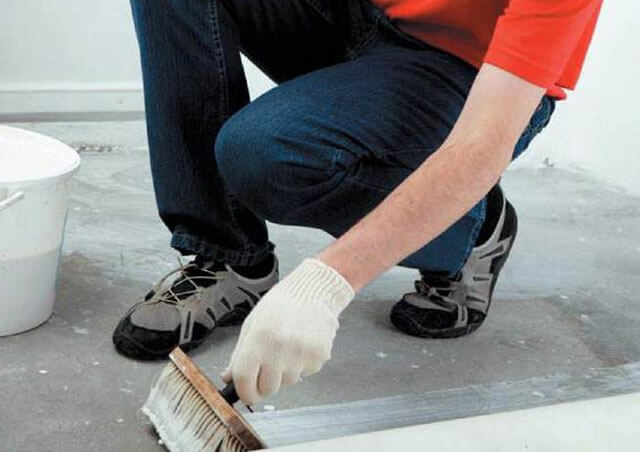
Pre-treatment of a concrete floor is carried out in three stages:
- Removing dust. At this stage, the surface is thoroughly cleaned of dust, unevenness and dirt. Next, grinding is performed to increase the adhesion of concrete with the coloring composition;
- Hardening. Next, the surface is treated with special impregnations - toppings, which include quartz, cement, plasticizers and dyes. Provide surfaces with reliable protection from abrasion, mechanical damage and dust formation;
- Primer. At the last stage, priming is performed with special protective compounds for concrete.
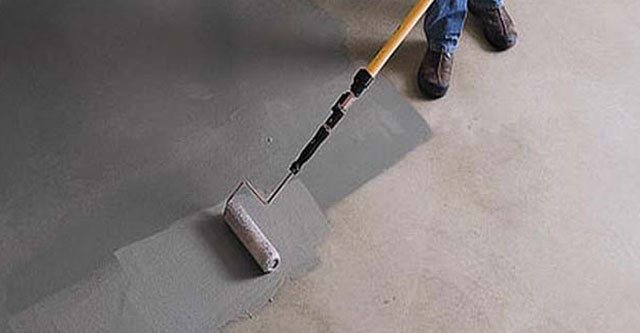
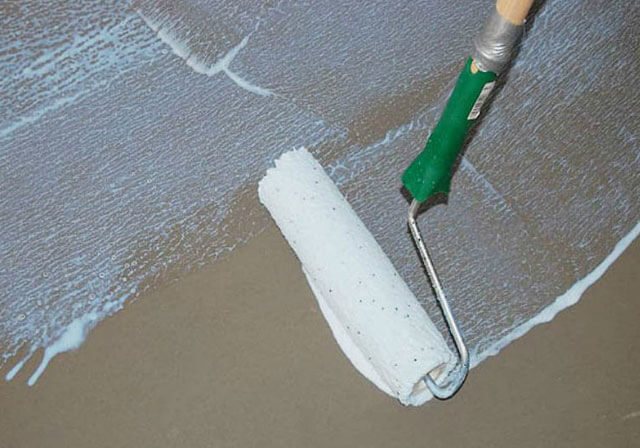
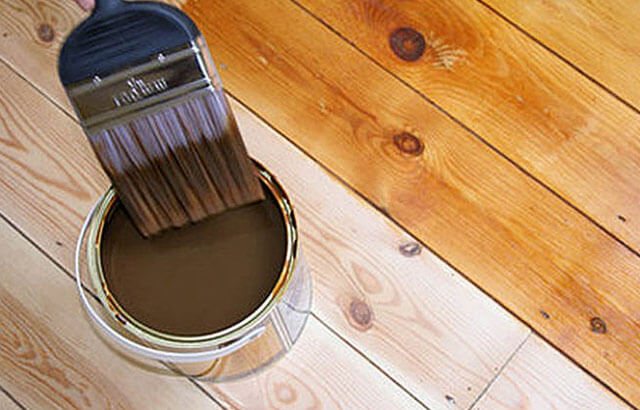
Next, the main work on painting the concrete surface is carried out. To do this, the selected impregnation is poured onto the surface and evenly distributed around the entire perimeter with a roller.
The treated floor must be left for 3-4 hours to dry. Re-paint with the remaining volume of the coloring composition and leave until completely dry for 96 hours.
In order for wooden and concrete floors in a bathhouse to maintain their performance characteristics throughout their entire service life, they need timely processing and proper painting.
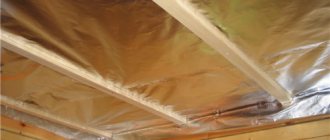
The construction of a bathhouse is a rather complex process, consisting of many important stages, for example, the strength of the entire structure will depend on the reliability of the foundation, and the amount of fuel consumed to warm up the bathhouse will depend on the quality of the insulation. This happens with another, no less important stage - floor treatment.
The treatment determines such parameters as the service life of the floor, the comfort of the room and its hygiene. It’s worth saying right away that concrete floors also need treatment, which beginners often forget about. In this article we will tell you how to treat the floor in a bathhouse, as well as how to do such work yourself, saving quite a lot of money.
How to treat the outside of a log bathhouse: recommendations from builders
***We again appeal to our readers with an invitation to share their own experience, which will be valuable for other bathhouse owners. Agree that it would be great if useful information was available to everyone.
- For the exterior walls of the log house, it is advisable to choose dark colors - this will help protect it from exposure to sunlight. On the street side, it is not at all necessary to use water-based paint; you can also use it containing alkyd resins (based on a chemical solvent).
- It is better not to treat the steam room with glazes and paints, because this room has the highest temperature and humidity. For this purpose, you can use water-resistant, heat-resistant acrylic varnishes based on water. Their use will protect and emphasize the structure of the wood, avoid a strong odor, and make it possible to touch the walls without the risk of getting burned.
- In the washing room, it should be taken into account that here all surfaces often come into contact with hot water and steam. This makes them vulnerable to rot and insect pests. Before painting, this room must be treated as thoroughly as possible with an antiseptic.
- After impregnation, it is better to cover the remaining rooms inside the log house with varnishes or paints based on water, and not on a chemical basis.
- When choosing a protective impregnation, it is better to give preference to one that contains insect repellents.
- When painting outside walls, remember that the ends absorb paint more strongly. They can and should be applied 1-2 more layers.
- Chemical compounds must be applied only to previously cleaned and dry surfaces.
- Before you start painting the floor, it should be treated in several layers with moisture-proof and antibacterial impregnations.
These simple recommendations will help you easily cope with cosmetic repairs and significantly extend the life of the structure. If you take care of your bathhouse in a timely manner and competently make minor repairs, it will please the owners for a long time.
When painting the inside of a bathhouse, you should not skimp on finishing material, since it not only allows you to get the desired interior, but also protects the structure itself from negative factors, such as fluctuations in temperature and humidity. It is optimal to apply one coat of paint, wait for it to dry, and then repaint.
The end surfaces need to be painted inside a little more thoroughly - up to 3-4 layers, since they absorb paint very intensively. If, after applying the first layer of paint, visible irregularities, gaps or roughness appear on the surface, they must be removed first by sanding and then by applying 2-4 layers of paint.
The log house and lining can be coated with waterproof varnish
So, painting the walls from the inside in a bathhouse is an extremely important process that allows you to achieve not only pleasant aesthetic results, but also significantly extend the life of the room itself. Protected wood will slow down the processes of destruction of its structure, which will avoid repairs for a long time.
Quite often, baths are made of wooden beams or logs in the style of a log house. This way the structure gets a good appearance and at the same time retains heat well due to the wood.
However, this material is susceptible to environmental influences, which greatly reduces its service life, which means you need to choose how to cover the exterior of the bathhouse frame in order to protect it.
Amateur photo of applying a special composition with an antiseptic to the surface of a log house
Do I need to treat the floor in the bathhouse?
Every amateur asks this question, but a professional will undoubtedly answer: “Yes,” but such an answer is not enough, because in order to choose the right impregnation, you need to become familiar with its purpose.
First of all, impregnation is applied as additional protection of wood from moisture. Impregnation clogs the pores, preventing the processes of rotting and corrosion. Special impregnation protects not only the finishing coating, but also its base, for example, joists. It is also worth noting that impregnations are perfectly combined with other materials for processing, for example, with a primer, which is applied before painting the floor in the dressing room or rest room.
A floor treated with impregnation will be distinguished not only by its durability, but also by its appearance, because many processing agents contain coloring components that emphasize the natural beauty of wood. As you may have noticed, impregnation is an important part of the construction work complex, so it is important to determine for yourself what to impregnate the floors in the bathhouse with.
What types of impregnations are there?
When you come to a hardware store, you will be faced with a difficult choice of your impregnation, because on the shelves there will be a variety of protective equipment, for example, you can find bath floor oil, which is used to protect the floor from moisture, and next to it there will be an antibacterial agent. Both of these impregnations will be extremely important for the floor in the bathhouse, but sometimes you want to save money.
Floor impregnations are divided as follows:
- Moisture protection products;
- Antibacterial;
- Compositions that protect wood from fire;
- Brighteners and darkeners.
Let's talk in detail about each of these groups.
Moisture protection products
penetrate into the natural pores of wood, after which they dry and reliably clog them. The degree of such protection depends entirely on how deeply the protective composition penetrates. The penetration rate of the solution is usually indicated on the label. It is also worth remembering that not every product is suitable for your wood, so always check with the seller whether such impregnation can be used for your bath.
Antibacterial protection
It is extremely important for a bath, because in an environment with high humidity, ideal conditions are created for the proliferation of various bacteria and pathogenic microorganisms. First of all, wood needs such protection, because under the influence of such bacteria it begins to rot. Bacteria can also harm humans, but the chance of this is extremely low. This impregnation is the ideal answer to the question of how to impregnate the floors in a bathhouse from rotting, because they provide reliable protection and are also ideal for wet rooms.
Fireproof impregnations
They are rarely used in bathhouses, but they are worth talking about, because they are a good impregnation for wood located near the stove. This impregnation creates a non-flammable layer on the outside and in the pores of the wood, but does not provide complete protection against fire, so never forget about other precautions.
The last group of darkening agents is purely decorative, but many of them contain components that protect wood from moisture and microorganisms. Darkening agents are used to impart some shade to natural wood.
Bleaches
rarely classified as impregnations, but they are also worth knowing about. During use, the wood in the bathhouse begins to darken. Some bathhouse owners replace the wood completely, but you can try bleaching it with a special product. More often it is used on darkened spots, and not on the entire surface of the floor.
It is also worth mentioning how to treat logs in a bathhouse from rotting. Joists require a more careful approach, but these impregnations will also cope with their protection.
Impregnations and oils for the steam room or how to protect the steam room
Using a sprayer, you can quickly cover a wooden wall.
Having completed the process of interior decoration of premises with lining, you must first decide how to cover the lining in the steam room.
After all, it is here, in extreme conditions of high temperature and humidity, that the tree is most intensively exposed to harmful influences.
Color palette - to cover in the desired color
And, despite the widely held opinion that there is no need to cover the wood in the steam room with anything, prudent owners have always tried to ensure wooden walls have a long and effective lifespan.
Previously, natural remedies were used for this in the form of coating with wax or various oils: linseed, hemp, etc.
Of course, the Finns are recognized as the greatest experts in this field, who, along with the Russians, are considered the main experts and connoisseurs of the bathhouse.
As an example, here we can name well-known products from Tikkurila:
- Supi Saunasuoja is a water-based acrylic impregnation that protects against blue stains and mold. Available both colorless and tinted to obtain different shades. When choosing a color, it is better to do a test painting of a small area to evaluate the resulting shade. Apply to the surfaces of walls and ceilings with a brush or spray in two layers with an interval of 2–3 hours. If necessary, dissolve with water. Not recommended for shelves and seats. Provides coverage - 8–12 sq.m/l. Price - 310 rub./l.
- Supi Laudesuoja is an oil impregnation for benches and seats that creates a water- and dirt-proof film. Apply with a brush in one layer. Covers - 8–15 sq.m/l. Price - 1640 rub./l. During operation, the bath can be reapplied after cleaning contaminated surfaces with the following product:
- Supi Saunapesu, which disinfects, whitens, dissolves lime deposits.
1 2
- Usadba U-409 is a protective impregnation for baths and saunas, protecting against dirt, stains and bio flora. The price of one package of 2.5 kg is 390 rubles.
- Eurotex Sauna - protective oil for coating wooden shelves in saunas. Cost - 480 rub./l. Average coverage - 12 sq. m/l.
Processing the lining before installation - you need to cover it in two layers.
When deciding how to cover the lining in a bathhouse, the main thing to remember is that ordinary varnishes and paints are absolutely not suitable here.
For these purposes, there are special heat-resistant and water-resistant water-based acrylic varnishes that create a decorative polymer coating that effectively protects the wood from all harmful influences.
Evrotex Sauna is a colorless acrylic semi-matte varnish with wax and antiseptic, which creates effective protection for wood when exposed to high temperatures up to 150 C. Apply in two layers with a brush or spray with an interval of 30 minutes. Average coverage - 12 sq.m/l. The cost of packaging 2.5 kg is 490 rubles.
To prevent fungi, you need to cover with this mixture.
SENEZH SAUNA is an antiseptic that serves to protect wooden surfaces in baths and saunas from fungi and wood-boring insects in conditions of high humidity and temperature.
It also provides hygienic antimicrobial and infection protection.
Apply 2-3 layers with a brush, roller or spray with an interval of 60 minutes. Covers an average of 10–12 square meters. m/l. The price of a 2.5 kg package is 730 rubles.
We suggest that you familiarize yourself with Isopan vapor barrier which side should be laid to the insulation
Dulux Celco Sauna is a water-based thermal and moisture-proof semi-matte varnish, used at temperatures up to 120 C.
Does not fade and has no odor. In addition to wood, it can also be used for mineral surfaces such as stone, brick, concrete.
Apply with a brush, roller or spray in two layers with an interval of 2 hours. Coverage - up to 18 sq. m/l. Cost - 330 rubles/l.
The work of applying protective and decorative coatings to the internal surfaces of a bathhouse is quite within the capabilities of a home craftsman who knows how to hold painting tools in his hands.
Building a bathhouse is a complex process that includes many different tasks. The basis of the bathhouse is a log house, which is additionally lined inside. The lining most often used is lining made from alder, aspen or spruce, which have high strength and resistance to steam and moisture.
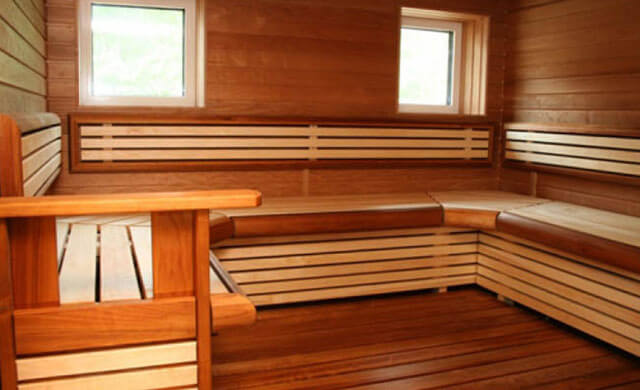
If you built a sauna using the right technologies, you probably insulated the steam room from external cold as well as moisture. After taking care of the wood from the outside, do not forget to treat the internal components of the steam room, because this will increase the strength and durability of any structure in the bathhouse.
The center of the steam room is the shelf where visitors spend most of their time, so it must be durable and safe. Despite the fact that wood is a material that is not resistant to moisture, it is usually used to build a shelf, which, if done incorrectly, will last no more than a year.
To achieve strength and long service life of the shelf, it is necessary to choose the right wood, as well as treat the finished product with a suitable impregnation, which can be made on the basis of natural or artificial components.
First we should talk about the choice of wood. The following types of wood are excellent for structures inside the steam room:
- Alder is an ideal material for a steam room, but it is difficult to find on the market;
- Linden is an inexpensive but high-quality material with a soft texture, great for steam rooms;
- Aspen is also an excellent tree for a bathhouse with high moisture resistance (more details: “Which aspen is best for a bathhouse - planning a log house”);
- Oak, ash, abash sedela, ofram and miranti are expensive wood species that are rarely used for finishing baths.
There are cheaper alternatives, such as pine or spruce, but they have a number of disadvantages and the savings are small, so it is recommended to use the above wood, which has good moisture resistance and is easy to process.
Next, it’s worth talking about treating the shelf with special compounds. Before treating the shelves in the bathhouse and sauna, you should think about whether it is worth doing. It is impossible to give a definite answer, so we will help you resolve this issue by providing some facts:
- Long-term contact of human skin with poor-quality impregnation can lead to unpleasant consequences, for example, a rash;
- If the steam room has excellent ventilation, then the shelves can simply be sanded;
- An untreated shelf can quickly turn black and develop mold on its surface.
Everything that has been said about the shelves and their processing also applies to other elements of the bathhouse, for example, doors, benches and walls.
All products used to process wood inside a bathhouse are divided into two groups: impregnating and coating agents. They are also often divided into colored and colorless, for example, wax, varnish and some impregnations.
Less common are bleaching agents, which are used in cases where the shelves have already darkened. Next, we’ll talk in detail about specific types of processing agents.
Varnishing
When thinking about how to cover the shelves in a bathhouse, most often what comes to mind is varnish, which is classified as a coating agent. Varnish is in demand due to its moisture resistance, but it is not always the best product for a bath. The problem is that at high temperatures, the varnish begins to release toxins and crack, after which fragments of the surface will stick to the body, and water will again get onto the wood.
If you decide to use varnish, then you should apply special acrylic varnishes from companies: Tikkurila, Belinka or Supi Saunasoja. Such varnishes for steam rooms are distinguished by a natural base that does not emit harmful substances.
The frozen surface perfectly withstands temperature changes. Using varnish, you do not have to additionally apply antiseptics, because they are already included in the varnish. When deciding how to treat the doors in the bathhouse, you can safely use a special acrylic varnish.
A wooden log house retains its performance qualities for a long time if the beams are promptly protected from adverse factors. Let's consider the main reasons for damage to bathhouse walls and ways to protect the building.
- Application Features
- To protect the log house from destructive factors, you should not use all the preparations at once and indiscriminately. Each product has its own purpose; if used incorrectly, the condition of the walls can worsen.
Modern preparations are able to protect the log bathhouse from all kinds of natural and physical influences:
- UV protection. Always protect the tree from the sun's ultraviolet rays. The sun's rays burn out natural resins in logs and destroy the structure of the wood. The material ages and becomes gray. To treat a log bathhouse, use compounds that create an ultraviolet filter. Containers with such impregnation are marked with the “UV” symbol.
- Fireproof impregnation. To prevent the wooden structure from burning, the logs are impregnated with special substances - fire retardants. After treatment, the wood will not ignite from a cigarette butt or spark. Cans of fire retardants are marked with a picture of fire.
- Moisture protection. Water is considered the main enemy of wood. When exposed to water or snow, wood rots, especially the lower parts of the walls. To protect the logs, they are impregnated with special compounds that protect the walls for 10 years.
- Antiseptic impregnation. Wood can be destroyed by molds, mosses and other microorganisms. It is very difficult to remove fungi, and they will ruin the appearance of the log forever. Microorganisms are disinfected with antiseptic impregnations. Products containing beeswax have proven well.
- Protection from insects. Wood-boring beetles, bark beetles and weevils infest logs, which can turn a wooden structure into dust. Biocides are used to kill insects. The product can be recognized by the image of a beetle on the label.
How effective are impregnations?
Impregnations will significantly reduce the chance of rot, but will not remove it completely. How effective impregnations are depends entirely on the manufacturer and the components he used.
When soaking a wooden floor in a bathhouse, do not forget about natural prevention:
- Ventilate the room after each visit to the bathhouse;
- Clean the area to minimize the chance of unwanted microorganisms;
- Do not leave the sauna without heating for a long time.
Wood floor treatment
Having chosen what to treat the wooden floor in the bathhouse with, you can get to work. This treatment is quite simple to perform, and following our instructions, you will create the perfect protection for your floor with your own hands.
Impregnation of a wooden floor in a bathhouse:
- Before treating the floors in the bathhouse against rotting, you must carefully sand the surface to be treated. Get rid of roughness and unevenness on the floorboards using a sander. You can perform this step manually using sandpaper, but you will spend a huge amount of effort and time.
- Clean the floor from any wood dust using a vacuum cleaner or broom. Next, wipe the floor with a damp cloth to remove any remaining dirt.
- Before treating the floors in a bathhouse in a sink or other room, wait until the wood is completely dry, after which you can safely begin processing. We recommend applying the composition with a roller, because processing is much easier and faster. You will also have to purchase a brush, because in hard-to-reach places, for example, corners, you cannot do without it.
Why is it necessary to treat concrete?
Impregnation has a strengthening effect on a new concrete floor, but it can also be used to treat an old floor with some defects to restore its original appearance and properties.
Speaking in more detail about its effect on concrete, we can highlight the following:
- Impregnation will increase the wear resistance: the floor will better withstand temperature changes, moisture, and mechanical stress, such as impacts;
- The concrete floor constantly crumbles, creating dust. Impregnation will help get rid of this problem by binding small particles of concrete;
- The treatment will also significantly increase the service life of a new or slightly worn floor;
- An untreated concrete floor will need repair, so treating it is also a money saver.
Types of processing agents for concrete
First of all, impregnating products for concrete floors are divided into organic and inorganic.
Organic impregnations can be made based on epoxy, acrylic or polyurethane. The most popular are impregnations made on the basis of polyurethane, because they are sold at a fairly low price, and their performance qualities often exceed those of competing bases.
After you have applied the composition, it will begin to penetrate the pores of the concrete, reliably bonding its entire surface. This way you will ensure reliable moisture resistance and also get rid of concrete dust.
Inorganic impregnations are less popular. Their method of action is quite simple: they convert soluble materials into insoluble ones, significantly increasing their resistance to various solvents, for example, acetone.
This impregnation for bath floors also has a classification according to purpose:
- Strengthening;
- Dust removal;
- Moisture-repellent.
Strengthening agents are absorbed into the upper layers of concrete and harden, as a result of which the floor acquires increased resistance to various mechanical influences.
Dust-removing impregnations protect concrete from abrasion. They additionally bind the surface of the concrete floor, which gives it significant strength. This bath floor treatment is ideal for painting. To give this treatment an extra boost, rub fine sand or silica powder into the concrete floor before applying the treatment. As a result, you will get a durable floor on which you will not slip.
Water-repellent impregnation for bathhouse floors is one of the best solutions. First of all, it is worth noting the low price and good protection of concrete floors. Such impregnations simply clog the pores of the concrete, preventing moisture from penetrating into the thickness of the floor.
This way you prevent not only moisture from entering, but also various chemicals that can lead to the formation of efflorescence. Harmful microorganisms will also not be able to enter the concrete and destroy it. We recommend using two-component water-repellent impregnations, which are widely available on the Russian market.
Be careful! Such impregnations enter into a chemical reaction with the concrete itself, so it is important to know whether your concrete is suitable for them or not. If you don’t know what the filling in your bath consists of, then you can limit yourself to a simple experiment.
Apply the impregnation to a small area of concrete, wait for it to dry and look at the result. If the concrete has not crumbled or darkened, and the impregnation is in a strong, uniform layer, then you can safely begin treating the entire floor.
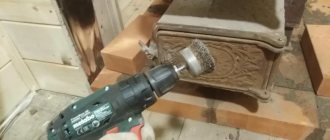
How to paint a stove in a bathhouse - choosing the right paint
In bathhouses, a brick oven is most often found. Metal products are also popular due to their lower cost. You can buy a ready-made design or make it yourself. Any sauna stove needs painting. And of course the question arises of how to paint the stove in the bathhouse, as well as the hot water tank.
Before painting a metal sauna stove, you need to choose a paint, and for this you need to take into account some important factors.
When choosing paint, you should take into account the fact that the surface to be painted will become very hot. Therefore, standard options will not work here. Ordinary paints will not stick to hot metal; they will peel off or burn.
Another point that you should pay attention to when choosing paint for an iron sauna stove: any type of metal expands when heated. Therefore, the material with the lowest value of this indicator is selected for the furnace. There is no metal with an expansion coefficient equal to zero. Accordingly, there is a high probability that the applied paint will crack.
The next factor that should be taken into account when choosing how to paint a brick stove in a bathhouse is the formation of a large amount of steam in the bathhouse. As a result of increased humidity, the paint begins to peel off.
The main task of paint is to prevent the appearance of traces of corrosion on the surface. The material from which the sauna stove is made, even if it is of the highest quality, will show the effects of negative factors after some time. Hot water tanks are the most susceptible to corrosion, and it is almost impossible to prevent this, since rust forms on the inside of the walls.
A painted sauna stove will look much more beautiful. In addition, an object made entirely of metal does not simply fit perfectly into the overall interior of the room. Ready-made sauna stoves are sold in painted and unpainted form. The last option should be covered with paint yourself.
You should be very careful when choosing what to paint an iron stove in a bathhouse with, since the paint must be heat-resistant and withstand high humidity. The basis of special paints is silicone or other substances containing silicon.
When heated to 150°C, polymerization occurs, as a result of which the paint turns into a durable film that can withstand any external influences and prevent the formation of corrosion. Before painting a metal stove in a bathhouse, you need to choose the appropriate composition.
The most popular compositions include:
- Paint KO-8101 is the most affordable. It can last the surface for about 15 years.
- Organosilicon varnish KO-85 is resistant to high humidity, prevents the formation of rust, but can withstand no more than 250°C.
- KO-8111 enamel meets environmental requirements, provides the surface with all the necessary protection, and also has a large selection of colors.
- Heat-resistant paint “Certa”, which has another name “OS-82-03T”.
- KO-8222 enamel has the highest heat resistance, up to 800°C, and therefore its cost is quite high.
We invite you to read: Give the walls an aesthetic appearance
In addition to the sauna stove, the hot water tank also needs painting. Special treatment should be carried out inside the container.
To do this, you can use the following methods that have been known for quite some time:
- Aluminum powder is applied to the inner walls to protect against rust. This method is environmentally friendly.
- Lime and cement are mixed in equal proportions. The tank is treated from the inside with this mixture and left to dry.
- The inside of the water tank is treated with red lead. You can buy it in the store.
There are special products that completely eliminate the problem of rust.
Such means include:
- Anti-corrosion composition TsVES No. 2. Manufactured using zinc powder and ethyl silicate.
- Heat-resistant "Certa". In bath conditions it can last about 7 years.
- Ecocin enamel, which contains zinc. Creates protection against mechanical damage.
- Enamel KO-422. Coating the surface with such compositions is called “cold galvanizing.”
You don’t have to think about how to paint an iron stove in a bathhouse, since not only paint can protect it. The method of metal bluing, which involves creating a chemical reaction, is widely used.
First the surface must be cleaned. To do this, use a 5% sulfuric acid solution, which should be applied with a brush. Then the laundry soap is diluted in water in a ratio of 50 g per 1 liter. This solution must be used to wash off the previously applied sulfuric acid. Next, the oven is heated to 150-180°C and treated with caustic soda diluted in water in a ratio of 50 ml per 1 liter. The composition should be applied only by spraying to avoid splashing.
Conclusion
In order for the stove to serve for a long time, it must be well treated, and for this you should make the right choice of what to paint the stove in the bathhouse with. The solution to this issue should be taken with full responsibility and there is no need to save money, because the stove is the main component of the bathhouse.
Applying impregnation for concrete floors
Treating a concrete floor, like treating a bathhouse floor from rotting, does not require any skills. Following our instructions, even a beginner can easily cope with this task.
We impregnate the concrete floor:
- Before starting processing, it is necessary to carefully prepare the surface. Get rid of various irregularities with sandpaper. If you are going to restore an old floor, then carefully tap it into the voids and seal all the cracks. After you have made a smooth concrete surface, remove large debris and vacuum; you can also use a damp cloth, but this is not necessary.
- Having prepared the concrete floor, you can begin impregnating it. Strengthening compounds are applied in two different ways. You can apply the impregnation with a roller to the floor surface, or pour it onto the floor and distribute it evenly with the same roller.
- Next, you need to carefully read the instructions, although it is better to do this before starting work. First of all, pay attention to how long it takes to dry the first layer. Once you know the time, wait for it. After the primary treatment has dried, you need to start pouring the next layer, however, a slight difficulty arises here: you must dilute the impregnation with a small amount of water, which the manufacturer usually indicates on the packaging. Apply the second layer in the same way as the previous one, then wait 20-30 minutes (the exact time is indicated by the manufacturer). When the layer has dried, remove excess impregnation with a squeegee and wash the floor. This concludes the processing of the concrete floor.
Conclusion
Don’t be afraid to start this work yourself, because now you know how to treat the logs in the bathhouse, as well as the floor laid on them. In addition, you can easily handle concrete processing, saving a lot of money. Also remember that work done yourself can sometimes turn out better than the work of a professional.
Many people dream of equipping their own bathhouse at their summer cottage, however, it is worth understanding that this process includes not only the selection of a plan and the construction of a building. An equally important issue during the construction of a sauna is the competent selection of floor coverings for saunas. This, as well as how to paint the floors in the bathhouse, will be discussed later in the article.
How to paint a brick stove
There are many options for finishing the outside of stoves:
- Plastering
- Painting
- Application of relief and regular patterns
- Tiling
Today we will talk about how to paint a stove so that it is beautiful and, most importantly, safe. Reheating - results Iron screed - a quick “cure” Advice: carry out plastering on a well-heated stove. Chalk painting - key methods and disadvantages As soon as the plaster dries, The oven can be coated with paint.
To the question of how to paint a brick stove with external plaster, we answer: Chalk paint is prepared like this: Lime - proportions and methods For painting with lime, the solution is prepared like this: A stove made of brick - PAINT Correctly Sometimes there is a need to change the appearance of a stove trimmed with brick.
What to do here? If you have a question about how you can paint a brick stove without plaster, we will try to help you. Paints and methods of use Paint for bricks - we prepare it ourselves If there is no suitable paint in stock, you can prepare it yourself. In order to get the color you need, do this: PAINTED OVEN - PAINT With your own hands It is prepared like this: Proportions of paint for painting:
- Water – 1 liter
- Gouache - until the desired tone is obtained
- egg white – 1 egg
METAL ALSO NEEDS CARE We paint, or rather “chemically” - blued the metal. Pure metal is a wonderful result. You can remove oxides from metal using the following compounds: Tip: you can apply caustic soda to a hot surface by spraying. BLUEING IS A COLD METHOD Another way to blue metal. Blueing has an attractive brown color: PREPARING PASTE FOR BLUEING The paste is prepared as follows:
- 50% olive oil
- 50% antimony trichloride
- Mix together and the paste is ready.
Hot or cold? – Size matters Smaller items can be heat blued in minutes. Paints – certification comes first
- durability (after any painting you want the result to please you for as long as possible)
These two solutions are often practiced when the question arises: how to paint a brick oven. The key word here is “brick”. The choice of coloring matter will also be appropriate. The paint must have good penetration. Further differences will affect the room in which the object is located. If in a bathhouse, then the relevance of moisture resistance and invulnerability to steam increases; if in a living room, beauty is important; in garages and industrial premises, strength is important.Stoves in garages and other non-residential premises are often subject to mechanical stress - accidental impacts from handling tools, etc. Accordingly, the paint layer must adhere as tightly as possible.
Perhaps these are the most ancient and life-tested methods.
Advantages:
- financial inclusion;
- ease of application;
- antifungal effect (in the presence of lime).
ease of preparation of the composition;
- The following disadvantages should be noted:
- the need for multiple applications (otherwise the transparency of the top light layer against the background of the dark bottom layer is guaranteed);
Lime and chalk are absolutely not suitable for painting red brick stoves. In the absence of experience, it is quite difficult not to make a mistake with the consistency;
- zero moisture resistance (accordingly, such solutions are unacceptable for sauna stoves);
- Both lime and chalk are problematic to apply to old water-based layers. But applying the solution after plastering is an ideal option.
Useful tips from the experts
- Experts recommend:
- Focus on the thickness of thick kefir or liquid sour cream. This mixture will not spread during application;
- add 30-40 g of salt, previously dissolved in warm water.
This will increase the strength of the applied mixture; - Before starting work, if possible, remove old chalk and lime layers, thoroughly wet the base with water using a spray bottle or a wide soft brush;
- for painting, use brushes only with natural bristles, and in some cases you can use a foam roller or short-pile fur roller;
- Apply each subsequent layer on top of the previous one only after it has dried.
As for the number of layers, there should be 2-3 layers in total. Primary, main and fixing.
What are the reasons for working?
Can it be applied to brick, metal, enamel? As a rule, lime and chalk are used for painting brick substrates. For example, if you need to renovate a Russian stove in a residential building or a brick or stone structure in a country house.
Iron is sometimes also coated with lime (almost never with chalk), but the result quickly disappears - the coating literally comes off in patches within a few months after the work has been completed. It is best to work on iron substrates with special paints.
Neither lime nor chalk are categorically compatible with enameled bases - the applied solution is repelled by a too dense smooth base.
New generation factory paints
The finishing and paint materials industry offers a wide range of products. Modern technologies have given rise to a whole galaxy of highly reliable, practical and aesthetically attractive coloring mixtures. There are so many products that it is sometimes extremely difficult to justify your choice.
Paint a metal stove
When looking for paint, a lot depends on whether you will paint the potbelly stove in a bathhouse or in a dry room. Rooms with high humidity require special attention to the characteristics of steam and moisture resistance.
- The remaining requirements are the same:
- heat resistance limits from 320 to 590-600 degrees;
- degree of mechanical strength (see information about this on the packaging);
Usually the manufacturer explains what this paint is intended for - to paint a sauna stove installed in a living room or a garage potbelly stove.
- check whether the composition contains aggressive substances that, when heated, can be released into the surrounding atmosphere (for industrial premises the requirements are lower, for bathhouses and residential premises absolute safety is required);
- expiration date (see on the package);
- Guaranteed durability (also see on the packaging).
- The most common modifications of metal paints:
- organosilicate fireproof. The KO-8111 brand is very popular; it has long been known to consumers. It has proven itself well in practice - easy to apply, long lasting;
As noted above, the first thing that comes to mind is lime and chalk mortars. But they are appropriate only where there are no high requirements for the aesthetics of external design. If we are talking about a stylish interior (shabby chic, country, ethnic), the design aspect should be given serious attention.
- Use:
- transparent coatings (heat-resistant varnishing);
colored shading paints (enhancing the original color of the masonry brick - red, terracotta, yellow);
- What the market offers:
- silicon-organic enamels (usually dissolves well with turpentine, so it is easy to dilute to the desired consistency - thicker for a thick layer, thinner for a thin layer);
- oil paints with enhanced thermal protection;
- heat-resistant primers (for old surfaces) in combination with latex paint compositions;
- water emulsion (perhaps this is the only option that does not give off a toxic odor).
We invite you to familiarize yourself with the interior of the bathhouse (65 photos): a bathhouse with a Russian stove inside and the interior of the washroom, the design of the steam room and dressing room, modern design options
When purchasing, do not confuse water-based paint for ceilings and walls with modifications for stoves. For the latter, heat resistance and safety in terms of the release of toxins at high temperatures come first.
Update your microwave
If the microwave is peeling off inside, it’s better not to risk your own health and not to paint it with anything at all. No matter how harsh it may sound, once the layer of factory coating has been destroyed, it will not be possible to restore it. Any attempt to correct the damage will create a hazard for the user.
Objectively speaking, not a single manufacturer recommends repainting the inner chamber of their products if coating damage has occurred there.
- However, the market still offers a number of solutions that can be used for internal areas:
- silicone food paints (group KO-5102);
- acrylic automotive primers. Inexpensive. Packaging in aerosol cans. Popular, although safety for food purposes is questionable;
- fire-retardant paints for metal (one of the popular ones for repairing microwaves is Polistil);
- electrically conductive Zinga. Withstands heating temperatures of about 150 degrees. Included in the category of expensive painting products. Does not apply to food coloring.
General recommendations
- When choosing any paint, be wise:
- specify the composition and purpose (what can be used to paint a potbelly stove in a carpentry workshop may not be acceptable for an iron bathhouse or home brick stove);
- find out the availability of certificates (unfortunately, there are dubious products on the market made from ingredients that have not been tested for safety. Certificates largely eliminate this issue and inspire confidence in the manufacturer);
- do not forget to use the product correctly - prepare the base (clean it of dust, grease, debris) and apply the required number of layers.
Caution and rationalism in finding solutions will help you achieve your goal without harm to your health, beautifully paint your stove or fireplace, and protect the outside from damage.
Many craftsmen make sauna stoves with their own hands. Not only for the bath, however. To make the stove look presentable, it is better to paint it. Paint not only improves the appearance, but also protects the metal from splashes and reduces its contact with oxygen; oxidation occurs more slowly. Brick stoves are painted less often, especially if they are made of good brick.
But sometimes the brick starts to crumble - you were unlucky with the batch, or it overheated. Even more often, cracks occur in the masonry. They are covered with a solution, but to give a more attractive appearance, they are painted over. What is much more often needed for a brick stove is to tidy up the doors: stove casting also rusts. Heat-resistant paint is used for all these needs: for a metal or brick oven or for casting.
Types of floors in the bathhouse
For baths characterized by high humidity and sudden temperature changes, as a rule, two types of floors are used:
- Wooden flooring.
- Concrete screed.
Concrete screed is often installed in steam rooms and washrooms. Ceramic tiles are usually laid on top of such a floor, choosing non-slip, durable and intended for rooms with high humidity levels.
Alternatively, when deciding how to cover the floor in a steam room, you can choose wooden lattice panels for laying on concrete, which will protect your feet from direct contact with the cold floor (pro
Proper work with coating
When processing wooden floors, it is very important to correctly set priorities and strictly adhere to the sequence of technological processes, otherwise the floor will not only turn out to be imperfect, but will also very quickly become unusable.
In addition, when choosing what to cover wooden floors in a bathhouse with, you should not purchase materials from unverified manufacturers with questionable quality, otherwise you risk completely replacing all wooden elements.
Processing and finishing of the boardwalk in the dressing room and other rooms of the bath includes the following steps:
- Applying an antiseptic to protect against mold.
- Finishing with paints and varnishes.
Antiseptics
The main purpose of any antiseptic composition is to protect wood from rotting, mold, fiber destruction, and pest proliferation.
The operating conditions of any bath require constantly high humidity and high temperatures. All this has a detrimental effect on wood, so it is impossible to do without antiseptic treatment.
When choosing a suitable antiseptic, you should take into account that it must be intended specifically for use in baths, and also that it be produced by well-known companies on the market.
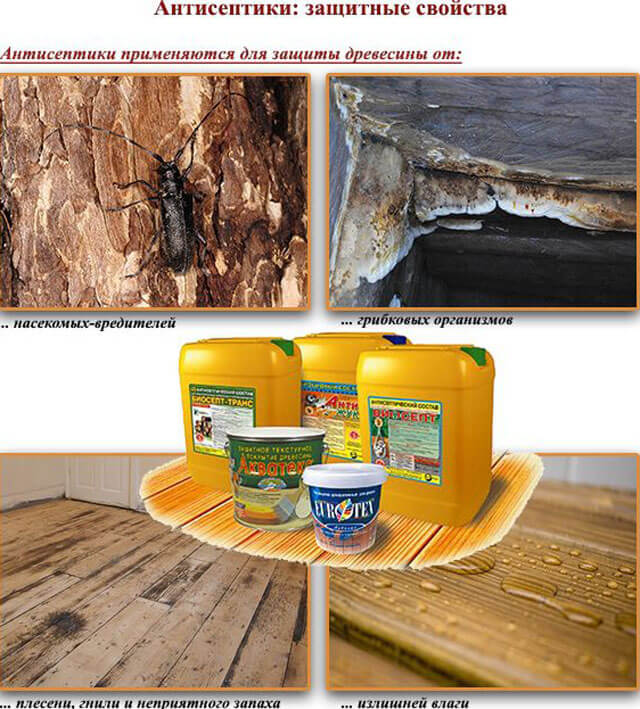
- Water soluble . This composition is optimal for treating walls in rest rooms and dressing rooms.
- With organic solvents . Surfaces treated with such impregnations acquire moisture resistance and increased strength. This composition is suitable for both interior and exterior decoration. In particular, if you don’t know how to treat the floor in a steam room, then this product is quite suitable for you.
- Oil based . Products from this category can only be used where there is no high humidity and no sudden temperature changes. You must first understand what is the best way to treat the bathhouse floor in your case.
- Combined use . The advantage of these compounds is that they simultaneously provide protection from both rot and fire.
Before treating the floor in the steam room or any other room in the bathhouse, you should thoroughly clean and dry the wood. Next, you should apply impregnation in several layers, paying special attention to the cut areas and joints. If damage by insects is detected, an alcohol-containing composition should be poured into the channels with a syringe, not forgetting the small area around the defective area.
However, it is a mistake to believe that one soak with an antiseptic will be enough. As the bath is used, any product is gradually washed away. Therefore, it is recommended to apply bath floor varnish over the antiseptic, preferably water-based.
Bath paint: types and choice
High-quality painting of the interior walls of a bathhouse is a responsible process, but with the right attitude to work, it is interesting and exciting. It is important to remember that not all paints are suitable for interior decoration. The reason is the composition and substances used to obtain a particular shade. When making a selection, you need to focus not on what the final design will be, but on whether the paint can withstand the high temperature in the room.
Choosing paint for a bath
Safe materials are used to paint the bath
Painting a brand new sauna or bathhouse from the inside can be done either using a paint brush or the modern method - using a spray gun. The second option is recommended for people who have some experience in working with the device, as difficulties may arise and the end result will not be satisfactory.
The choice of paint directly depends on what type of wood is used as the main one in finishing and creating the overall interior. If hardwood predominates inside, then costs can be reduced, since the material itself is quite durable and strong, therefore, the paint should serve more of a decorative function than a protective one.
The bathhouse is painted with matte paints
Preparing the surface for painting
Protective agents that will have to be used to treat larch must be based on chemical components that can protect the tree from cracking and reduce the release of resins.
Wood needs to be sanded before painting.
A bathhouse built from coniferous trees, in particular spruce, is more likely to suffer from the negative effects of mold and mildew than a structure made from larch, but in this case there will be much fewer problems with resin. Paint for interior work in such a room should be water-based.
Painting a bathhouse is a process that needs to be taken as seriously as possible. The durability of the building and its attractiveness depend on the quality of the coloring composition, its compliance with the surface and compliance with the rules of the painting procedure. Before you start finishing, you need to decide what kind of paint you can paint in a bath, what to look for when buying the composition, and what order to follow in the process. Let's look at everything in order.
To select the most suitable composition in terms of quality and properties, you need to understand their classification. All paints according to the dyeing method are divided into two types:
- Professional. Difficult to use because they require knowledge of the technological map. They contain different emulsions, which are applied in 3-4 layers. They are distinguished by their high cost.
- Construction and household. They are more common due to their ease of use and relative cheapness. They consist of one material, which is used to paint the surface in 1-3 layers.
Based on their composition, paints are divided into:
- Water-based dispersion acrylic. They protect the tree from low temperatures and unfavorable climatic conditions. They are durable and do not lose performance characteristics for up to 10 years. Quick-drying and most suitable for processing baths, since they do not interfere with the natural air exchange of wood. It is not advisable to apply them to surfaces treated with salt fire retardants. Price - from 650 rubles per 1 liter.
- Oily. Not recommended for external use due to high sensitivity to UV radiation. Cost - from 400 rubles per liter.
- Enameled. Used for brick structures, applied to a previously plastered surface. They are inexpensive - from 70 rubles per liter.
- Alkyd resins. They fade faster, fade and lose their appearance. They are relatively inexpensive - from 300 rubles per liter.
- Silicate. They are made on the basis of liquid glass and are suitable only for painting brick steam rooms. From 150 rubles per liter.
- Water-based bath paint. It is resistant to moisture, and therefore can be used for painting the ceiling in a washing room for brick buildings. Price - from 40 rubles per liter.
If the composition contains driers, the paints dry quickly.
It is better to choose dark shades for exterior bath paints, since light ones will quickly fade in the sun. In addition, please note that the shade of the painted wall will differ significantly from the picture in the catalog due to the disproportion of the surfaces.
The main requirements for coloring compositions for baths: protection from precipitation and UV radiation, increased service life, preservation of aesthetic appearance, insecticidal properties.
Coloring compositions from well-known manufacturers have the highest performance properties: Belinka (Czech Republic), Vidaron (Poland), Aquatex, Neomid, Rogneda, Senezh (Russia), Adler (Austria), Pinotex (Denmark). However, the most popular is Tikkurila bath paint, as well as similar ones Biotex and Vivacolor.
You need to calculate the amount of composition for painting according to the principle: liter – per 10 m2.
You need to start painting after the wood has dried. The humidity level should be less than 20%. Before carrying out work, special attention must be paid to the correct dilution of the coloring composition, according to the manufacturer’s instructions. Otherwise, the surface will quickly begin to peel off and lose its aesthetic appearance.
- Carefully sand the wooden surface. If the log house is not new, then remove the top darkened layer and treat it with a bleaching agent.
- We remove dust from the wall. You can use an air compressor or vacuum cleaner for this purpose.
- After blowing, wipe the wood with a semi-dry cloth.
- We impregnate the surface with an antiseptic primer and sand it after hardening.
- We treat the wood with a fire retardant. Some bioprotective substances already contain a fire-fighting substance.
- Apply the first thin and even layer of paint (if you are using a spray gun, hold it at a right angle to the wall being painted) and wait for it to dry completely. This usually takes 12-24 hours depending on weather conditions.
- Sand the surface with 120/140 grain paper.
- We paint the wall again using the same technology as the first time.
- Apply a thick layer of paint to the ends of the logs 4-5 times. They have a rough surface, and therefore absorb significantly more coloring matter.
- Please note that the lower three logs must be processed with special care, since they are more exposed to negative atmospheric influences than others.
Please note that a reliable and durable coating can be achieved with two layers of paint if you use a brush, and the surface will be matte. Using a spray gun, you need to apply 3-4 layers for high-quality painting, and the wood will turn out glossy. If you still decide to use a paint sprayer, then choose a liter container for convenience.
To maintain and preserve the appearance, it is recommended to paint the bathhouse every few years. If the paint is of high quality, then a repeat procedure will be needed after 7-8 years.
External painting of the bathhouse is necessary to give and preserve the aesthetic appearance of the wood. In addition, many painting compositions contain antiseptic components that protect walls from negative influences. But there are many opinions regarding the interior painting of a bathhouse.
Experts recommend refraining from painting the inside of the steam room. The chemical composition will interfere with free air exchange, and the bathhouse will not have its traditional woody smell. In addition, when exposed to high temperatures, paints release toxic fumes.
Some owners strive to minimize the effect of humidity and temperature changes on wood and periodically treat the walls, floor, and ceiling. The inside of the bath can only be coated with special tinted bath compounds. In particular, Tikkuril protective impregnation is presented on the market, which is capable of protecting wood from harmful effects and giving it a certain shade.
Natural substances have long been used to paint log houses. For example, a decoction of oak bark is popular even today. It gives a dark shade to the wood and preserves its original pattern. A mixture of ocher and starch is used not only as a dye, but also as a fire-fighting compound. Some people recommend using onion skins. It gives the tree an interesting texture, but attracts insects and rodents.
Such methods cannot compete in their protective properties with improved and universal chemical compositions, and therefore, if possible, it is worth giving preference to industrial coloring compositions.
For this purpose, I went to the store and purchased PINOTEX FOCUS AQUA paint 9 liters for 2,700 rubles, as well as two wide brushes.
Why this particular paint?
I didn’t really choose - I looked at the painted samples in the store, and it was this composition that seemed to me as close as possible to my understanding of the Scandinavian style. Plus the presence of wax in the paint to improve water-repellent properties and preparations to protect against mold.

9 liters should be enough for all work.
The manufacturer promised complete drying of the layer in 8 hours, i.e. Over the weekend the bathhouse will be completely painted. I already had experience working independently on painting lining as a painter, so the upcoming volumes fit well into the weekend.

I took a wide brush – 100 mm
Applying varnish
The final stage of finishing any room is varnishing. However, the materials necessary for treating surfaces in a bathhouse are subject to special, increased requirements (for more details: “Which varnish to choose for baths and saunas - the differences and advantages of different compositions”).
The varnish must provide:
- absence of rotting due to increased effects of antiseptic impregnation;
- protect floors from any damage, including mechanical;
- safety for the health of humans and their pets;
- resistance to high humidity;
- no toxic fumes due to overheating.
Before covering the floor in a steam room with any chosen varnish, you should pre-treat the surface, that is, clean the wood from grease, dirt, dust, and remnants of old paints and varnishes. All cracks and irregularities in the floor must be puttied and then treated with an antiseptic.
After this, you can apply the varnish using a brush or roller - whichever is more convenient for you. The varnish should dry thoroughly, after which another layer can be applied if necessary. Please note that in the steam room you can only use varnishes that do not contain toxic substances released into the air when heated. Another important point is that the varnish must protect the coating from accidental fire as a result of a spark from the oven.
Types of bath floors
Based on their functionality, steam room floors can be divided into two large groups: sheer floors and non-wet floors. What are their fundamental differences and advantages over each other? Flood-type floors are used mainly in traditional black-heated bathhouses. Their peculiarity is the combination of a steam room and a washing compartment and the absence of a dressing room as a functionally dedicated internal volume of the room. The drained water passes freely through the leaks in the joints of the flooring and is absorbed into the underlying soil. The installation of a drainage system as such is not required. What are the advantages of pouring floors:
- They are easy to install with low manual labor costs.
- The construction of poured floors does not require expensive materials and it is quite possible to get by with a regular set of edged planed boards of a suitable cross-section.
- Due to complete drainage and good ventilation conditions, floors of this type are much better resistant to getting wet and subsequent damage by pathogenic microorganisms. When using larch boards, you can get even better durability indicators for such a floor.
- The installation of a floor in a steam room with such a design also implies simpler repair and maintenance.
Important! At the same time, it must be said that the poured floor has a low degree of thermal insulation and is more suitable for use in seasonal baths used in the warm season, as well as in regions with a mild climate and above-zero temperatures in winter.
Non-spillage floors are distinguished by the fact that they have a system of water collection and centralized drainage. This circumstance has several aspects, both positive and negative:
- There is an objective opportunity to equip a heated floor in a steam room, that is, a system that will transfer heat to the floor surface either through a coolant or through electric energy;
- This flooring has higher energy efficiency;
- It can be built from various types of building materials;
- The floor surface can be covered with ceramic tiles of various colors, shapes and textures.
At the same time, such floors in a steam room in a bathhouse are more demanding in terms of work performance, quality of material, are difficult to install and more material-intensive.
However, practice shows that most floors in modern baths are made according to the non-spill principle, so we will dwell on this type in more detail.
Non-drip floors, as a universal type in arranging a steam room

As we have already noted, there is no ideal recipe in the context of solving the question of how to make a floor in a steam room. At the same time, the arrangement of a non-drip floor leaves a wide field for this type of activity. Take, for example, the area of material selection. For it, you can use a variety of materials and subsequent finishing options:
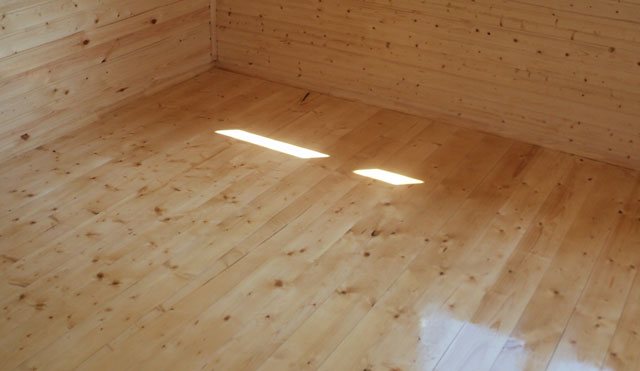
- Wooden floors fit organically into the overall interior background of a traditional bathhouse. They have high levels of environmental cleanliness and all the delights of a natural product. They put forward increased demands on the quality of moisture collection, including water vapor condensate, its removal and the organization of an effective supply and exhaust ventilation system. The most optimal choice in terms of raw materials for flooring is coniferous wood, especially larch. In conditions of sufficiently low temperatures at floor level, the release of resins from the pockets is not so active, and their very presence causes the wood to be more resistant to water. Finally, it is worth saying that wood has a low heat capacity coefficient and it is unlikely that you will get a burn as a result of contact with such a floor. Moreover, removable wooden ladders are an indispensable attribute of floors made of mineral materials, of course, except for the so-called “warm floor”. The problem of how to paint the floor in a bathhouse in a steam room seems to be rather how to treat the floor in a steam room of a bathhouse and is solved through good impregnations, which, if desired, can be made independently;
- Concrete floors are characterized by good mechanical strength, durability, absolute non-flammability and resistance to adverse environmental factors in a steam room. They are not susceptible to the destructive effects of pathogenic microorganisms, primarily molds. At the same time, the construction of such floors requires a serious amount of concrete work and floor insulation skills, since concrete floors in the form of a monolith are not very suitable for comfortable use;
- Brick floors in their pure form are quite rare and largely duplicate the advantages of a concrete floor;
- Ceramic or clinker tile floors are not functional as an independent part of a floor system. For full operation, it is necessary to organize a supporting base for them - a “substrate”, which can be brick or concrete and, in some cases, wood. Tiles are widely used in “warm floor” systems as a finishing coating.
By the way! Do not forget about such an important quality of a tiled floor as its frictional qualities. The better the adhesion of the surface to the sole of the foot, the less chance of slipping and getting a domestic, and perhaps for some, an industrial injury.
Floor painting
Floors in bathhouses are often not only varnished, but also painted in order to further extend the life of the coating. However, when choosing what to paint the floor in a bathhouse with, you need to take into account that the paint must be safe for health, that is, not release toxins when heated. In addition, in the steam room it is better to do without paint at all.
If you need a product to paint the floor of a bathhouse in a washroom, make sure it meets the following requirements:
- ensured the formation of a thin protective film on the surface after application, preventing the accumulation of moisture, dirt and excessive overheating;
- prevented fungal growth and mechanical wear.
Before painting the floor in the dressing room, you should perform all the same preliminary procedures as when varnishing the surface.
Requirements for modern paints
The dye used for the bath must not only have important properties, but also meet certain standards:
Often home craftsmen are interested in how to paint a stove in a bathhouse, so that this design pleases not only with warmth, but also with an attractive appearance. Most often, this question arises when painting walls, because an unpainted stove will stand out from the updated interior.
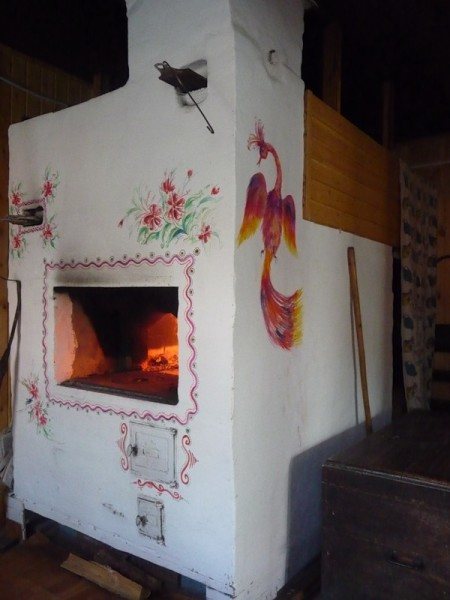
Traditional whitewashed stove.
The two simplest methods most often used in Rus' are whitewashing with chalk or lime.
Let's take a closer look at how to paint a sauna stove:
- Preparatory stage. If small defects (potholes, unevenness) are noticed on the stove, then it is advisable to first plaster its surface, or coat the seams between the bricks with clay mortar.
Plaster is prepared from a mixture of clay and asbestos, applied to a well-heated stove. Once the plaster layer has dried, you can begin painting.
- To do this, put pieces of chalk in a bucket and fill them with water so that it completely covers the chalk. After this, let the solution infuse for about an hour.
- In another container, prepare a solution of animal glue mixed with water in a ratio of 25:1.
- Mix both solutions until a homogeneous thick mass is obtained.
Painting is carried out in two layers. The second layer is applied only then. When the first one is completely dry.
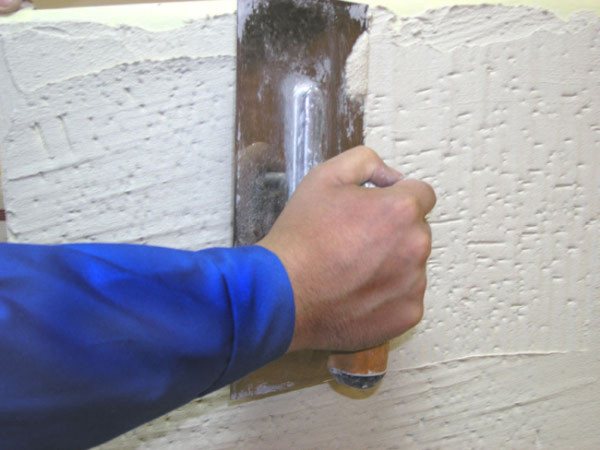
Apply lime mortar.
- To prepare the solution, take 1 kg of freshly slaked lime and fill it with 1.5 liters of water. Add a teaspoon of drying oil, 25 grams of blue and 5 grams of salt to the mixture. Blue gives whitewash a bluish tint.
- The solution is also applied in two layers, only the second layer is applied before the first one is completely dry.
When deciding how to paint an iron sauna stove with your own hands, you should pay attention to silicon-organic enamels, which can withstand temperatures up to 600 degrees Celsius.
Iron stove covered with enamel.