Insulating the ceiling with expanded clay in a bathhouse is environmentally friendly and inexpensive
The bathhouse is a universal place for rest, relaxation and health improvement. It is known that the bath accelerates blood flow and stagnant processes in the body, promotes the rapid elimination of toxins and waste, rejuvenates the skin, and relieves fatigue. However, the entire effect depends on how well the bathhouse is designed.
The ceiling and walls of the bathhouse must be insulated. This is especially true for the ceiling, because it is under the ceiling that the temperature is highest, and when heated, the air becomes lighter and goes into the roof, into the attic and further into the street. As a result, all the energy and all the heat heat the space around the bathhouse, and this is wasteful. If the bathhouse ceiling is poorly insulated , condensation will appear on it. The appearance of condensation indicates that it is necessary to urgently begin the insulation process. It is best to carry out insulation at the construction stage of the bathhouse, because in this case you will not have to disassemble the structure.
Expanded clay is one of the many materials that is often used for insulation. It consists of fired porous clay granules. The unique thermal insulation properties of expanded clay are due to its cellular structure.
Technology
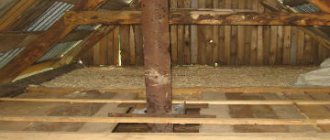
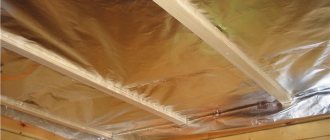
How to insulate a bathhouse ceiling with expanded clay? The technology for insulating the ceiling in a bathhouse with expanded clay is of medium complexity. In principle, anyone who does not have any construction skills can handle it. The insulation is installed from the attic side. First you need to put a layer of vapor barrier material. It will also perform the function of waterproofing.
The current construction market offers a huge variety of options for vapor barriers . These can be modern materials such as Izospan or analogues. You can take regular plastic film, roofing felt and aluminum foil. However, experts do not recommend roofing felt. When exposed to very high temperatures, it gets wet. In addition, roofing felt may catch fire.
The chimney pipe and rafter beams are also laid with a vapor barrier . The vapor barrier should be fixed higher than the height of the expanded clay layer. Vapor barrier film or membrane sheets are secured with a regular construction stapler or masking tape.
The expanded clay layer is not laid out immediately. First, lay a layer of crushed clay .
The expanded clay layer should be at least 12-15 cm. For better thermal insulation, material of two fractions is used, which are called expanded clay sand and expanded clay gravel. This will increase the density of the layer and reduce future subsidence of the granules.
Advantages and disadvantages
Insulating a bathhouse ceiling with expanded clay has many more advantages than disadvantages. Let's name the main advantages of this material :
Expanded clay has virtually no disadvantages . Except that the insulation process will be a little labor-intensive for a beginner in construction.
Insulating a bathhouse ceiling with expanded clay is popular due to the environmental friendliness, cheapness and reliability of this material. The installation technology is not very complicated and even a beginner in construction can do it.
How to make a pitched roof for a bathhouse with your own hands - characteristics and construction rules
Perhaps it’s no secret that the Russian people especially value the bathhouse as part of their national tradition.
In such a place a person can not only have a good time, but also strengthen his body. In this article we will talk about how to build a frame bathhouse with a pitched roof with your own hands, which will easily fit even on a small plot of land. In order to build a pitched roof on a bathhouse as high quality as possible, and not be afraid of its sudden breakdown for many years, construction must be carried out according to technology.
A pitched roof is made in the following sequence:
- Walls are erected, one of which should be higher than the other. To give the structure greater strength, in this case shorter rafters are installed.
- Waterproofing is laid on the walls and a mauerlat is mounted. The beam for the Mauerlat can be installed on anchors or steel studs - this will depend on the material of the bathhouse walls.
- A rafter template is made, according to which the required number is made, taking into account the pitch between the rafters of 50-80 cm. The leg is put on the Mauerlat with a groove and fastened with nails, self-tapping screws or steel plates.
- A counter-lattice is attached to the rafters at right angles, on top of which a waterproofing film is laid. There is a gap between the rafters and the film that prevents moisture and condensation from getting inside the structure.
- A sheathing is installed on the waterproofing. If you plan to lay hard and lightweight roofing material, then the slats are laid in increments of 15-20 cm, but if the material does not hold its shape well, then you will need to lay a solid base, for example, from waterproof plywood.
- At the last stage, the roofing covering is laid on top of the sheathing. Its installation should begin from top to bottom with an overlap of 10-15 cm. For fastening, you need to use special roofing screws equipped with rubber caps to prevent moisture from entering the cracks. If there are no such fasteners, you can make rubber gaskets yourself and use them together with simple self-tapping screws.
The final stage of installation of the roofing deck will be the arrangement of the gables. They are sewn up and a drainage system is installed. This information should be enough to understand how to properly make a pitched roof for a bathhouse. Then such a structure, made with your own hands, will be able to retain heat as much as possible, thereby delighting the owners and their guests.
How to properly install insulation for an attic roof
Insulation of pitched roofs with Knauf Insulation thermal insulation
The penetration of moisture into roof elements is facilitated, for example, by inaccurate laying of a vapor-proof layer on the inner surface of the insulation, insufficient overlap of vapor barrier strips, their loose connection to walls and pipes, accidental ruptures and other circumstances. Therefore, the first thing you should take care of when insulating the roof is installing a reliable vapor barrier on the interior side. On the roof side, the insulation must be protected from moisture by a layer of waterproofing, which is laid along the rafters or on a special flooring.
Such two-sided protection of an insulated roof is quite reliable, but this is not enough. It is also necessary to create conditions for the removal of moisture that accidentally penetrates here. And this is achieved, as a rule, due to air circulation in two cavities, one of which is located between the roof and the under-roof waterproofing layer, and the other between the under-roof layer and the thermal insulation.
But the air circulation system, naturally, can only function if there is a free flow of air into these cavities from the street and its removal. To do this, vents are installed in the roof overhang and in the upper part of the roof. The most popular thermal insulation materials for roofs are mineral fiber mats, polystyrene foam and polyurethane foam boards.
All of them must have hygiene certificates. Typically, the labels of these materials contain data confirming their suitability for use indicating the thermal conductivity group, which is usually equal to 0.40 or 0.35 W/(m*K).
To achieve the required thermal insulation value, you can use either a material of thermal conductivity group 0.35 of a smaller thickness or a material of a thermal conductivity group of 0.40 of greater thickness.
Shed roof design
Insulation of the ceiling can be done using a plank method, when thick boards are laid on the upper crowns of the log house, or by hemming - fastening from below to the floor beams. There is also a panel method of insulation using pre-made multilayer panels.
Natural materials, for example, clay mixed with sand, straw or sawdust, and modern insulation materials such as mineral or basalt wool can also serve as thermal insulation for the roof of a bathhouse. The role of insulation is also played by boards hemmed or laid as a ceiling, so their thickness should be the maximum possible for this type of insulation.
It is not recommended to use foam plastic for ceiling insulation for two reasons: it is a fire hazard and when heated it emits harmful substances. To insulate the slopes of a bathhouse with an attic floor, you can use polystyrene and other slab foam insulation materials under one condition: the brand of insulation must be non-flammable with the addition of fire retardants, for example, polystyrene foam PSB-S.
Laying layers of insulation on the ceiling
In addition, it is necessary to pay attention to the vapor barrier of the ceiling. It is performed from the steam room side and usually uses metallized hydro-vapor barrier films, for example Izospan FB. The metallized surface not only insulates the steam room from moisture evaporation, but also reflects infrared radiation, which improves thermal insulation.
If insulation is carried out using fibrous materials, it is necessary to ensure the removal of moisture from the insulation layer, so they are covered on top with membrane waterproofing with one-way vapor conductivity towards the attic. When insulating slopes, it is also necessary to ensure one-sided vapor permeability of the entire insulation layer so that the humid air of the attic does not condense on the walls and ceiling.
We suggest you familiarize yourself with How to clean a chimney in a sauna: how to clean a chimney from soot in a sauna stove, how to clean a stove, cleaning in photos and videos
How to insulate a ceiling with expanded clay
The issue of a structure’s ability to accumulate heat always remains relevant for owners of their own homes. The amount of heating costs and living comfort directly depends on it. That is why it is difficult to do without high-quality insulation.
As a rule, everyone tries to insulate the walls, forgetting about other parts of the structure, but this cannot be done. Up to 15% of the heat passes through the ceiling alone. Many people in this matter resort to using foam boards for insulation, but there are excellent alternative options. Next, let's look at why attics are often insulated with expanded clay and what are the features of using this material.
Advantages and disadvantages
List of positive features when using expanded clay as ceiling insulation:
Expanded clay also has low sound and thermal conductivity, but the material also has some disadvantages:
Having considered the positive aspects of the material, the negative ones seem completely insignificant.
Features of insulation with expanded clay
Before carrying out the insulation process in a private house, it is necessary to conduct a detailed analysis of the entire structure: walls, floors and ceilings. Only if there is a complete understanding of the characteristics of the thermal resistance of all materials from which the construction of a house, bathhouse or other structure is made, it is possible to achieve high thermal efficiency of the building using insulation materials.
Insulation of the ceiling of a bathhouse or in a private house is considered effective if its thickness is in the range of 20–40 cm.
Also, when choosing expanded clay as a ceiling insulation, you need to take into account some features of its use:
When insulating a bathhouse made of wood or frame slabs, expanded clay must be completely protected from moisture. To do this, waterproofing material is laid on both sides (bottom and top).
Technology of floor insulation of a bathhouse roof
Floor insulation is used most often in small wooden baths. Thick boards are cut into the upper crowns of the log house by 5-10 cm. The thickness of the boards should be at least 60 mm, since they simultaneously play the role of load-bearing floors and insulation. They can be lined with vapor barrier and decorative cladding on the bottom, and additionally insulated on top.
- The flooring boards are laid across the steam room.
To improve the thermal insulation properties of the ceiling, recesses are made along the thickness of the boards in the penultimate crown. The logs are treated with an antiseptic for internal work, after which the boards are laid, fitting them tightly together. For greater tightness, you can use a tongue and groove board. Laying boards on the ceiling - The inside of the boards is treated with an antiseptic, dried, and then covered with a vapor barrier film, securing it with a construction or furniture stapler.
The joints are taped with metallized tape. The ceiling is glued with a vapor barrier film and taped with metal tape - The top of the boards is covered with vapor-permeable waterproofing.
Vapor permeability is necessary in order to remove water vapor that gets into the floor boards, otherwise they will begin to rot. That is why it is not recommended to use polyethylene film for waterproofing the ceiling. A layer of heat-insulating material is laid on top of the waterproofing. This can be clay mixed with sand or sawdust, expanded clay, slag, as well as modern fibrous materials. The layer of expanded clay or expanded clay must be at least 20 cm. Expanded clay is poured on top of the boards - Mineral or basalt wool, which has excellent thermal insulation characteristics, is laid in a layer of 10 cm. To lay thermal insulation in a bathhouse with an attic floor, it is necessary to first lay bars on the floor, which act as supports for the finished floor.
The laying step is from 50 cm. The bars must be thoroughly treated with an antiseptic. Laying mineral wool for insulation - Another layer of waterproofing is placed on top of the insulation. Secure it to the finished floor bars with a stapler. This layer of waterproofing is necessary to protect the insulation layer from leaks or condensation droplets. The finished floor of the attic floor is laid over the waterproofing; for an unheated attic, it is enough to cover the waterproofing with an unplaned board to protect it from damage.
Technology of hemmed insulation of a bathhouse roof
This method differs from the flooring method in that the ceilings are made above and below the ceiling beams that are attached to the walls. Such ceilings can be used for baths of any size, both wooden, brick, and block. In this case, the main insulation is placed in the space between the beams on the rough ceiling.
Technology of hemmed insulation of a bathhouse roof
- Make a rough ceiling from a board at least 25 mm thick, securing it to the bottom of the beams with nails or self-tapping screws.
On the side of the steam room, the rough ceiling is sheathed with a metallized vapor barrier film using a stapler, the joints of the film are taped. The finishing ceiling is made from clapboard, securing it to bars laid on top of the vapor barrier. All wooden elements must be treated with an antiseptic, and the lining must be treated with a special water-based bath varnish. Vapor barrier sheets are laid, impregnated with an antiseptic and the lining is laid - Insulation mats made of mineral fiber materials are placed between the floor beams.
The layer thickness is 10-15 cm. The mats are laid so that there are no gaps left. Instead of mats, you can use expanded clay. It is not recommended to use clay or slag in this case, as they create quite a lot of pressure on the false ceiling and can push through the boards. The process of laying insulating mats - A waterproofing film with a vapor-permeable layer is placed on top of the insulation to remove vapors from the insulation layer.
The joints of the film are also taped. Laying waterproofing film - The finished floor of the attic floor is laid on the beams. It can be made from boards or moisture-resistant plywood.
Causes of moisture in the attic roof
The roof over an unfurnished attic, consisting of rafters, sheathing and roofing, does not require the measures discussed here. The attic floor is constantly ventilated, the temperature and humidity of the air inside the attic practically do not differ from the corresponding indicators of the outside air, and if they differ, it is insignificant.
The picture changes when installing thermal insulation, which separates the internal environment from the external one. In this case, the temperature and humidity of the air inside the attic floor and outside begin to differ significantly. Therefore, problems arise that force us to take additional measures to protect roof elements.
One of these problems is the increase in air humidity resulting from human activity. When cooking and washing, washing and wet cleaning, breathing and sweating, the air is saturated with moisture in the form of particles of invisible steam (unlike the steam coming out of a boiling kettle, which we can observe). This moisture, together with warm air, rises, accumulates there or escapes out through leaks in the roof.
The amount of moisture in the form of water vapor that the air can absorb depends on its temperature. The warmer the air, the more moisture it contains per unit volume. When the temperature drops sharply, the air can no longer retain this moisture, and it falls out in the form of water droplets.
The same phenomenon can be observed when water vapor penetrates from living spaces into structures, where it comes into contact with the colder lower surface of the roof. This leads to the appearance of condensation droplets on it. Moisture spoils the appearance of structures and finishes, worsens the thermal properties of insulation, and provokes putrefactive processes.
Insulation of roof slopes
Insulation of slopes is necessary only in the case of a heated attic. In general, the technology for insulating a bathhouse roof is no different from insulating a conventional roof using fibrous materials or polystyrene foam. Insulation can be done both when laying roofing materials and later. To perform thermal insulation, a kind of “pie” is created, consisting of a vapor barrier on the attic side, waterproofing on the roofing side and a layer of insulation between them.
We suggest you familiarize yourself with how and how to insulate a bathhouse from the outside
Insulation of roof slopes
When insulating the roof, it is necessary to remember about the correct arrangement of pipe penetrations - the distance from the pipes to combustible materials must be at least 20 cm. To fulfill this condition, a box is made of sheet iron, and the space around the pipe is filled with non-flammable insulation, for example, stone wool.
Proper installation of the stove when insulating the roof
Floor insulation is used most often in small wooden baths. Thick boards are cut into the upper crowns of the log house by 5-10 cm. The thickness of the boards should be at least 60 mm, since they simultaneously play the role of load-bearing floors and insulation. They can be lined with vapor barrier and decorative cladding on the bottom, and additionally insulated on top.
- The flooring boards are laid across the steam room.
To improve the thermal insulation properties of the ceiling, recesses are made along the thickness of the boards in the penultimate crown. The logs are treated with an antiseptic for internal work, after which the boards are laid, fitting them tightly together. For greater tightness, you can use a tongue and groove board. Laying boards on the ceiling - The inside of the boards is treated with an antiseptic, dried, and then covered with a vapor barrier film, securing it with a construction or furniture stapler.
The joints are taped with metallized tape. The ceiling is glued with a vapor barrier film and taped with metal tape - The top of the boards is covered with vapor-permeable waterproofing.
Vapor permeability is necessary in order to remove water vapor that gets into the floor boards, otherwise they will begin to rot. That is why it is not recommended to use polyethylene film for waterproofing the ceiling. A layer of heat-insulating material is laid on top of the waterproofing. This can be clay mixed with sand or sawdust, expanded clay, slag, as well as modern fibrous materials. The layer of expanded clay or expanded clay must be at least 20 cm. Expanded clay is poured on top of the boards - Mineral or basalt wool, which has excellent thermal insulation characteristics, is laid in a layer of 10 cm. To lay thermal insulation in a bathhouse with an attic floor, it is necessary to first lay bars on the floor, which act as supports for the finished floor.
The laying step is from 50 cm. The bars must be thoroughly treated with an antiseptic. Laying mineral wool for insulation - Another layer of waterproofing is placed on top of the insulation. Secure it to the finished floor bars with a stapler. This layer of waterproofing is necessary to protect the insulation layer from leaks or condensation droplets. The finished floor of the attic floor is laid over the waterproofing; for an unheated attic, it is enough to cover the waterproofing with an unplaned board to protect it from damage.
This method differs from the flooring method in that the ceilings are made above and below the ceiling beams that are attached to the walls. Such ceilings can be used for baths of any size, both wooden, brick, and block. In this case, the main insulation is placed in the space between the beams on the rough ceiling.
- Make a rough ceiling from a board at least 25 mm thick, securing it to the bottom of the beams with nails or self-tapping screws.
On the side of the steam room, the rough ceiling is sheathed with a metallized vapor barrier film using a stapler, the joints of the film are taped. The finishing ceiling is made from clapboard, securing it to bars laid on top of the vapor barrier. All wooden elements must be treated with an antiseptic, and the lining must be treated with a special water-based bath varnish. Vapor barrier sheets are laid, impregnated with an antiseptic and the lining is laid - Insulation mats made of mineral fiber materials are placed between the floor beams.
The layer thickness is 10-15 cm. The mats are laid so that there are no gaps left. Instead of mats, you can use expanded clay. It is not recommended to use clay or slag in this case, as they create quite a lot of pressure on the false ceiling and can push through the boards. The process of laying insulating mats - A waterproofing film with a vapor-permeable layer is placed on top of the insulation to remove vapors from the insulation layer.
The joints of the film are also taped. Laying waterproofing film - The finished floor of the attic floor is laid on the beams. It can be made from boards or moisture-resistant plywood.
Bathroom insulation with expanded clay
To maintain a stable temperature in the bathhouse and minimize heat loss, special attention must be paid to the thermal insulation of the structure. It is important to take care not only of insulating the walls, but also the floor and ceiling. For these purposes, various synthetic and natural materials are used. Of the latter, expanded clay is the most popular.
Types of expanded clay
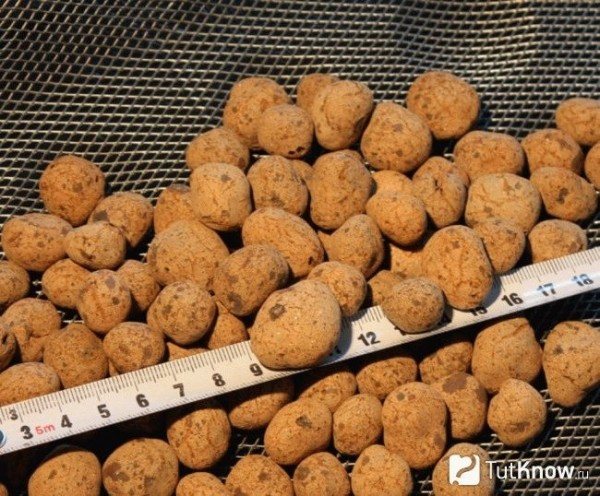
Expanded clay is represented by round granules with a porous structure made of baked clay.
. Available in grain sizes from 0.1 to 10 mm. It is used as a filler in mortars and as a backfill when insulating bathhouse ceilings up to 50 mm thick. Price - from 150 rubles per bag.
Features of bathhouse thermal insulation with expanded clay
Expanded clay is a natural material, which means it is environmentally friendly. However, environmental friendliness is not the only advantage of this heat insulator. It is very popular when insulating a bath due to its many advantages, such as:
- Cheap
. Compared to most synthetic insulation materials, expanded clay has a low cost.
As for the disadvantages of using the material, among them we can highlight the labor-intensive process of thermal insulation. In addition, when using expanded clay to insulate a bathhouse, it is necessary to pay special attention to vapor and waterproofing.
Bathhouse insulation technology with expanded clay
Instructions for insulating a bathhouse ceiling with expanded clay
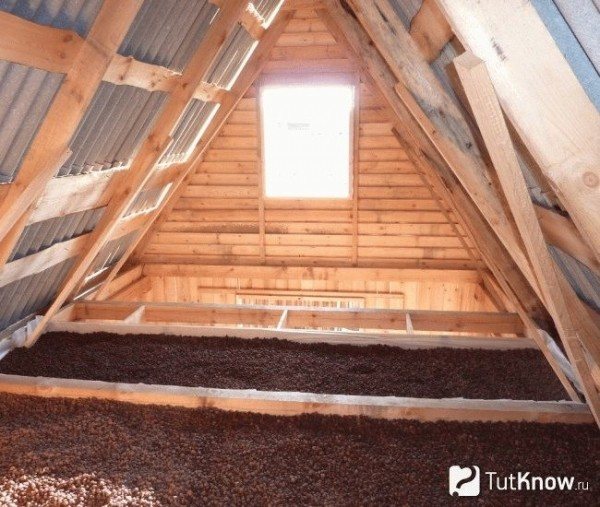
When calculating the amount of material for thermal insulation of the ceiling in the bathhouse, keep in mind that the layer should be 20 cm or more. Insulation is carried out from the attic side. If desired, you can mix expanded clay in the form of sand and gravel. This will make the backfill as dense as possible.
Features of floor insulation in a bathhouse with expanded clay
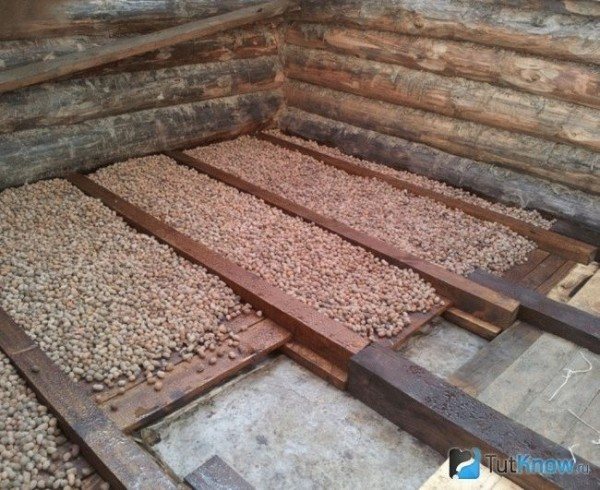
The thermal insulation of the flooring in the steam room must be taken care of at the stage of its construction or major repairs. It is also important to take into account the maximum permissible load when calculating the layer thickness.
- We spread the waterproofing bitumen material on the concrete covering with an overlap of 10 cm. The overlap on the walls should be about 15 cm.
If you decide to insulate with expanded clay over the ground in a bathhouse, then its layer will be significantly thicker (about 30-35 cm), which will raise the height of the floor. This must be taken into account at the stage of designing the height of the walls of the bathhouse.
Specifics of insulating bath walls with expanded clay
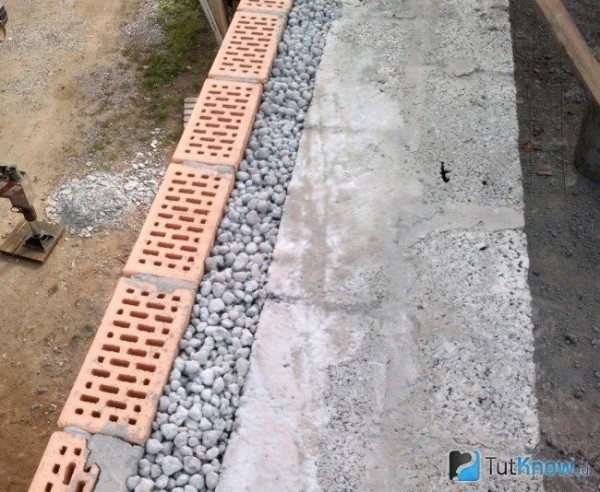
Bulk materials can only be used for thermal insulation of brick walls of buildings. This process must be thought through during construction.
Effective thermal insulation of a bathhouse with expanded clay can be done with your own hands, if you take into account all the nuances of this process. The material is hygroscopic, and therefore the insulation of surfaces must also be carried out reliably. By adhering to general recommendations and instructions, you can easily insulate a steam room with an environmentally friendly and durable heat insulator.
Environmental friendliness, durability and low cost are the main advantages of expanded clay, which allow it to be used for insulating steam rooms. However, due to the hygroscopicity of the material, during the thermal insulation process it is necessary
Features of a pitched roof for a bathhouse
Its distinctive features can be identified:
- Ease of manufacture. Even a novice master can build such a bathhouse. The technology involves performing all the work without requiring additional help, which allows you to save some money.
- Low cost. A do-it-yourself pitched roof for a bathhouse requires one and a half or two times less costs compared to a gable roof. It is possible to save money by reducing costs on the components of the rafter system, which in this case do not have to be made of high-quality wood, as well as on the roofing covering.
- Reliability. If the project is carried out correctly, in which the slope angles and the thickness of the supporting elements are clearly calculated, such a roof will be able to function uninterruptedly for many years, protecting the bathhouse from weather conditions of any complexity.
- Convenience of placement. Thanks to its compact size, it is possible to create a design for a bathhouse with a pitched roof, according to which it can be easily attached to an existing house. With proper organization, you can save enough free space and building materials, and also provide access both to the street and to the house.
We invite you to familiarize yourself with the Roof of a bathhouse - 105 photos on how to build and decorate a beautiful roof for a wooden bathhouse
Preparing the roof frame
Isolating a roof from moisture and insulating it is quite a complex job, so before you begin, you should make sure that the rafter system is in good condition and, if necessary, carry out its “sanitization.” Often, wooden roof elements, especially in old houses, are affected by insects and pests
This can be judged by the presence of wormholes in the wood. If they are detected, the infected wood must be treated with chemical protective agents, after consulting with a specialist. Severely damaged structural elements are replaced.
Rafter structures, especially in old houses, also need to be checked for statics. And here you cannot do without the help of a specialist.
We build a pitched roof for a bathhouse with our own hands
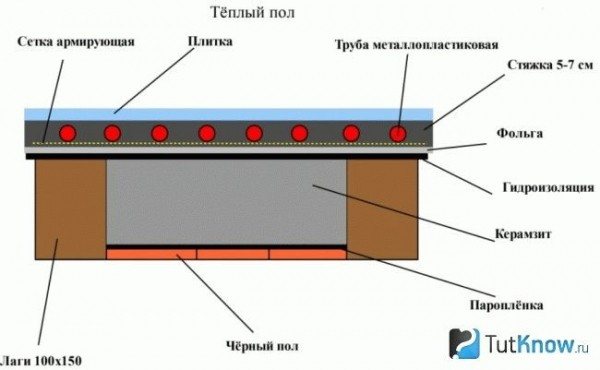
Let's talk about the roof today. But it’s true, no matter how super cool the floor is, without a roof over your head it turns into nothing. Don’t take this as an advertisement, but I want to show you how to make warm water floors in a small rural bathhouse: here is a link to the description.
Naturally, there are many options for arranging a roof, which allows any “bathhouse attendant” to choose exactly the one that will be most effective and convenient for use in his particular case. DIY pitched roof step by step - this is exactly the question I want to consider today in this article.
A few additional points
In general, I described the technology. In essence, there is nothing complicated. The principle of work is the same for almost all types of materials, but I would like to draw attention to some other points that may introduce their own changes.
Firstly, when installing rafters, you should take into account the distance between the walls. Usually the width of the bathhouse is not so large, and therefore the rafter legs are installed simply by attaching to the mauerlats using the technology described above. If your structure claims to be grandiose, then you will have to provide additional supports in the form of struts or support trusses (in common parlance - soldiers).
Secondly, insulation. The ceiling can be insulated in the following way: roll out a vapor barrier, lay insulation, cover it with waterproofing, cover it on top with a rough board or other available material that will protect the film from accidental rupture. There is nothing complicated here. And then everything follows the scheme: sheathing, roofing.
Thirdly, do not forget to consider ventilation. To do this, you just need to provide small gaps between the layers of insulation and several technological holes in the ends of the roof. This will help significantly extend the life of your structure.
An anecdote on the topic: - Father, you just got a new jeep. - Everything is God’s will. - The roof of the church is leaking! - Are you going against the will of the Lord, an apostate?
Do-it-yourself pitched roof for a bathhouse - how to install it correctly
When building a bathhouse yourself from a large selection of roofs, the lean-to structure is the simplest. In addition, it performs excellent thermal insulation functions.
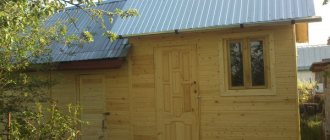
Russian bathhouse with a pitched roof
When erecting a pitched roof in a bathhouse with your own hands, it is very important to avoid mistakes and errors. We will consider all the significant points when choosing a shed roof structure, and we will also try, using the video in this article, to explain in as much detail as possible how to properly lay such a roof.
Advantages of a pitched roof
- This type of roof does not need a supporting system; it is supported by the foundation of the building;
- Minimum material consumption;
- Easy installation of the roof structure;
- Reasonable price for construction;
- Sufficient resistance to prolonged rains and winds;
- Possibility of carrying out repair work;
- Durability.
The construction of a lean-to structure is much faster than the construction of other types of roofs. The flat surface of the roof can withstand loads and serve as an additional floor of the building in the open air, where you can spend your free time without risk to life and health.
