Preliminary work
Immediately before starting to finish the ceiling in the bathhouse, it is necessary to carefully prepare the project in order to avoid mistakes or undesirable consequences in the future.
The ceiling in the bathhouse must meet several requirements:
- Serve as a heat insulator;
- Look beautiful;
- Do not release fumes that spoil the pleasure of going to the bathhouse;
- Have a long service life;
- Serve as protection against moisture for the thermal insulation layer.
Before arranging the ceiling, you also need to decide on its height. For most modern bath rooms, a height of about 2.5 m is ideal. For bath structures made of wood, a gap is also provided, since the material shrinks.
After this, you need to decide on the materials with which the ceiling will be finished, the necessary lighting and the method of installing the selected finish.
Sheathing the ceiling in a bathhouse should be done only after calculations have been made and the ceilings have been secured. The false ceiling in the bathhouse is the most common. It is a “layer cake” that is mounted on pre-installed joists. The basis is made up of tongue-and-groove boards fixed directly to the ceilings, followed by a heat-insulating layer followed by a vapor barrier. So how to properly hem the ceiling in a bathhouse?
The listed building materials are quite sufficient to ensure that the optimal temperature in the bathhouse is maintained for a long time. An additional room can be created from the attic by simply laying a layer of boards on top of the thermal insulation. They can be fixed to the same beams - the protective layer usually does not exceed them.
Before starting work, it is necessary to measure the room and add 5% to the result obtained. It is worth paying attention to the symmetry of the ceiling. If it is not ideal, you need to decide which wall the sheathing, cut at an angle, will be attached to. Usually this is done near the darkest wall so that it is not too noticeable. The rough ceiling in the bathhouse and the filing must be installed taking into account all the necessary requirements.
Required:
- roulette;
- ruler;
- putty;
- wooden slats and bars;
- building level;
- electric drill;
- screws.
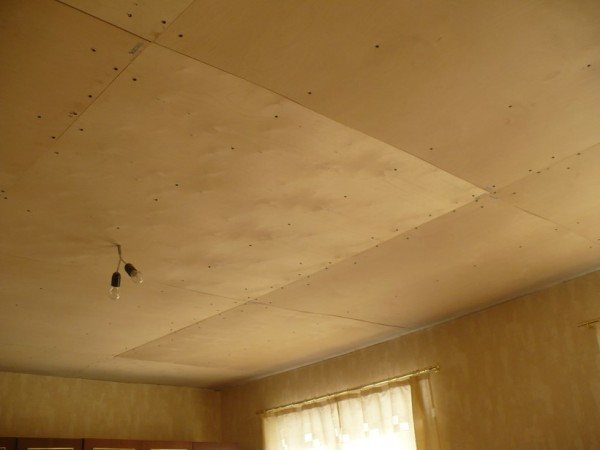
To sheathe a ceiling with plywood, you need to have a fairly flat surface, since all the irregularities will stand out on the already installed material. Therefore, the potholes and cracks present on it must be repaired using putty. When installing, it is better to use sheets that are equal to the length of the room. This will give the future ceiling a more aesthetic and neat look.
Before work, its surface must be prepared. To do this, if necessary, the old coating is removed and cleaned of dust and dirt. Then a diagram is drawn up, on which the location of entire sheets is noted and the sizes of their cut pieces are determined. It is also necessary to calculate the order of installation of the sheathing.
Figure 1. Installation diagram of wooden sheathing.
Since the edges of the plywood must be screwed to the sheathing to avoid sagging, the location where the entire sheets will be located is first calculated. They are usually screwed in the center of the room, and cut-off elements are installed closer to its edges. After this, you need to determine the center of the ceiling using a tape measure.
It is necessary to install a wooden sheathing on the ceiling, onto which the plywood will subsequently be attached. For this, glued laminated timber with a cross section of 20x40 mm is used. First, horizontal slats are fixed to the ceiling surface with screws, then intermediate ones. When installing them, you need to maintain a distance of 40-50 cm between the sheathing elements to avoid sagging (Fig. 1).
What other materials are suitable?
The most commonly used means of finishing the ceiling space of a bath room is wood. The most commonly used panels are made from species such as aspen or linden. The fact is that they contain less resin than coniferous wood. Thanks to this, the panels have increased sound insulation and heat resistance, and also significantly reduce the thermal conductivity of the material.
In addition, at first, the resins in the facing material can melt at high temperatures and cause inconvenience to people who are steaming.
It is also necessary to treat the ceiling indoors with antiseptic compounds to avoid the formation of mold and mildew, which are dangerous to human health.
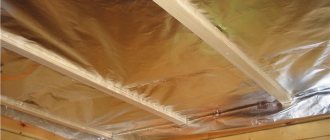
A vapor barrier material can be thick polyethylene film or aluminum foil. Among modern types of finishing, construction stores offer penoplex or isospan. Here the choice is only up to the owners.
Among other things, the ceiling space must be insulated. There are many decent options.
Insulation options
After all the rough work has been done, you can begin the interior finishing. How to cover the ceiling in a bathhouse? For the steam room you need to use only wood. The rest room and washing room can be decorated with other materials, but wooden slats are traditionally used. Each of the presented wood species has its own advantages and disadvantages. Before purchasing building materials, it is best to familiarize yourself with the parameters of each of them.
- Linden;
- Aspen;
- Larch;
- Oak;
- Cedar.
The type of wood used to decorate the ceiling in a bathhouse will differ not only in color, but also in price. It is impossible to clearly say which tree will be the most optimal - it all depends on financial capabilities and personal preferences.
Linden is distinguished from others by its noble white shade, which will not darken throughout the entire period of operation of the bath. Perfect not only for finishing a steam room, but also for the entire bath room. The advantages include the absence of odors even at high temperatures and low thermal conductivity.
Covering the ceiling in a bathhouse with linden clapboard should be carried out only after preliminary treatment of the surfaces with antiseptic compounds. Tools can be pre-treated with an antifungal solution, since linden promotes the formation of mold and fungi without treatment with special compounds. Linden is easy to process and install.
The color of the wood is noble white, the fiber structure is thin. Wood is easy to process - you can even bend it without fear of it breaking. Additionally, it is not necessary to treat aspen with special compounds, since it is least susceptible to rotting. A distinctive feature of aspen is moderate drying, the tree will last for decades, will not crack and will retain its excellent appearance throughout its entire service life.
Larch
Larch is distinguished by high strength and resistance to thermal and mechanical stress. The rock is not subject to rotting and insects due to the release of resin. Not afraid of high temperatures and humidity. Due to constant exposure to moisture, it only becomes stronger, an excellent option for those who do not know how to cover the ceiling in a bathhouse.
The raw materials can be used not only for finishing the ceiling in the steam room and washing room, but also for the ceiling in the relaxation room of the bathhouse. The color of larch wood is red-red, the structure of the wood is uniform, and does not require additional processing.
Boards for the ceiling in a bathhouse made of oak are the most durable, have low thermal conductivity and are not at all afraid of moisture. Throughout its service life it does not deform and does not change color. The wood has an original texture and a variety of shades.
Disadvantages include high cost and heavy weight. Oak baths are rare today, but they can boast of their durability. Oak wood is perfect for the ceiling in a washing bath; the material is not at all afraid of moisture.
From cedar you can not only build a rough ceiling in a bathhouse, but also sheathe it from the inside. If you decide to use coniferous wood, cedar is the best option. The color of wood has a variety of shades, ranging from light beige to dark coffee. Among the advantages are high resistance to moisture and elevated temperatures, durability in use.
To prevent the formation of mold and mildew, wood must be treated with antiseptic compounds. Disadvantages include high cost and the ability to release resin. But this can be solved by treating it with a special impregnation. The release of resin may go away on its own after several years of using the bath.
Wood paneling always allows you to make a room cozy and comfortable with a minimum of effort. But time does not stand still; manufacturers of construction and finishing materials have begun to produce a new product - imitation timber.
In appearance, it is similar to an ordinary large-sized lining, after installation of which it seemed that the structure was made of timber. The elements are made from linden, cedar, larch, pine and other types of wood, and have their own classification. For interior decoration, you need to use imitation timber with a thickness of no more than 21 mm.
The imitation timber is attached to a completely flat surface or to a wooden sheathing. What to lay on the ceiling in a bathhouse? The best option for this is imitation linden timber, after which the surface can be treated with protective compounds. The profile width can be chosen at your discretion - the material is presented in many variations. Attaching imitation timber is easy; no additional skills are required.
Do-it-yourself floor repair in the rest room: possible options
As already mentioned, in such rooms there are two types of floors - wooden and concrete. The latter are divided into floors based on the rough flooring and on the ground. Wooden floors can be of two types, namely leaking and non-leaking.
Leaking floors are cold because they do not provide thermal insulation. They are used for the southern regions and only in bathhouses, washing rooms and steam rooms. Other types of flooring are effectively used in any room, including rest rooms.
The above types of floors have the following structures: a base, insulated insulation and a concrete or wooden floor. But often, especially in winter, simply insulating the floor in the rest room is not enough. In such cases, you have to resort to installing different floor heating systems on your own or using the services of specialists.
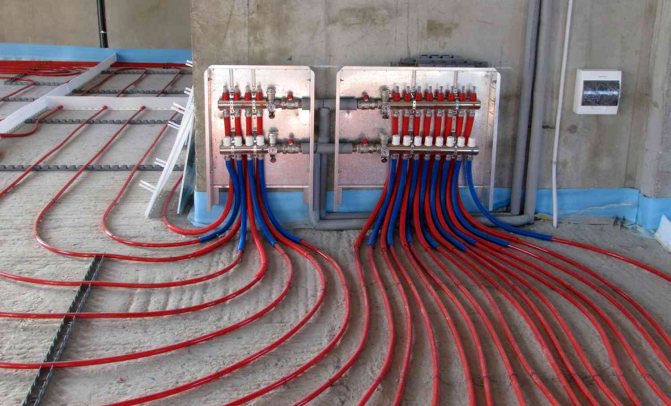
Underfloor heating systems are usually divided into the following types:
- warm electric floor, which differs in the heating principle (infrared, convection) and in the design of heating elements (film, rod, cable);
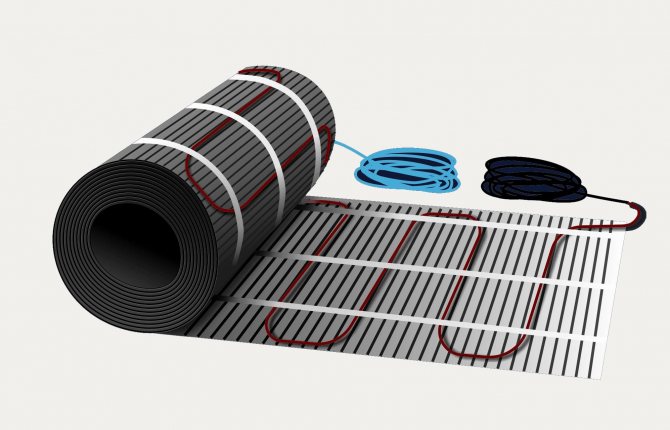
- water floor operating on the principle of radiator heating.
Ceiling installation options
Insulation options
There are three ways to arrange the ceiling in a bathhouse:
- Floor ceiling;
- False ceiling;
- Panel ceiling.
Flat ceiling
This is the simplest and cheapest option for decorating the ceiling space. But this finishing option also has a number of disadvantages. For example, it is suitable only for small rooms, no more than 2.5 meters wide. It is also not possible to install an attic on the roof with such finishing.
But, if you still decide to make the ceiling in your own bathhouse in this way, you need to follow some technology.
- The first step in installing a floor ceiling should be laying 50mm wide boards. The installation should be tight and there should be no gaps or cracks between the boards. The boards are securely attached to the walls of the bathhouse.
- After laying the wooden plank base, a vapor barrier layer is laid. It is important to lay it with an overlap on the walls of the bathhouse, approximately 15 - 20 cm.
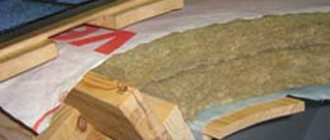
- The selected insulation is laid on the vapor barrier layer. Most often, mineral wool or expanded clay is used here, but everyone is free to make their own choice of material depending on their own preferences.
This completes the installation of the floor ceiling in the bath room. This is a quick and easy finishing method that is suitable for small bath rooms and steam rooms.
false ceiling
This method of design requires more time and will cost a little more than the flooring option, but it will more than pay off in its reliability and durability, as well as excellent performance. Moreover, the construction of such a ceiling can be easily done with your own hands.
The installation diagram involves several important steps:
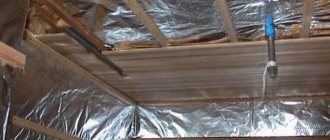
- Firstly, a load-bearing sheathing with a cross-section of 5x15 cm is mounted on the walls of the bathhouse. The chimney is also lined with a frame made of beams. Upon completion of the work, along the entire perimeter of the ceiling there should be a load-bearing frame made of beams, securely attached to the walls and beams.
- Secondly, the ceiling is covered with eurolining. In this case, the fasteners are best placed in the grooves. And not in the middle of the lining.
- Then a vapor barrier layer is laid on the eurolining, which is stapled to the load-bearing beams. The insulating layer must overlap the walls of the room by approximately 15 cm. If several layers of insulating material are laid, then the next layer must be 20 cm larger than the previous one.
- After this, a layer of insulation is laid between the beams.
- The thermal insulation layer is covered with a waterproofing layer, for example, aluminum foil or plastic film.
- A flooring of boards is installed on top, which must be secured to the supporting beams with wide-headed nails.
After all the manipulations, the ceiling is ready. It is noteworthy that the scheme can be changed and the work done exactly the opposite. This finishing option will be ideal for baths with an attic space.
Panel ceiling
This type of finishing involves laying panels on the ceiling surface. There are also several steps involved in making such a ceiling:
- Two beams are laid on the surface parallel to each other and at a distance of 0.5 meters from each other. The edges of the beams should rest against the batten.
- Boards 60 cm long are nailed across the beams to the beams. The boards must fit snugly against each other.
- The structure is turned over and lined with a vapor barrier from the inside.
- Then the rope is laid on the walls of the bathhouse; when attached to the beams, the rope must be installed on them as well.
- The panels are stacked one after another.
- A thermal insulation layer is inserted, which is covered with a waterproofing layer.
- The gaps between the panels are lined with moisture-resistant heat-insulating material.
- The panels are covered on top with plank flooring, which also connects the panels to each other.
- Inside the room, the ceiling is decorated with eurolining.
This finishing option is very labor-intensive and cannot be done on your own; you will need 1–2 assistants. In addition, this finishing option is more time-consuming than other options.
Making the floor in the washing area
Our task is to ensure that the flooring is not damaged by moisture that can penetrate to its base. We make the layers of the sink floor according to the same principle as in the previous case.
- make a sand cushion; — lay a layer of waterproofing; — laying the logs; — installing a wastewater drainage system; — place a vapor barrier film;
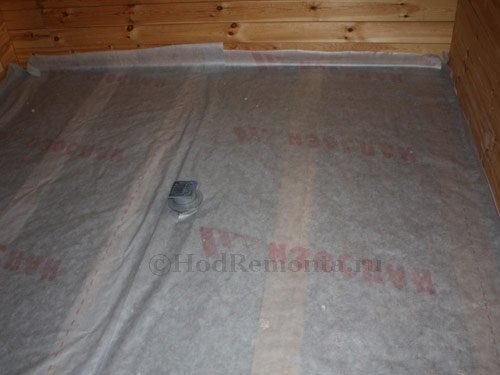
Floor in the washing room. In the middle there is a sewage outlet.
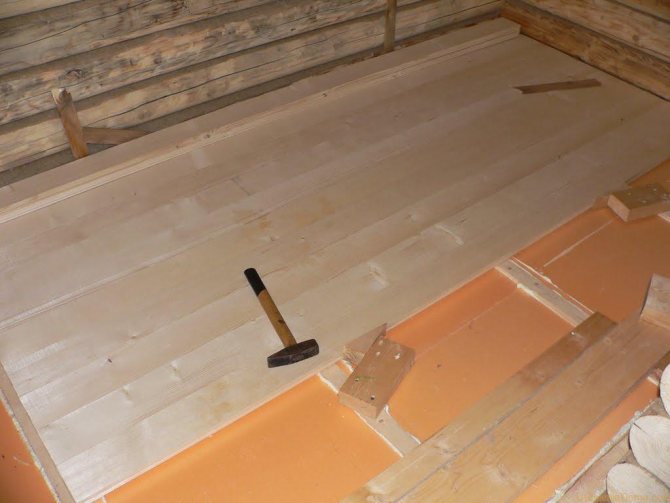
We wind plywood sheets
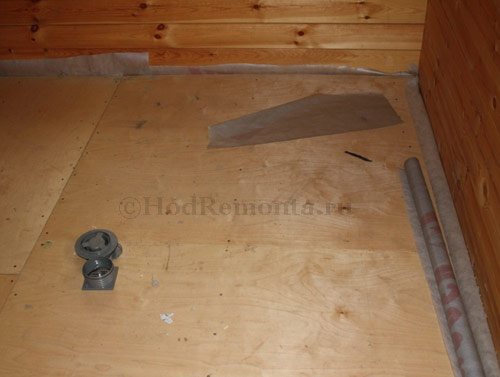
The plywood sheets are ready, you can proceed to the next stage - preparing the base for laying floor tiles.
How to sheathe with clapboard correctly
The interior decoration of a steam room always begins from the ceiling; for this purpose, the sheathing is prepared. You need to secure the wooden planks from the front door to clamps. The last plank is nailed with a nail without a head.
The clamps perfectly secure the material and do not spoil the appearance of the skin. Particular attention must be paid to the installation of the first board. All subsequent elements must be located strictly perpendicular to the walls of the steam room.
After the lining is fixed to the ceiling, it can be additionally treated with a water-repellent compound. The ceiling covering in a bathhouse must be reliable enough to withstand not only the internal lining, but also the insulation. The basic requirements for installing a ceiling in a steam room include:
- The fasteners must have a zinc coating;
- The boards must be fastened tightly to each other.
- To care for the surface, do not use hard brushes or abrasive mixtures.
Lighting on the ceiling in the bathhouse
- If the ceiling in the bathhouse involves the use of an attic space. Do not forget about the presence of a hatch with a retractable or extension ladder;
- Finishing the ceiling should be done after finishing the floor, but before finishing the walls;
- The ceiling is the most vulnerable place in a steam room, so special attention should be paid to its thermal insulation;
- The first plank of the ceiling trim must be laid perfectly as it serves as a guide for the remaining planks.
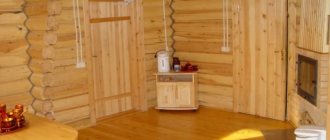
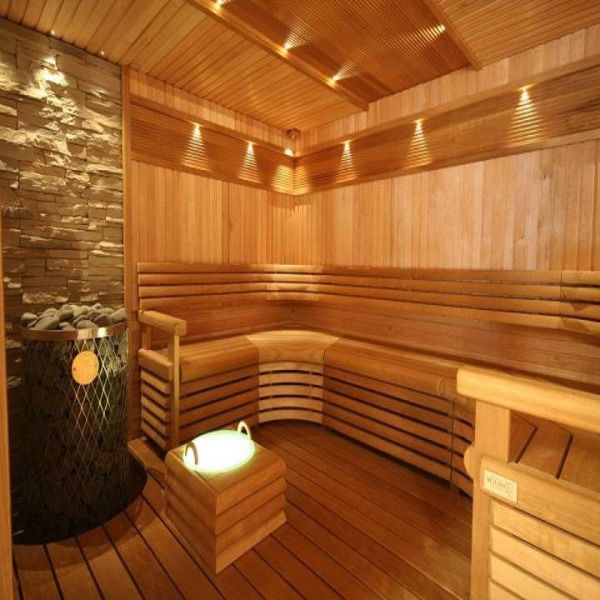
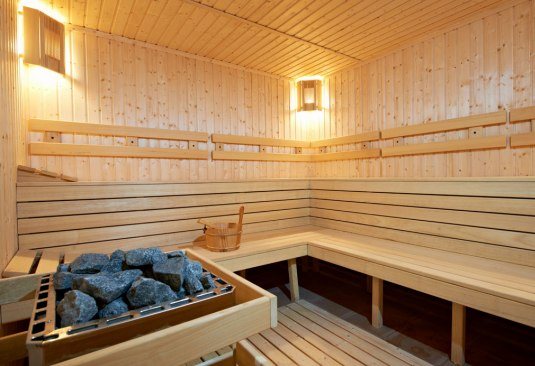
A modern bath room also requires the presence of lamps in the steam room. It is important to take into account that the lamps must be heat-resistant.
Don't forget to install wooden protective boxes near the lamps to protect against contact. The best solution would be to install lamps under the ceiling, preferably in the corners of the room.
So, we looked at several types of ceiling decoration in a bathhouse with our own hands. They all have their pros and cons, and also vary in pricing and installation time.
Only the owners of the bathhouse can decide which ceiling is suitable. The choice of materials for finishing the ceiling space in the bathhouse also entirely depends on the preferences of the consumer.
So what is the best material to make a bathhouse ceiling from? Experienced craftsmen still recommend paying close attention to the false ceiling option. This is a fairly simple and cheap finishing option. Which can easily be built on your own, with only a few skills and a small set of tools available in every home.
Advantages and disadvantages of laminate in a bathhouse
If we talk about the disadvantages of laminate in a bathhouse, we should highlight the following:
- may swell and swell. You cannot be 100% immune to this, no matter what waterproof laminate you choose;
- clicking or knocking noise. Coverings such as laminate produce a characteristic sound from steps, falling objects, and so on. This effect can be mitigated by using a substrate made of problems or polystyrene foam;
- chips and scratches. Laminate flooring can be damaged in certain cases. If there is such damage, then you can purchase a special wax-based pencil that will mask the defect.
If we talk about the advantages, it should be noted:
- there are no dents left on it after placing the equipment;
- very similar to natural wood and you can choose any color of this coating;
- affordable price and ease of installation;
- such a floor is not afraid of temperature changes, does not fade in the sun, and in general is quite good friends with water. Although, if we talk about water, it is best not to let him come into contact with it too much;
- this material is pleasant to walk on;
- generally speaking, it goes well with such a thing as a heated floor.
In general, it should be noted that for a bathhouse, laminate is not such a bad solution as it might seem at first glance. But at the same time, it should be understood that if it is used in this room, it should be looked after as carefully as possible.
Near the stove
It’s clear how to cover the ceiling with clapboard in a bathhouse, but what about the space near the chimney? The decoration near the bathhouse stove on the ceiling should differ from the main one. Wooden lining is not suitable for finishing it, because it is susceptible to burning. The place where the pipe comes into contact with the ceiling must be additionally protected with non-flammable material and covered with a metal apron. How to cover the ceiling in a bathhouse? The following can be used as protective fibrous material:
- Basalt or stone wool;
- Asbestos is a fire-resistant material in sheets;
- Minerite is a non-combustible slab that is produced specifically for insulating stoves.
On the outside of the ceiling, the outlet of the chimney must also be insulated with non-combustible material, regardless of the thermal insulation material.