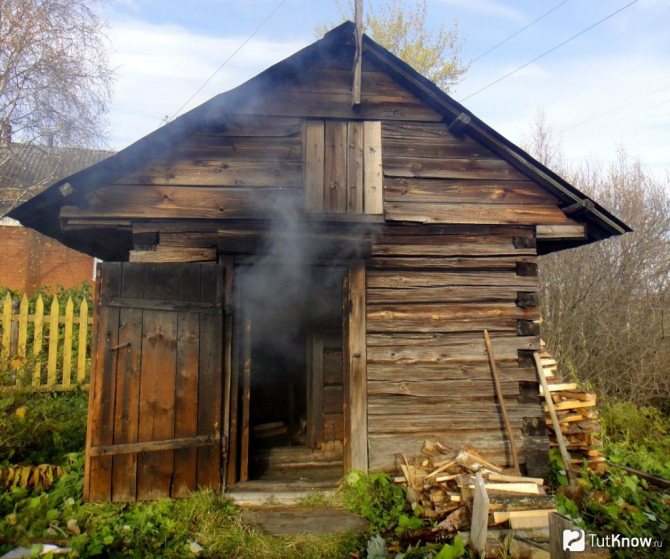
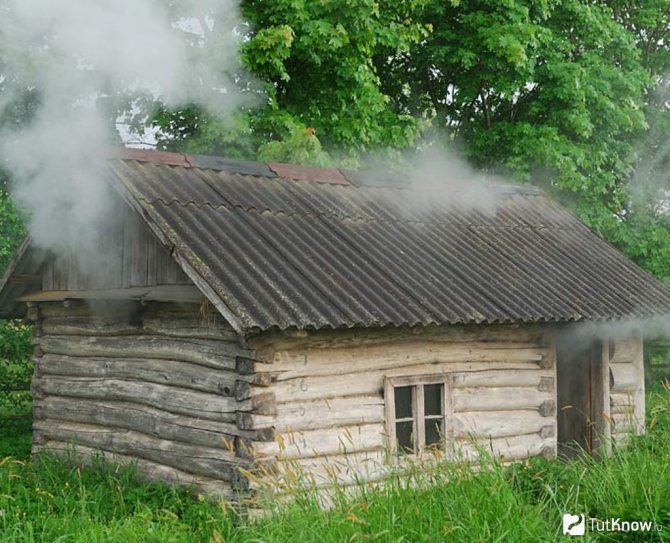
What a black bath is, it seemed clearer to me. Here I completely agreed with the description on Wikipedia that “a black or chicken sauna is a sauna heated by a stove without a chimney.” I was convinced of this as a child. Therefore, when I read from the Commissioner of Qatar that today few people understand what a black sauna and a white sauna are, and what the difference is between them, I was extremely intrigued. Indeed, another discovery awaited me ahead. So, a rustic Russian black bath, what is it? You will probably be surprised to learn the answer to this question. As well as solving the riddle of the meaning of the phraseological unit “running around like crazy.”
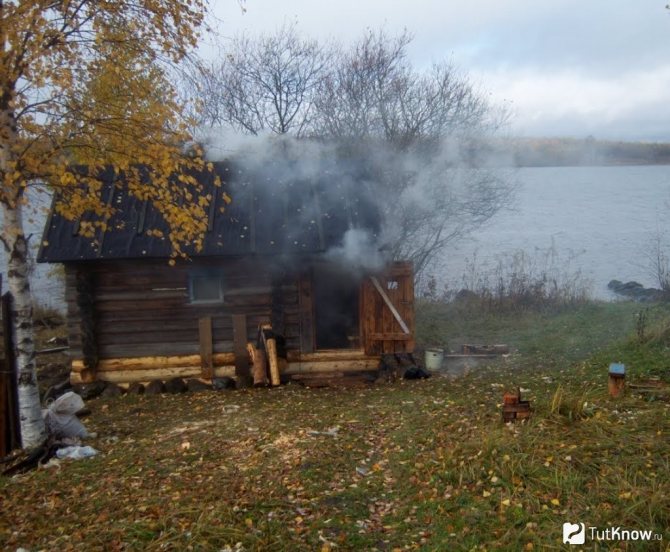
Our judgment about the difference between a black bathhouse and a white bathhouse comes down to their main feature - whether the bathhouse has a tube or not. If there is a pipe, then it is a white bath. But no, it’s black. Stove smoke fills it when the stove is fired, blackening the walls and ceiling with soot. You can’t get into one like this right away. Having heated it well, it is necessary to ventilate it. So that the stove smoke does not eat your eyes.
Listen to the opinion of an Old Believer in Qatar about what a black bath really is:
“Meanwhile, everything is completely different. In remote villages of Russia you can still find baths, partially or completely buried in the ground. They are called in black, that is, located in dugouts or semi-dugouts. I’ve steamed in these and they have exhaust pipes.”
Features of a black sauna
Even taking into account the specifics of the firebox, the “black” sauna is still popular. And not in vain, because it has many advantages:
- Fast warm-up
. The steam room warms up completely two to three hours faster than in a white sauna. The black tint of the walls improves the temperature properties of the steam room. - Characteristic smell
. Wet, heated, smoked wood depletes the traditional “bath” aroma. In addition, soot is effective in absorbing unpleasant odors (especially sweat). - Simplicity of design
. Thanks to the combination of a washing room and a steam room, as well as the absence of a separate rest room, setting up a black bath will cost you significantly less. - Minimum heat loss
. Due to the absence of a chimney, all the heat is used to warm the room, and therefore less wood is required for the firebox. - Disinfection
. The content of acetic acid, phenol and formaldehyde allows you to kill pathogens and bacteria. Therefore, there is no fungus in such a steam room. In the old days, births were even delivered in “black” baths. - Health effect
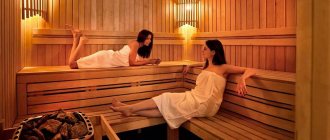
. Taking procedures in a black bath has a good effect on blood circulation, has antidepressant, rejuvenating and analgesic properties. This has been proven by centuries of use.
As for the disadvantages, these include:
- Greater smoke
. If the firebox is not installed correctly, you can get carbon monoxide poisoning. - Fire hazard
. It is important to follow safety rules, since an open flame in a wooden structure can cause a fire. - Limitations in warming methods
. The steam room is heated only with wood, which is very labor-intensive both in preparation and in operation.
If you properly arrange the bathhouse and adhere to precautions, then such shortcomings will seem insignificant. At the same time, the smoke does not enter the human lungs and is ventilated through the logs, and therefore the Russian black bath does not need additional ventilation.
Preparatory work
Dimensions and location
This issue must be addressed when designing the bathhouse itself. To do this, let’s determine its dimensions and the location of the heater’s construction:
- Depending on the total area of the steam room, the dimensions of the stove are calculated using black. For example, the steam room area is 10-12 m2. In this case, we make a heater with dimensions of 1500 mm by 1000 mm, the height is 400-500 mm;
- The shape of the oven may be different. At the request of the master, it can be made in the shape of a circle, rectangle, or even a polygonal shape can be laid out of brick;
- Having decided on the dimensions, it is important to choose the optimal place for the heater. It should heat a small room evenly, so it is better to install it close to the door. In this case, cold air entering through the open door will quickly distribute heat throughout the steam room;
- It is important to install the stove taking into account the manufacture of ventilation vents, with their help the air masses in the steam room are replaced.
Materials
It is impossible to indicate the exact quantity of materials. It all depends on the size of the stone and the structure itself. In addition, fireclay or refractory bricks are useful for building a permanent barbecue, and stones can be used as finishing for a gazebo or other buildings.
The main thing when preparing materials is to choose a good stone for the stove. Several breeds are used for these purposes:
- a stone with high ability to accumulate heat and water-repellent properties is semi-precious, but very resistant to high temperatures, Jadeite;
- you can lay volcanic rocks Vulcanite or Basalt. Such a stove will have a safety margin, will not be exposed to water and will save heat;
- When using Soapstone, the service life of the furnace increases, the heating time and the heat capacity of the material decrease.
It is not recommended to lay stone containing mica or limestone; they emit large amounts of carbon monoxide at high temperatures. If you line a sauna stove with black granite, marble or flint, such a stove can cause injury to its owners, and it will only serve for a short period of time. when heated, the material begins to crumble and shoot steaming stone chips into the room.
To line the furnace, use fireclay or refractory bricks. An ordinary building one will quickly collapse under the influence of high temperature and the load from a mountain of stones. Select Basalt or Soapstone fragments of different sizes for better placement, without large voids.
Tools
To work you will need to prepare:
- shovel and bayonet;
- trough for mixing the solution;
- trowel and hammer;
- plumb line or building level;
- welding machine and electrodes;
- a set of locksmith tools;
- rod for grating, diameter 14-16 mm.
Black sauna construction technology
To build a “black” sauna yourself, you need to take into account many technological nuances. It is important not only to correctly calculate the load on the foundation and build walls, but also to properly equip the furnace and select materials suitable for this process.
Preparing to build a black sauna
First, you need to familiarize yourself with the projects of black baths.
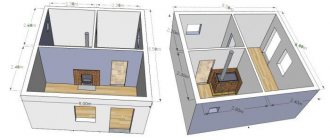
Often the building is a five-wall structure (with one partition inside). The interior space is divided into two rooms. The first has a steam room and a wash room, the second has a dressing room, which serves as both a locker room and a kind of rest room. Before starting work, you need to decide on the type of foundation and the depth of its formation. This depends on the type of soil, the depth of its freezing and the groundwater level.
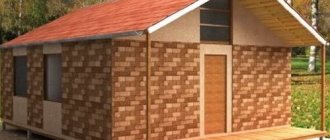
Traditionally, a Russian bathhouse is built in the form of a log house. Wood breathes and is therefore capable of transmitting smoke. There is no place for artificial materials here. Logs must be free of defects and areas of insect damage. You need to choose high-quality dried coniferous wood.
The best option is larch and cedar. However, in order to save money, even pine is often used. Jute or moss is laid between the rows as a heat insulator. The interior decoration of the steam room is not recommended.
Construction of a foundation for a black sauna
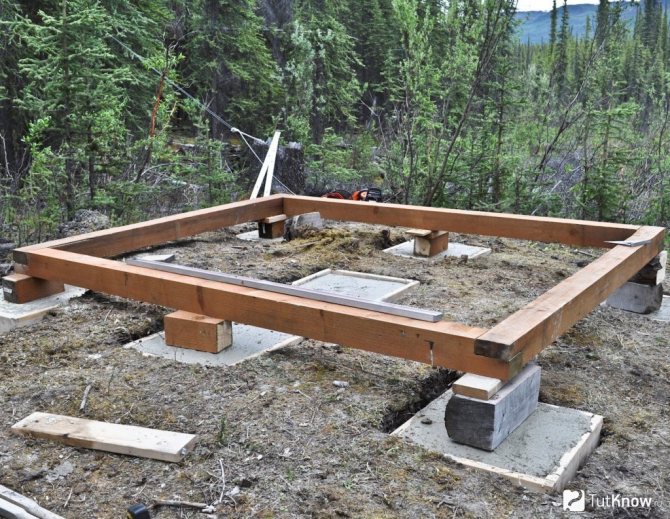
If the weight of the building exceeds 20 tons, then a powerful reinforced concrete strip foundation must be poured.
For lighter steam rooms, a columnar base is suitable. To build a columnar foundation for a black bath, we adhere to the following sequence:
- We clear the area around the construction perimeter and remove the top fertile soil layer.
- We make markings on the ground according to the dimensions of the structure. Poles must be placed at the corners of the building, under load-bearing walls and partitions, as well as at joints. The distance between them should be no more than 0.8 meters.
- We dig meter-long holes with a diameter of 20-25 cm in the marked places. For these purposes, you can use a regular drill.
- Fill the sand and crushed stone cushion to 15 cm and compact it thoroughly.
- We insert asbestos pipes into the resulting holes. We fill the remaining space to the ground with a mixture of crushed stone and sand.
- We insert a reinforcement frame into the pipes and fill it to the top with concrete.
At this stage, you need to take care of pouring the foundation for the stove:
- To do this, we select a construction site and dig a pit of appropriate dimensions with a depth of 0.5 meters.
- Pour in a mixture of sand and crushed stone and compact it thoroughly.
- We fix it to the walls and lay construction polyethylene (more than 300 nanometers) or roofing felt on the bottom. We attach the material with an overlap of 15-20 cm.
- We insert the reinforcing grid into the recess and fill it with concrete.
After the concrete in the pipes and the base of the furnace has completely dried, we lay two layers of roofing material for high-quality waterproofing.
It is more convenient and reliable to stick it on using molten resin. We fix support slats made of timber to the pipes, fastening them with galvanized fasteners or tenon joints, and also treat the wood of the support slats with antiseptic compounds and fire retardants. When installing pipes and pouring the foundation for the furnace, be sure to use a hydraulic level. All pipes must be located strictly at the same level, and the base of the stove must be placed parallel to this plane.
Construction of bathhouse walls in black style
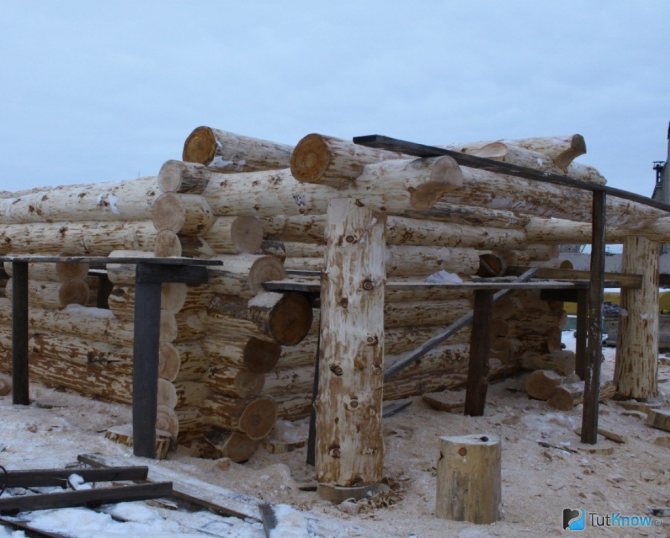
Prepare insulation (jute, moss or tow) in advance to perform thermal insulation at this stage. We carry out the work in the following sequence:
- We lay the first crown and check the evenness with a spirit level. The bars are securely connected to each other with metal pins. The first row does not need to be attached to the foundation; stability is formed due to the heavy weight of the structure.
- We fill the gap between the base and the first crown with polyurethane foam to additionally protect the wood from negative factors.
- We lay a heat insulator around the perimeter of the lower crown.
- We make holes for fasteners along the edges of the logs.
- We install the remaining rows according to the project. Leave openings for windows and doors. The optimal size of the material is 15x15 cm. Instead of galvanized pins, you can also use wooden dowels.
- We install floor beams.
It is not recommended to install window systems and doors at this stage. The log house will shrink and may deform the openings.
Rules for arranging a roof over a black bathhouse
Usually a black bathhouse is equipped with a gable roof. The technology for its construction is standard and looks like this:
- We install a wooden Mauerlat around the perimeter of the walls.
- We assemble the rafters on the ground and install them on the roof, first along the edges, then in the middle.
- We attach the ridge board and additional jumpers.
- We cover the gables with slats.
- We fix the vapor barrier membrane with an overlap of 15-20 cm, and seal the joints with metallized tape.
- We fill the sheathing and lay roll insulation between the boards.
- We lay waterproofing with the same overlap and fill the counter-lattice.
- We attach the finishing coating, leaving a ventilation gap to the insulating layers.
After installing the roof, the log house must be left for at least six months to allow shrinkage of the logs to occur.
Then re-caulking is carried out. The stove for the “black” bath is equipped without a chimney, so there is no need to leave a hole for it when constructing the roof.
Manufacturing instructions
The work on constructing a stove for a black sauna is divided into several stages. Let's look at the main ones in more detail.
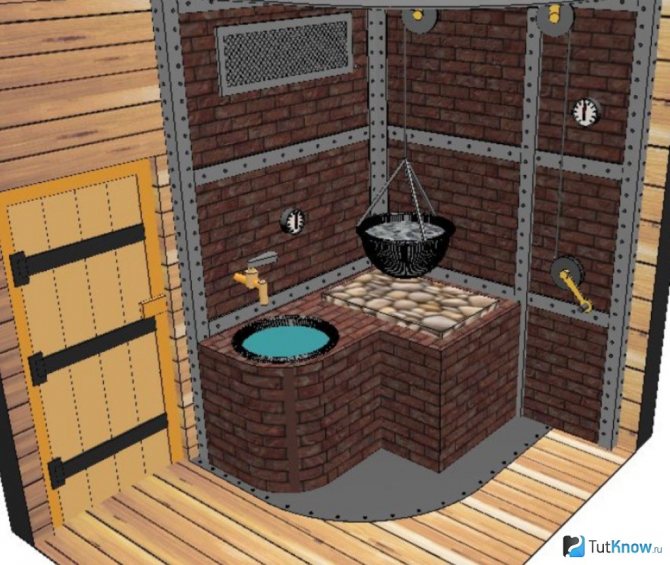
General scheme
Scheme of a stove for a black bath
Construction of the foundation
This operation must be performed during the process of laying the main foundation. The large mass of the structure will require an additional base for the heater:
- We dig a pit to a depth of 500-600 mm. Remember that the base must exceed the dimensions of the oven by 700-1000 mm;
- We make sand and gravel backfill and compact it. To do this, you can fill the sand with water and when it dries, walk with a hand tamper. We bring the layer thickness to 100-150 mm;
- we fill in a layer of thermal insulation made of expanded clay with a thickness of 150-200 mm;
- We cover the bottom of the pit with a 150 mm overlap on the walls with roofing felt, geotextile or plastic film. This is the base waterproofing layer;
- we connect sections of steel rods with wire and reinforce the foundation;
- We make formwork from the boards so that the foundation protrudes above the base of the bathhouse by 50-70 mm. for large sizes, you will need to install several jumpers, which serve as beacons when pouring the solution;
- we order or make a concrete mixture by hand and pour the solution into the pit. We level the concrete using a rule made from a board or profile pipe;
- compact the layer and bring it to the required height;
- at high air temperatures, fill the base with water and cover with film. In this case, the concrete does not crack. This operation must be performed several times a day.
The base of the black sauna stove is ready, you can move on to the next stage of work.
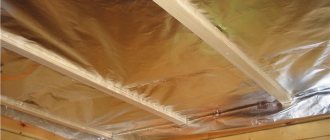
Wall and ceiling insulation
While the concrete hardens, we carry out work to protect the walls and ceiling from exposure to high temperatures. For these purposes, it is recommended to use a layer of thermal insulation, additionally covered with foil to reflect heat. In this case, the heat will be distributed evenly throughout the steam room.
It is difficult to independently apply a layer of thin foil to mineral wool or other insulation, so it is better to use a construction version of the material on a thin paper base. Among such materials we can highlight the moisture-resistant “Ruf Izol”, which can withstand heating up to 1200.
Among the ready-made panels with a protective screen, the following are in demand:
- "Isover Sauna";
- foil "URSA";
- "Sauna Butts"
With such slabs, the spaces between the sheathing bars are filled, and foil tape is glued to the joints.
The ceiling is covered in the same way as the walls, but it may need to be secured with lintels.
While work was being done to protect the walls and ceiling, the concrete had completely hardened and you could proceed to the main operation.
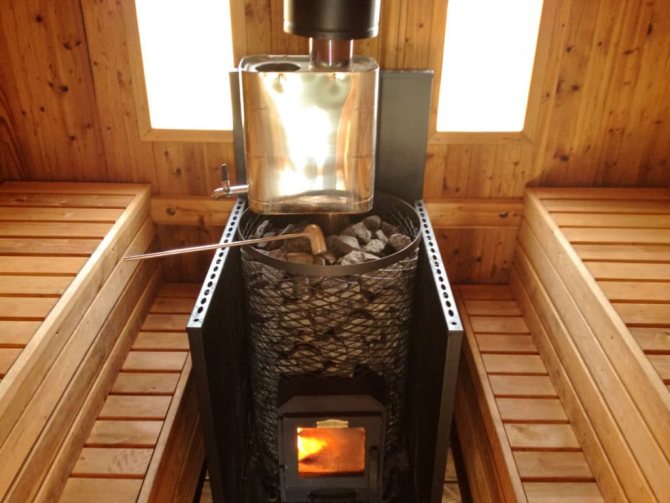
Furnace masonry
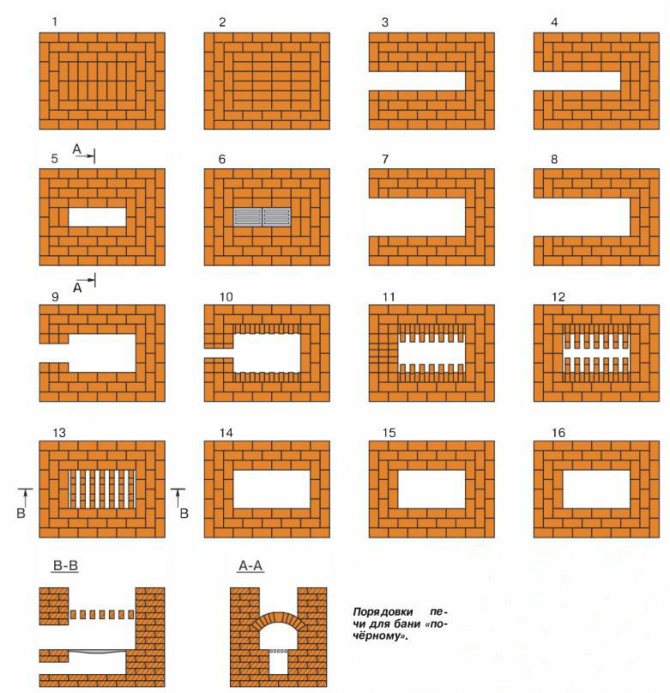
Ordering a sauna stove in black
Masonry work is carried out in several stages:
- Soak or rinse the fireclay brick with water. Clay ones will need to be filled with water and left until all air bubbles leave the surfaces.
- We cover the base with a double layer of moisture protection. It is better and cheaper to use old roofing felt.
- We mark the dimensions of the oven. We apply a layer of clay and cement solution on the base in a ratio of 5 to 1 and lay out 1 row of bricks over the entire area of the future heater. It is important to try to lay the first row exactly along all planes and according to the markings. All seams must be filled completely, without voids.
- We lay the second row on the mortar so as to tie the bricks of the first row. In the middle of the base we leave a cavity for arranging an ash pan and a blower. There is no need to make it large; it is enough not to lay 2 rows of bricks in the middle.
- We lay the third row of bricks on a thick layer of mortar according to the same pattern, leaving a vent groove.
- We weld the pieces of reinforcement and lay the grate. If the rods are not long enough, they can be butt welded.
- We lay out the walls of the combustion chamber with the thickness of the walls being brick. On the front side we leave a window for storing firewood.
- We bring the walls of the firebox to the required height, and lay a grate for stones on the penultimate row. It can be made from steel rods, the thickness of which is 14-16 mm, which are welded in the form of a lattice with a size between the rods of 100-150 mm.
- We apply a thick layer of mortar on top of the lattice on the bricks and lay the last row of bricks.
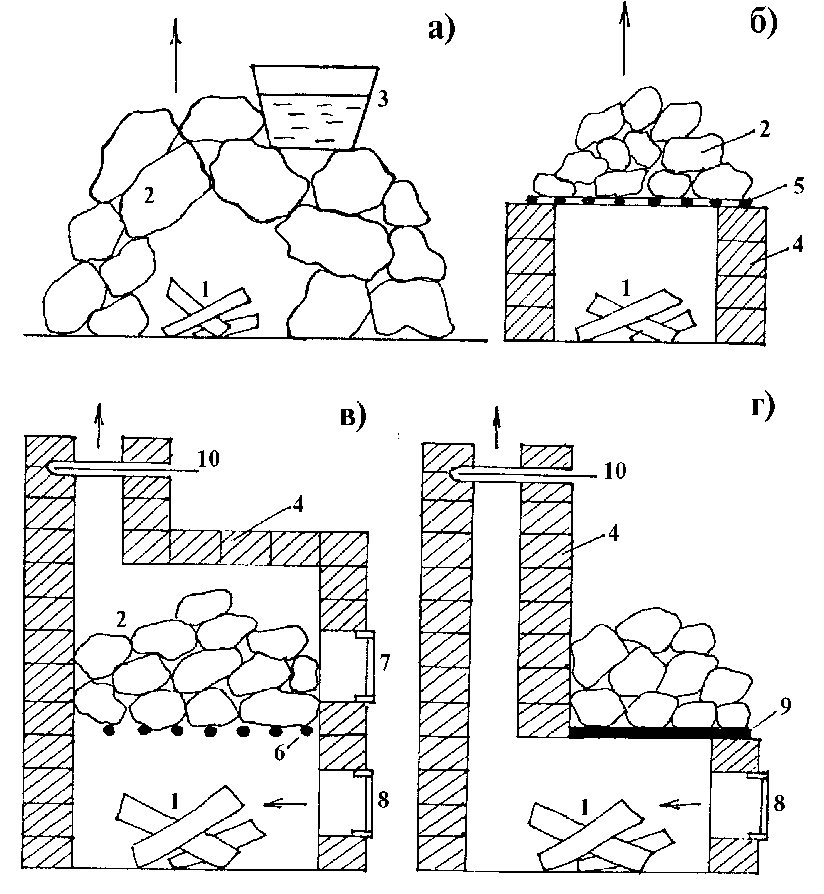
- We begin laying stones. First we place the large ones, leaving small gaps between them for the passage of air and the escape of smoke; in the second row we place smaller stones. Then we repeat the installation, alternating large and medium stones, gradually making a spherical arch of the heater.
- In the classic version, tanks for heating water were not installed. Small ledges were made on the vault, on which basins of water were placed; it was quickly heated from the heater to the required temperature. If you wish, you can wall up a steel water container on the back, install a tap in it and use the hot water supply.

Ready oven
Important! Do not leave large gaps between the stones at the bottom of the heater. Flames can pass into these cavities and burn human skin or cause a fire.
Examples of other options for finished structures in the photo:
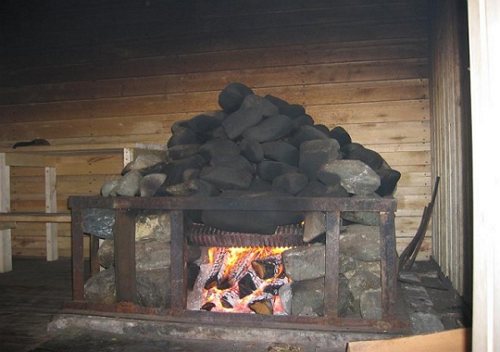
Photo 1
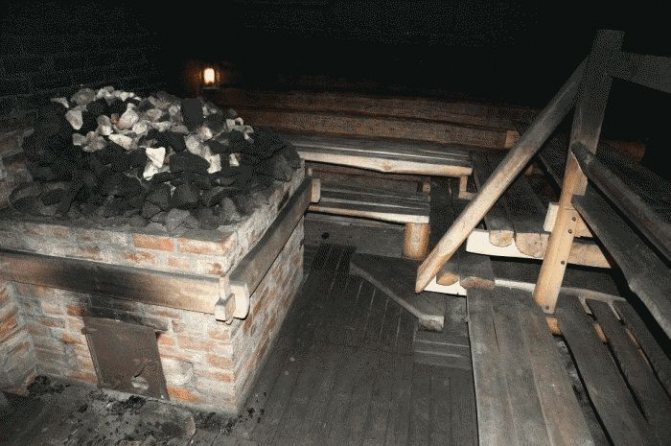
Photo 2
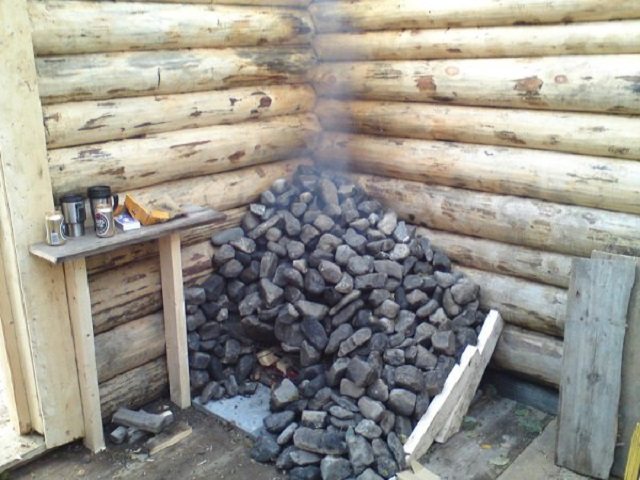
Photo 3
You should not immediately start your first trip to the steam room. You will need to perform, albeit not the main, but very important work (drying and kindling).
Drying
This operation is necessary to remove residual water from the brick and mortar, which, if quickly heated for the first time, can cause cracks. Therefore, you will need to gradually dry the stove and only then add a full load of firewood.
It may take up to a week of gradual firing of the stones, mortar and bricks to completely remove the moisture. Several times a day, we fill a quarter of the firebox with dry wood and light the stove. Then you can do household chores. After 5-6 hours we repeat the operation.
Ideally, 1 stack of firewood should burn completely within an hour. At the same time, do not forget to open the vent on the stove and the bathhouse door. In the following days, gradually increase the amount of firewood, gradually bringing the combustion chamber to full capacity.
In the first days, wet spots will form on the walls; when the release of water from the bricks stops, you can safely start using the stove. You should not use resinous wood for drying, especially in the first days. It is better to dry the stove with thin branches or wood chips from deciduous trees.
Construction of a stove for a black sauna
We prepared the foundation for the furnace in advance.
For further work, you need to stock up on silicate refractory bricks and normal clay (neither skinny nor greasy). In the process we adhere to the following procedure:
- We dry lay two rows of bricks on the waterproofing layer, overlapping the seams of the previous one.
- Making clay mortar for masonry.
- We lay out the firebox 0.5 meters high with an open top. The walls should be 19-25 cm thick.
- We install reinforcing bars on top of the structure in increments of 7 cm. You can use a ready-made industrial grid for these purposes.
- We put stones. Flattened cobblestones with a smooth surface and no defects work well. An excellent option is sea pebbles and peridotite.
- Large items (up to 15 cm in diameter) are placed down. We place medium stones (7 cm) in the middle. We put the big ones on top again.
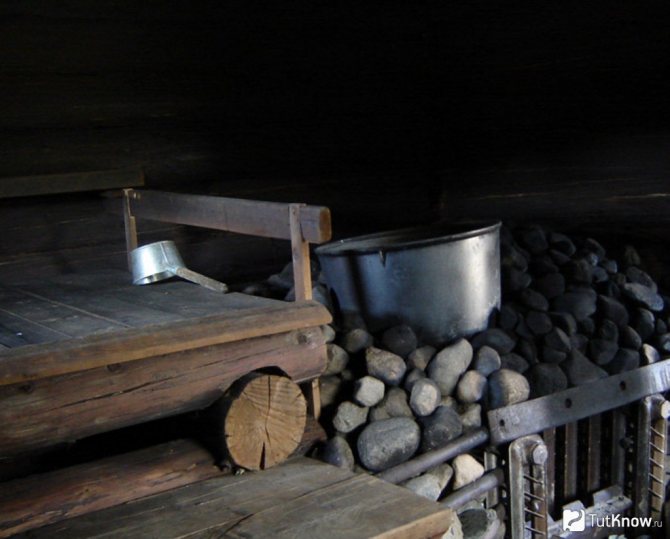
- We install a metal container on top for heating water.
The oven itself is not equipped with a water tank. In the old days, hot stones were thrown into a basin or barrel for heating.
Tips before starting construction of a bathhouse
Before starting construction work, you need to carefully plan and prepare thoroughly.
First of all, choose the appropriate type of base. At this stage, you need to take into account the level of groundwater passage, the type of soil, the weight of the future bathhouse, etc. The best option for most cases is a columnar base.
Think about the issue of water supply for the bathhouse in advance. Some home craftsmen use an ordinary well with a pump for this, while others lay a full-fledged water supply system. Make a specific decision in accordance with the specifics of your situation.
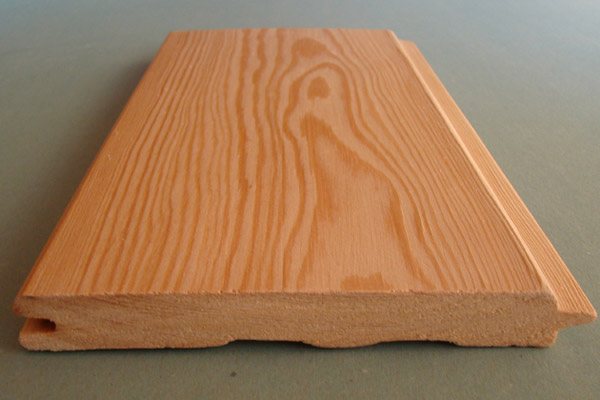
Select the material for construction. It is best to build a black bathhouse from the material that was used for its construction hundreds of years ago - a wooden frame. Cedar and larch are excellent. The most budget option is simple pine.
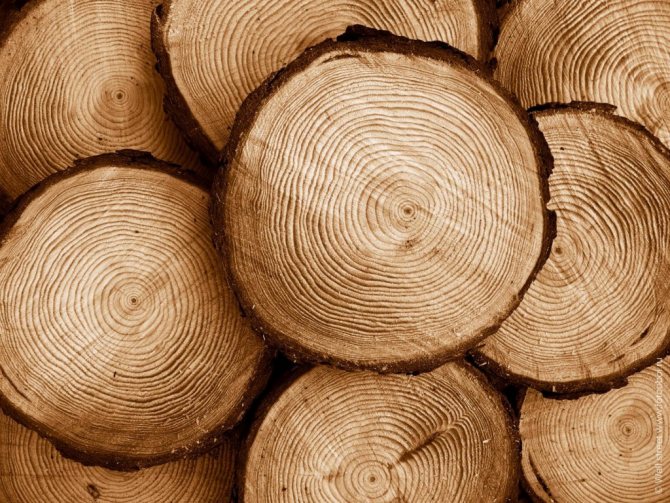
Pine cut
To insulate the steam room in a black style, it will be enough to lay moss or jute tape between the rows of the log house.
Professionals strongly do not recommend finishing the walls of the bathhouse from the inside. The exception is frame baths. If you decide to build a steam room from frame elements, use mineral wool for insulation. However, this option is extremely undesirable - the sensations from the “black” bath will be completely different.
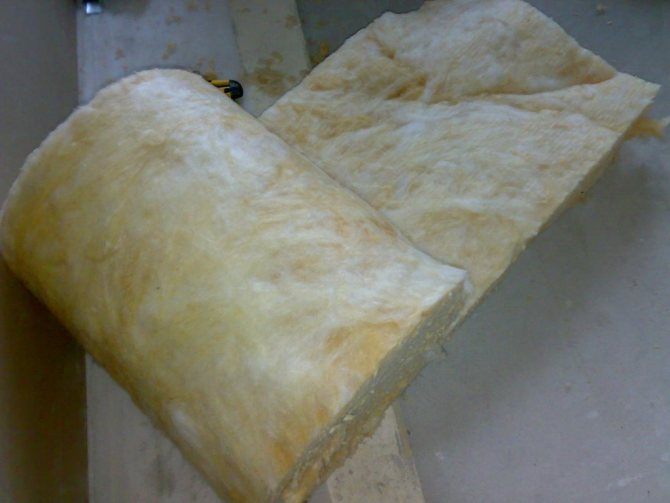
Minvata
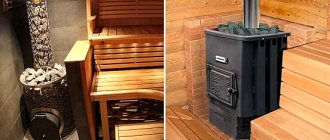
The design of the sauna stove does not require a chimney and this is an additional advantage for private developers. Select the size of the stove in accordance with the dimensions of the steam room. So, to warm up a steam room with an area of 10-12 m2, a stove measuring 1x1 m is enough.
It is most convenient to place the stove opposite the entrance to the steam room.
It is recommended to assemble shelves from larch. Due to the nature of bath procedures, the room will have to be cleaned quite often, so it is more convenient to make the shelves portable.
Larch paneling
Internal and external finishing of the bathhouse in black
The inside of the walls in the bathhouse is not finished with anything black.
The natural look of the logs looks very trendy. As for other surfaces, we adhere to the following instructions:
- We insulate the flooring and install a wooden floor on the support joists at a slope towards the drainage point.
- We lay roll insulation between the floor beams and cover it with wood.
- We install the electrical wiring in a special corrugation, and for lighting we use heat- and moisture-resistant lampshades.
For high-quality air circulation, the room is not cluttered with unnecessary details.
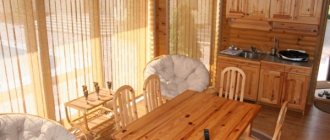
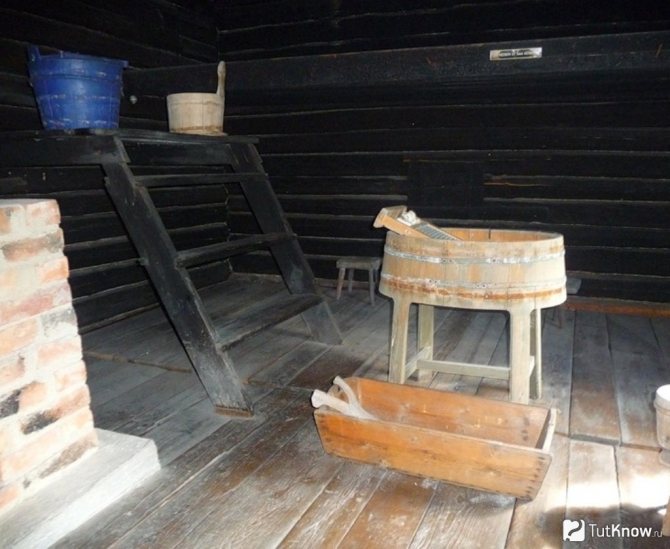
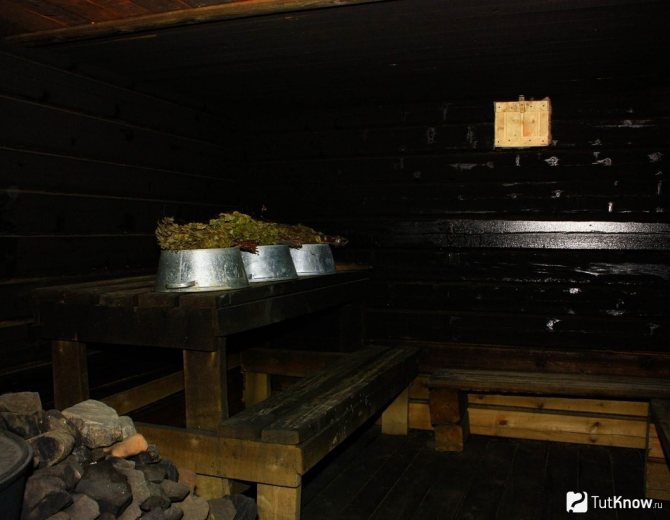
Just above the level of the stove under the wall we install shelves one meter wide and two meters long. We install two benches made of planed boards: one near the shelf, the other under the window. On the third wall we fix a wooden shelf for bath accessories. We place a tub of cold water in the corner near the front door. As for the dressing room, you can place a clothes hanger, a shoe cabinet, a table and chairs in it. After the procedures, you can drink tea or kvass here. Also, brooms and towels are usually stored in the dressing room.
When installing window openings after shrinkage, do not forget to fix the casing to prevent deformation of the systems.
Types of stove masonry in a black bath
Stove with a barrel
There are many existing options for installing a black bath. Among them the most popular are:
- Stove made of natural stone and brick. In such a structure, a brick arched vault is made, which serves as a support for natural stones.
- Black sauna stove with door. This masonry is a more modern version. The door is attached to a metal strip, which is first welded to the frame. To do this, a recess of the required size is made in the bricks. Doors are installed as an addition to the unchanged original design of the black sauna stove.
- A stove with a barrel instead of a back wall. The container, which is installed behind the stove, replaces the wall and is used to heat water.
In various variations of the stove masonry, only the details are changed or supplemented. The functioning of the stove remains inherent to all the characteristics of a rustic Russian black bath.
Specifics of the first kindling of the stove in a black sauna
When choosing firewood, give preference to hardwood (aspen, birch).
Conifers contain resins that are released at elevated temperatures. Oak firewood burns for a very long time, so its use is also not recommended. Use well-dried, medium-sized logs. The process itself is carried out in the following sequence:
- We check the steam room and remove unnecessary things from it. Leave the door half open.
- We put paper or wood chips in the oven and make a kind of “hut” around it.
- We set fire to the crumpled paper and leave the room. As long as the door is open, combustion air will flow into the steam room.
- When the room warms up, close the door and wait for the fire to go out. Please note that it is not advisable to extinguish the stove yourself.
- We clean the fuel compartment from ash.
- We wait for the steam room to be completely ventilated, and leave the bath to brew for 25-30 minutes. Then we spray the walls, shelves and stones with water, creating the first steam, after which we can begin the procedures.
How to build a black sauna - watch the video: Thanks to the large number of stones, a self-made black sauna warms up quickly and retains heat for a long time. A steam room measuring 2.5 x 3 meters can be heated in 1 hour and 20 minutes. In this case, the optimal temperature will remain for about 3-5 hours. Instructions, photos of black baths and construction recommendations will help you carry out the work yourself and equip a full-fledged steam room in the best Russian traditions.
Description of the operating furnace
In the presented version of the stove masonry, the walls lie on a die of one and a half bricks. There are four rows in height, the depth of the firebox is four bricks.
Two strong rails are laid on top of the walls, on which a metal channel is placed. It is laid with rolled strong river stones, without any damage or stains. They should be smooth and evenly colored.
The rocks are placed in layers, overlapping the joints so that the smoke can pass in different directions when heated.
A large 100-liter barrel for heating water is located next to the stove. Three metal pipes are welded to its bottom. The ends of two of them meet in the firebox, and on the edge of the middle one there is a built-in tap for draining the remaining liquid. The water is heated in such a container for an hour.
While using the stove, a brick may burn out or a stone may crack, but everything can be easily fixed. The design is completely simple. It’s not difficult to build such a stove for a black sauna with your own hands.