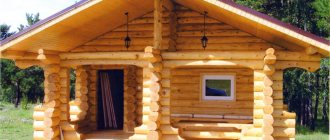
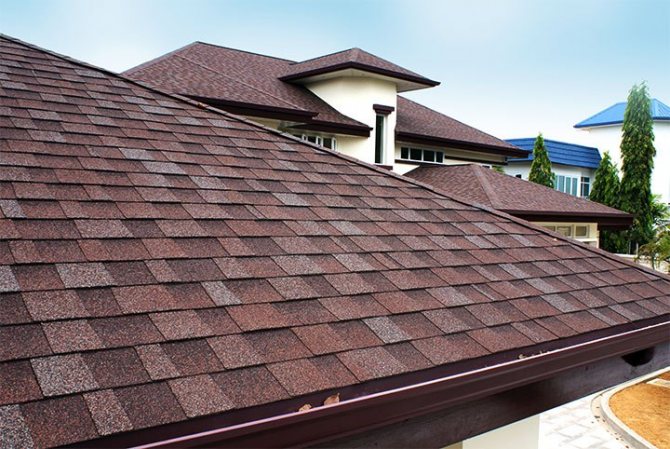
For many centuries, the color, shape and texture of tiles were for many peoples a kind of architectural ideal for roof covering. And our ancestors couldn’t have been wrong for so many years. The tiles, thanks to their scaly surface, withstand the vagaries of the natural elements and at the same time are pleasing to the eye. A properly executed tiled roof does not lose its position even after a century.
The roof with tiles is popular because... has a presentable appearance and good performance characteristics.
The technology of laying tiles consists only in the fact that the tiles of the lower row must be covered with tiles of the upper row - this is the whole “trick”, and in this case you will get an airtight roof. You can find out all other details from professionals in this matter. Otherwise, the shingles may be mistakenly discredited, and they do not deserve that. In this article you will receive information about the features of laying this material in order to assess the complexity and labor intensity of the work yourself before turning to specialists for help.
What is soft roofing
The basis of the raw material is fiberglass (fiberglass insulation), which is impregnated with bitumen with additives. On top of it there is a layer of stone chips - it protects from environmental influences and provides a large selection of tile colors.
Soft roofing is available in three types:
- Rolled. A striking example is roofing felt, ondulin, uniflex. Flooring occurs in strips. Sealing of joints is achieved by fusing strips or gluing. Roll roofing is suitable for flat (single-pitched) roofs with a slope angle of up to 9 degrees. It is often used to cover the roofs of garages, barns, and outbuildings.
- Liquid mastic. Sold chilled (requires heating) or ready-made. To strengthen it, a metal mesh is first laid on the roof. Then mastic is applied in a monolithic layer. Suitable for flat roofs.
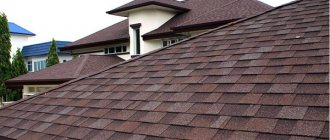
- Roof tiles. The base is bitumen. It consists of small elements - shingles (tiles). In composition and properties it is many times superior to both previous types. In terms of shape and relief, shingles are very similar to ceramic tiles. On each side of the shingles there is a strip of adhesive, the elements of which are glued to the wooden base. Each shingle is glued separately. For reinforcement, roofing screws or other hardware are used. When the new coating is heated in the sun, the edges of the tile melt slightly and a continuous sealed layer is obtained.
Further in the article, the types and technology of installation of bitumen shingles will be discussed.
The standard shingle length is 1 m, width is from 31.7 to 34.9 cm.
Laying soft tiles can be done for complex roofing systems: pitched, hip, domed, conical, hipped, hexagonal.
It is suitable for roofs with a slope angle of 11 degrees or more. The greater the angle of inclination, the longer the coating will last.
Users often search for:
- How to build a frame bathhouse with your own hands
- We are building a bathhouse in the country
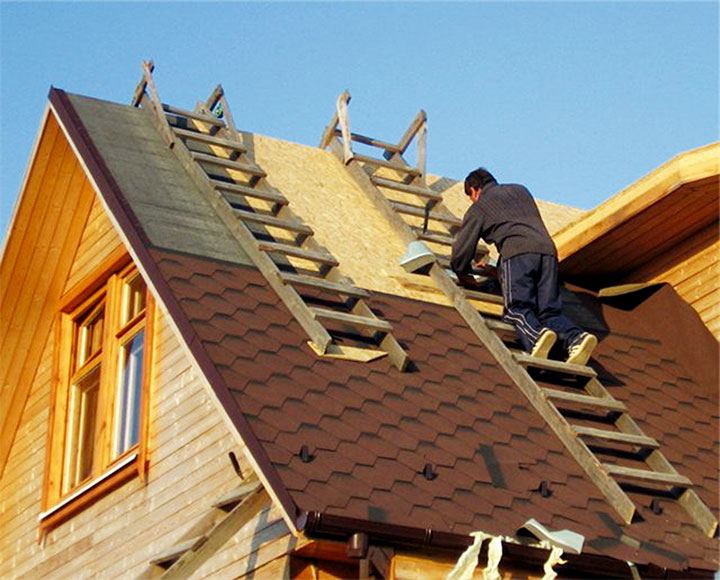
How to properly lay soft tiles with your own hands
Scientific and technological progress has not spared any branch of human activity, including the production of building materials.
Nowadays, there are many products that are used for roofing. soft tiles are especially popular among them.
It is worth noting that any roofing material will last the entire (or even longer) warranty period if the installation technology is followed.
The advantages of bitumen shingles over their competitors are as follows: they forgive minor installation flaws, they can be used to cover roofs with a slope of 11 degrees.
Soft tiles can be used to cover roofs with a slope of 11 degrees.
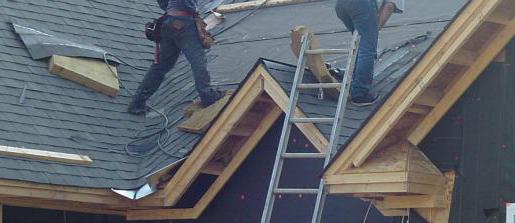
Roof installation with soft tiles.
Laying flexible tiles in winter #8211; not the best idea, most manufacturers recommend carrying out all work at above-zero temperatures (from +5).
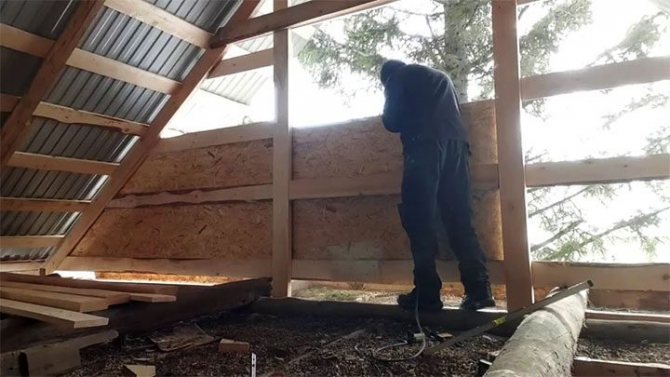
The fact is that the sheet with “tiles” must be attached to a wooden base and lining carpet, the surfaces are fastened with a self-adhesive layer, the tightness of the coating is ensured only in bright sunlight, which gradually “melts” the adhesive substance. But in sub-zero temperatures, you can begin preparatory work: install rafters, wooden flooring, insulate the structure, perform steam and waterproofing.
If there is no other way out and you need to put the house into operation in the winter season, then these recommendations are especially for you! First, erect a metal or wooden structure on top of the roof and cover it with a special noise-proof or dust-proof film or simple polyethylene film. Inside, the “second roof” will be heated by diesel heat guns, so you can maintain the optimal above-zero temperature. By the way, the “warmhouse” also allows you to carry out plastering work.
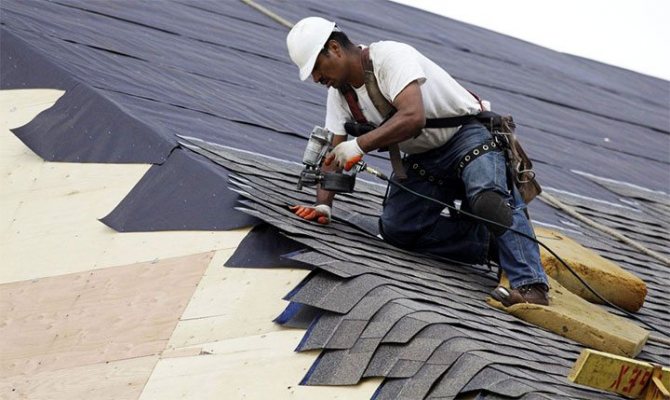
Laying bitumen shingles
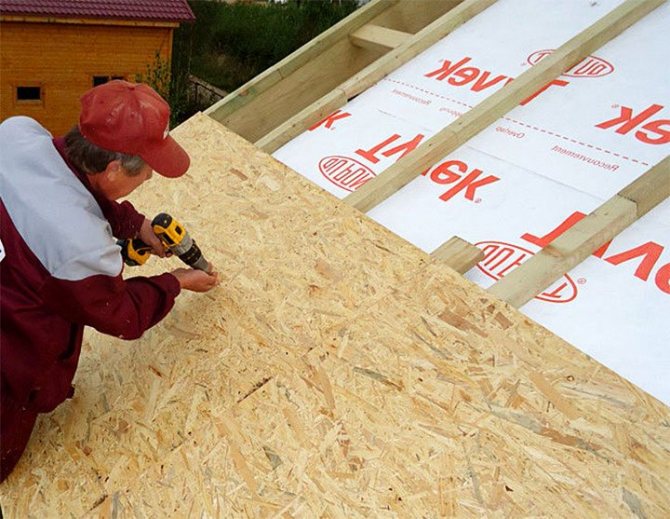
As a base for bituminous shingles, a material with a flat surface (for example, OSB, tongue-and-groove plywood or edged board) and a humidity of no more than 20% is suitable.
Place the joints of the boards where the supports are located.
The thickness of the plywood and boards should be optimally correlated with the pitch of the rafters; as an example, we list some values:
- With a rafter pitch of 60 cm, the thickness of the board should be 2 cm, and plywood #8211; 1.2 cm.
- At a step of 90 cm, the thickness of the board #8211; 2.3 cm, and plywood #8211; 1.8 cm.
- At a step of 60 cm, the thickness of the board #8211; 3 cm, and plywood #8211; 2.1 cm.
Why is ventilation needed? There are at least two points here:
- To reduce the formation of icicles and ice on the roof in winter.
- To drain water from sheathing and roofing material.
Laying bitumen shingles.
Most often, a rolled insulating product is used as a reinforcing lining, which is mounted from the bottom up with an overlap of 10 cm.
Seal the seams with glue and secure the edges with nails in 20 cm increments.
If the slope of your roof is 18 degrees or more, it is possible to install a spacer layer only in the valleys, on the eaves, near the chimneys, where the roof adjoins the vertical walls.
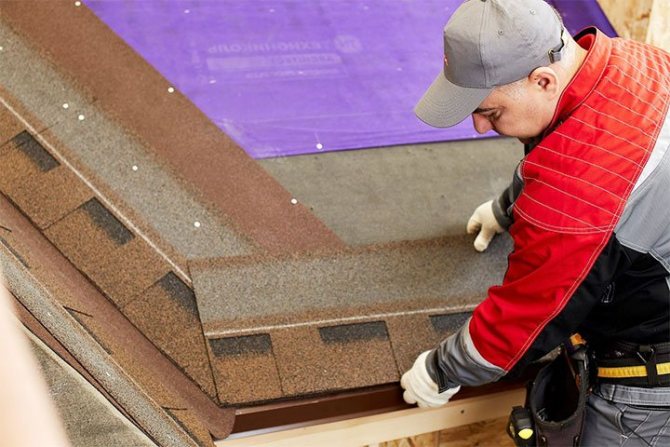
We install eaves strips, gables, valley carpet, ordinary tiles
To protect the sheathing from moisture, on the eaves overhangs (at the top of the lining carpet), install metal eaves strips (droppers), overlap #8211; from 2 cm. Nail them with roofing nails in a zigzag pattern, step #8211; 10 cm. The gable strips are also installed with an overlap, but already 2 cm (step #8211; 10 cm).
To increase the waterproofness of the structure in valleys, lay a valley carpet on top of the lining layer that matches the color of the tiles. Step between nails #8211; 10 cm.
Next, it’s time for self-adhesive eaves tiles; lay them along the eaves overhang, joint to joint, removing the protective film.
Step back 2 cm from the bend of the eaves strip, nail the elements near the perforation points, and after the fastening point, cover with ordinary tiles.
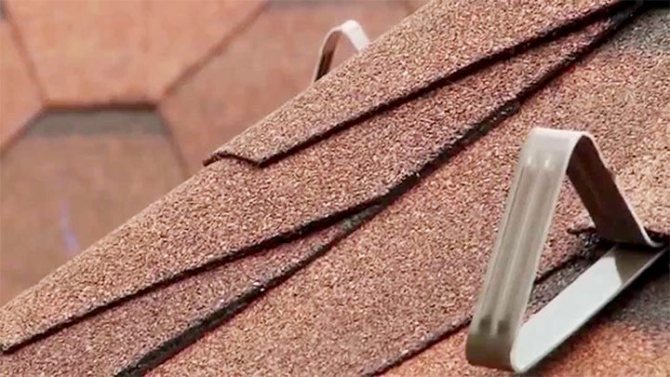
Fastening flexible tiles.
To avoid color discrepancies, it is recommended to use roofing elements mixed from several packages.
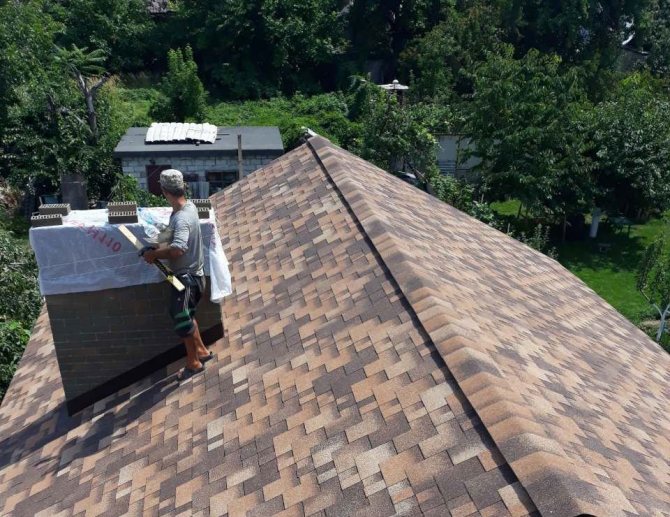
Start laying ordinary tiles from the center of the eaves overhang to the end parts of the roof.
Remove the protective film, place the tile in the intended place, nail the element (4 nails above the groove line; if the roof slope is more than 45 degrees, then increase the number of fasteners to six).
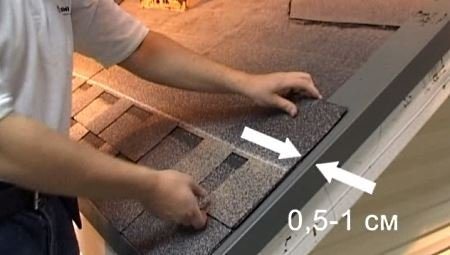
Start laying soft tiles so that the edge of the first row is located 1 cm higher from the bottom edge of the eaves product, and #8220;petals#8221; hid the junction points.
The “petals” of subsequent layers should be flush with the cutouts of the elements of the previous row. At the end, cut the material along the edge and glue it (a strip of glue #8211; about 10 cm).
Leave an open strip of 15 cm at the bottom of the valley.
Ridge tiles are obtained by dividing the tiles into 3 parts at the perforation points.
Install the elements with the short side parallel to the ridge, nail them with nails (two #8211; on each side). Now a little about the passages through the roof.
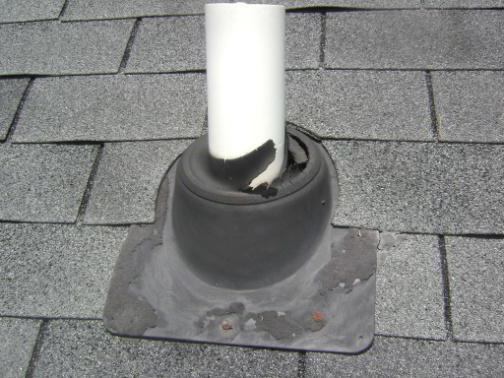
The antenna holes are equipped with rubber seals; smoke #8211; needs to be isolated.
Consumption and method of applying sealing adhesive
To seal the overlaps of row tiles on the valley carpet and underlay carpet, joints, and passages of ventilation systems, bitumen glue is needed. Let's talk about composition consumption:
- To process the overlaps of the underlay carpet (the width of the glue application #8211; 10 cm), you need 0.1 liters of glue for each linear meter.
- To process the overlaps of ordinary tiles onto the valley (the width of the glue application is #8211; 10 cm), you need 0.2 liters of glue for each linear meter.
- To glue ordinary soft tiles on the end elements (glue application width #8211; 10 cm), you need 0.1 liters of glue for each linear meter.
- To treat brick walls and pipes (over the entire surface), you need 0.7 liters of glue per linear meter.
Advantages and disadvantages of the material
Advantages of soft tiles:
- Long service life. Depending on the manufacturer, the warranty period can reach 60 years.
- Attractive view. It looks better than the usual gray slate, does not lose its brightness even after years, and perfectly emphasizes the majesty of the building and the entire site.
- Tightness of the coating. Does not allow water to pass through. The elements are securely fastened together, so there is no risk of moisture getting inside the roof.
- To be repaired. If damaged, you can easily replace one or more parts without harming the entire coating.
- Low noise level. Raindrops hitting the roof will fall silently, unlike corrugated sheet flooring.
- Environmental resistance. Shingles are not afraid of temperature changes, frost, precipitation, and do not rot. Damage by insects is excluded.
- Suitable for laying roofing systems of various depths.
- It is simple and convenient to install.
Of the minuses:
- Highly flammable. Not recommended for use on frame wooden buildings.
- Doesn't hold heat well. Therefore, when covering the roof of a private house, high-quality insulation will be required.
Below we will analyze the differences in types of products.
Types of soft tiles
The materials differ from each other in two ways.
By number of layers
Happens:
- single-layer (3 mm thick);
- two-layer (from 5.5 to 6 mm);
- three-layer (9 mm).
For a strong roof covering, it is recommended to use only multi-layer bitumen shingles. The thicker the material, the stronger the surface.
By cutting method
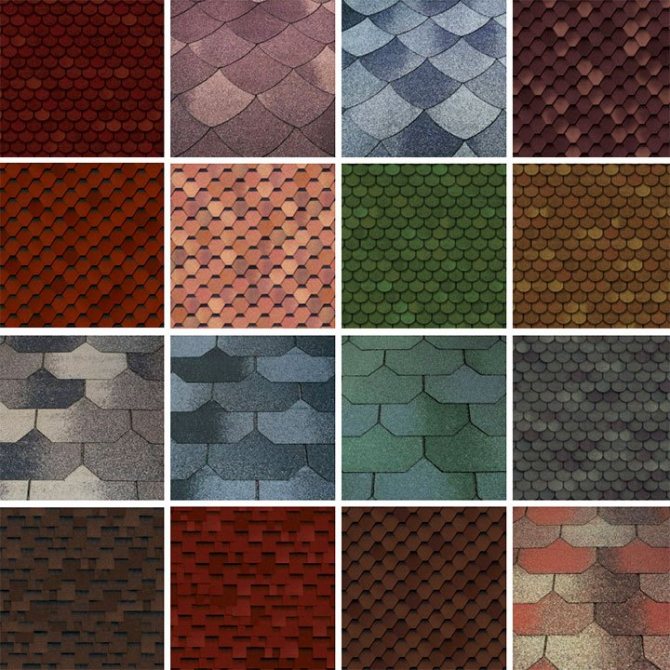
Issued:
- square;
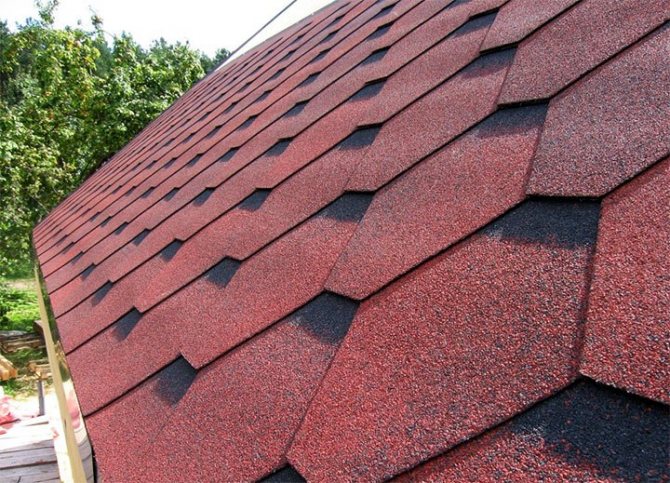
- hexagonal (honeycomb);
- rectangular;
- oval;
- convex;
- diamond-shaped;
- beaver tail;
- brick;
- dragon tooth
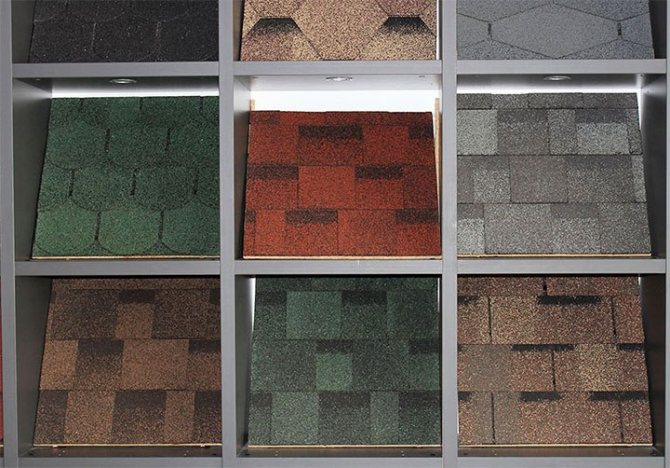
There is a much larger selection of colors. In demand:
- red;
- green;
- brown;
- blue.
In addition to single-color products, there are also colored products with a 3D effect or with a smooth transition between colors. The coating can be matte or glossy.
What you need to know before installing a flexible roof
Before you begin installing shingles, it is important to do the following:
- Provide ventilation. Bitumen shingles do not allow moisture to pass through. If this is not done, condensation will begin to accumulate under the material. Ventilation gaps are left at the bottom and top of the roof - air will circulate and excess moisture will evaporate. Exhaust vents are placed at the top, supply vents are placed at the bottom under the slope.
The recommended distance for normal air exchange between the insulation and the roof is 5 cm or more.
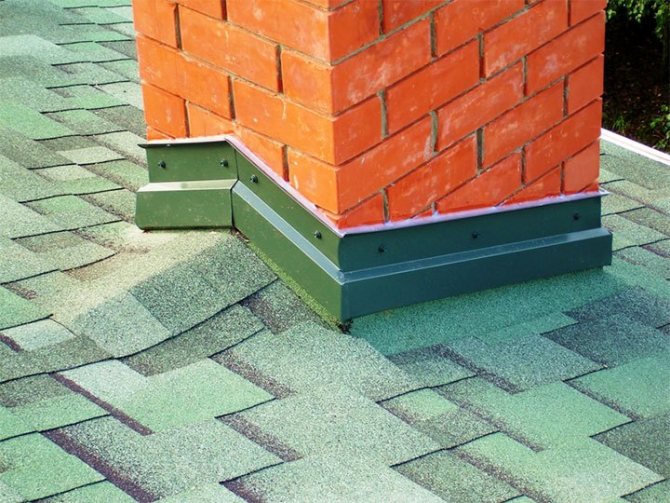
- Calculate the dimensions correctly and leave holes in the roof for the chimney, antennas, and drainage. For small openings, rubber seals are sufficient (for cable passage). The riser is laid on plastic passages; tile shingles should already be placed on top.
- Carefully consider the arrangement of the chimney. In addition to reliable waterproofing and insulation, you will need to cover the pipe wall 30 cm with a metal sheet (fire safety requirement). A valley carpet is attached on top with an overlap of metal sheet and tiles by 20 cm. Then shingles are applied, but 8 cm must be left without tiles. Install a metal apron.
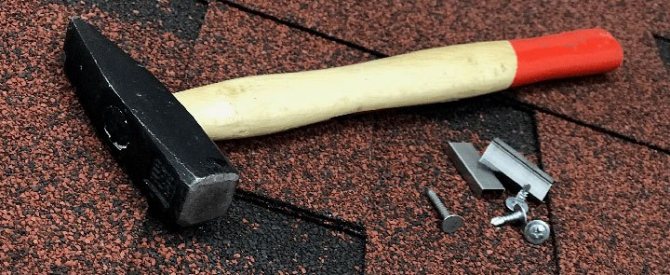
- Nails must be driven in at right angles to the surface. The nail should connect the elements and the base, but nothing more.
It is better to buy bitumen shingles, components, and fasteners from one manufacturer. In this case, the products will be maximally adapted to each other.
Installation of roofing material
First of all, the installation of cornice tiles is carried out - a special element of a soft piece roof. Not all manufacturers offer special shingles for eaves. In this case, you need to use a strip of material that is cut out from ordinary shingles - the petals are cut off from it. Stepping back 2 cm from the eaves overhang, the resulting elements are glued.
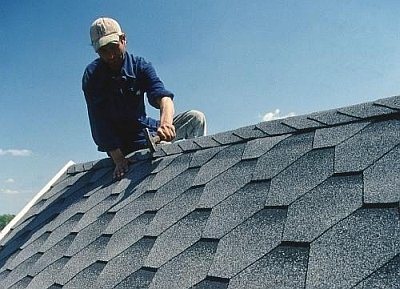
Before installation, markings must be applied to the roof. Chalk lines indicating the location of rows of material make it possible to lay shingles exactly parallel to the eaves. The vertical line marks the middle of the slope. To make the roof look aesthetically pleasing, the covering is installed from bitumen tiles taken randomly from several packs. This allows you to level out differences in shades of the material.
Laying of flexible tiles begins from the middle of the eaves overhang - the shingles are installed to the right and left of the first. The protective film from the roofing elements is removed immediately before installation. The shingles are pressed tightly to the base, and then additionally secured with roofing nails driven in above the groove: 4 pieces for each shingle.
The first row of shingles is positioned so that their lower edge is 10-15 mm higher than the lower edge of the eaves tiles. Laying is carried out with the expectation that the petals of the bitumen elements cover the joints of the eaves shingles. The ends of the petals of subsequent rows should be above the cutouts of the previous layer or at their level. In the places where the shingles join the gable strips, the material is cut off along the edge of the roof, the edges are glued using bitumen mastic, and they need to be coated by 10 cm.
Arrangement of the valley
Installation of a soft tile roof requires a special approach to creating a reliable and durable valley structure. Before laying ordinary tiles, a waterproofing lining is installed under the valley, to which the flexible tiles are fused using a hot air gun or fixed using bitumen-polymer mastic.
On the slope opposite to the selected one, parallel to the valley axis, at a distance of 30 cm from it, a line should be drawn. The shingles reaching this line from the first slope (with an overlap of the valley axis) are cut along the line and secured with mastic or fused with a hot air gun. This method is used to install all shingles that come from a gentle (or short) slope. Then a line is drawn on this slope, parallel to the axis of the valley and spaced 10 cm from it. The shingles reaching the line from the opposite slope are cut exactly along the line, and their upper corners should be trimmed by approximately 60°.
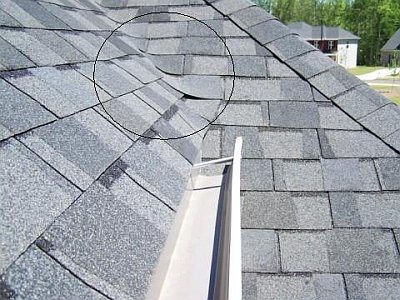
Ridge covering
The ridge covering is laid after the installation of ordinary tiles is completed. Cornice elements can be used for these purposes. In other cases, the material is cut from ordinary shingles
:
- if the shingle petals are rectangular in shape, they are cut off, and the remaining wide strip is mounted on the ridge;
- The shingles, which form a pattern of hexagons when laid, are cut into hexagonal fragments, from which the ridge covering is made.
Straight strips are heated with a hot air gun, bent along the axis and laid on the ridge with an overlap of 50 mm. Each strip is fixed with 4 nails.
Hexagonal fragments are mounted with the short side along the roof ridge, overlapping in the direction of the prevailing wind for the given area. The overlap should be at least 5 cm. The ribs of hip roofs are designed in a similar way, with the installation of elements starting from the bottom.
How to lay soft tiles according to all installation rules is presented in detailed video instructions.
Performance characteristics of flexible roofing
The parameters are:
- Bitumen begins to melt at a temperature of 300 degrees.
- A bitumen carpet in one layer does not exceed a load of 5–8 kg per square meter. m, laminated multilayer - 13 kg per sq. m, so it is not necessary to build a reinforced rafter system, unlike metal tiles.
- Soft tiles are environmentally friendly and safe for health.
- The bituminous surface does not store electrostatics.
- Low electrical conductivity minimizes the risk of lightning strikes.
- Bitumen has a hydrophobic property - it repels moisture.
- Tight fastening to the roof makes the material resistant to any wind loads.
- Flexible roofing is plastic and protects from ultraviolet radiation.
Its important feature is the low amount of waste. Often the figure does not exceed 5% of the total amount of material used.
Additional waterproofing
This is the first stage of installation of flexible tiles. A layer of additional waterproofing is laid in valleys, along overhangs, as well as in places adjacent to the building, on ridges and roof windows. This layer will serve as additional insurance against leaks in places where the greatest accumulation of water will be observed.
The waterproofing carpet is fastened with roofing nails in increments of 40 cm. Along the lower edge this distance should be more frequent (10 cm). The second layer must be laid on top of the first layer. In places where there is an abutment with a wall or pipe, the material should extend onto them by 5-10 cm.
This task is not faced by those who solve the question “How to put flexible tiles on a gazebo with your own hands?” After all, in this case there simply won’t be a pipe.
Methods of fastening sheets of soft tiles
The shingles will be easy to install and cut, but it is important to think through and arrange a continuous sheathing for them.
You can lay a soft roof in the following ways:
- The main one is an adhesive strip on the inside of the tile.
- Additional reinforcement for fastening is the use of roofing mastic and bituminous glue. The latter must be attached strictly according to the instructions, otherwise an excessive amount will only damage the coating.
- Combination with metal hardware. Roofing screws, nails, press washers, screws, staplers, and felt pins are suitable.
In some cases, when bitumen shingles will be laid on top of a steep metal canopy, gazebo or porch at the entrance to the house, it is allowed to use a gas burner and fuse the elements.
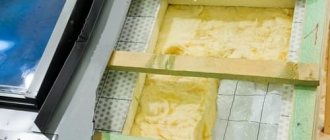
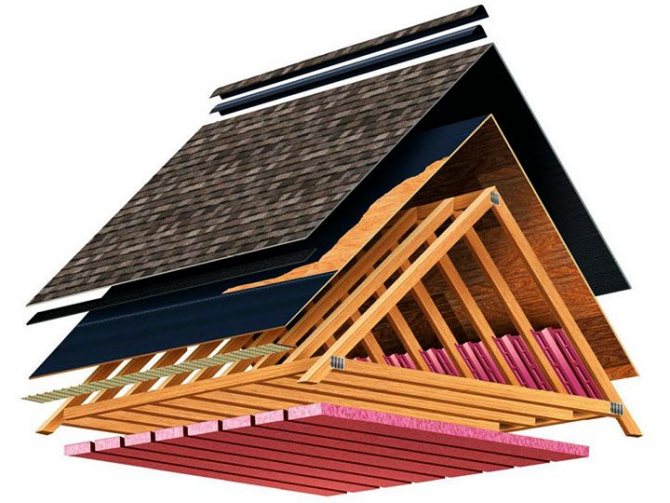
Types of roofing pie for soft roofing
The roofing cake protects the building from the formation of condensation in the under-roof part and reduces heat loss. The procedure for installing a roof in different regions of the country, depending on its design, can vary significantly.
The structure of the pie for laying a cold roof:
- Rafters.
- Solid and sparse lathing made of wooden boards.
- OSB boards or moisture-resistant plywood.
- Substrate.
- A layer of bitumen shingles.
When arranging the attic floor or residential attic, the roof will have to be insulated.
Assembling the pie step by step will be a little more difficult and will take more time and money. The order is as follows (from outside to inside):
- Elements of bituminous shingles.
- Substrate.
- Moisture-resistant plywood, OSB board (optional).
- Sheathing made of boards.
- Counter-lattice.
- Waterproofing layer.
- Rafters.
- Thermal insulation material (it is better to lay mineral wool).
- Vapor barrier.
- Additional insulating layer (technoNIKOL polystyrene foam boards, penoplex).
- Lathing for covering the roof from the inside.
- Plasterboard, OSB for internal roof lining.
The detailed sequence of work will be discussed in the section below.
Articles that people are interested in:
- Gazebo attached to the bathhouse
- Bathhouse with a large terrace
Step-by-step instructions for installing a soft tile roof
Lathing
It is important to take into account that flexible tiles completely follow the surface topography, so a continuous sheathing of smooth material must be placed under them.
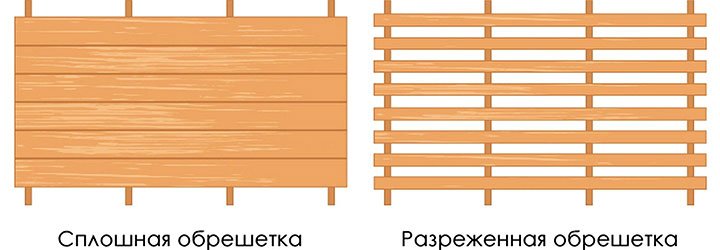
Types of lathing: on the left - solid, on the right - sparse.
Suitable for this:
- sheets of moisture-resistant plywood;
- OSB boards;
- edged or grooved boards.
When fastening the sheathing, it is necessary to leave a gap of up to 5 mm between the panels for thermal expansion of the material. They need to be laid out in a checkerboard pattern.
In detail it looks like this:
- Take boards 10-15 cm wide and 25-30 mm thick. They are placed on top of the rafters. The distance is selected in accordance with the dimensions of the sheet material (plywood, OSB). You need to choose so that two boards fall on the edges of the sheet and one board is in the center.
- The sheets are placed in a checkerboard pattern to increase the strength of the coating. Between the sheets you need to leave a gap of up to 5 mm so that the material has room to expand when heated.
- To ensure natural ventilation under the roof, wooden blocks must be nailed on top of the rafters. Thickness – from 40 mm. They should be laid parallel to the rafters.
When assembling the sheathing, take into account the angle of inclination of the slope - the smaller it is, the smaller the step between the sheathing is.
Cornice strip (dropper)
A drip edge is a metal strip that is usually installed to the eaves overhang. It serves to strengthen and protect the wooden parts of the roof from precipitation. Water will not flow under the roof, but will go straight into the gutter, which is located under the eaves.
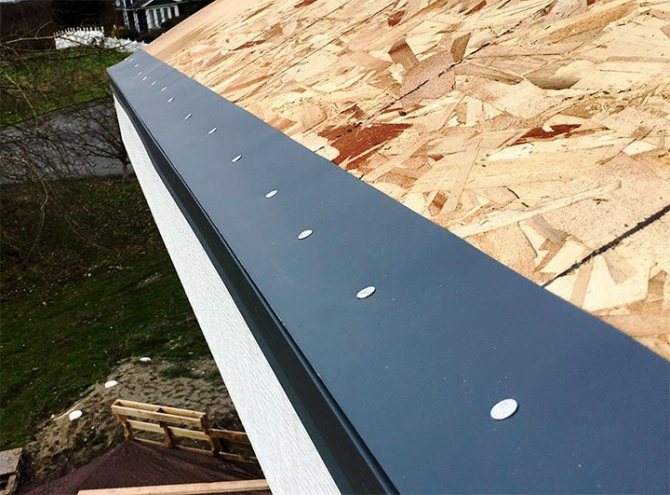
It looks like a steel corner up to 3 m long. The width of the shelves is 15–25 cm.
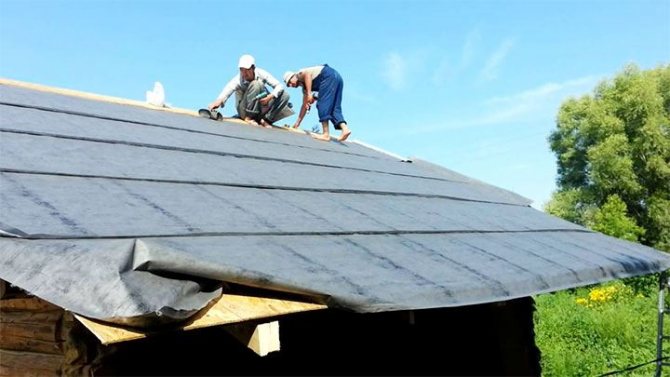
Underlay (underlay carpet)
The resulting sheathing must be covered with a special lining carpet. It is based on bitumen-polymer raw materials.
Carpet functions:
- Leveling the sheathing before laying rows of tiles.
- Strengthening the moisture-repellent properties of the cake.
- Extending the service life of the roof structure.
The carpet is selected to match the technical characteristics of the bitumen shingles. The service life of both materials should be approximately the same.
Installation of the carpet is carried out in the following order:
- Valley flooring. Its middle should coincide with the center of the carpet, and at least 50 cm of coverage should remain on each side.
- Now you need to lay the carpet along the eaves. The material covers the drip shelf at least halfway
- Covering the rest of the roof. Direction - bottom-up. It is recommended to fasten the rows with an overlap of 10 cm in length and in width with an overlap of up to 15 cm. Fasteners - roofing screws, nails. To ensure reliability, the edges of the material must be coated with mastic.
On a gable or hipped roof with various decorative details, the roll of lining carpet should be laid horizontally. You need to start covering from the lower left edge of the slope.
Pediment and roof overhang
A pediment strip is used. Its function is similar to that of a cornice - protection from moisture, only in this case the ends of the sheathing.
The gable planks are overlapped and fastened together with nails. The fastening pitch is 15 cm.
Valley carpet
Endova is a section of the roof that is subject to the heaviest loads during precipitation and snowfall. It needs strengthening and additional insulation from moisture.
The valley carpet is rubber-bitumen raw material, which is stitched with polyester mesh.
An indentation of 3 cm is made along the perimeter from each edge. The carpet is fixed to the valley with nails and reinforced with bitumen mastic. The fastening pitch is 20 cm.
There is no need to cover the bottom of the valley with tiles; the carpet will be visible there.
It is better to choose the color of the carpet the same as the color of the tiles. It is permissible to replace the valley carpet with metal tiles.
Tile flooring
Step by step it looks like this:
- A starting row is built (the edges of the shingles need to be trimmed) or starting strips are purchased (for ridge-eaves tiles).
- Laying is carried out along the cornice from the center and corner of the row (optional). The distance from the overhang should be at least 1.5 m. Roofing nails are used for fastening. The element fixation step is 20 cm.
- In the next row, the shingles are placed, slightly offset towards the already fixed element. Thus, the petals cover the attachment points of the previous parts.
If the slope is inclined less than 45 degrees, each shingle is fixed with 4 nails. At a larger angle of inclination, it is better to fasten with 6 nails.
Installing shingles around the valley
From the middle of the valley, 30 cm in each direction, the tiles are glued to bitumen mastic. The bottom up to 15 cm wide is left without covering material.
It is impossible to fix shingles with nails, since a lot of water always collects on the valley during precipitation.
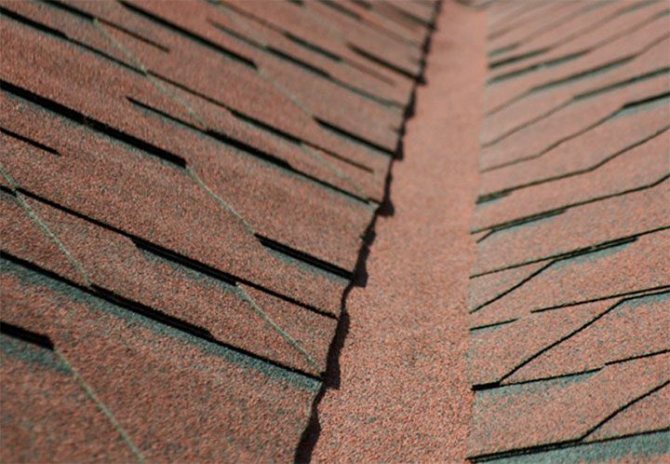
Arrangement of the ridge
Now you can start laying the ridge. It is important to leave a gap of up to 3 cm between the slopes for free air exchange.
You can fasten a finished metal ridge element on top with self-tapping screws or make a ridge yourself and cover it with a layer of bitumen mastic.
It is also permissible to lay out a solid roof and make holes for ventilation.
Laying tiles: accessories and components
Snow guards for the roof will prevent snow from falling from the roof and prevent possible injuries.
In addition to the tiles themselves that make up the roof surface, manufacturers usually provide a full set of component elements, the number of which increases with the complexity of the roof geometry: wall tiles, half tiles, side tiles (right and left), cornice tiles (edge and row), corner tiles (external and internal) , ventilation, etc.
A separate kit is provided for the ridge, when, in addition to the grooved ridge tiles themselves, the initial and end elements (mainly decorative), sculptural details for decoration and hip joints are included. Installing shingles with this variety will allow roofers to avoid having to adjust and file tiles into place.
In order to more thoroughly treat the junction points and protect other important areas of the roof from moisture seepage, when laying tiles, a set of the following components is used: corrugated tape with bitumen mastic, airtight ridge tape (for attic and mansard roofs), impregnated foam rubber seals for valleys, eaves ventilation “anti-bird” ribbon and much more. They are made, as a rule, from high-quality and corrosion-resistant materials: aluminum, copper, tin. To fasten the tiles, there are steel wire clamps, which have a special design for edged tiles. The skates are secured using clamps made of painted aluminum sheets. Special fasteners are provided for the ridge beam.
Accessories deserve special attention. First of all, these are snow-retaining elements (in the form of hooks, separate shelves or steps along the entire length of the slope, preventing damage to drainage systems and avalanche-like snowfall), devices for cleaning chimneys, for ventilation ducts (ceramic heads, etc.).
Famous manufacturers
Below is a list of asphalt shingle manufacturing companies that are in greatest demand.
IKO
Production is located in Belgium, Slovakia, Canada. The main raw material for tiles is soft bitumen.
The molds for casting the material were developed in our own laboratory.
The choice of colors is very large. Product prices are at an average level.
DOCKE
It is a group of companies that have two factories in Russia. Start of activity - 2005. There are official representative offices in every region of the country.
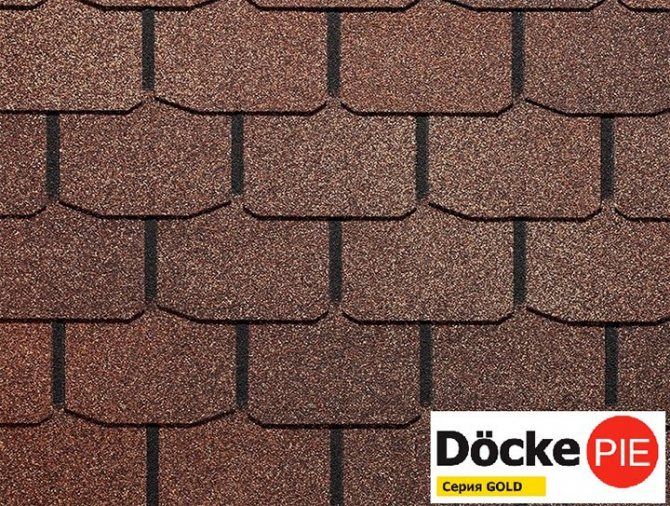
To create soft roof elements, SBS-modified, oxidized bitumen is used.
Low-cost product options have a 20-year warranty, and expensive ones have a 50-year warranty.
TechnoNIKOL (Shinglas)
The association of enterprises produces bitumen shingles under the trademarks TechnoNIKOL Shinglas (Shinglas), Tilercat.
There are both single-layer and multi-layer roofing elements on sale. Several model ranges of tiles are produced. The quality is high.
The warranty period for certain types of tiles reaches 50 years.
Icopal
Large Finnish manufacturing company. The basis of the material is SBS-modified bitumen. Own molds for low tide. Assortment of flowers. Prices are average.
Tegola
Production - Italy. The company started its activities in 1973. Constantly holds a leading position in terms of sales in Europe. There are official representative offices and production in 73 countries, in Russia – in the Ryazan region.
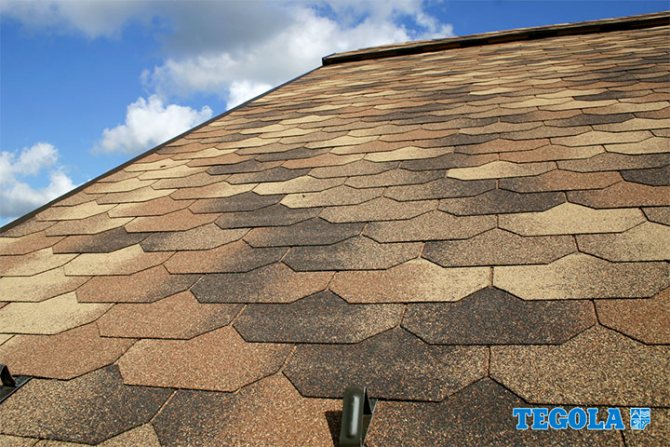
Particular attention is paid to the decoration of shingles. There are shingles with different types of coating, which allows you to decorate buildings in different styles (country, chalet, Provence). The price is affordable.
Kerabit
Finnish manufacturer. Product prices are average market prices. Good quality.
CertainTeed
American manufacturing company. Finished products are also available for sale on the Russian market. The range of tiles in shape and color has no analogues among competitors. Prices are high.
Katepal
Katepal is a large Finnish company producing soft roofing. It goes on sale under the Ruflex brand. Start of work - 1949.
When creating shingles, bitumen with increased frost resistance is used. Multilayer tiles are also produced, but the assortment is several times inferior to the Italian plant.
Key quality criteria when choosing flexible tiles
Reduced to the following list:
- Flexibility test. You need to try to bend the element. High-quality shingles will return to their original position without any problems, without loss of appearance.
- No noticeable odor. If it is present, then this indicates the low quality of the raw materials. The material will quickly lose the necessary elasticity.
- The outer coating of stone chips should be applied evenly and not crumble.
- The minimum thickness of shingles in one layer is 4 mm. Products with a lower indicator are not worth taking.
- If the tiles have a self-adhesive surface, it is important to pay attention to the production date. If more than six months have passed, you will have to glue the elements with a hair dryer. These tiles are considered old.
According to the standard, a pack should contain 22 units of material. In terms of finished coating, this is 3 square meters. The weight of a pack of single-layer shingles reaches 8 kg, multilayer - 20 kg.
To ensure a high-quality and durable roof, it is important to take a responsible approach to the preparation of the base, ensure the tightness of the coating and not skimp on fasteners.
Features of lathing installation
How to lay flexible tiles? Due to the fact that the material is not affected by mold and fungi, it does not deteriorate or rot. However, it is laid on wood, which is damaged by high humidity. What needs to be done in this regard? All wooden structures must be treated with antiseptic impregnations. However, that's not all.
In order for wood to serve for many years, it must be subject to natural ventilation. To do this, gaps of 5 mm must be left between the waterproofing layer and the base under the roof slabs. Sometimes for this purpose they arrange a counter-lattice, to which the base is attached. In addition, special ventilation holes are made along the perimeter of the roof, placing them in the overhangs. To prevent birds and insects from entering such openings, they are covered with nets.