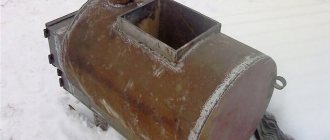
The simplest and at the same time cheapest way to make a sauna stove is to use a piece of ordinary steel pipe. Such a design will function quite normally in any room, regardless of its size. Moreover, thanks to the sealed casing, a stove made of pipe will not emit carbon monoxide during operation, which means it is absolutely safe for humans. Therefore, there is no need to build any additional fences.
How to weld a sauna stove from a pipe
How to weld a sauna stove from a pipe? In reality, there is nothing complicated here - if you have the appropriate equipment and skills in working with a welding machine, the manufacturing procedure will take only a few hours.
Prices for lime mortar
mortar
A little history
This heating device received its name from the name of the ruling class of capitalist society. Not all of its representatives left Russia during the years of the revolution. And during the period of devastation, they were forced to escape the cold with the help of just such a stove. And the potbelly stove saved their lives not only. Many people in those days survived thanks to it, heating their homes and cooking food on it.
Wood-burning stoves also gained recognition during the war years. Made in a handicraft way, they were not only widely used in apartments or rear institutions, but also saved soldiers from the cold in dugouts, dugouts and other field conditions.
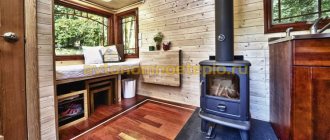
This type of stove became very popular in those days when Soviet people began to be allocated summer cottages everywhere. These heating units did an excellent job of heating country houses and were used for baths. They heated greenhouses.
After the collapse of the Soviet Union, some regions experienced problems with heating residential premises. People remembered such a heating device as a potbelly stove. We installed it in the kitchen, put the pipe out the window and warmed up by gathering with the whole family next to it.
And in the modern world, the oven does not remain idle. Not every person can afford to install central heating in their country house. And here the potbelly stove comes to the rescue again.
It is also indispensable for a bath. Greenhouses are also heated to this day by these stoves. It also finds its application in heating garages.
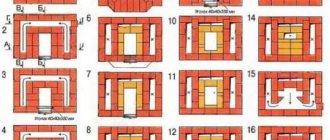
Creating a horizontal oven
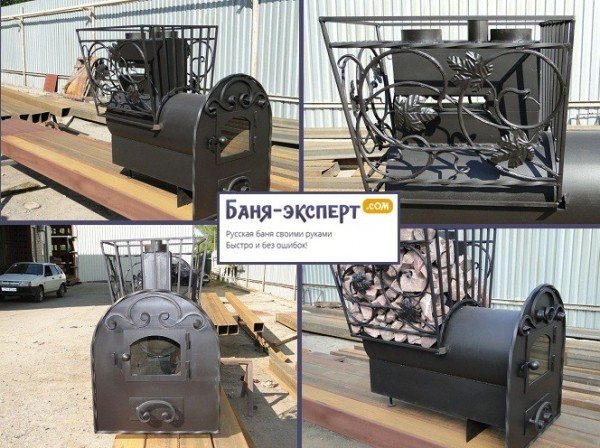
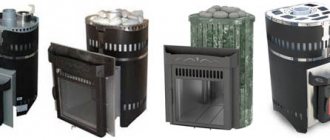
Beautiful horizontal stove for a bath
The horizontal design implies the presence of a hanging water tank and an external heater. This stove is more compact, and thanks to the increased depth of the combustion chamber, it will quickly heat the room. During the manufacturing process, you need to perform the following steps.
Option for a homemade pipe stove
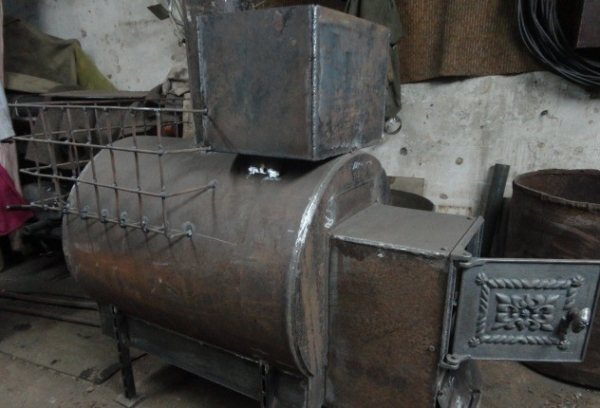
Horizontal sauna stoves have a different appearance, but the design is similar
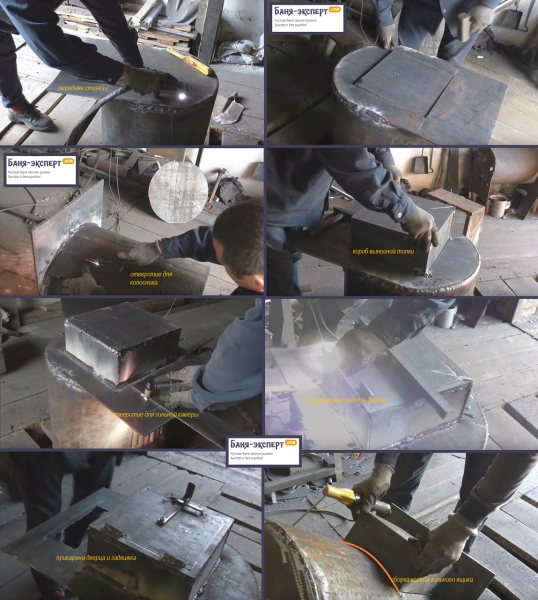
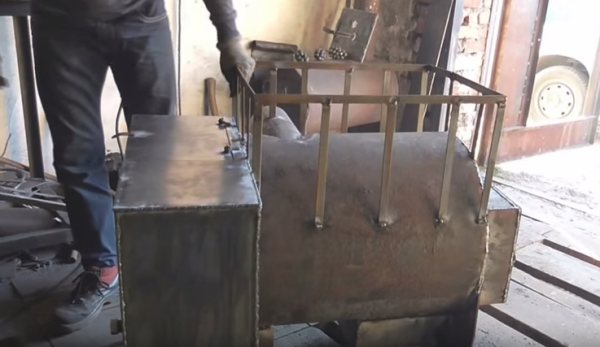
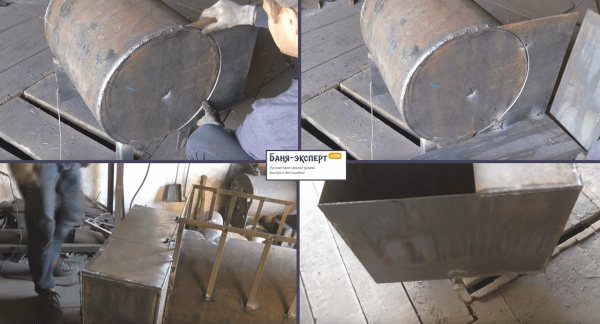
Step 1 . A piece 80 cm long is cut out of a steel pipe with a diameter of 50 cm. The edges are carefully aligned and cleaned.
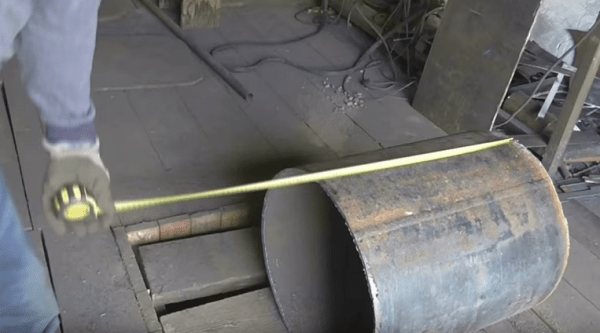
Preparing the pipe
Step 2 . A grate area is created. To do this, a rectangle measuring 80x40 cm is cut out of a steel sheet 1-1.2 cm thick. A hole is made inside the rectangle, after which the reinforcement is welded to it (the rectangle). As an option, you can purchase a ready-made grate made at the factory.
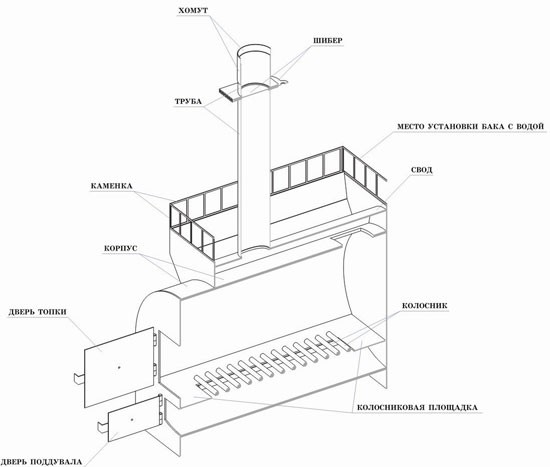
Furnace drawing
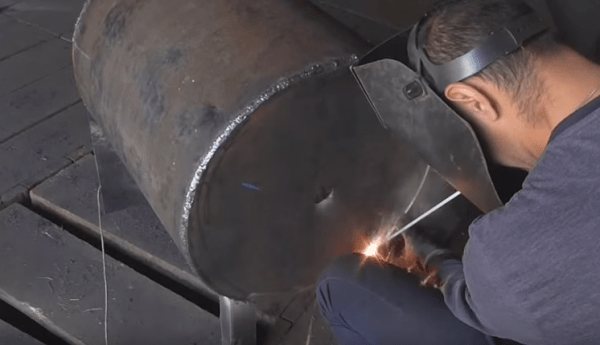
Step 3 . The grate is welded inside the body. At this time, the pipe itself is positioned so that the seam on it is under the grate. The fact is that the metal burns out mainly at the welding points, and such a simple technique will help to significantly reduce the thermal load on the seam.
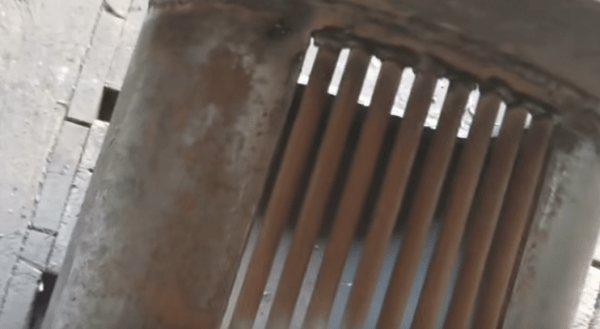
Grate option - the rods are welded to a rectangular opening cut out in the body
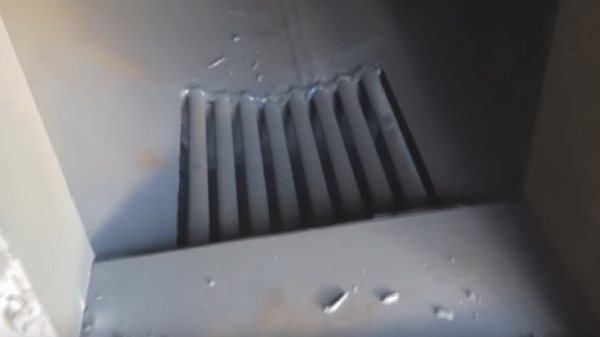
The inside of the grate will look like this
Step 4. A façade (external firebox) of a rectangular shape (height - 0.7 m, width - 0.6 m) with a rounded top is made from a steel sheet. A couple of rectangular cutouts are made in the facade - for the doors of the blower and firebox.
Stages of manufacturing a remote furnace firebox with an ash pan
Step 5. The back part of the structure is also made of steel sheets, but the dimensions here are different - 0.9x0.7 m. By the way, the upper part of this element will also serve as a limiter for the heater.
Back wall
Step 6. The back and front are welded to the body. A front limiter for the heater is welded in the center of the body, and it – the limiter – must exactly follow the contours of the body from below and the rear part from above.
Step 7. A rectangular hole 150x150 mm is cut out on top of the case (in the back of it). A stove roof made of sheet steel with a hole for the chimney is installed on top. It is important that the hole is 12-15 cm closer to the facade - this will ensure not only cutting off the flame, but also complete combustion of the fuel (see diagram above).
Step 8. The chimney pipe is welded to the vault. By the way, the arch will also be the bottom of the heater. It is necessary to weld a reinforcement grid 20 cm high onto the walls of the vault - this will increase the volume of the heater.
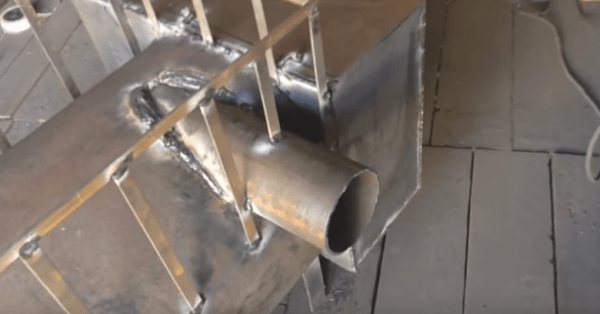
Pipe for connecting the chimney
Welded heater
Step 9. The ash pan and firebox doors are attached. The furnace is cleaned with a grinding wheel to remove rust and scale residues, after which it is coated with a layer of heat-resistant polymer-based paint. The first heating is done outside so that the paint bakes.
Note! The chimney is led outside in the same way as in the case of a vertical stove.
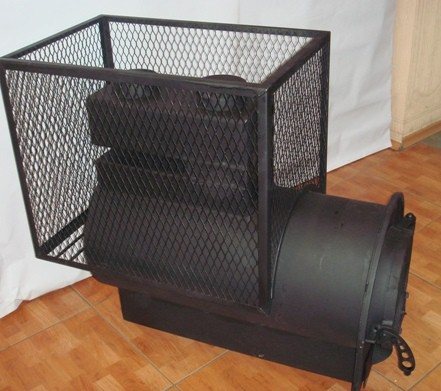
Step 10: Mount a water container on top of the back. To do this, a shelf is welded there, the dimensions of which correspond to the dimensions of the bottom of the tank. The heater is laid with stones, while one important rule is observed: it is necessary that their flat surfaces fit extremely tightly to the iron walls in order to heat the latter more efficiently.
Container for water
Steel sheet prices
steel sheet
Video - Making a stove from a pipe (horizontal version)
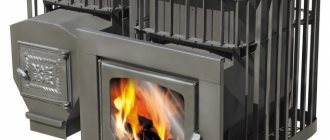
What kind of oven is this?
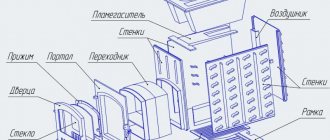
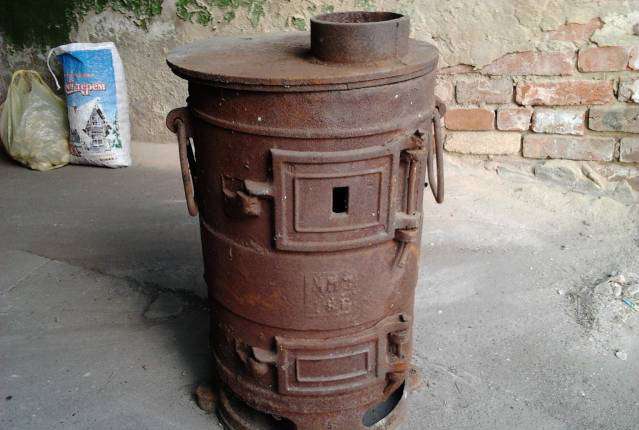
A potbelly stove consists of a metal structure, usually rectangular, and a chimney. It has a door and a drawer in which ash is collected. You can use more than just firewood. Any type of fuel is suitable - coal, technical waste, etc.
Modern stoves of this type differ from their predecessors. The models offered by manufacturers at this time are equipped with a hob, that is, you can not only heat up, but also cook food. The unit has become so multifunctional that it helps many people.
Potbelly stoves have many advantages. Among them are the following:
- easy to operate;
- does not take up much space;
- The stove can be assembled quite simply by any man with his own hands;
- will heat and allow you to cook food;
- economical in terms of heating, allows you to use any type of fuel;
- autonomous.
But there is no perfection in the world. This also applies to the potbelly stove. Its main disadvantage is that it cools down just as quickly as it heats up. That is, for constant heat, fuel must be added to it all the time. This is not a long-burning stove that you don't have to touch for long periods of time. The potbelly stove has a very low efficiency - no more than 10%.
But stove manufacturers and self-taught craftsmen are constantly working on this problem.
The army potbelly stove is considered one of the best stoves. It has been in constant production for a long time and has many positive reviews. These ovens are produced in different sizes. The civilian population is also purchasing them.
The features of army stoves include the following factors:
- their significant strength and high efficiency;
- Any solid fuel is suitable;
- it is impossible to equip an army potbelly stove with water accessories (jacket, coil), that is, it is not suitable for a bathhouse;
- higher price compared to conventional ovens.
On the market, military stoves are represented, for example, by such a type as the POV-57 potbelly stove. It is capable of heating a room of 40 cubic meters. m. Made of cast iron. It consumes little fuel and is economical.
If you load the firebox full in the evening, it will still be quite warm in the morning. Such stoves have been used in the army for more than 50 years, without subjecting them to any special reconstruction or modernization. This indicates the high reliability and efficiency of the device.
Parts of furnaces, their purpose and design: smoke circuits, heaters, chimneys
Smoke circulation
Smoke circulations serve to absorb heat from the firebox, transfer heat to the room and direct exhaust gases into the chimney.
There are different vertical smoke circulations - sequential and combined (Fig. 5). The second ones are the most economical, they are ring-shaped, with bottom heating, the last channel leading to the valve is located not at the edge, but in the middle of the heating shield, which contributes to uniform heating of the shield and better traction.

Fig.5. Vertical smoke circulation: a - sequential; b - combined; 1 - suction channel
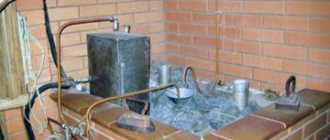
Laying smoke ducts is a so-called hidden work, so it must be done immediately with special care - it is impossible to correct them later.
Metal tubular heaters
To speed up and increase the heat transfer of the furnace, it is recommended to install heaters made of a seamless metal pipe with a diameter of about 60-70 mm, bent at the bottom and top, in the middle of the vertical smoke circulation. The bottom of the tube is installed on the wall of the shield, and the upper end is suspended on a wire from the ceiling while the masonry is being carried out. After the upper end is embedded in the wall of the shield, the wire is removed and the laying is continued to the end. The ends of the pipe go outside and can be covered with removable lids on chains. Installed in two or three smoke circuits in one pipe.
Rice. 6. Installation of metal tubular heaters
The tubes provide heat before the brick heats up. In the absence of tubular heaters, you can do without them. Ceiling trim. The pipe from the ceiling to the top of the roof must be straight, without horizontal ducts (beds) leading from the chimney. According to the layout of the house, the stove must be placed in a place where the occupied space is rationally used and the necessary amenities are created (schemes for connecting stoves to houses of various layouts are given when describing the types of stoves). The opening for the ceiling cut may coincide with the ceiling beam.
In this case, before cutting the opening, the ceiling beam, if it coincides with the heating shield along the line, must first be hung on crossbars placed on adjacent beams on both sides of the intended opening, and the beam must be bolted to the crossbars.
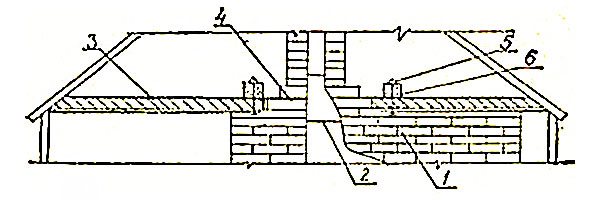
Rice. 7. Opening for ceiling cutting: 1 - oven; 2 - valve; 3 - ceiling beam; 4—cutting; 5 - bolt; 6 - crossbar
Unlike the previous ceiling trims, which were made from below with eaves via eaves, ceiling trims are now common, arranged on corner steel measuring 60X60 or 50X50 mm. These cuts are economical, aesthetically pleasing and safer in terms of fire safety. In addition, the consumption of bricks and time for their production has been reduced. The heating shield is placed to the lower level of the ceiling. Two corners 70 cm long are placed on the shield, and two more 78 cm long are placed on them (Fig. 8). The 1st row of bricks is placed on the stove and on the corners. Subsequent rows are laid out as shown in the figure.
Rice. 8. Ceiling trims: 1 - corners; 2 - 1st row; 3 - 2nd row; 4 - 3rd cutting row
Previously, the wooden parts of the ceiling should be insulated from the masonry with asbestos or felt, lubricated with a clay solution. If the ceiling is lubricated with the addition of flammable materials (sawdust, peat, chaff), then the cuttings are placed one row above the ceiling grease, then they are cut to the cross-section of the pipe and a chimney is placed.
The bottom of the cut should be flush with the bottom of the ceiling. On all sides of the stove, in places where wooden structures of walls and partitions adjoin it, vertical cuts are made at a distance of at least 38 cm from the smoke, and for stoves with long-term combustion - at least 50 cm from the smoke.
The stove must not be placed close to the wall. An indentation of 13 cm is made from the wall (cold quarter). The wooden wall is preliminarily lined with bricks on edge. In the indentation, 13x13 cm holes are left at the bottom and top for the circulation of warm air in the room.
Smoke pipes
Chimneys are made into separate risers (root risers) or mounted, that is, they are placed directly on the stove in half a brick flat or on an edge in a quarter of a brick, without a hog (lounger). Root pipes are unprofitable because they take up extra usable space and require additional brick consumption. Up to the roof, the pipes are laid on clay-sand or lime mortar, and on top of the roof, as a rule, a complex mortar for masonry and plaster is required.
The main parts of the chimney are shown in Fig. 9.
Rice. 9. Chimney installation
L - trunk; B - otter (depression from a leak); B - how long; G - neck; D - cornice and cap
The wooden parts of the roof should be 10 cm away from the pipe, and this distance is covered with roofing iron. The cap is made of roofing iron or laid out of brick and serves as a barrier against pipe blowing, especially if there is a tall building or tree nearby. In all cases, the head of the chimney (that part of it that is located above the roof) must be at least 50 cm (without a cap) from the ridge of the roof.
In the initial rows of the chimney laying, it is necessary to make a window for cleaning, through which to block the lower channel with plywood so as not to clog it with the solution. Upon completion of the masonry, the plywood and mortar are removed and the window is sealed with brick.