Features of mixtures for plastering stoves and fireplaces
Not every building mixture is suitable as plaster for a stove. It must meet a number of requirements, otherwise it will quickly become unusable, since it is operated in extreme conditions. There is a large temperature difference inside the furnace and on its surface during combustion, and after cooling there is a sharp temperature drop. As a result, the plaster regularly expands and contracts, and in the absence of certain properties it begins to become covered with cracks.
Heat-resistant mixtures are used for finishing fireplaces and stoves
Professionals point out a number of important nuances that need to be taken into account when facing a stove or fireplace yourself:
- When the structure is heated strongly and regularly, it is important to select a special primer for the job that is heat-resistant. The use of ordinary primers may cause the mortar to detach from the oven.
- Plastering can only begin after some time has passed since the construction of the stove. It is better if it lasts at least 2-3 months, and the stove must be regularly heated throughout this period. This will reduce the risk of the coating shrinking in the future.
- After completing finishing activities, the stove can be warmed up after 3 days, when the coating stops being pressed through with a finger. For the first time, they do not heat at full power, then gradually increase the heating temperature. After heating, the vent is not closed to ensure natural evaporation of moisture from the plaster.
- Whitewashing, tiling or painting of the stove begins about a month after plastering.
To ensure quality work when plastering a stove, professionals recommend:
- Proper mixing of the solution. To do this, you can take a small amount of the mixture and roll it into a ball in your palm. If cracks form on it, you need to add a little water.
- The mixture should be viscous so that it can be easily applied.
- Before starting work, all cracks must be repaired.
- To strengthen the plaster, use reinforcing mesh.
- After plastering, you cannot immediately heat the stove, otherwise the coating may crack. You need to wait until it dries completely.
For high-quality plastering of the stove, the main thing is to mix the solution correctly - it should not be too liquid or thick. Following the instructions will allow you to avoid common mistakes and get a durable and aesthetic lining for your home stove.
How to plaster correctly (step by step)
Whatever the coating, before starting work on a new stove, you need to make sure that the masonry is dry and stable. Rushing will only harm the process, and the finished coating will have to pay for it. At a minimum - shrinkage cracks.
Preliminary work consists of preparing the surface. An operating furnace requiring reconstruction is freed from layers of old plaster down to the brick base. The surface of the new one is cleaned from the remains of the masonry mixture.
The next stage is priming the brickwork, followed by a waiting period until it is completely dry. Applying the mortar is necessary to ensure better adhesion of the plaster.
The primer has dried, you can begin installing the slats and reinforcing the oven with metal or fiberglass mesh. The slats will be used to level the surface and they are attached directly to the plaster solution. A mesh is attached to nails between the slats, in increments of 10 cm. This is done to further strengthen the coating, despite the presence of reinforcing additives directly in the plaster.
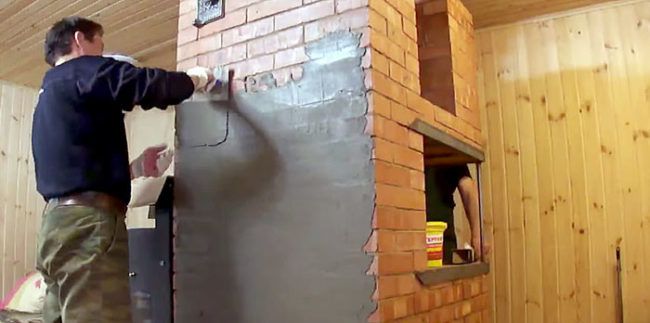
The oven must be coated after pre-firing; the heated surface of the brick attracts the mortar, providing good adhesion. The masonry is moistened and the first layer is applied, liquid, creamy consistency. On top of it is a mixture of greater density, but with the same thickness of 5 mm.
The applied layers are rubbed down with felt or cloth soaked in the solution, sprinkling the drying areas with water.
Next, the stove corners are leveled along the slats; this stage is carried out with control of deviations from the horizontal and vertical levels.
The first warm-up is not earlier than after 3 days and not at full strength. Gradual increase in temperature over a week of daily exercise. Following these recommendations will allow the coating to gain maximum strength and protect it from cracking.
The steps for treating the oven surface are the same for any solution you choose. The differences are minor, but they need to be taken into account when working. So a solution with the addition of gypsum hardens 2 times faster than cement. Fireclay clay in the mixture is ideal for application to bricks made of the same material, because the thermal conductivity coefficient is the same.
The plastered stove must dry without the use of auxiliary means.
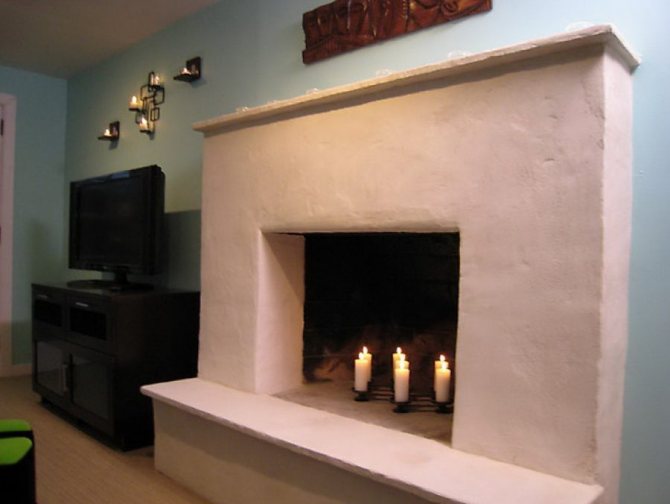
Plastering the surface, regardless of the mixture you choose, will emphasize the beauty of the elements, hide blemishes, and prepare the brick oven for further decoration, whitewashing or painting.
Any oven is based on a frame made of metal, bricks or clay. Fireplaces, unlike stoves, are also made of stone or concrete. All of these materials have different thermal conductivity and coefficient of thermal expansion, unequal service life, and differ in aesthetic properties. If the structure is not covered with a layer of finishing material on top, it can quickly lose its strength and attractiveness.
Other purposes for which it is recommended to use stove plaster:
- increasing the strength of the entire structure and its resistance to destruction;
- optimization of heat transfer and improvement of thermal insulation;
- increasing the safety of using the stove;
- ensuring the tightness and durability of the masonry;
- giving the structure a neat, neat appearance or changing the design of the stove to suit the new interior.
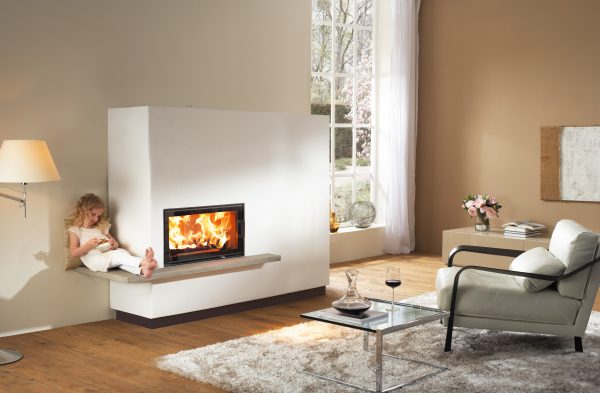
As for decorative fireplaces, their plastering is carried out primarily for aesthetic purposes. Typically, marble plaster for the fireplace, Venetian plaster or composition with the “travertine” effect are used. If the fireplace has an exhaust system and is actually used to heat the room, modern heat-resistant plasters are used for its cladding, which have many advantages:
- ease of application, low consumption;
- increased fire safety, non-flammability;
- high adhesion to any materials;
- increasing the heat capacity of the fireplace, long-term heat retention.
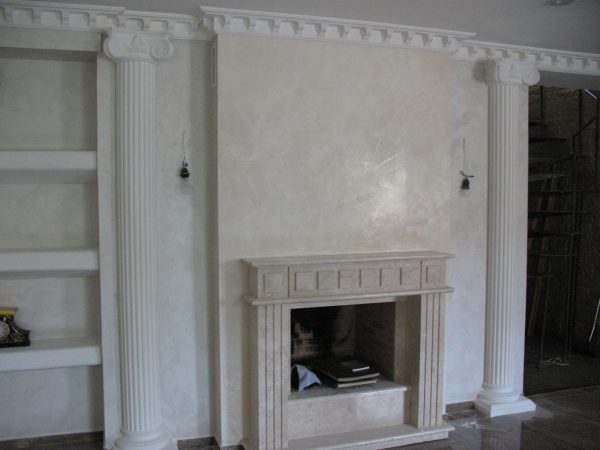
Fireplace finishing with marble plaster
Ceiling insulation
Warm air and steam always collect near the ceiling. Therefore, the owner of a bathhouse should definitely think about insulating it so that the heat is not wasted.
This applies to any type of ceiling - hemmed, floor or panel, regardless of what is on top: a cold attic or a warm attic.
The following requirements apply to the ceiling insulation used:
- incombustible;
- moisture resistant;
- does not emit harmful substances when heated;
- with low thermal conductivity.
Expanded clay is good in this regard - it is poured onto a waterproofed rough ceiling between the floor beams on the attic side. And then they are again isolated from moisture. Instead of expanded clay, you can add a layer of ecowool.
It is also a good idea to use basalt wool without phenolic impregnation. But it easily absorbs water, so it needs high-quality insulation from water and steam. The wool can be laid either on top of the flooring boards or hemmed underneath.
Polystyrene foam would be good for the ceiling, but it is flammable and, if manufactured poorly, releases harmful substances when heated.
When insulating the ceiling, clay or mixtures with clay are often used; find out if it is suitable here.
We recommend that you familiarize yourself with the materials from the section Insulating the ceiling of a bathhouse and Insulating the roof.
IMPORTANT! Above the steam room, the ceiling needs a double layer of vapor barrier.
A brick bathhouse can become very comfortable, but it will require a large investment of labor and money from the owner. Therefore, it is worth going to build such a bathhouse only if it seems completely acceptable.
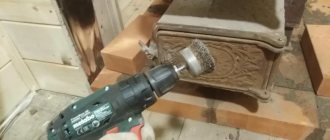
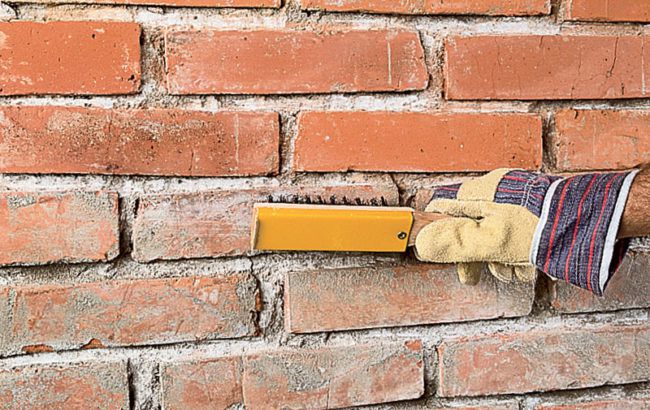
Surface preparation process
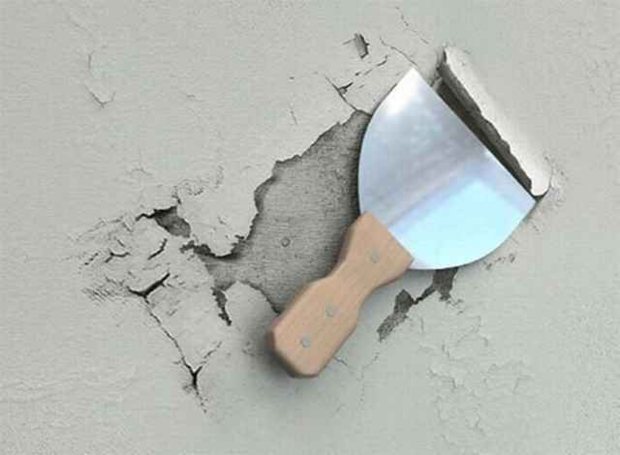
It is important to start work by treating the surface of the oven. If there is old plaster on it, it must be removed
Exposed brickwork must be perfectly clean. You can use a spatula to clean it. The surface must be cleaned carefully, avoiding sudden movements that could damage the masonry.
If cracks are found on the surface, they should be treated with special oven glue.
To treat cracks, the glue is brought to a thick sour cream state, after which the surface must be cleaned of dust using a brush
Then, it is important to moisten the same brush with water and treat the holes. Next, this defect must be treated with glue using a spatula
After all defects have been eliminated, it is necessary to apply a primer mixture to the working surface. An acrylate mixture is suitable, which is capable of penetrating deeply into the material, filling all the pores, and forming a film on the surface.
This will ensure a stronger connection between the primer and putty. The mixture should be applied with a brush and rubbed in. After this, you need to dry the oven, leaving it on for a day.
Finishing stoves and fireplaces after plastering
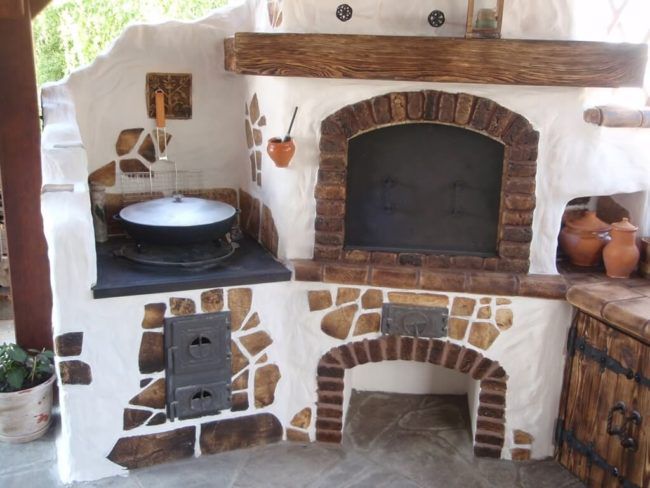
The advantages of lining the stove with plaster include:
- Low cost. Compared to any other type of stove finishing (tiles, clinker or ceramic tiles, red brick, etc.), plaster is the cheapest option.
- Ease of operation. Finishing with clinker tiles or red brick requires experience and knowledge. Even a beginner can plaster a stove with his own hands.
- Versatility. This finishing option, such as covering with plaster, is suitable for absolutely any stove or fireplace: Swedish, Dutch, bell-type, Russian, etc.
- Increased heat transfer. A layer of plaster increases the thickness of the furnace walls, and therefore increases the efficiency of heat transfer.
Any stove can be covered with plaster
- Increased fire safety. In addition, a thick layer of plaster prevents carbon monoxide from entering the room.
We suggest you familiarize yourself with Installing a pipe on a sauna stove
The only drawback of such facing work is cracking, but this can be avoided if you strictly follow all technological norms and rules when performing plastering work.
What can cause cracking? There are several options:
- Poor composition of the solution.
- Incorrect technology of facing work.
- Improper priming and preparation of the oven surface.
In construction stores you can find ready-made plasters, sold in the form of dry construction mixtures and ideal for finishing stoves:
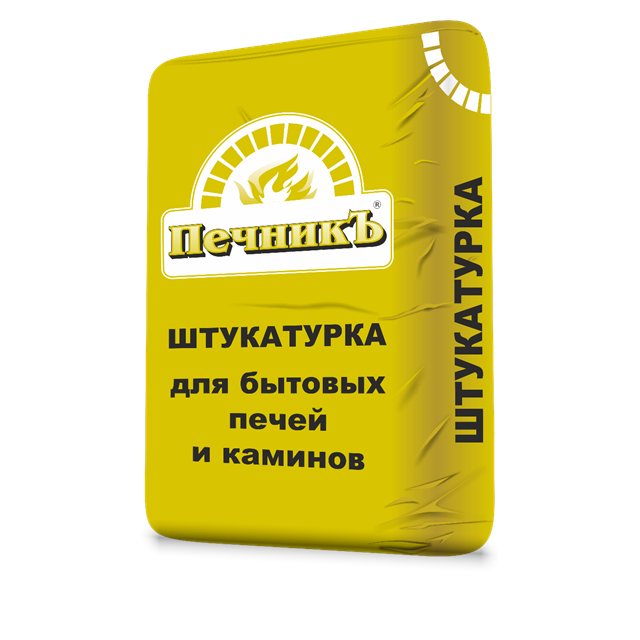
- Plaster for stoves and fireplaces “Pechnik”. It is fire-resistant up to 600 degrees, made on the basis of clay, sand, cement, gypsum, mineral and polymer additives. Has low consumption - only 1 kg/1.4-1.5 sq. m.
- Plitonit "Superfireplace Fireproof". Suitable for plastering stoves and fireplaces made of brick, since it is close to this material in terms of thermal expansion coefficient. Made on the basis of clay, cement and heat-resistant fibers. Characterized by high moisture-holding capacity.
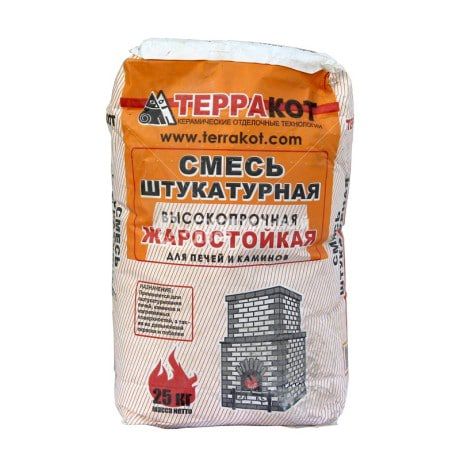
- The Terracotta mixture is heat-resistant. Mineral plaster based on kaolin clay with a smooth texture, applied in a layer of 2.5-8 mm. Terracotta plaster can withstand heating up to 400 degrees, so it is excellent for finishing and leveling stoves, fireplaces, barbecues, and barbecue areas.
- Modeling plaster TSP-4. Contains mineral granules 0.5-1 mm in size, designed specifically for plastering stoves with the last (finishing) layer. Ideal for thin layer finishing. Withstands heating up to 200 degrees. It is highly resistant to cracking due to the presence of liquid glass.
- Plaster for fireplace KODRU. It is not afraid of heating up to 1270 degrees, does not shrink and does not crack. Due to its high elasticity, it is suitable for any heated areas, including stoves, fireplaces, and pipes.
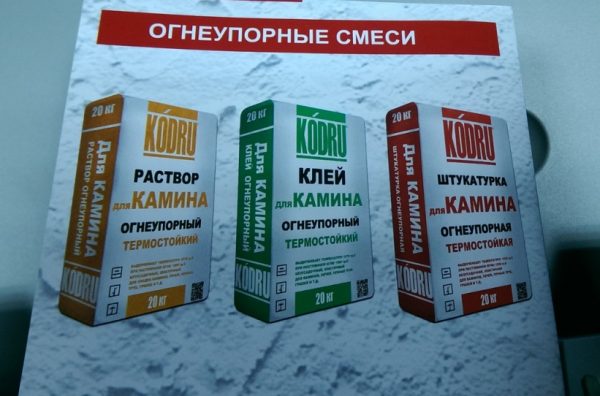
Fireproof mixtures for fireplaces KODRU
Why is it recommended to plaster a brick oven? In terms of increasing the reliability of the entire structure, it is necessary to note the fact that the plastered brick is protected from the direct influence of aggressive bath factors (temperature changes, moisture, steam). The brickwork itself increases the strength and tightness of the seams.
Ready-made stove plaster can also be used for finishing. There are many varieties of such mixtures. But the most popular are “Pechnik” and “Terracotta”. The advantage of such plasters in comparison with those prepared by hand is a high degree of heat resistance. “Pechnik” and “Terracotta” are able to withstand temperatures up to 200 degrees.
Whatever mixture is used for plastering the stove, purchased or homemade, there is no need to prepare a large amount of it at once. The volume of a single serving should not exceed 8-10 liters. In any case, the solution needs to be developed in a maximum of 2-2.5 hours.
In the future, the plastered surface can simply be whitewashed with water-based emulsion, lime, chalk, painted with heat-resistant paint, colored varnish and decorated with stucco. Since oil solutions darken faster when exposed to temperature, it is better to use pentaphthalic paint or nitro enamel.
Please note that all heat-resistant compounds have a very strong odor and release toxic substances when dry, so it is better to work with them in a respirator. Such compositions take longer to dry than conventional ones.
As decorative materials, you can use mineral compositions such as Bayramix, Misan, Ortner, etc. The surface of a stove or fireplace, finished with stucco or a rough decorative primer, and then treated with latex water-dispersed dyes, looks very original.
Another interesting option is to add brick flour to the water-based emulsion and then coat it with colorless heat-resistant varnish. For decoration, special plastic stamps for plaster are also used, with the help of which all kinds of embossing are made on the surface. Material costs with this method are minimal, and a stove or fireplace finished in this way looks simply great.
Tiles and tiles
As mentioned above, ceramic tiles can only be glued to those walls of fireplaces and stoves that do not heat up very much, for example, to a fireplace chimney. Even heat-resistant tile adhesive will not last long on hot surfaces.
Tiles have been used for hot stove walls for centuries. This is a special ceramic tile with a rumpa - a frame on the back side, which is filled with clay or sand. In the walls of the pump there are holes for attaching the tile to the stove masonry with wire or pins.
This type of finishing has many advantages:
- The thermal cushion of the pump allows you to retain heat longer without additional heating;
- protection from burns and fire at home;
- reliable mechanical fastening will not allow the tiles to fall off;
- a beautiful front side will turn the stove from a heating device into a home decoration;
- The surface covered with enamel or glaze is easy to clean.
Tiles are not only a functional solution for cladding, but also a way to create a unique interior for your home.
So, finishing stoves and fireplaces with your own hands is not such a difficult process. If the sequence of work is followed and the correct choice of mixture for plastering and final finishing, such a structure can be turned into an original and unusual part of the interior.
Development of a standard project
The working design of a bathhouse made of aerated concrete is the first stage of construction of a structure, which takes into account all the main technical and operational characteristics of aerated concrete blocks.
Design involves the preparation of the necessary documentation for work related to waterproofing, vapor barrier of the bathhouse, as well as the arrangement of a dry steam room.
Various projects of aerated concrete baths include basic data:
- General dimensions of the construction site.
- Type of foundation.
- Dimensions and layout of the main premises: steam room, dressing room, rest room, sanitary unit and others.
- Type of heating equipment - location and installation method, operational characteristics.
- Arrangement of utilities - ventilation ducts, chimneys, cold and hot water supply, drainage and sewerage.
- Dimensions of openings for doors and windows.
A finished bathhouse made of aerated concrete, the design of which was developed at a professional level taking into account the main characteristics, will last for many years without the need for major repairs.
The construction of an aerated concrete bath is carried out in stages and includes:
- Laying the foundation. The best solution for buildings made of aerated concrete is a shallow strip foundation.
- Construction of wall structures with the installation of a reinforcing frame every 4 rows.
- Installation of roof truss system, covering of roofing material.
The photo shows similar projects.
Basic rules for applying plaster to a stove
Before directly plastering the stove onto the work surface, the following work must be completed.
- The plaster must be stirred to achieve a homogeneous mass and the consistency of thick sour cream.
It is important to remove all contaminants from the working surface of the stove (dust, remnants of the previous plaster that were used when laying the stove). To improve the “grip of the mortar”, you need to clear the masonry seams to a depth of about fifty millimeters
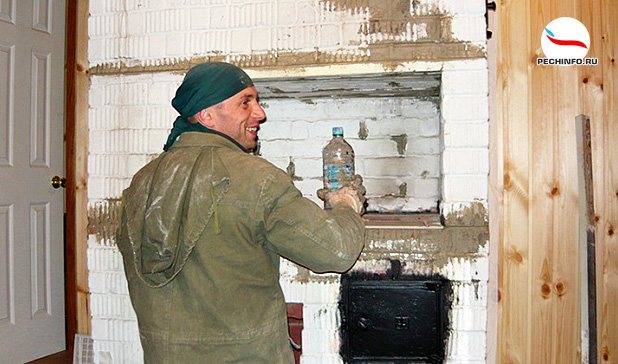
Before application, it is important to heat the oven a little in order to achieve 20–25 degrees of heat; On warm walls, the plaster will lie more evenly, and an excellent level of quality will be achieved.
After all the preparatory procedures, you need to proceed to the main part:
- Additional surface cleaning.
- Treatment of cracks.
- Surface primer.
- Installation of reinforcing mesh.
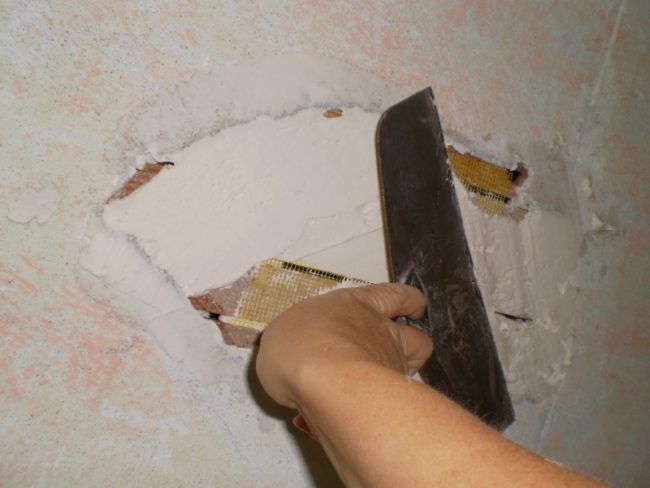
- Plastering the stove
And although facing work is not a tricky business, you still need to take into account the basic rules that will help you successfully complete the task.
- The oven must be thoroughly dried before starting work.
- If facing work needs to be carried out on an old stove, then the first step will be to clean the surface of the old plaster. Do not ignore this step and under no circumstances apply fresh mortar over the old cladding.
Cleaning old plaster - If the plaster is being prepared for painting, choose only water-based paint. If the paint contains drying oil or other components, then when the oven heats up, this smell will spread very strongly throughout the room. Even with prolonged use, it will not fade.
- Use only natural materials that will not harm the health of the residents of the house.
Lining for room cladding
You should take a responsible approach to choosing wood for cladding. The greatest resistance to decay is inherent in coniferous species, but when heated they are capable of releasing resin. Therefore, it is better to use them when covering a dressing room or washing room. Of the deciduous species, oak has the optimal resistance; however, when wet, it becomes slippery.
Windows and doors in the bathhouse
It is advisable to make them wooden, for which pine or ash are suitable, and varnishing is allowed only on the outside, otherwise harmful fumes cannot be avoided. For the same reasons, it is not recommended to use polyurethane foam as a sealant; it is better to use natural materials, such as felt.
The windows in the bathhouse serve only for lighting, therefore, in order to reduce heat loss, they are made small and placed low.
Special attention should be paid to the door to the steam room - it should open exclusively outward and close only with a ball latch, so that it can swing open simply from a push or under the weight of the body if one of the visitors becomes ill. Dimensions are smaller than standard (to avoid waste of heat).
Electrical wiring in the bathhouse
When installing the electrical network yourself, you should not forget that in aerated concrete walls the cable, wound into a corrugated tube, is laid along grooves cut into the blocks. It is first recommended to carefully develop a layout of electrical appliances, as well as lighting points, sockets and switches inside the room.
According to the calculated power of lamps and other electricity consumers, it is necessary to select a cable of a suitable cross-section in order to avoid overloads and heating of the wire. Since the bathhouse is a room with high humidity, the insulation of the electrical network should ensure maximum safety, and sockets should not be located too close to the floor.
It is recommended to install a circuit breaker at the entrance of the electrical network to the bathhouse. It is also advisable to provide each wiring branch, in accordance with the diagram, with a separate fuse. This is a fairly important part of the work in installing electrical equipment, so if you can’t do it yourself, it’s better to invite specialists.
A truly working legal way to save money. Everyone needs to know this!
How to plaster a stove without cracks
It is necessary to choose the mixture for plastering the stove wisely. Finishing the stove with a standard building mixture is impractical. Due to temperature fluctuations and their high values, heat-resistant plaster is needed. Plasticity indicators are also important to prevent cracking and even shedding of the coating during the firing of the furnace.
Ready mix
You can always find special plaster mixtures for stoves on sale. A solution prepared according to instructions in most cases guarantees ease of application. Heat resistance is ensured by the presence of additives, and the components are selected in the required proportions. The disadvantage of special plaster is the cost.
The main components present in the mixture give the solution its name.
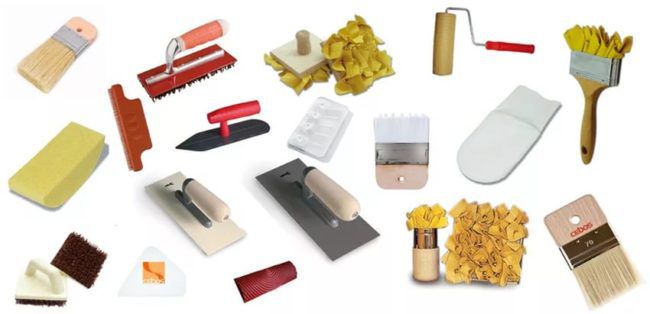
Plastering tools
- Medium spatula - for scooping up the solution.
- Wide spatula - for spreading the plaster over the surface.
- A hammer will be needed to reinforce the wall.
- A grater helps distribute the solution and smooth the surface.
- Chisel.
- Smoothing - allows you to bring the surface to a perfectly smooth coating.
- Brush – will help give the surface a textured pattern.
- Corner aligner.
- Metal brush for cleaning the surface.
- Construction rule.
- Construction level and plumb line.
We suggest you familiarize yourself with How to attach guides for PVC panels
It is recommended to carry out the work of plastering the stove no less than 2-3 weeks after the complete completion of the stove laying. It should dry well and the masonry mortar should completely harden. If you rush and start facing work ahead of time, then after 2-3 lightings of the stove cracks may appear on the decorative layer.
To apply the solution evenly, it is necessary to carefully prepare the oven wall.
- Prepare the workplace for construction work. It is advisable to cover all furniture and the floor with film, since in the process of cleaning the surface of the walls a lot of dust is generated.
Removing the old coating - If you decide to renew the cladding on an old stove or fireplace, you must first clean the surface of the old layer. For this step, use a chisel and hammer. If you are covering the stove with plaster for the first time, you need to brush the surface well, as mortar may remain on the walls.
- After you have completely removed the top old layer of plaster, clean the surface well from dust and dirt using a wire brush and a rag.
- Now we begin to deepen the seams. Using a brush and trowel, clean the dry mortar from the seams.
Deepening the seams - If, after cleaning the surface from the old layer of cladding, you see that the wall is not level, then you will have to apply plaster in several layers. To do this, you need to stretch a metal mesh with 15*20 mm cells onto the wall. Attach the mesh to the wall using wide-brim nails, which must be inserted between the seams. The reinforcing mesh will allow the plaster to adhere well, and a thick layer of cladding will only increase heat output.
- If the corners are not straight, you can attach the steel corners with glue.
- Prime the seams with a brush.
You can choose any mixture for plastering the stove: ready-made store-bought or do it yourself.
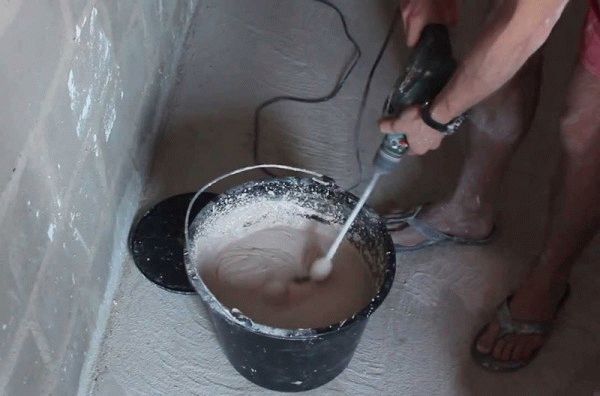
To prepare the solution with your own hands, combine the required amount of dry ingredients in a bucket and only then add water. Using a construction mixer, you need to knead the solution well.
How to prepare lime mortar?
- If you use a clay-lime mortar, the lime must first be slaked.
To do this, pour lump lime into a metal bucket and fill it with water. Do all work outside. After a day, drain the cooled solution, and pass the slurry, which has settled as sediment at the bottom, through a wide sieve to remove all undissolved lumps.
Preparation of the solution
- Soak the clay in water for 4-5 days. After it turns into a paste, you need to pass it through a wide sieve to filter out all the lumps and excess debris.
- Add 0.2 parts of asbestos or fiberglass.
- Thoroughly knead the mixture with a construction mixer or a drill with an attachment. The consistency of the solution should be plastic, without lumps and resemble sour cream.
There are two ways to plaster the surface of the stove. It all depends on the condition of the walls.
In order for the plaster coating of the furnace to serve for a long time and not give shrinkage cracks, it must adequately respond to the process of expansion of the furnace when heated. Of all the compositions existing on the construction market, several types of clay-based products meet this requirement. In addition to clay of a certain fat content, gypsum is suitable for this purpose, but it is used much less frequently, since it also cracks without the introduction of certain additives. It is better to use gypsum as an additional binder in a ready-made clay mortar to speed up its setting and drying time.
In addition to gypsum, asbestos fiber is used as additives to clay. It helps make the plaster more flexible and durable, resistant to moisture and fireproof. This component can be added to any oven finishing product, regardless of its other composition. Instead of asbestos fiber, cheaper straw chaff is sometimes used.

Fireproof compositions for plaster
Before starting work, carefully prepare the base, because the quality and service life of the plaster layer will depend on this. The walls of the stove or fireplace are freed from the old coating - knock it down with a chisel and hammer. The seams are well cleaned with a brush to remove pieces of plaster and sweep away dust. If the masonry is fresh, remove any adhering and escaped drops of mortar, which can lead to detachment of the new plaster.
The old paint is completely removed. Irregularities and cracks in the bricks are covered up, masonry joints, on the contrary, are deepened by 5-10 mm. If the base is too smooth, small notches are made on it. The walls of the stove or fireplace are primed 2-3 times. The seams are especially well coated with primer.
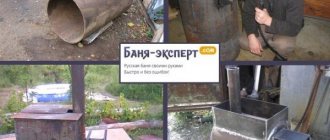
Plastering stoves with your own hands
When building a stove or creating a fireplace, you will need to decide not only on their design, but also on the facing material, mortar for fireplaces and stoves, chimney, and backing brick. A direct component of the process of creating a fireplace or stove is the solution for lining the stove or fireplace. The appearance of unlined stoves, as a rule, is not aesthetically pleasing; in addition, dust accumulates in the masonry seams, which, when the stove is heated, becomes a source of unpleasant odors.
The composition of mixtures for stoves and fireplaces may be different. To plaster the stove, you can use simple clay or complex mortars: lime-clay-sand, lime-gypsum, cement-clay-sand. The mortar for plastering the stove can be prepared either independently or purchased ready-made. Which dry mixes for the oven should you prefer in your case?
Plastering stoves with clay is the most common application. Plastering of the front surfaces of the structure begins after the brickwork has completely hardened, when the possibility of its further shrinkage is excluded. As a rule, this requires at least a month. Properly prepared composition of the mortar for plastering the stove is a guarantee of a long service life.
To prepare a clay solution, the clay must be soaked the day before work begins so that it absorbs water. The sand is pre-sifted. A mixture consisting of soaked clay, sand and water is stirred with a hammer drill with a mixing attachment until a homogeneous mass is obtained.
The amount of sand required for mixing into the clay is determined by its fat content. At a high value of this indicator, the proportion of the constituent components of the mixture is either 1/3 or 1/4. The strength of the plaster is increased by adding crushed glass fiber or asbestos fiber (0.1/0.2 share) to the clay solution.
PLEASE ATTENTION: a high-quality solution for plastering a stove should lie relatively easily on its surface and at the same time be smoothed out well
The start of work is preceded by cleaning the front surface of the structure from dirt, dust and remnants of masonry mortar. To improve the adhesion of the mortar to the brickwork surface, first clear the seams to a depth of about 0.5 cm. Before lining, the oven is heated so that the mortar is applied to the warm walls.
Necessary tool
In order to apply the plaster mixture efficiently, prepare all the necessary tools in advance, and during the work process use those that are more convenient to use. They also buy a primer that will enhance adhesion to the mortar and strengthen the masonry, metal corners, tile adhesive, beacons, and some gypsum plaster.
Here is a list of accessories that may be useful to the master:
- trowel, trowel - for applying and distributing the mortar over the surface of the oven;
- spatulas of different sizes - for applying, leveling, smoothing the composition, especially in corners and other hard-to-reach places;
- construction grater, trowel or trowel - for leveling and rubbing the surface;
- brushes and rollers - for painting dried plaster;
- chisel - for making notches on the surface before plastering, if it is too smooth and does not adhere well to the mortar, and reinforcement has not been carried out;
- hammer - for quickly beating off old mortar;
- metal scissors - for cutting reinforcing fabric;
- level and rule (plumb) - for proper leveling of the coating;
- a construction mixer and a suitable container for mixing plaster;
- hard metal brush - for removing old plaster and cleaning joints.
We suggest you read: Can children go to the sauna: safety rules and recommended age for visiting the sauna
When carrying out work on plastering the stove on your own, you should prepare in advance the appropriate tools and containers for the solution:
- trowel or plaster spatula;
- falcon;
- grater and grater;
- rule;
- metal brush;
- brush or brush for wetting the surface;
- construction mixer;
- corner rail.
When preparing the solution, you will need a shovel, scoop, measuring containers, sieve, scales, and a container for mixing ingredients. It is better to control the leveling of the surface using a building level. A chisel and hammer may be useful for removing old plaster. A vacuum cleaner will help get rid of dust.
Types of mortar for plastering ovens
The main requirement for the solution is the ability to withstand sudden temperature changes.
There are several options for plaster mixtures that you can prepare yourself:
- Simple solution. It consists of only 3 components: sand, clay, water.
- Complex solution. The composition includes additional components: lime, cement, gypsum, etc. As a rule, such solutions are purchased in stores, since it is difficult to prepare them yourself at home.
Factory plaster for the stove
To prepare a simple mortar, we need clay, river sand, water and crushed fiberglass, which adds strength to the plaster.
We take 1 part of medium-fat clay, 2 parts of high-quality sifted river sand and 1/10 part of crushed fiber.
The quality of the solution is greatly influenced by clay, which can be thin or oily. The degree of fat content of the clay can be varied in the mixture by adding or reducing sand. For oily clay, you can increase the amount of sand to 4 parts per part clay.

If you wish, you can make plaster for the stove yourself. It is only important to properly prepare the clay in advance. The raw materials are soaked in water for 5 days, then washed again, removing any floating debris. Then do the following:
- the water is finally drained, but if there is small debris left in the clay, it is first filtered through a sieve;
- mix the clay until smooth, remove any lumps (they will cause cracks);
- River sand is prepared separately - sifted, washed, dried;
- fluff up asbestos, prepare milk from lime by mixing with water (if these additives are planned to be added to the plaster);
- connect the main components together, add water until you get plaster with the desired texture (like thick sour cream).
If you want to save money, make your own mortar for plastering stoves: the proportions and preparation technology are below.
Simple solution
Prepare a simple mixture like this: sift the sand, mix it with clay, pour it into a container, add water and stir with a mixer until creamy.
The proportions of clay and sand for plastering stoves depend on the fat content of the clay. If it is oily, add 3-4 parts of sand to one part. To determine the fat content of clay, put it in a bucket, pour in water and at the same time stir until creamy. Then scoop up a little with a board. If the clay covers it by 1 mm, it means it is not greasy. If it’s in a thick layer, it’s oily.
Walling
You can build a bathhouse from aerated concrete quite quickly:
- Three layers of roofing material are laid on the finished foundation for waterproofing purposes.
- At the next stage, lay out the first row of blocks, starting from the corners. Bonding to the foundation occurs through cement mortar mixed with sand. The thickness of the seam is made from approximately 1.2 to 1.5 centimeters.
Particular attention is paid to the masonry of the first row; the reliability and strength of the structure depends on this. To check the horizontality of the blocks, use a level.
- Next they make a special adhesive to hold the blocks together. Usually they use dry glue, which is added to water; it is important to do it this way, and not vice versa. The mixture must be stirred until smooth using an electric drill with an attachment, then left for several minutes and stirred again.
- The adhesive solution is applied to aerated concrete products with a trowel horizontally and on the sides to a thickness of about 0.7 centimeters. For strength, every 4th row can be covered with reinforced mesh.
If you need to cut a block for laying in a corner, use a hacksaw.
- After the construction of each block row, sanding is done and then the dust is swept away.
- The top row of windows and doors is laid with U-shaped tray blocks. To do this, a support from boards is made under the window or door. Blocks are installed on top, into which a frame made of reinforcement is embedded. After such preparation, concrete is poured.
- The walls are built from products of various configurations; they can be large in size, resembling bricks. The same adhesive composition is used for connection.
The initial stage of construction of buildings of any type and complexity is laying the foundation. All work is carried out in the following order:
- Selecting the appropriate type of foundation. Experts recommend choosing a shallow strip base for the construction of a private bathhouse from aerated concrete blocks. For heaving soils, a pile foundation with a grillage is suitable.
- Preparing the construction site for the foundation, leveling the top layer of soil.
- Applying markings in accordance with the finished project.
- Construction of a pit up to 65 cm deep.
- Laying a waterproofing cushion of gravel and sand up to 16 cm high.
- Installation of wooden formwork from chipboard, plywood sheets or slate. Performing a mandatory check of the verticality of the finished structure using a building level.
- Installation of armored belt.
- Pouring the formwork with concrete. To prepare the concrete mixture, it is recommended to use M200 or M300 concrete.
- Arrangement of a waterproofing layer after the concrete base has hardened. Sheet roofing material can be used as waterproofing.
The next stage of construction is laying the walls. It involves performing the following work:
- For an aerated concrete bath, it is recommended to maintain an optimal wall thickness of 25–50 cm.
- Calculation of the high angle of the foundation for laying the first block.
- Laying blocks on a cement mixture level in 3 corners.
- Grouting the surface after the solution has hardened.
- Installing corner slats and pulling the cord for proper laying of blocks.
- Prepare the adhesive mixture according to the instructions.
- Installation of blocks with glue, maintaining a seam thickness of 70 mm.
- Installation of a reinforcing frame every 4 rows of blocks. Arrangement of grooves with a small indentation from the outer edge of 60 mm along the entire perimeter of the building using a cutter. Pouring the adhesive mixture into the grooves, inserting the rods until they stop, pouring the concrete mixture.
- Block masonry with a bandage of 0.5 blocks. A hacksaw is used to cut blocks.
- Installation of jumpers and strength belts using U-shaped blocks. Pouring reinforcement with M200 concrete.
- Laying the top row with additional arrangement of the strength belt.
- Installing waterproofing material with waterproof tile adhesive.
Choosing the composition of the plaster
The question of how to plaster brick stove walls is the most important one when planning such an event. It should be said right away that the usual cement-sand mortar used for plastering the walls of a building is not suitable for stoves. It will simply crack in a very short time. For plaster, you can use a ready-made mixture intended specifically for this purpose, or prepare it yourself, but according to a special recipe.
To solve the question of what to plaster with, simple 2-3-component mixtures and complex compositions with the addition of various ingredients (fiberglass, asbestos, salts, plasticizers, etc.) can be used. The composition of the mortar also depends on the type of brick used for the construction of the stoves (fireclay, red brick, silicate varieties, etc.). Certain components added to the plaster increase its adhesion to the material.
If you decide to use ready-made materials, then you need to purchase a stove or fireplace plaster mixture. All the necessary ingredients have already been added to it, and preparation for application consists of diluting it with water in the proportion specified in the instructions. When using them, one caveat should be taken into account: their long-term storage is undesirable, since atmospheric moisture can lead to premature hardening of the mixture in the form of poorly soluble lumps.
Most often, homemade solutions for plastering stoves are prepared of the following types:
- clay;
- lime-clay;
- calcareous-sandy-clayey,
- lime-gypsum;
- cement-sand-clay.
The practice of furnace construction shows that it is precisely such compositions that are least susceptible to cracking when heated. Other additives are also introduced to improve properties.
When preparing the solution, it is important to choose the correct proportions of ingredients. Precisely selected composition allows you to easily and evenly apply a thin layer to the stove wall
In particular, a certain consistency of the composition is used as grout. The viscosity of the solution is regulated by the proportions of water, the plasticity largely depends on the amount of sand, and the more sand there is, the less elasticity of the mass.
Laying the foundation
Due to the lightness of the aerated concrete structure, the foundation does not require special power, so the most popular strip type of foundation can be used to build a bathhouse from an aerated concrete block.
- First you need to measure the area of the territory, then mark the outline. To do this, you will need to drive pegs into the ground and pull a cord along them. It must be taken into account that the width of the foundation should be 15–20 centimeters wider than the walls.
- Next, a trench is dug to a depth below the freezing point of the ground in a specific area. The first layer is made of sand approximately 10 centimeters thick. After compaction, the next, same layer of gravel is poured in and compacted again.
- Next, for waterproofing, there is a layer of roofing material, after which the formwork is installed.
- To install the reinforcing structure, reinforcing bars are used, the thickness of each should be at least 1.2 centimeters. The reinforcement is connected by welding or tied using baked steel wire. To join at the corners, the rods are bent and then secured.
- After the preparatory work on assembling the reinforcement frame, concrete is poured. Horizontal fill lines must be smooth, so you need to monitor their level. It is best to use a concrete mixer and pour the foundation right away.
After one month, the foundation hardens, but according to the advice of professionals, it should be allowed to stand in the winter.
Furnace painting
So, now you know how to plaster a stove so it doesn’t crack. Of course, after the applied solution has dried, its surface must also be whitened. It is best to use a milk-chalk mixture for this purpose. This whitewash tolerates temperature changes well and also does not get dirty.
In order to prepare it, you just need to mix 1 kg of crushed chalk with 2 liters of milk. You can also paint the stove with regular lime. This finish will also not deteriorate due to high temperatures. In order for the lime to stick better to a hot surface, you can add a little table salt (35 g per 1 kg).
You cannot paint stoves and fireplaces using oil paint. The drying oil contained in such paints will begin to evaporate at high temperatures, and an unpleasant odor will appear in the room.
Interior finishing
Aerated concrete is very good for building a bathhouse - it is the best thermal insulation material. But one of its drawbacks - absorbing moisture - can be eliminated by interior decoration. Waterproofing walls must be done correctly so that there is no obstruction to natural air circulation, and the walls do not crack after freezing.
The plaster finishing of a bathhouse made of aerated concrete should serve as a barrier and allow evaporation only to the outside.
In order to do the job efficiently, you need to choose special mixtures for plastering aerated concrete products.
There are several important properties characteristic of high-quality cladding:
- the material must be environmentally friendly (at high temperatures, the release of fumes and harmful substances is not permissible);
- durability, increased resistance to moisture and temperature;
- thermal insulation qualities (accidental contact with the casing should not cause burns or irritation);
Of the deciduous tree species, ash is the most resistant to moisture and temperature. Coniferous species are traditionally more resistant, but they can release resin, although, as practice shows, small drops that appear are simply removed and do not cause any particular inconvenience.
The internal and external finishing of the bathhouse should provide maximum waterproofing, since aerated concrete, due to its structure and production technology, easily absorbs moisture.
It is also important to ventilate the room well after each use - this will give additional durability to the interior decoration of the bathhouse and will avoid the formation of fungi and corrosion. In this regard, the steam room can be lined with ash or alder, and pine or spruce are perfect for the washing room, dressing room and rest room.
At the same time, a bathhouse made of aerated blocks opens up more possibilities in the design of a dressing room or washing room, where ceramic tiles can be successfully used to decorate walls made of aerated concrete, which, if you have some construction skills, are easy to lay with your own hands.
Frame for lining and insulation of the bathhouse from the inside
After the electrical wiring is assembled, the cables are inserted into grooves and sealed, finishing of the internal surfaces begins. To improve the hydro- and thermal insulation of a bathhouse made of aerated blocks, it is advisable to plaster the walls not only outside, but also inside. According to the instructions, this work is carried out after the structure has stood for some time and shrinks.
The process of interior finishing of the bath continues by securing the supporting beam for clapboard cladding. The use of wood is mandatory in the steam room and preferably in the relaxation room. The sink can be lined with ceramic tiles.
The free space in the frame between the sheathing bars is filled with insulation. Under no circumstances should you use expanded polystyrene (foam), otherwise moisture will accumulate behind the interior trim and remain there for a long time. The insulation must be vapor-permeable; glass and mineral wool have proven themselves well in this matter.
Aerated concrete is a crumbling material, so when attaching the installation beam for lining to the walls, special metal dowels are used to work specifically with this type of block.
The inside of the bathhouse is covered with clapboards in such a way that the boards are attached to the frame vertically. This will make it easier for condensation to drain onto the floor and further remove excess moisture through the drainage holes.
The sheathing with insulation is covered with a layer of vapor barrier film, after which they begin to attach the lining itself to the frame. Fixing the sheathing panels can be done with nails, however, if dismantling is possible in the future, it is better to use self-tapping screws. This way, walls made of aerated concrete will be sufficiently protected from moisture absorption from the inside.
Nuances of finishing baths
1. Building a bathhouse frame from aerated blocks is the easiest to do with your own hands; the material is quite strong and reliable, but it requires a responsible approach to internal and external cladding and wall finishing.
2. Aerated concrete has a crumbling structure, so when attaching elements of internal and external decor to it, you should use only special metal dowels.
3. Increased moisture absorption by blocks requires careful waterproofing of the foundation of such a bathhouse, as well as its internal and external wall surfaces.
4. The cladding and finishing of the steam room and washing room can differ radically from each other in the materials used: ceramic tiles are suitable for the dressing room and shower, while the cladding of the steam room and rest room is strongly recommended to be made from wood species that are least susceptible to moisture, high temperature, and fungi and corrosion.
5. It is highly undesirable to use artificial materials (expanded polystyrene, polystyrene, plastic, polyethylene and others) in decorative elements, cladding, cladding and insulation from the inside - this can lead to the release of harmful fumes into the internal atmosphere of the room when heating the steam room, and, as a result, to the negative impact of bath procedures on the general health of its visitors.
6. After each visit to a bathhouse made of aerated concrete, lined inside with wooden lining, the room should be thoroughly ventilated and dried to avoid the appearance of mold, fungi, as well as corrosion of decorative elements and destruction of load-bearing walls made of aerated blocks.
A distinctive characteristic of aerated concrete is its porous structure, which lends itself well to cladding.
For interior finishing of the floor base, it is recommended to use ceramic tiles, porcelain stoneware and wooden lining.
Before finishing work begins, it is mandatory to waterproof the ceiling and wall surfaces. This will provide additional protection for decorative materials from the negative effects of increased moisture and high temperatures.
The best material for finishing the walls of a steam room is lining made from deciduous trees. Linden, alder, oak and aspen are suitable for this. This wood is most resistant to hot steam and humidity, while providing rapid heat accumulation.
It should be noted that for high-quality cladding of the facade of a bathhouse made of aerated concrete blocks, the following modern materials are suitable: brick, decorative plaster, slabs, siding, ventilated facades and block houses.
Taking into account all the operational characteristics and advantages of the material, we can safely say that a do-it-yourself aerated concrete bathhouse is a reliable and practical structure. At the same time, compliance with the rules for performing work at each stage of construction will allow you to get a decent result with minimal financial and time investments.
Covering
The last layer of plaster is necessary in order to completely level the surface of the stove. The primer needs to be moistened quite generously before applying it. The solution in this case should be used even less thick than for the first two layers. The mixture should fill absolutely all cracks and irregularities remaining on the surface.
The thickness of the covering layer can be from 2 to 5 mm. It is impossible to level the stove in planes with plaster. Ultimately, the total thickness of the finishing layer should be no more than 1-1.5 cm. When laying out brick stoves for your home with your own hands, this should be kept in mind. When performing this work, you should initially try to make the walls as even as possible.
To avoid problems...
- If the plaster is applied to dry brick, you will not be able to avoid peeling. And too intense moisturizing will lead to scratches and the need to redo the work after the masonry has dried.
- If you use poorly slaked lime, miniature bumps may appear.
- The main cause of cracks is improperly mixed mortar. Moreover, most often the “to blame” for this is too oily clay, diluted with a small amount of sand.
- Cracks can also appear if the applied layers of plaster are too thick or as a result of the previous layer not setting sufficiently.
As you can see, you don’t need to be a seasoned stove maker to plaster a brick stove yourself. And if you still have doubts about whether you can do everything without additional help, watch a video on this topic