It’s time to open the cabinet of curiosities of nonsense that various “experts” produce en masse on various information sites dedicated to the bathhouse. Just the other day, one of our readers shared with the editor another piece of this kind of “innovative” information. It turns out that linden brooms need to be harvested during the time of active flowering, which, according to the “specialist” giving such recommendations, occurs in early spring. Both the first and second are fundamentally wrong. We, of course, understand the depth of the problem of climate change, however, thank God, the events described in the fairy tale “The Twelve Months” have not yet been observed in reality. In general, today’s topic is a kind of short course for a young bath fighter on the topic: “how to make a broom.”
Introduction to jute thread
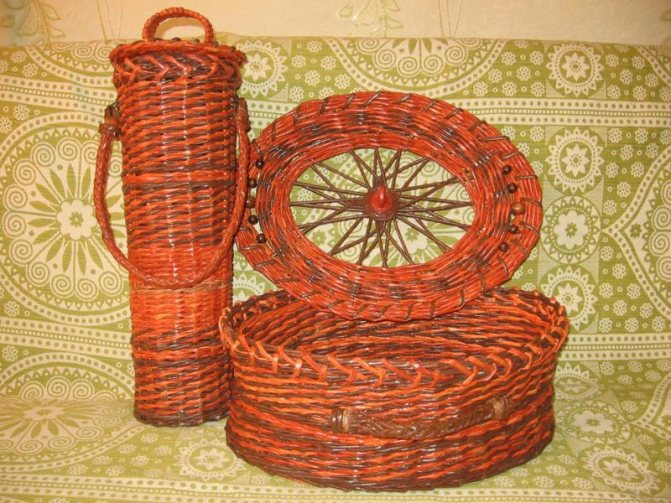
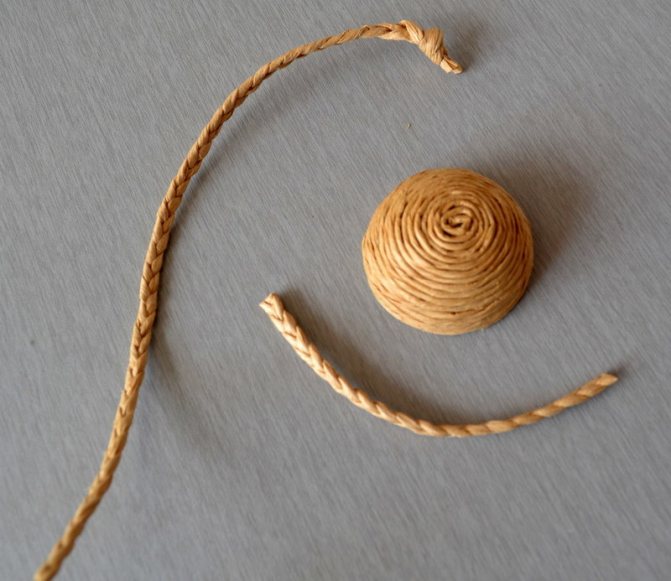
Even beginners can weave simple crafts from jute threads. Experienced craftsmen use jute to weave more complex unique items using other decorative elements. Several master classes on do-it-yourself twine crafts will help you master this unusual technique.
Before beginning craftsmen weave something, they need to become more familiar with jute thread. This durable dressing material is most often used in everyday life. In addition, due to its strength and neat appearance, it is used for bandaging, packaging and stitching various products. There are several types of twine, each of which is used in a specific technology:
- polypropylene - able to withstand high temperatures up to 50 degrees. It is not afraid of either moisture or alkali. It is the strongest thread, which is why it is called cord;
- textile - used for packaging and stitching products;
- jute;
- linen;
- flax-hemp;
- linen polished.
Before starting work, you should choose the type of thread and prepare everything you need so that you do not get distracted during the process, but completely surrender to creativity.
Broom-amulet
Beginners should start with the simplest crafts. This is exactly what a broom-amulet is. It is simple to make; you will need: scissors, jute thread, a book.
Making a broom:
- wind the thread on the vertical side of the book in one layer, tie the end of the rope in a knot;
- carefully remove the thread from the book; the resulting skein should not be confused;
- hide the end of the rope with a knot inside the threads;
- retreating about 2-3 cm, tightly wrap the top of the broom with another thread;
- Having secured the top, without cutting the thread, continue to wind it around the fibers, this will be the handle of the future broom;
- not reaching the end about 1/3, fasten the winding and tie it with a knot. Thus, the lower part is the future twigs of the broom;
- Carefully cut the lower part lengthwise;
- Divide all the twigs in the lower part into small bundles and wrap each one with additional thread. The broom will look better if you wrap the bunches in a checkerboard pattern.
Such a talisman should be in the house. It would be correct to place the broom on the handle. That is, upside down. In this position, he will definitely bring good luck and save the house from troubles.
Jute rug
Another master class on DIY jute crafts accessible to beginners is rug weaving. Thanks to its strength, twine makes good jute rugs. They are woven using a large hook.
Making a jute rug:
- cast on 8 chain loops on the hook and close them in a ring;
- Next comes 1 chain lifting loop and knits a row of single crochets, adding a few loops;
- In this way, several rows are knitted to the desired diameter of the rug.
Such rugs can often be seen on the floor in the hallway or bathroom. If desired, the threads can be dyed or bleached.
Twine basket
A very interesting craft made from rope is a basket. Such an exclusive item, which is not only original, but also useful, can perfectly serve as decor in the kitchen.
For a master class on making a twine basket with your own hands you will need:
- hook;
- scissors;
- plastic bottle;
- glue gun, you can use silicone glue;
- twine.
You can take a plastic bottle for this craft of any diameter depending on the size of the planned basket.
Making the basket:
- Cut a plastic bottle crosswise. Only its lower part is useful for work. The craftsman can choose the height of the product himself. It is necessary to make small notches on the upper edge of the container, which should be at the same distance from each other;
- you should start winding the jute rope in a vertical direction, passing it through the notches each time;
- at the end of the circle, fix the rope with glue and cut off its end;
- Now the twine needs to be woven in a horizontal direction, passing it with a hook through the vertical threads, in a checkerboard pattern. In this case, it is necessary to ensure that each subsequent turn of the thread fits very tightly to the previous one;
- weave the walls of the basket to the desired level;
- Then you can start weaving the bottom. To do this, the bottom of the plastic bottle is well coated with glue. Then from the middle you need to start laying out the twine in the form of a tight spiral, let the workpiece dry well;
- If desired, you can make a lid for the basket in a similar way.
It will look very interesting if you use twine of different colors. It can also be decorated, for example, with a rope flower.
Additional decorative elements
Any crafts made from a bundle of rope and twine can be decorated with cute flowers of your own making. This product will look even more attractive. Flowers made from paper twine are especially good.
To work you will need:
- scissors;
- glue moment;
- plastic film or bag;
- crochet hook;
- wire and beads;
- threads of paper twine;
- stain of different shades.
Before you start work, you need to think about the composition of the decor. You can’t go overboard with flowers; no matter how many of them are made, the thing will look original in any case.
Methods for painting twine
At home, threads can be dyed using several methods. Each of them is effective in its own way.
The following paints can be used:
- household dyes - construction colors, stains of different colors;
- food - Easter paint for eggs;
- natural - brilliant greens, onion peels, wine.
After each staining with any type of dye, it is necessary to fix the result with a vinegar solution. For this you need 1 tsp. dissolve vinegar essence in 0.5 liters of water. But before you dye the twine, it must be bleached plain white.
Bleaching twine with white
The process of bleaching twine is not at all labor-intensive. The main thing is not to soak the skein of thread in white. They must be gradually unwound, immersed in a container of bleach.
For whitening you will need:
- whiteness - 250 ml;
- enamel container for bleaching;
- water 1 l;
- strings of twine;
- fabric softener.
This amount of bleach is designed for a small amount of thread. Accordingly, if there are more threads, whiteness must be added. In this case, you will need to use a larger soaking container.
Whitening process:
- dissolve the white in warm water in an enamel container;
- Gradually immerse the twine in the solution;
- leave the threads in the solution for a day;
- after 24 hours, remove the threads, lightly wring them out, and rinse them in fabric softener;
- put the threads on a bag, battery or hang on a rope until completely dry.
When working with white, you must use rubber gloves. After the twine has completely dried, you can start painting it.
Dyeing threads with different dyes
Any DIY twine craft will look much more interesting if you use threads of various bright colors in the weaving.
To work you need to prepare:
- newspaper;
- glass jar;
- vinegar;
- food coloring;
- bleached twine.
Before painting all the twine, you should test the paint for color. To do this, you need to dilute it in a jar, stir well until completely dissolved. Cut a small piece of twine and dip it in the dye solution. If the color on the thread is suitable, you can start dyeing the entire batch of threads. If the color is not saturated enough, you can add a little more dye.
Dyeing threads with food paint:
- pour boiling water into the jar;
- pour the dye into boiling water and dissolve it completely;
- add 1 tsp to the paint. vinegar;
- place twine in the solution;
- after acquiring the desired shade, pull out the threads and squeeze them out;
- Place the twine on the newspaper until completely dry.
Painting with stain and color occurs in the same way. The only difference is that after dyeing using these methods, you need to rinse the threads under running water.
Using this method, you can dye the threads absolutely any color. By spending a little time, you can end up with an unusually beautiful handmade craft.
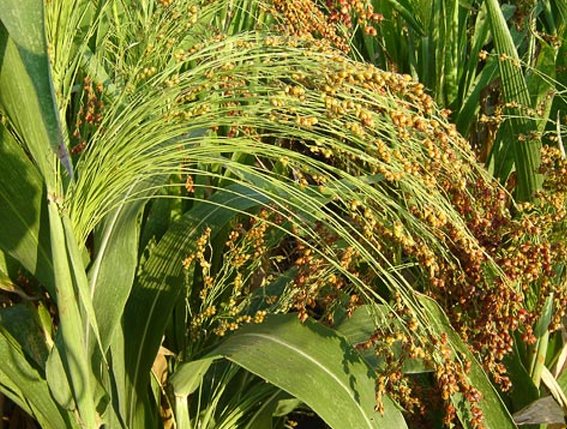
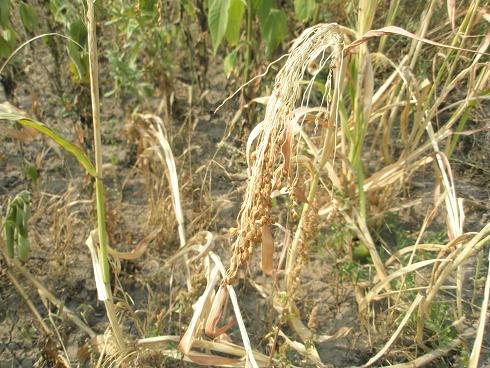
Sorghum (Sorghum) belongs to the grass family. Almost 50 species of this plant are known, but only five are common in our country, and four are cultivated. These are common sorghum, broom sorghum, grass sorghum and sugar sorghum. How to make a broom from sorghum will be discussed in our article today.
Material for broom
You can probably make a sorghum broom from each of them, with the exception of grass sorghum, or Sudanese, or as it is also called - Sudanese grass. But it is best, nevertheless, to make a sorghum broom from the broom variety, or technical sorghum (Sorghum dochna var.tehnikum), the stem of which is 2-4 meters tall and weakly bushes. The panicle is long (40-70 cm), rodless.
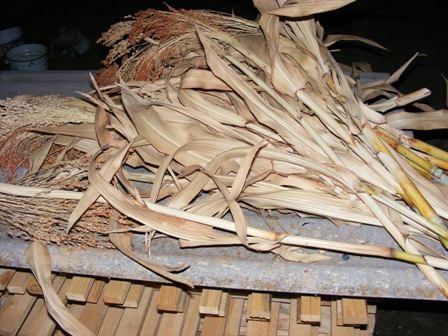
To knit a sorghum broom with your own hands, you must first prepare the raw materials. When the sorghum ripens, you need to cut off the stems along with the panicle, and their length should be slightly longer (20-30 cm) than the length of the future broom. And then, carefully, so as not to damage the panicle, which is the working part of the future broom, thresh or pick the grain.
After this, the stems with threshed panicles must be loosely tied with twine into small sheaves and dried in the shade, for example, in the attic.
When the sorghum stems are dry, you can knit brooms. First you need to select the required number of stems with panicles, and the thickness of the future broom can be arbitrary, at your own discretion, making sure that all selected stems have approximately the same diameter and a well-developed panicle, and it is also desirable that they are no thicker than an ordinary pencil, otherwise the broom will be loose.
Knitting technology
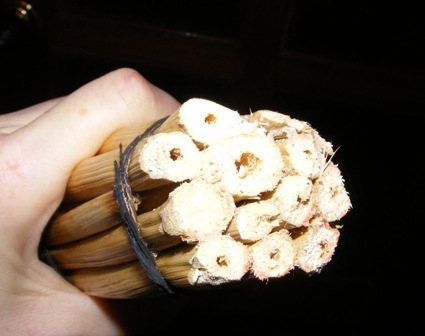
Knitting a broom from sorghum is not particularly difficult, but you must follow a certain technology. The peculiarity of knitting sorghum wreaths with your own hands is that all slings should be without knots or any loops. The twine, after being wrapped around a bunch of stems, is tightly pulled at the opposite ends, and its excess parts are cut off near the very base of the broom.
To knit a sorghum broom, you need to make only seven slings, although you can do 1-2 more or one less. However, if there are fewer than seven bands, the broom may not be very strong. For the convenience of making a broom, the slings must be performed in a certain sequence.
First, a bunch of stems selected for one broom is divided into three equal parts and tied tightly separately from each other at a distance of approximately 25-30 cm from the tops of the panicles, making sure that the tops of the panicles in each of the three bunches are on the same level, and also that in all three bundles the bandage is made at the same distance from the tops, then the broom will be good.
Winding the twine
You need to take a piece of twine 50-60 cm long, one end of which should be passed through the middle of the bundle so that it extends outward by 3-5 cm, and then wrap the bundle of stems 5-6 times, and in all slings the turns of twine should be placed towards the top parts of the future broom (from panicles). Then pass the twine through the middle of the bundle again, but preferably so that it comes out on the opposite side. In this case, the turns of twine should not be applied tightly.
After this, the sling can be tightened well. It is difficult to do this with your hands, so it is best to use, for example, pliers, grabbing both ends of the twine alternately and tightening them tightly. Cut off the excess ends. If you use nylon twine, then you can burn off the excess near the base of the bundle with a match or soldering iron.
However, be careful not to overtighten the twine, because... then he can cut individual stems if they are too dry.
Already tied, three separate bundles are folded together, making sure that their slings are placed on the same line, and tied together into a broom.
The technique for performing all slings is the same. However, to perform the last four general dressings, the pieces of twine need to be taken slightly longer - 75-90 cm, since the total thickness of the broom is greater than its three individual bundles. When you acquire certain skills, you can tie it straight from the coil to save twine, cutting off the end after tightening the twine.
First, they step back 2-3 cm above the bands of individual bundles, pass the twine through the middle of the middle bundle so that it extends out 3-5 cm, and loosely apply 5-6 turns around all three bundles together, forming a broom. The end of the twine is again brought out through the middle of the middle bundle, only from the opposite side. After this, the twine of the sling is tightly tightened at the opposite ends, and the excess is cut off.
Also, after approximately 15-20 cm, three more slings are made. After completing the last top tie and tightening the twine, use a sharp knife to cut off the excess ends of the sorghum stems in the form of a semicircle. Your own sorghum broom is ready.
And finally. The broom (the whisk itself) can be steamed in salted boiling water: it will be stronger and last longer. It must be placed with the whisk facing up.
When compiling the article, materials from the magazine “House Garden and Vegetable Garden No. 7” were used.
You can’t live without a good broom in an apartment or private house. The equipment is used for indoor cleaning, and although it is inexpensive, many people prefer to knit brooms with their own hands.
This is especially true for owners of country houses who have at least a small plot of land. They can easily sow black sorghum on the plot and tie a broom for sweeping.
Part of the inventory can be used for your own needs, the rest can be sold on the market and receive financial benefits.
LiveInternetLiveInternet
Wednesday, June 19, 2013 07:51 + in the quotation book vsaduidoma.com Growing sorghum. We make brooms with our own hands.
Of all the types of sorghum, and there are three of them, sorghum broom is intended specifically for making brooms.
The plant is undemanding to soil. Sowing is done in heated soil. This period occurs during corn sowing. The seeding depth is up to 5 cm. Care consists of constantly loosening the soil, watering and applying humus or mineral fertilizers: urea in the first month of growth and superphosphate. After applying fertilizers, watering is required. You can sow sorghum broom in rows along the border line of the plot. Sorghum grows best in holes of two plants. Then you get a more massive stem with larger panicles. Sorghum is harvested in the phase of full grain ripeness. This time falls at the end of September - beginning of October. The stems with panicles should be cut to approximately 100-110 cm. Then the cut stems are tied and hung until completely dry. When they are completely dry, you can start knitting brooms. The technology is like this.
It is necessary to clear the stems of leaves and husks, and the panicles of seeds. They can be used as 8 poultry feed. The stems are adjusted to each other to a length of 90 cm. They are selected as many as you decided to knit brooms. Now it all depends on whether your stems are thick or thin. For one broom, 25-27 thin ones will be enough, 18-20 thick ones. Take a trough and place the stems with panicles there. Boil water and pour the stems into a trough. You can use the bath. Leave them soaked for 2 hours. Prepare twine, two wooden slats no more than 25 cm long, 2 cm thick. Gather the stems selected for the broom into a bundle and tie at the top. Then, stepping back 6 cm from the first tie, make a second knot. Step back another 8 cm and make a third knot, repeating this two more times. Then prepare two needles from bicycle spokes or 10 cm long wire. Thread twine or polyethylene cord. Spread the tied panicles 10 cm apart and secure them with slats. Using needles to thread the panicles, weave them tightly with twine. Tie with a strong knot. Step back 10 cm from the last node. Thus, you have begun to prepare the broom. Step back another 6 cm, straighten the panicles and secure them with slats. Using two needles, pull the twine through in the same way and secure. Step back another 6 cm and do the same operation, securing the slats and tying with twine. Keep the finished broom under pressure for 20 minutes, and you can use it.
tanynadacha.ru Now I sow millet myself, but it also reproduces well by self-sowing. It needs to be sown in warm soil, as it is a heat-loving plant. I usually sow with dry seeds, but you can soak the seeds, then the shoots will appear earlier. You can’t sow thickly, otherwise the plants will oppress each other and grow short and there won’t be good panicles. Therefore, after germination, I thin out the crops. The usual care for crops is loosening the soil and removing weeds. The fact is that at the beginning, millet does not grow very quickly, and if you do not remove the weeds and thin out the crops, then you cannot count on a good harvest. The plant responds well to watering and fertilizing. But I don’t fertilize specifically, only during autumn tillage. There is also no way to water, but if it rains, the plant grows more powerful and taller. This plant is very useful on the farm. The seed is used as bird food, and the panicles make beautiful brooms. cofe.ru Brooms are made from stems with panicles. To do this, plants with fully mature inflorescences are cut. Cut panicles with stems are dried in the sun or in a dry room for 5-7 days. Then the stems are cleared of leaves and the seeds are “combed out” with a special comb, and the plants are sorted by thickness and length. Typically, one broom requires 25 to 30 sorghum panicles. For work you will need: nylon thread or thin twine (preferably tarred) rope-cord 4-6 mm wire (preferably copper) for tying the handle. But you can use both twine and willow twigs for this purpose. You will also need a press made of two metal plates, held together by rubber rings; two steel pins for stitching with a diameter of 1.5-2 mm and a length of 10-15 cm. Sharpen one end at the pins, and make a small ring or hook on the other. Tie the rope to a ring or hook attached to the end of a table or workbench, and secure the other end to the vise drum. Loop the rope around the collected panicles and pull them tightly so that the sorghum stems fit tightly together to form a broom handle. Take the thread prepared for winding with pins at the ends and, using a pin, pierce and thread one end into the middle of the handle (it should hang 6-9 cm from the handle). Wind the other end of the thread tightly around the handle, turning it in a rope loop, tighten it tightly, cut it, use a hairpin to pull it into the middle of the handle, on the same side as the first end, tie them tightly and hide them inside the handle. Make four or five such bindings along the entire length of the handle, the last binding at a distance of 3-3.5 cm from the top edge. Using a sharp knife, carefully cut the stems in a circle, stepping back from the trim by 1.5-2 cm, at an angle of 45 degrees. Next, place the press plates on the panicles on both sides, closer to the beginning of the binding, and put rubber rings on both ends of the plates. Distribute the stems with panicles evenly to the desired width. Place the plates in a vice and compress the panicles to the desired thickness and sew them together, piercing them with the same pins as the handle, grabbing bunches of 3-4 cm. Tie, cut the thread and hide the ends inside the panicles. Make two or three such stitching strips along the entire length of the panicles, moving the press plates. Instead of a vice, you can use the same plates with holes drilled at the ends and, using bolts and nuts, clamp the panicles with a wrench and release them when moving for the next firmware. Wooden plates can also be used; in this case, you need to place metal washers under the heads of the bolts and nuts. Immerse the tied broom in salted boiling water for 1.5-2 hours (2 teaspoons of salt per 10 liters of water). Then place it on a flat surface under a weight until dry. The broom is ready, use it. Broom made from plastic bottles
A series of “do-it-yourself” messages:
Part 1 - Embroidery on chain-link mesh Part 2 - How to make a sundial yourself. ... Part 5 - Do-it-yourself agropanel. Part 6 - Aaaaaaah, what a greenhouse...! Part 7 - We make brooms from sorghum, millet, plastic bottles ourselves. Part 8 - Country washbasin, flowerbed fence, bird repeller with its oaks. Part 9 - How to paint tiles and many other interesting things. Part 10 - How to make homemade scales - for a summer house or kitchen. Part 11 - Crafts for a summer house/well made from tires, a hammock or a hanging crib for a child, a shower stall, a well drilling rig, a mousetrap. Part 12 - beds
Cited 7 times Liked by: 2 users
Like share
0
Like
- 2
I liked the post - Quoted
- 0
Saved
- Add to quote book
- 0
Save to links
Liked2
0
Features of a homemade broom
A broom is a small bunch of branches or twigs. The item is often called a broom; it is used to restore order in living quarters or sweep the local area. In addition to its standard purpose, the tool was used by our ancestors to spray laundry or garden crops against pests. When treating plants, it is necessary to dissolve the active substance in water, dip a broom into the liquid and make a sharp movement with your hand.
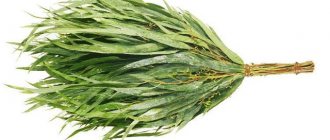
To make a broom, herbaceous plants and twigs of shrubs no less than 55 cm long are used. They are attached to a small wooden handle with a rope or wire. In addition to natural raw materials, modern brooms are made from synthetic materials (polypropylene threads), which are tied with twine.
About the principles
We talked a lot about bath brooms in detail. In this section, let us briefly recall the key, fundamental principles of use:
- A broom can be used to distribute steam in the interior space of a steam room. For “old school” bathhouse attendants in purely steam baths, this is called “working with a steam cake.” A broom for such a procedure should have the shape of a fan, not a broom; in this case, it will be convenient for them to grab pieces of the pie and direct it to a certain area of the room or, directly, to the body of the steamer.
- It is also used for broom massage, when, through a variety of techniques on the body, blood circulation in the human body is improved, the dynamics of lymph outflow is accelerated, muscles and ligaments are warmed up, and pores on the surface of the skin are cleaned.
- Its use is as a steam generation tool, when using a broom, the stones of the heater stove are irrigated evenly and in doses, in order to obtain a certain volume of high-quality steam.
- For air aeration in a steam room, creating a healing atmosphere saturated with phytoncides, biologically active substances and essential oils. In this regard, we can also mention inhalation procedures.
By the way! In view of the above, a bath broom should be considered a fairly universal tool in bath use; at the same time, there are also quite highly specialized brooms. For example, a bamboo broom is more used for massage procedures, while a eucalyptus broom, to some extent, specializes in saturating the atmosphere with biologically active substances.
In addition, it is necessary to note a number of qualities and properties that should be inherent in a high-level bath broom:
- Environmental friendliness and safety of use in a hot and humid environment of a steam room, with direct contact with the human body;
- Sufficient strength and ability to withstand mechanical stress. The Finns are big experts in bathing matters; they believe that a truly high-quality broom should not lose more than two sheets during the procedures during the bathing day. This quality also determines the possibility of maintaining cleanliness in the steam room, when after the bath there is no need to clean up and collect fallen leaves from the brooms;
- A good broom is quite light and compact. This quality is highly valued by soarers, since with a voluminous and heavy broom it is difficult to carry out all the necessary procedures at the proper level, at a good pace, and without taking a breath. It is also worth noting here that such a tool must be moderately flexible and pliable, and have good “feedback”.
Growing sorghum
To grow raw materials you need sorghum broom. Culture seeds can be bought at a specialty store or borrowed from neighbors. In the southern part of our country, sorghum has time to ripen; the seeds of the crop can be collected independently.
Harvesting and planting seeds
Ripened sorghum grains are black in color; they are not needed for the production of brooms, so the seeds are collected during the procurement of raw materials. Many summer residents simply squeeze the stem and tear off the sorghum with their hands. In this case, it is necessary to use gloves to protect the skin on your hands. Craftsmen have come up with a simpler way of preparing seed material. They take a metal bucket, clamp the seed part between the handle and pull out the stem - the grains end up in the bucket.
Sorghum is planted in previously prepared, weed-free soil. It is best to carry out operations after the threat of frost has passed, when the ground warms up to +15 °C. Sorghum is sown to a depth of 2 to 4 cm in rows, with a row spacing of 35–40 cm. There is also a continuous scatter sowing method. The area is leveled with a metal rake, which will allow the grains to be deepened into the soil.
Important! After the emergence of seedlings, the crops need to be thinned out so that there is a distance of 7–12 cm between neighboring plants. This will prevent lodging of the crops.
Harvesting
Harvesting begins at the stage of waxy maturity of the grain. The stems are cut by hand, only the tops within 80–100 cm. After this, the grain is collected in a bucket, sorted and the stems are tied into bunches. It is necessary to properly store the raw materials; they are hung under a canopy or in a well-ventilated area.
Agrotechnicians recommend drying the grain, part of it will be used for subsequent sowing or for sale, the rest is used as an additive for poultry. Unnecessary stems that remain in the field are collected in late autumn, when the summer resident has more free time. The raw materials are crushed in a special crusher and used as mulch for various garden crops.
Manufacturing stages
Let's consider the basic technological operations related to solving the question of how to knit brooms correctly.
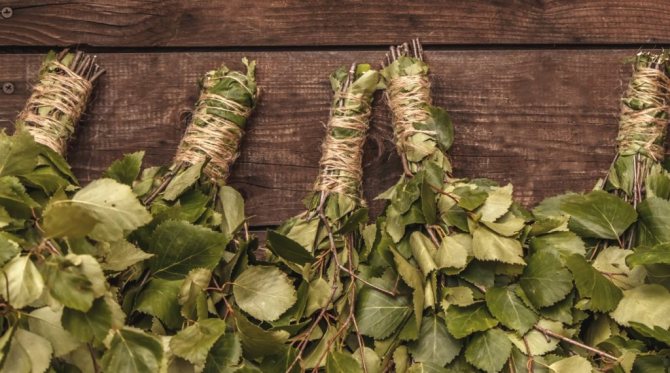
Preparation of shoots
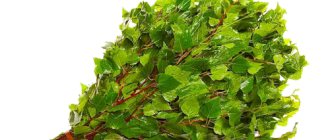
For bath brooms, young but fully formed shoots, 40 - 70 centimeters long, are used. A mandatory condition should be the presence of branches of different thicknesses and textures in the array. This will allow it to be formed more correctly and conveniently at the manufacturing stage. Branched shoots will allow you to obtain a tool with a more regular geometric shape. Let us repeat that a bath broom is not a janitor’s broom, so the selection of raw materials should be approached more carefully. It is clear that the bulk consists of 2-3 year old shoots, which easily and without deformation are rolled into a ring.
A word from Experienced! At this stage, a fundamental decision is made. Either brooms are formed from fresh shoots immediately after withering, or the collected mass is withered, dried and then stored in the form of a sheaf. Oddly enough, but experts say that it is “sheaf brooms” that are more durable and delicate to use. In Finnish farmsteads, birch brooms are made precisely according to the sheaf principle. In any case, at the stage of procurement and transportation of raw materials, the possibility of “steaming” the green mass should be excluded. Therefore, here too, a loose sheaf, “roughly” intercepted with a rope, would be more appropriate.
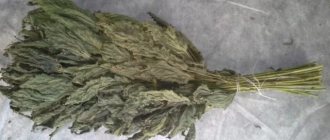
Withering
With any method of further storage, drying is a mandatory step when deciding how to properly knit brooms for a bath. It consists of preliminary drying of the green mass, which is carried out for 2 - 3 days, in a shaded, well-ventilated room. The shoots themselves are laid out in a loose thin layer and periodically tossed.
Knitting
Making sorghum brooms with your own hands is quite simple. You need high-quality raw materials and special tools.
Procurement of material
Weaving a broom from millet is not difficult. At the preparatory stage of work, the required number of stems is selected. Each product will use 25–30 thin branches or 20 thick ones. The raw materials are placed in a large container, then poured with boiling water. An important condition for softening sorghum is keeping the shoots in warm water for 2 hours. After this, the stems need to be dried a little.
Brooms are produced in a factory using a special machine, which allows you to produce from 150 to 200 products per shift. We don’t have such equipment at home, so we knit a broom from twine or tie the stems with rope and cut off the end part. It is important to familiarize yourself with the features of the workflow.
Manufacturing technology
Step-by-step process for making a broom:
- The dried and seeded twigs of the crop are placed in small bundles with a diameter of about 10 cm. The panicles are trimmed and tightly tied with wire or twine near the base.
- In tying (with rope, wire or other material - each person has the right to choose independently), the main thing is to tie a tight bunch, the stems of the crop should not crumble.
- Divide the lower part of the broom into three parts and tie the bundle in these places (you should get three bundles).
- On the side bunches, several upper stems are cut obliquely, which will help reduce the diameter of the handle to convenient parameters. The shoots are cut about 5 cm higher from the bottom trim.
- Squeezing the handle of the broom, make sure that the shoots fit tightly one to the other, and tie them in several places, every 8–10 cm.
To give the product a neat appearance, the panicles in the lower part are trimmed with scissors, and the upper protruding rods are cut with a knife. If something is unclear about the technology for making a broom at home, you can watch the video.
About the place of collection of raw materials
In this regard, do not forget about the following fundamental principles:
- It is forbidden to collect plant materials near busy highways, within city limits and in the sanitary zone of industrial enterprises. Caution should be exercised when collecting shoots in forest shelterbelts along the perimeter of farmland. In such brooms, an accumulation of harmful substances can occur, which can negatively affect the atmosphere of the steam room as a whole;
- The most pliable and delicate brooms are those for which the shoots are cut in a damp place. This applies mainly to birch and oak and, to a lesser extent, linden. At the same time, it is not worth harvesting in wetlands, choosing dry clearings for this;
- In Rus', the old rule was that raw materials for brooms were prepared in groves. Freestanding trees were not suitable for this. This is due, in particular, to the fact that a shoot provided with moderate sunlight is more rigid, which is unacceptable for brooms.
Homemade brooms made from other materials
Sorghum stems are not the only material for making brooms. Thin birch branches are suitable for the production of a broom with a handle. They are tied into a bundle of the required diameter, then the stalk is hammered. The tool is used for cleaning the local area.
Bath brooms are made from branches of various trees (oak or aspen). The stems are tied together with the leaves and hung in a shed to dry. An original idea would be to make cleaning equipment from plastic bottles. In the container, cut off the neck and bottom, then cut thin strips from bottles 1 cm thick and 20 cm long.
Subsequently, the elements are inserted between two wooden planks and glued together to make a broom handle.
About procurement times
So, when are brooms prepared for a bath? Several factors are fundamental in this matter:
- Maximum accumulation of biologically active substances in plant shoots.
- Sufficient strength of the cuttings and leaf blades and the shoot as a whole.
- The ability to maintain both the integrity of the form and the accumulated useful elements during the drying process and subsequent storage. First of all, this applies to brooms made from deciduous trees, since conifers, in most cases, make it possible to harvest them all year round and use them fresh.
- The absence of factors that could negatively affect the production of a broom, its storage and use.