Natural wood meets all these parameters, so only this raw material can be used to create bath furniture.
Description of the bath complex
When choosing wooden tables, you need to remember that wood comes in different types, and therefore reacts differently to changes in temperature and humidity. Manufacturers most often construct tables from linden, aspen, and poplar. All of the above species, except pine, do not emit resins, which means they cannot leave a burn on human skin, are quite easy to clean and dry very quickly. There are practically no knots, good density, and quite easy to process.
Next week is jam day. All my favorite friends will be there, I want to surprise them and please them with something delicious. Psychologist, Gestalt therapist in training.
The main advantage of natural wood is its healing effect on the human body. Stroy-podskazka Furniture Tables Wooden tables for a bath: selection criteria. Raw materials used for the manufacture of bath furniture must meet the following requirements: do not change their characteristics under the influence of increased levels of humidity and temperature; be natural and environmentally friendly; durable and hardy; attractive; easy to process.
A bathhouse is a place where the concepts of benefit and pleasant relaxation are perfectly combined. In this establishment, people relax body and soul, strengthen their immune system, relax, get rid of unpleasant memories, thoughts and emotions, and have a good time. For a complete and high-quality relaxation in the bathhouse, you need durable and reliable furniture that will give comfort and decorate the room.
The legs are: Made in the shape of the letter X. This is the most convenient option for folding tables and small items; With bridging strip.
DIY bath furniture: a table for good company
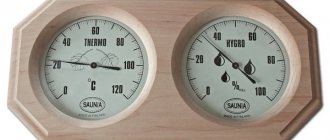
Although the table is not placed in the steam room itself, it should also be made taking into account the characteristics of the room. Even in the dressing room, furniture cannot be protected from temperature changes. Humidity, although not as high as in the washing room and steam room, can also ruin furniture.
It is advisable to impregnate bath furniture with special antiseptic compounds
- Cut five blanks two meters long from the boards. From these you have to assemble a tabletop.
- Cut one of the boards to a size of 150 cm. It will fasten the table legs together.
- Lay out five boards to form a future tabletop. Step back 30 cm from the short edges of the table and attach a thin block with 5 screws. Then step back 35 cm from the same edge, and strengthen another similar block next to it. The ends of the bars should be cut at an angle of 45 degrees.
- Attach similar bars on the opposite side.
- Make the table legs. These are 4 pieces of timber 70 cm high. You also need to make supports for them. These are 4 blanks in the shape of a trapezoid with angles of 45 degrees.
- Assemble the legs. To do this, insert two 70 cm pieces between two trapezoidal blanks and fasten the structure.
- Insert the finished legs between two bars mounted on the tabletop. Fasten everything with self-tapping screws.
- Insert a prepared board 150 cm long between the legs. If you calculated everything correctly, then on each side it should protrude 4-5 cm. Strengthen the board.
- Round all the parts using a jigsaw.
So, wooden furniture for a bath is a classic version of its design. If it is made correctly, it will last for decades. It is not difficult to make it yourself. But to make the products practical, simple, durable and non-hazardous, you need to know a few nuances. Do not clutter the bathhouse with unnecessary utensils. Incorrect placement of furniture in the steam room prevents free air circulation.
Even if you don’t have much experience, you can make simple bath furniture with your own hands.
Tools that will be needed along the way:
- hammer;
- plane;
- drill;
- a circular saw;
- pliers;
- roulette;
- square;
- Grinder;
- clamps;
- set of cutters;
- hacksaw.
First you need to make a table. You will need:
- boards 30 x 145 mm and 40 x 250 mm;
- wooden slats 40 x 40;
- bolts and “curly nails”;
- antiseptic primer.
Assembly is carried out in a simple sequence:
- Saw boards measuring 30 x 145 mm into four pieces of 1.2 m each. Make flanks on them on the right and left at an angle of 45 degrees. Stepping back 10 cm from the end of the blanks, cut off the excess material.
- Sand the workpieces properly. Coat everything with an antiseptic and let the boards dry.
- Fold the blanks crosswise.
- Attach our blanks with bolts. Place the legs at a distance of a meter. From the boards that are left, make and attach two spacers.
- From boards of a different size, cut or saw three pieces measuring 1.75 m in size. Process the prepared pieces for the tabletop with a sander. Apply antiseptic and allow to dry.
- The slats should be divided into two parts measuring 77 cm. Treat with an antiseptic primer. Connect all the boards of the tabletop.
- Turn the finished tabletop over. Place it on the legs of the future table. Use self-tapping screws to secure the result.
Now you can safely use your handmade creation in your bathing life.
Console table
Materials required for work:
- five boards 30 x 200 mm, 0.8 m long;
- block 40 x 50 mm, length should be 1 m;
- two bars 40 x 50 mm, 0.75 m long;
- self-tapping screws
Assembly must be carried out in the following order:
- Choose a place where you will place your future table. Make a mark approximately 0.7–0.8 m from the floor level. Using it, when using a level, the width of the table surface is determined and measured.
- Process the bars with a sander thoroughly, without missing a detail. Coat the boards with an antiseptic primer. Dry the materials thoroughly.
- You need to create a tabletop from the existing boards. Fasten the boards using 0.75 m long bars. One of them needs to be attached to the table top with a distance of 7 cm from the end. The other is attached exactly along the edge.
- Place the assembled tabletop against a mark on the wall. The crossbar should be as close to the wall surface as possible. Attach the tabletop with self-tapping screws.
- We make the installation. Place the block under the table surface. Mark the locations of future cuts and make notches at an angle of forty-five degrees. This is necessary to completely press the bar against the wall. We install the support in the intended place, securing it with self-tapping screws.
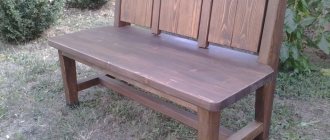
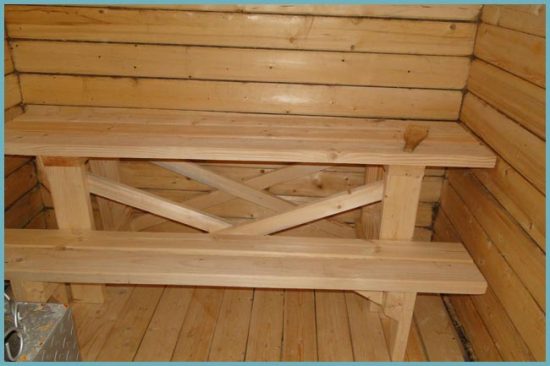
Comfortable bench
Naturally, a bathhouse needs seating. Therefore, the next thing you should learn to make is a bath bench.
Materials for production:
- three boards 30 x 45 x 1500 mm;
- two wooden planks 1460 x 10 x 20 mm;
- two wooden boards 420 x 260 x 30 mm;
- one wooden board 1240 x 30 x 200 mm;
- glue for working with wood;
- self-tapping screws
Progress:
- In the first board from the list, use a cutter on the side to make a groove 10 mm deep. Do this work with all the boards. On one of them, grooves need to be made on both sides.
- Lay out the already milled boards in a row, placing a board with two recesses in the middle. Coat all existing grooves and strips with glue. Place them inside each other. Press the boards tightly against one another and secure the resulting “shield” with clamps.
- When using a jigsaw, we make semicircular cuts fifty millimeters deep. We do the same work with the second stand.
- On a board 1240 mm long, stepping back ten centimeters from the edges, we draw two parallel lines across. Draw a perpendicular from the middle of the lines. We will get a square. It must be cut out using a hacksaw.
- Sand the stands and the resulting beam. Treat them with an antiseptic and let them dry thoroughly.
- Assemble all the elements and fasten them with self-tapping screws.
Set table in a bathhouse A reliable, durable, comfortable table for a bathhouse made of high-quality wood will not be cheap. Making this interior element yourself will save a lot of money. You can turn any of your ideas into reality and additionally make chairs and benches in the appropriate style.
How to make a ladle with your own hands: video tutorials
The location of benches and tables is the dressing room. It is there that you can have an intimate conversation and a cup of aromatic herbal tea, completely relax physically and feel a surge of mental strength.
Simple benches are made similarly to a steam room shelf, but are not attached to the wall. To work you will need:
- bars (section 100 x 50);
- planks or lining;
- screws or other fasteners.
Bath table
Before starting work, it is necessary to thoroughly sand all parts to avoid injuries and splinters. It is better to grind first using a machine method (grinder) and then manually (sandpaper). Particular attention should be paid to the edges and corners of parts.
- Measure the required length according to the drawing and cut the timber.
- Make a frame from the bars.
- Attach boards or clapboard to the frame frame. The distance between the slats is at least 1 cm.
A furniture set for a bath will not be harmonious without a good-quality table. To make this you will need:
- glued laminated timber for the sides and crossbars of the table;
- furniture board for cutting out tabletops;
- fastener
All table parts must be cut out of timber according to the dimensions of the drawing. Make the necessary cuts and assemble the structures. Do not forget to lubricate the joints of the parts with wood glue for better strength and durability of the product.
Scheme for making a bench
Schematic representation of a bench without metal
Drawing of a wooden bench
Font
Wooden font
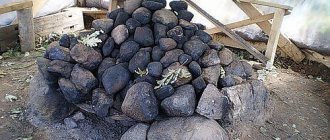
A wooden swimming pool can serve as a replacement for an expensive and oversized pool. What it is? In appearance it resembles a particularly large barrel. Its diameter is usually about 150 cm. Such a structure can accommodate two or even three people at once. In a font filled with medicinal herbal decoction or cold water you can perfectly invigorate yourself after a hot steam room.
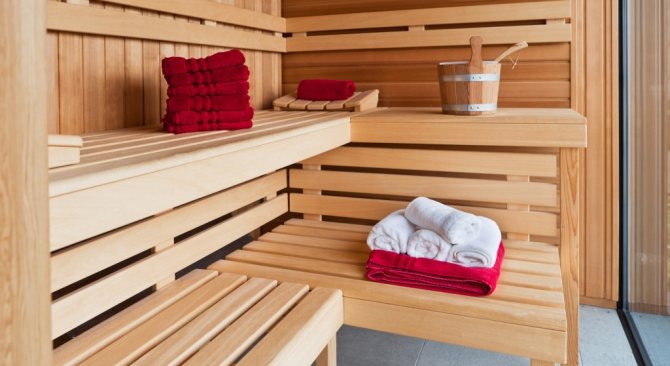
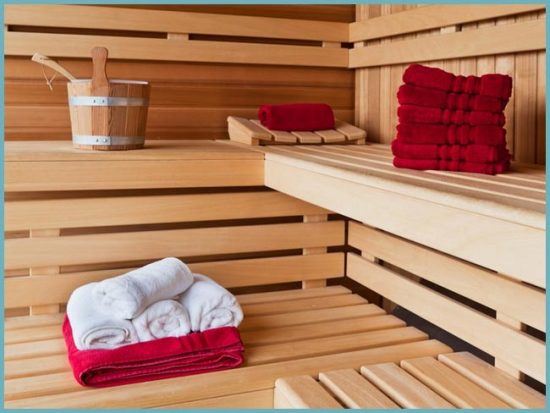
Bath shelves
Bath shelves
The size of this important element of the bath interior should be determined according to the size of the room. The shelves should be comfortable so that you can sit comfortably on them without resting your head on the ceiling. Optimal dimensions: length 200 cm and width 70. Remember the fact that all metal furniture parts, such as screws and nails, must be very well hidden under the wood, i.e. buried. So, your guests, household members, and you yourself can avoid skin burns.
Tub and basin
Tub and ladle
Of course, purchasing basins and tubs will cost you little if you buy these items in a specialized store. But made from wood, they will be much nicer and, of course, more useful. They cannot be compared in any way with the plastic products that the factory produces.
Making your own table
By purchasing wooden furniture panels, you can make a table in a short time. The main difficulty will be in selecting the grooves for the wedges. The rigidity of the table structure depends on the correct sampling. First, mark the contours of the grooves. Take into account the slope of the dressing of 2 cm. Drill the intended contour with a drill, taking into account the tolerances for finishing. Do this on each side. Clean the grooves using a chisel, flat and square file, and abrasive sandpaper.
Now make blanks for the wedges, take the size with a margin of 5 mm, the excess material will be ground off when fitting to the drilled groove. Ultimately, you should have a tight connection with no play. Start assembling the table by connecting the bottom bandage to the sides. Wedges should also be used for this.
Clothes hanger
Making a hanger from branches
A homemade hanger has a simple design. It consists of a U-shaped fork having a thickness of about 2 cm; boards, 4 cm thick; branches for hangers. Pre-dry and peel the bark from the knots. To properly join the branch to the board, pre-treat it with a plane. Sharpen the branch replacing the hook using a rasp, then finish the branch with fine-grit sandpaper. Now open the workpiece with varnish or stain.
Make holes in homemade hooks and the board itself and attach hangers. All! The process is complete.
Shoe shelf
Pallet shoe rack
The simplest shoe shelf can be replaced by a pallet. Form the shelves from wooden pallet boards attached to the supporting strip on the sides. Connect the parts with self-tapping screws and glue. Make legs from the remaining boards. Attach them to the top of a kind of rack.
Materials
There are a lot of wood species that can be used to create an interior. However, not all of them are suitable for a bath or sauna.
Conditions for using wood in a bathhouse:
- thermal conductivity should be small;
- the material must be easy to process;
- there should be no damage or defects on the material in the form of cracks or resin pockets;
- The density of the wood must be high.
Only Canadian cedar among conifers can be used indoors with high temperatures, since its resin content is low. Deciduous trees are well suited for a steam room.
The parameters of commonly used wood species are very diverse.
You should familiarize yourself with them:
- Pine. It has a light shade, is durable and has good density. Easy to process. Moreover, it is a cheap material. The only negative is that when heated it will release resin (cannot be used in a steam room).
- Spruce. It has a reddish tint. It has a pleasant structure, easy workability and a low and reasonable price. However, it also has a number of disadvantages: it is highly susceptible to rotting, contains a lot of resin and has a large number of knots, which is not good when used in a bathhouse.
- Larch. Has a yellow color. It has a pleasant structure and high density. Resistant to environmental influences. Of the minuses: it is difficult to handle and can be easily damaged.
We invite you to familiarize yourself with the Operating Instructions for the Spray Foam Gun
- Oak. It has gray and brown shades. The advantages of this breed include a pleasant texture and high resistance to negative environmental influences. Among the disadvantages: it has a large mass and is quite difficult to process.
- Ash. Has light shades. Among the positive qualities: it will last for many years, is flexible and has a pleasant texture. Among the negative characteristics: sudden changes in temperature can be detrimental to ash.
- Poplar. Has a sandy tint. Positive characteristics include easy processing and low weight. Among the negative qualities, one can note a high susceptibility to rotting.
- Aspen. Has a light yellow tint. Positive characteristics include high moisture resistance, which is important for use in a bathhouse, and easy processing. One of the negative qualities is fragility. Also, over time, aspen is subject to darkening.
- Alder. It has pinkish and brown shades. Alder has many positive qualities: it is a very soft, light and flexible material that is resistant to moisture and will not deform or dry out over time. Moreover, alder has healing properties. And there are no negative sides at all.
- Linden. Another wonderfully suitable material. Has a light beige color. Among the positive qualities, one can note a pleasant smell, which is important in a bathhouse; linden is easy to process, heat-resistant, does not rot and also has healing properties, like alder. There are also no negative qualities.
- Canadian cedar. It has a reddish-brown tint. Among the positive qualities, the pleasant texture and strength of this material, which is not subject to rotting, are especially noted. Canadian cedar has a pleasant smell and also has healing properties for the human body. And it has only one negative aspect: cost. This is an expensive type of wood.
Wooden sauna table
Before starting work, you need to decide on the material of manufacture. Plastic, metal and particle boards (chipboard, IMF) are not suitable for making bathhouse furniture due to their performance characteristics. Some get too hot and can burn, while others emit toxic fumes when exposed to high temperatures.
Traditionally, a sauna table is made of wood. Moreover, it must be selected according to certain criteria: high density, low thermal conductivity, attractive appearance, ease of processing, minimal resin content, absence of defects.
All these requirements are met:
- English oak. It has a noble warm shade and is durable. Using it to create a table, you must first carefully drill holes for fasteners and only then fasten it together. Otherwise, chips and cracks may appear.
- Aspen. An affordable material that is popular among furniture makers. Wood has antiseptic properties and is easily impregnated with protective compounds, but does not withstand increased mechanical stress and often warps and shrinks.
- Alder. Similar in characteristics to aspen. Due to its unique texture, it is often used as an imitation of valuable wood. Pliable in processing.
Fasteners must be galvanized. Nails can also be used, but self-tapping screws are more effective. Do not forget about protective compounds for wood - antiseptics and fire retardants.
Please note that the moisture content of the wood used to create the table should not exceed 20%.
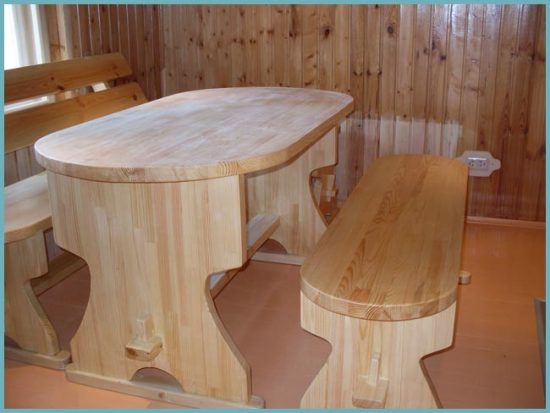
Wooden tables for a bath: selection criteria
Small tables can accommodate a person, no more. The configuration can be different: round - ideal for small tables; oval - a folding table of this shape looks quite interesting; rectangular - the standard model of a table for a bath, a solid option that will last for many years.
Taking into account these nuances, materials for the manufacture of bathhouse furniture must meet the following characteristics: safety when exposed to high temperatures; the material should not emit substances toxic to people; attractiveness; no defects inside or outside the product should be visualized; low thermal conductivity; resistance of the material to high temperatures; no resins in the composition; ease of use; resistance to high humidity.
The main quality is simplicity and a kind of softness in processing. The finished canvas retains its original appearance for a long time, has an attractive pink tint, and a pleasant smell of essential oils, which appears when the wood is heated. It has a resinous structure, which gives the finished product strength and durability, endurance to difficult internal conditions in bathhouses.
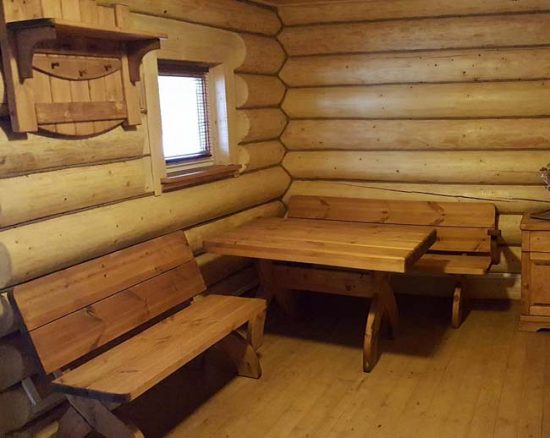
Choosing a table shape for a bath
Table in a chopped bathhouse
Having selected the wood, draw up a drawing of the bathhouse table with your own hands. To create a durable and strong product, you need to decide on its shape and design:
- A round table can be installed in a bathhouse if you plan to place benches in the form of a corner or arrange chairs in a circle. This model is more suitable for large rooms.
Making a square table for a bath
Drawing of a square table in a bathhouse
Before starting work, thoroughly sand the wood and treat it with two layers of antiseptic and fire-retardant composition, applying each subsequent layer after the previous one has dried.
Making a square wooden table for a bath goes like this:
This table can easily accommodate up to six people: two on each side and one at the ends.
Round table in the bathhouse
This is a technology for manufacturing a small table with a round tabletop on eight legs, which will originally complement the interior of the room.
To assemble a round table for a bathhouse, we work in the following sequence:
- We prepare a beam with a cross-section of 10*10 cm and a length of 66 cm. We carefully grind it.
We invite you to familiarize yourself with the extension to the bathhouse in the form of a gazebo
Please note that rough sanding can be done with coarse-grained paper, while for final sanding it is advisable to choose fine-grained paper.
The owner can make a wooden bath table himself. To do this, you will need a great desire to equip your bathhouse, simple carpentry tools and suitable wood.
A wooden table for a bath is easy to make and does not require special skills.
Even in a bathhouse it is impossible to do without a table. Having such a simple item will make your vacation truly comfortable. Having simple tools and the necessary materials at hand, you can make a table for a bathhouse with your own hands. Such a product will become a source of pride for the owner and will help save money when arranging the dressing room.
Wooden bath furniture should be treated with additional materials to prevent splinters.
To get started, you will need to prepare the following materials and tools:
- Edged boards 100x25 mm.
- Bars for legs.
- Glue for woodworking.
- Nails (preferably wooden) and self-tapping screws.
- Saw or grinder with circular saw.
- Roulette.
- Drill.
- Construction level and pencil.
- Square.
- Hammer.
- Sandpaper of different grits.
At the first stage of work, it is necessary to make blanks of the required size. For the table frame you will need 2 end boards and 4 longitudinal ones. To assemble the frame, it is necessary to place longitudinal boards at an equal distance from each other on a flat surface. Using glue and self-tapping screws, attach the end ones to them. During work, make sure that the frame does not warp. To do this, use a square.
Parallel to the longitudinal boards, you need to attach one more on each side. This will give additional strength to the structure and help hide the place where the legs are attached.
The next stage is making the countertop. It can be made from individual parts. It is better to nail them to the frame with wooden nails. If it is difficult to obtain such fasteners, you can use self-tapping screws, the heads of which will have to be completely hidden in the thickness of the wood. Then the caps will have to be puttied and sanded. If this is not done, the heated metal can severely burn if touched carelessly.
The boards cannot be fastened tightly to each other. There must be a gap of at least 5 mm. In addition, there should be a small protrusion from each edge of the frame, no more than 25 mm.
Next you can start attaching the legs. If you use bolts as fasteners, the table can be folded and moved to another location if necessary.
Type of furniture. We choose the best!
A wooden panel for a bath is made as follows.
Wood carving is mainly done to decorate tables and chairs. But another interesting element is considered a wooden panel, which can usually be found in recreation rooms. Before you decide to make such a panel, try to first decide on a pattern. True, you can find a ready-made drawing or develop it yourself. The most popular is a panel or sign that depicts a bathhouse attendant with equipment. But another popular option is a sign with the inscription “To wash in the bathhouse - to be born again” or “The fragrant steam heals not only the body, but also the soul.”
Such a panel with a picture or a sign with an inscription can be bought in a store or from people involved in wood carving, but the option of making it yourself cannot be ruled out.
Materials and tools:
- beam;
- sharp knife;
- pens;
- galvanized fastenings;
- stain;
- turpentine;
- linseed oil.
In such cases, you can choose any tree. To manufacture such accessories, work is performed sequentially, namely:
- We take a block and begin to grind it from the inside.
- After the sanding process has been completed, you need to use a knife to cut out the design.
- After the drawing is ready, we cover its cut out elements with water stain.
- We treat the rest of the part with a solution of linseed oil and turpentine.
- The last step is nailing the galvanized fasteners.
Wood selection
Bathroom furniture should not only reliably perform its functions, but also last for many years. Therefore, it is worth paying special attention to the choice of wood for furniture. Pine lumber is the most affordable, but it is not moisture resistant. This means that pine boards cannot be used to make furniture in the steam room. The best materials would be linden, poplar or aspen. It is also worth considering that furniture and shelves cannot be varnished during processing.
Some people, wanting to minimize costs, take old or tired pieces of furniture from home to the bathhouse. This, even if economical, is in no way practical. Agree, there is little joy from a chair from which dust is pouring, and the table threatens to collapse at the most inopportune moment. The best savings in this case would be to make your own furniture from lumber.
If you use cedar, larch, beech or oak as the starting material, then in addition to being especially durable, the furniture will also emit a pleasant aroma when heated.
Arrangement of the rest room
A person comes into contact with the furniture in the bathhouse with exposed areas of the body. Therefore, increased demands are placed on the wood that will be used for this purpose. The material must have a low resin content, low thermal conductivity and high density. The presence of chips, cracks and knots is unacceptable.
The relaxation room in the bathhouse should be as convenient and comfortable as possible.
As for furniture for other rooms, for example, for the dressing room, there is some freedom when choosing the material. You can use any type of wood, even coniferous, which is strictly prohibited in the steam room.
A relaxation room in a bathhouse or dressing room is a place where you can relax, unwind, and take a breather after visiting the steam room. In addition, this room is also used as a locker room. Given its versatility, you should carefully and thoughtfully consider its equipment. The room should be equipped with all the necessary comfortable furniture to ensure real relaxation.
The dressing room must have a table, chairs or benches, a hanger or a locker for clothes. No special decorations or intricate elements are required for this furniture. For example, you can easily build a bench with your own hands. A board or furniture board attached to the wall with screws and corners will be a good and comfortable bench.
It will be easy to clean around it, and nothing will interfere with good ventilation. In a similar way, you can make small shelves and attach them in different places. You can store bath accessories and all sorts of necessary little things on them. A small chest of drawers will also not be superfluous. It is convenient to store clothes, towels, tablecloths, napkins and other necessary textiles.
Tables can have different designs and sizes.
Everything will depend on the size of the room and the desires of the owner. The tabletop can be made from edged boards or furniture panels. It can be rectangular, square or round in shape. The underframe can also be very different. The tabletop can rest either on simple timber legs or on a more intricate structure, for example, on a tree stump.
If the bath area is small, then a good solution would be to install a folding table. To build such a structure, you will need a wooden panel and hinges that are attached directly to the wall. For good stability, it must be equipped with one or two legs, secured with wooden or metal corners.
Do It Yourself (Ogonyok) 1994-02, page 29
Rice. 7.
Shavings humpback
When marking, they are guided by the following dimensions: blade length - 40 cm; cutting length - 100...102 cm; the thickness of each workpiece (block) at the end is at least 5 cm; The thickness of the workpiece at the bend is 6.5...7.5 cm.
In fact, 2...3 pieces of wood can be cut with a regular two-handed saw, but if a larger number of blocks are required, you will have to build high sawhorses, like for sawing a plank (one person at the bottom and the other at the top) and work with a fly saw - a two-handed saw with handles perpendicular to the plane of the saw.
In (Fig. 6, above), a blank is shown - a block for a shovel, which, as already mentioned, is cut out from 2 ends. The sawn block is roughly trimmed with an ax (Fig. 6, in the center), and brought to the final shape of a shovel (Fig. 6, below) with an ordinary single plane and humpback shavings. The latter has a curved lower bed (Fig. 7) and is designed for processing concave surfaces. Thus, with the help of a humpback we finish the inner surface of the blade, and the outer surface and handle with a plane.
The optimal thickness of the blade is about 1 cm, the thickness of the “transition” of the handle into the blade is 6...7 cm, and the diameter of the handle at the upper end is 3.5-4 cm.
The finished shovel must immediately be coated with liquid heated resin, or drying oil, and dried under a canopy or
in the barn. As you can see, making a wooden shovel does not require any special skill and does not require any special tools. True, not all craftsmen have shavings, but it is not very difficult to make it from an ordinary wooden plane, attaching a curved bed to it (see Fig. 7).
TOW
Previously, the making of wooden troughs was carried out mainly by peasants in the winter time free from field work. And this business was quite profitable. Now, of course, it is ridiculous to talk about the revival of the “trough” craft on the previous scale, but for shredding cabbage and as a souvenir, small aspen troughs will be in demand for a long time. So a description of the process of making wooden troughs will certainly be useful to craftsmen seeking to find their niche among manufacturers of wood chips.
As you know, mass production of a product is much more economical than individual production. Therefore, the technology proposed below will correspond to the technology of mass production of troughs. So, all about the wooden trough.
You look at such a trough, and the question arises - what kind of wood is this from which such a fairly large thing is made, moreover, it is light and very durable. People even have a saying about this: “It’s a wonderful tree, where did it grow?”
And everything is explained very simply. The tree from which the trough is made is the most common aspen, an inhabitant of our forests. At the same time, making a trough is nothing complicated; it does not require any complex tools or special workshops. Aspens of medium quality are suitable for troughs; a small amount of redwood is allowed; some curvature of the trunk is also not a problem. However, rot, slanting, knots and cracks inside the trunk are unacceptable.
The most convenient time for making troughs is winter. Aspen logs of different sizes are prepared for troughs, but not thinner than 20 cm in the upper cut. The most convenient length of logs used to make troughs is 3.5 m. Each such log produces 5 troughs of five sizes. Thus, theoretically, the first piece from the butt (for the largest trough) will have a length of 106 cm; 2nd - 88 cm; 3rd - 70 cm; 4th - 52 cm; and the 5th - 34 cm (in reality, these dimensions are smaller by 0.5 saw thickness each). These round timbers are then split in half, producing 10 halves, or plates.
Pinned the corresponding number of pla
Wood preparation
Tabletop diagram for a bathhouse.
Making furniture for a bathhouse with your own hands requires patience and accuracy. The workpieces must be carefully processed, the edges must be rounded. Sanding must be done especially carefully. Self-tapping screws can be used during assembly, but their heads must be completely hidden in the wood.
The bathhouse is characterized by high humidity and high temperature. These factors have a negative impact on all objects in the room. Wooden products, including furniture, are especially affected. To protect wood from negative factors, it must be treated with special compounds that are intended for rooms with high humidity.
The use of toxic drugs is strictly prohibited. High temperature and humidity will provoke the release of toxic substances, and this can cause irreparable harm to human health. It is not recommended to coat furniture with varnish, paint, or impregnate with drying oil.
When assembling finished products, there must be gaps between individual parts. This will ensure good ventilation and preserve the ability of natural wood to “breathe”. Compliance with these conditions will ensure a long service life of the items.
Furniture for a bath: a few secrets
Wooden furniture for a bathhouse or sauna is a classic interior option. Most often it is made from linden or aspen. Such shelves and benches practically do not warp, and when heated, they cannot leave burns and almost do not rot. But if you decide to make bath furniture yourself, consider a few nuances:
- Coniferous species cannot be used. At high temperatures they can release resins. Even a small drop of resin can cause a burn. Exception: cedar. This wood contains few resins, but a lot of essential oils that will create a unique and healing atmosphere in your steam room;
- When you get down to business, don't overdo it. There should be a minimum of furniture in the steam room. In a cluttered room, air will not circulate properly. The most necessary thing is shelves. You can add a small bench for basins and ladles, a hanger with hooks;
Furniture for a relaxation room in a bathhouse
- It is customary to fasten individual elements of bath furniture with oak wedges, for which appropriate grooves must be made. A simpler and more modern option is self-tapping screws. But metal caps can cause burns. Self-tapping screws must be recessed to a depth of at least 5 mm. Cover the top with a layer of wood putty. By the way, this will protect the metal from oxidation;
- When assembling the surface of a bench, table or shelf, do not place the boards right next to each other. When temperature changes, wood will expand. In addition, the gaps between the boards will contribute to better ventilation and water drainage;
- All parts must be perfectly processed. The edges must be made rounded, and the surface must be sanded twice: first with a machine, then with sandpaper by hand. And, of course, sauna furniture cannot be coated with any varnish.
We invite you to familiarize yourself with the Sauna trailer on wheels
Designers recommend using folding furniture, small tables and stools in bathhouses, especially small ones. The room should not be cluttered with large bulky objects. There should be little furniture. But all items should be comfortable and multifunctional.
The further away the objects are located from the steam room, the better. This will greatly extend their service life. When installing upholstered furniture in a recreation room, preference should be given to those models that are covered with water-repellent fabric or leather.
If the dressing room has a low ceiling, then furniture with high legs and accessories with longitudinal stripes can visually correct this. Properly selected items and furniture will help make the dream of a perfect relaxation in the bathhouse come true.
Snacks and drinks for baths and saunas

A visit to a bathhouse or sauna usually involves not only a bath, but also relaxation, communication, a pleasant pastime, and, of course, a meal. Therefore, when going to the bathhouse or sauna, stock up on the right foods for a snack. Then visiting her will give you real pleasure.
To create a suitable diet, you must first of all take into account the processes that occur in the body during the bath procedure. The fact is, as a result of exposure to hot temperatures, especially contrasting changes in temperature, the metabolism works much more intensely than under normal conditions. Cardiovascular activity also increases.
If you eat inappropriate food in the bathhouse and sauna, the load on the body will increase. This may cause undesirable consequences. As a result, instead of a healing effect, you can get a deterioration in your condition.
What dishes and products are suitable for baths and saunas?
As you know, during bath procedures, moisture is intensively lost as a result of sweating. Therefore, juicy, soft fruits are best suited for baths and saunas. Best choice: grapes, oranges, tangerines, pears, pineapple, persimmons, etc. They will saturate the body with vitamins and minerals, and most importantly, restore moisture levels.
Appetizers here include vegetable salads with a dressing of vegetable oil and lemon juice. The combination of vegetable oil (preferably olive) and lemon juice has a choleretic effect on the body and causes a cleansing effect.
Seafood is very suitable for the bath diet: shrimp, crayfish, crabs. Also suitable bath foods are low-fat cut meats and fish.
Radish has always been considered a famous ancient Russian bath dish. Our ancestors knew very well that this root vegetable has powerful cleansing properties. Radish cleanses the liver, kidneys, and entire gastrointestinal tract. It also has a beneficial effect on the functioning of the pancreas.
One of the healthiest bath dishes is radish salad. To prepare it, grated radish is seasoned with vegetable oil, sugar and vinegar. For the salad, you can use black or green radish, you can also take white (daikon). Red juice is very useful for cleansing the body. You need to drink it little by little, in small sips.
What is not recommended to be consumed in baths and saunas?
It is strictly not recommended to eat fatty, heavy, high-calorie foods in the bathhouse and sauna, as it puts a serious strain on the gastrointestinal tract, heart, and blood vessels. They are now already working in enhanced mode, trying to compensate for the effect of high temperature on the internal organs. Therefore, there is no need to overload them with digesting heavy food.
When planning to go to the bathhouse, refrain from fatty meat, ham, lard, pizza, hamburgers, pastries, etc. Also give up large amounts of bread, potatoes, cereals, pasta, and legumes. Not to mention sweets (cakes, cakes, sweets). Sushi and rolls are not entirely suitable food, although they are often offered to visitors in bath complexes.
Drinks for baths and saunas
But drinks in the bathhouse are absolutely necessary, since the body is in dire need of replenishing the fluid deficiency formed due to profuse sweating.
Of course, you need to avoid alcoholic libations. As is known, alcohol has a vasodilating effect. But from exposure to high temperature, and even from temperature changes, the vessels have already dilated, as a result of which the heart experiences increased stress. In this case, alcohol may be the last straw that can lead to undesirable consequences.
You can drink beer, but in small quantities. It is best to do this a couple of hours after the bath, when the body has cooled down and recovered from temperature overload.
It is best to drink kvass in the bathhouse and sauna. These are also natural fruit juices, preferably with a sour taste (orange, tangerine, pineapple, grapefruit, tomato). They perfectly quench thirst and restore salt balance in the body. Compotes and fruit drinks are good choices. This is also tea with honey or mineral water.
Herbal teas are great for saunas and baths. First of all, those that cause sweating and have a cleansing effect. These are linden, mint, chamomile, rose hips, lingonberry leaves, currants, strawberries. All of them have a healing effect. You can also add lemon and honey to them.
But drinking coffee in a bathhouse is strictly not recommended.
So, the main thing is to remember the most important rules when visiting a bathhouse. You can eat a hearty meal 3-4 hours before. While in a bathhouse or sauna, during the break between entering the steam room, you can eat fruits and light salads. And be sure to drink a lot. Then visiting a bathhouse or sauna will be an excellent health procedure that will bring many benefits, and after which you will feel reborn!
Article rating:
Laid table in the bathhouseLink to main publication
Related publications
- Quest ancient egypt
How to do it yourself?
Comfortable bench
These three materials have low thermal conductivity and high density, rarely have defects, and are easy to process. An important factor is the absence of resins in the structure of this wood.
The most common and accessible trees in Russia are linden and aspen. Abashi (abachi) is a valuable wood native to tropical Africa. The cost of such material is much higher, but it is more durable when used in a steam room.
Wooden furniture made from driftwood and branches.
How to make a ladle with your own hands: video tutorials
Hand-made furniture can be made in a variety of variations. But before you start the production process, decide on the desired set of furniture. Among the most common pieces of furniture, it is worth highlighting: a bench, a basin with a tub, a font, bath shelves and a table.
A bench consisting of four legs, a seat, crossbars and braces can be made very quickly. In addition, such a design will be highly stable. To begin, cut the components of the bench: legs measuring 5x5 cm, a seat 5 cm thick and struts the same size as the legs. Make cutouts for the crossbars on the inside of the legs.
For those who like to do everything with their own hands, there was a video on how to make a carved ladle. A special cutter with different attachments is used here, but if desired, everything can be done with hand tools. It will undoubtedly take more time, but it’s hardly worth buying equipment just for a couple of buckets.
The second video is about how to make a carved ladle for a bath. Here the master works exclusively with hand tools. His dexterity is enviable.
The process of arranging your own home is an extremely sensitive and heartfelt process. The same applies to arranging a bathhouse or sauna. After all, this is the place where the process of relaxation and restoration of mental and physical strength will take place. Therefore, the selection of furniture should be approached consciously and thoughtfully.
Wooden furniture is best suited for a bath
Naturally, the most suitable furniture for a bathhouse will be furniture made of solid wood. For example, from linden or aspen. This wood can withstand high temperatures and high humidity well, has low thermal conductivity, so it will serve in your corner of health for a long time without deforming or causing harm to its owners.
With a little construction skills, almost anyone can make a dressing room table or steam room shelves for themselves and their loved ones. You need to be patient and have the desire to create something.
Wooden bath table
The design of a wooden table, which can be used for a bath, is remarkable for its simplicity. The table and benches can be made in a natural style: the tabletop, backrest and seat of the benches are made in the form of a raw board.
You can put any wooden table in the dressing room, because in this room there are no significant temperature fluctuations and the requirements for wood are not so critical.
It’s another matter if you want to make a massage table for your bathhouse out of wood with your own hands. For such a table, it is necessary to choose wood that is not subject to rapid destruction under the influence of moisture and high temperatures and will not release resins.
To make a table that is suitable for both the dressing room and the steam room, you will need the following materials:
- edged aspen board 50 x 200 mm, 3 meters long;
- thin bars (slats) 50 x 50 mm 1 meter long;
- medium and fine grit sandpaper;
- self-tapping screws
Manufacturing stages
Step 1. First, dry the boards and cut off all the irregularities with a plane. We saw off five boards two meters each (leaving a margin of 2 mm for sanding).
Step 2. We make one board 150 cm long - it will be used to attach the legs to each other.
Please note: the length of this board can be from 140 cm to two meters (200 cm - 30 cm - 30 cm = 140 cm, to the result we add the tail we need between the table legs).
Step 3. Lay the boards of the future tabletop. We retreat 30 and 35 cm from the edges of the short sides of the resulting rectangle and attach 2 thin bars (the ends are cut at an angle of 45 degrees). Each block requires at least 5 screws.
Step 4. Cut out the legs for the table - 4 pcs. 70 cm each. It is also necessary to cut out 4 supports for the legs, which are made in the shape of a trapezoid with an angle of 45 degrees.
Step 5. Sand all the resulting parts using a sanding machine. All corners are rounded. After this, you need to remove all remaining defects and burrs with sandpaper. First we work with medium-grain paper, and finish sanding with fine-grain paper.
Step 6. Assembling the legs. We lay two 70 cm long boards side by side (the distance between them should be no more than 5 cm) and fasten them with two trapezoidal boards using self-tapping screws.
Step 7. We insert the resulting legs between the slats nailed to the underside of the tabletop.
Step 8. We insert a 150 cm long board between the legs so that 4.5–5 cm peeks out on each side. The edge boards of the table top can be slightly rounded using a jigsaw and sanded.
Please note: do not saturate the table with drying oil or varnish, otherwise it will evaporate toxic substances!
Homemade furniture for the heart of the bath - steam room
In a good, proper steam room, apart from places to lie down and a few handy accessories (rest for head and feet, basin, ladle), there should be nothing superfluous. It is important that hot air circulates freely in the steam room, so you should not clutter the steam room. You can make shelves for your bath or sauna yourself.
Before you start making sun loungers for the steam room, you need to decide what you need. What shape, width or size should the shelves be, how will it be located: in the form of steps or along the perimeter of the steam room; what it is intended for: for sitting or lying - all this depends on the desires and imagination of the owner, as well as on the characteristics of the room.
Before you start making furniture, prepare drawings
- The first stage of making a shelf for a bathhouse is measuring the room and sketching the future lounger. It is necessary to measure the steam room as accurately as possible and draw a schematic drawing of it, where you must indicate the location of the boiler and door. Then draw the future shelves on the drawing, indicating its dimensions and attachment points.
- After all measurements have been taken, boards and timber have been purchased, you can begin to work. We assemble a frame from timber (section 100 x 50). The racks can be fastened together with metal screws, so they will not be on the surface. The distance between the posts is no more than 45-50 cm.
- Next we make seats for the shelves. They can be made from well-sanded boards or from lining. The boards must be fastened at a distance of 1-1.5 cm from each other. This will allow water to flow down smoothly and also allow the seats to dry out faster. It is better to fasten the boards for the seat with wooden dowels, since you can subsequently get burned on the metal heads of nails or screws.
Advice! Do not treat wooden products in the steam room with anything: varnish, paint, chemical impregnations. At high temperatures this is fraught with toxic fumes and poisoning.
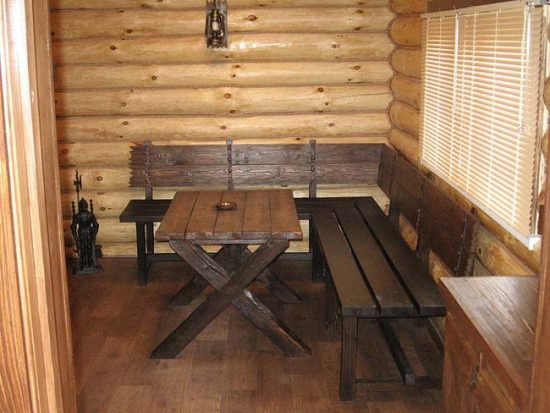
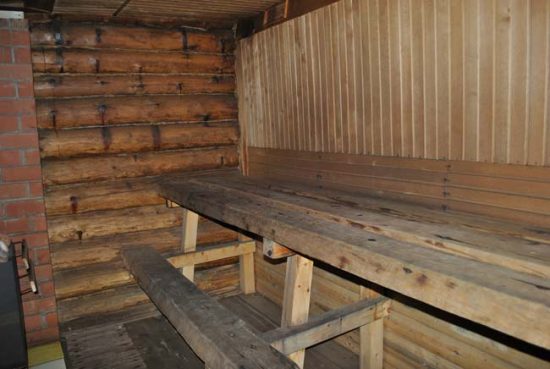
Log table
The second option is an antique wooden table that will fit perfectly into the interior of the bathhouse. The legs are made from solid logs.
A massive wooden table with simple shapes will look especially natural and harmonious in a log bathhouse.
For greater convenience, you can use a rounded log. It has already been processed - the bark has been removed, the wood has been cleaned, the surface has been milled. All sides of the log are smooth and equal.
For the tabletop, logs are used, sawn in half lengthwise. You can also assemble it from cross cuts of a log. In our example, we will look at making a tabletop from boards.