Beacons for floor screeding are the most important tool for both initial and major repairs of an apartment or private house. Thanks to them, a horizontal plane is created around the perimeter of the entire room, with the help of which you can monitor the uniformity of the thickness of the layer, and also use it as guides for the rule that evenly distributes the dry screed mixture or the screed mixture itself. The material from which to construct beacons for pouring screeds mainly depends on the thickness of the fill, the experience of the master and the material of the mixture.
Installation of screed beacons
I would like to warn you right away that installing floor screed beacons with your own hands is not anything overly difficult. If you approach the matter competently and wisely, you will quickly learn how to do this and fill the floors not only in one room, but throughout the entire apartment.
What are beacons?
Now let's figure out what kind of beacons these are? In simple words, this is a flat, level horizontal beacon line no more than 3 centimeters wide.
Craftsmen use any available materials as guides themselves. Let's take a closer look at what exactly is right for you for your chic, new floor!
Important!
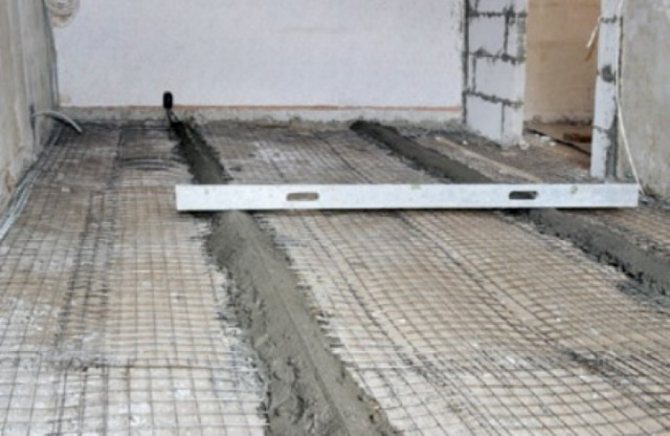
The beacon line does not cover the entire room, but only a few strips at a distance of 0.5 to 1 meter from each other, which run throughout the room from window to door. The distance from the wall should not exceed 10 -30 cm.
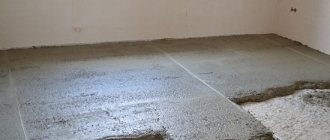
The beacon lines themselves are installed on piles of cement mass.
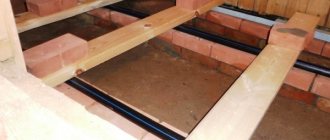
Beacons made of bars
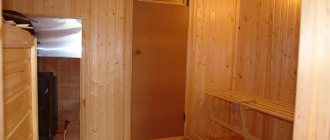
Instead of an iron profile, you can also use wooden blocks, approximately the same size 3cm. x 3 cm.. Wood is of course a less durable material, however, upon completion of the work it will remain under a good layer of concrete and nothing will happen to it in the next 50-70 years.

Wooden beacons for floor screed
Beacon profile for screed
If you install wooden blocks as beacons, they must be moistened with water before pouring the screed. Thanks to this, the sand-concrete mixture will be separated from the support line, and that in turn will not interfere with the pouring of the screed.
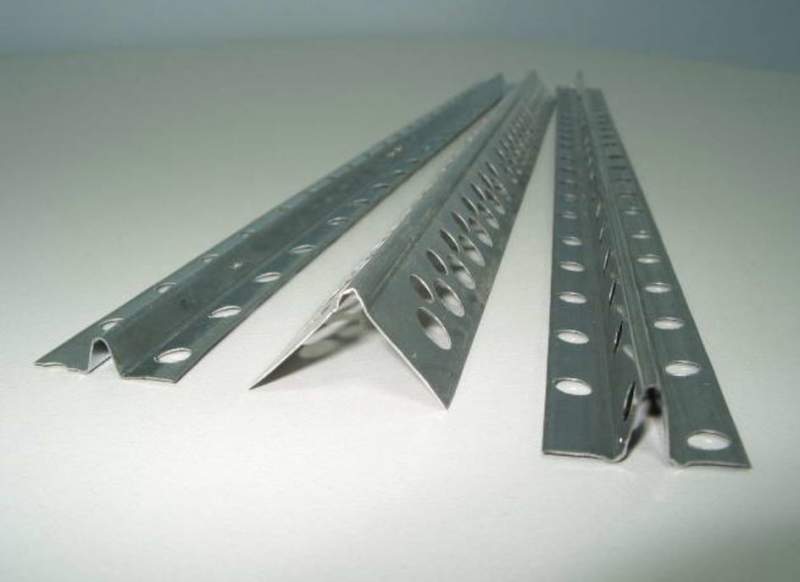
Beacon profile
Another common material for this operation is the profile for beacons for floor screed. It is sold in stores as fasteners for drywall sheets.
It is worth remembering that the profile is laid ONLY with the base up! Installation of beacons for floor screed from a profile is the simplest. And if you are going to lay laminate as a finishing coating, then you don’t even have to pull out the profile!
Before starting work, you will need to install self-tapping screws for all planned beacon lines. The distance between them should not be more than 40-50 cm. The dimensions of the screws should be chosen so that when screwed in, it fits more than half into the dowel.
Self-tapping screws are set to zero level. If the level does not work, you can easily either unscrew or tighten them. Afterwards, stretch the thread as a guide and then place the profile on the screws.
It is worth considering that the zero level is set along the entire length of the beacons.
After installing the profile, its horizontal plane and the space between the beacon lines are checked. Having made sure that everything corresponds to the intended dimensions, they begin to lay the bloopers.
You need to start from the places where the screws support the profile. After this procedure, the horizontal lines are checked again. If everything is normal, you can install beacons on both sides completely.
After complete drying, pour the floor screed.
Cunning!
Instead of self-tapping screws, you can also use improvised materials: halves of bricks, bars, or anything else you have on hand.
Plasterboard beacons

Plasterboard beacons
In addition to the profile and bars, you can use a plasterboard profile to install beacons. To do this, take two sheets and insert them into each other, thereby eliminating deflections. It is worth noting that it is not necessary to put a lot of supports under them.
One of the advantages of this technology is its low cost . One sheet of drywall is enough for an average room of 17 sq.m.
Cement beacons
If all of the above methods do not suit you for some reason, you can use the budget option. This option is practical in that there is no need to tear out signal structures from the already poured screed. The most important thing is that the material for this type of beacon matches the solution of the screed itself.
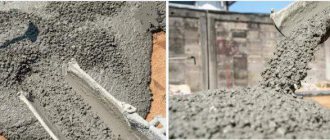
Concrete beacons
To do this, mix cement and lime solutions in equal proportions and pour beacon lines from the resulting mass.
This arrangement of beacons for floor screed is mainly used for semi-dry screed, which will be laid in a thick layer.
- On the one hand, this is easier, since after the floor screed has completely dried, you will not need to cover up the remaining cracks and cracks.
- On the other hand, before pouring the screed, you need to wait for such a structure to dry completely.
Beacons for self-leveling floors
Although self-leveling floors themselves spread over all planes, filling all the depressions and potholes, they also require the installation of beacons for floor screed. Only for this type of flooring a special type of beacon is used.
- Benchmarks (tripod beacons)
- Self-tapping screws
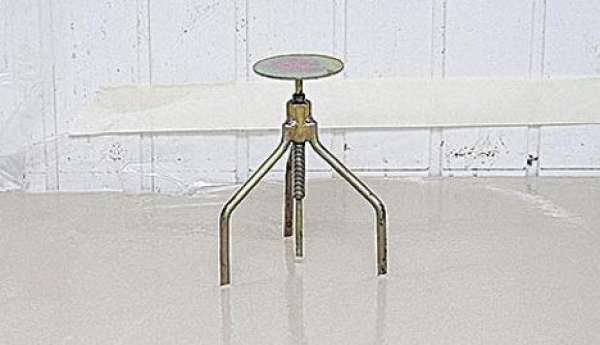
Lighthouse benchmark
Lighthouse self-tapping screw
Benchmarks are a small structure with three limbs and a screw rod inside. It is this rod that regulates the zero level. Since this equipment is professional, it is not cheap (an example of a budget option is given below) . And for one room you need 5-10 pieces (depending on the area).
Important!
Stay tuned and a little later I will write an article about how to make beacons for floor screed with your own hands. Looking ahead, I will say that to make them you will need a welding machine.
After priming the rough surface, benchmark beacons are set. The distance between them should be no more than 1 m. And the caps of their rods help set the required surface level.
A budget option for beacons for self-leveling floors are the same self-tapping screws that I described just above. They are screwed into the floor and leveled using a rule. Afterwards, a rope is pulled, which serves as a guide when pouring the floor.
Other types of beacons
Square pipe beacons
Another convenient material can be metal pipes. The cross-section of the pipe does not matter. Be it a circle, rectangle or square. This technology is used for pouring floors on an industrial scale, for example in industrial premises.
In general, floor screed beacons can be made from anything (as a hint, I can give you an idea: go to any large hardware store and just look around at what’s on the shelves. Surely you can find something else suitable for This) you just need to remember that all work needs to be done wisely, since in most cases you are doing this for a long time and most likely for yourself.
Brief description and purpose
When removing the old coating, you should take into account the type and pattern of laying parquet flooring
Beacons are guide structures made from available materials or building materials. The composite structure may vary depending on the material used and how it is installed.
Installation of guide structures is carried out in several stages, including calculations, surface preparation, and installation of hydro- and thermal insulation.
The main task of the lighthouse is to limit the spread of the compositions and mixtures used, while maintaining a flat plane. That is, the main task is to direct the screed in the desired direction when distributing it along the plane and control the upper limit in height.
To install beacons, only modern and reliable compounds are used that can withstand the weight of concrete mortar, filler and other related components. The specific type of structures used depends on the type of mixture used.
Important principles for installing beacons
To make a perfectly flat floor using the above materials, you should know at least an approximate design of beacons for floor screed and remember a couple of key points:
- Set the “zero level” accurately
- Maintain the specified distance from the guides
Setting the zero level is almost the most difficult task, the correctness of which will determine the final result.
Zero screed level
Remember!
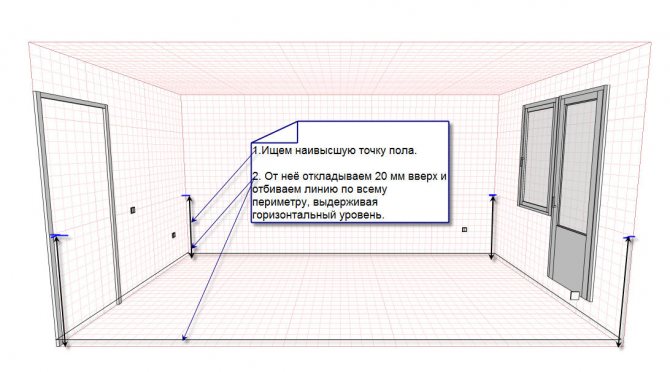
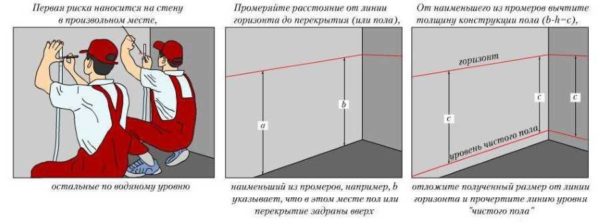
First, find the highest point of your floor, add to it the desired thickness of the screed (3-5 cm) and at this level mark a horizontal line around the perimeter of the entire room.
Zero level tapping
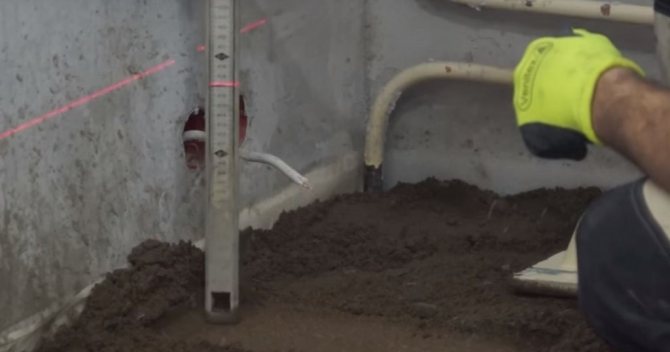
Since the beacons are set at the zero level, its setting must be approached with extreme care and accuracy. First of all, mark a distance of 1 meter from the floor with a marker in the highest corner using a ruler or tape measure. Then move the mark at this level to all corners in the room. It is better to carry out the transfer using a construction laser level. If you don’t have such a device in your arsenal, a laser pointer will do just fine.
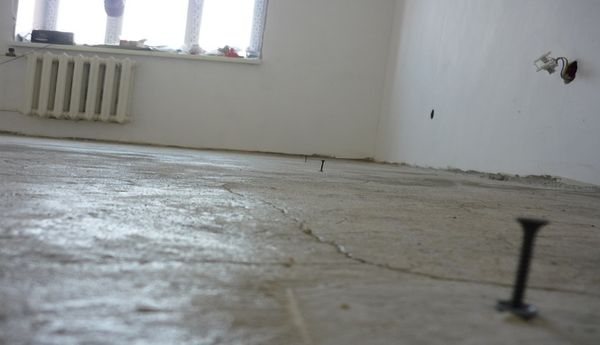
After there are notches in all corners of the room, measure the distance from them to the floor. And in the place where the height is the smallest there will be the highest point of the surface being poured.
Zero level tapping tool
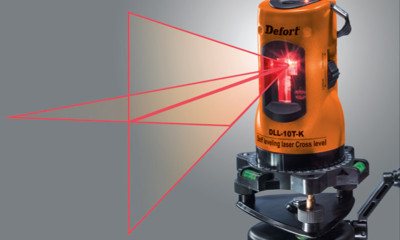
Laser level
Hydraulic level
In this corner with the highest point, make a mark that will be 3 centimeters higher than the level of the base (this is mentioned just above) and also project horizontal lines into all corners.
The resulting level will be zero. You will use it as a starting point when you place beacons for floor screed.
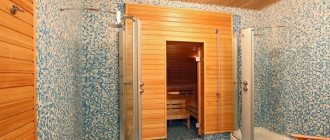
Warm floor system
The beacon for screeding a heated floor and the pouring of the solution itself requires special attention, since the heated surface is subjected to both physical stress and thermal expansion due to heating and cooling.
It is recommended to make the thickness of the tie for the heating cable 3-5 cm. If it is less than 3 cm, it may simply “break” due to thermal expansion. If the layer is more than 5 cm, the cable may not be able to cope with the heating, and the temperature on the floor surface will not be able to match the temperature set on the regulator. The optimal thickness of the screed on the separating layer is at least 3 cm.
How to look younger: the best haircuts for those over 30, 40, 50, 60 Girls in their 20s don’t worry about the shape and length of their hair. It seems that youth is created for experiments with appearance and daring curls. However, already last.
These 10 little things a man always notices in a woman Do you think your man doesn’t understand anything about female psychology? This is wrong. Not a single little thing can be hidden from the gaze of a partner who loves you. And here are 10 things.
Why do you need a tiny pocket on jeans? Everyone knows that there is a tiny pocket on jeans, but few have thought about why it might be needed. Interestingly, it was originally a place for storage.
11 Weird Signs That You're Good in Bed Do you also want to believe that you please your romantic partner in bed? At least you don't want to blush and apologize.
15 Cancer Symptoms Women Most Often Ignore Many signs of cancer are similar to symptoms of other diseases or conditions, which is why they are often ignored. Pay attention to your body. If you notice.
Never do this in church! If you are not sure whether you are behaving correctly in church or not, then you are probably not acting as you should. Here's a list of terrible ones.
Distance between beacons
The beacons should be located parallel to each other to make it more convenient to pull the tie. Also keep in mind that the beacon strips should not be located far from the wall 20-30 cm. This is quite enough. If they are close to the wall, the floor will not be level.
Expert advice!
The distance between two adjacent beacons should be no more than the length of the rule. If you use the rule of more than two meters for work, it is recommended to keep the distance no more than 1.8 meters.
If you install more than two beacons for your floor screed, you will have to measure the plane of the middle guides more often. To facilitate this task, a cord is pulled between the outer beacon lines, along which the middle guides are then adjusted.
Horizontal level tapping
The beating is carried out using the following technology:
- a laser level or a plane builder is installed in an area of one room so that its beam hits the walls of adjacent rooms through doorways, a mark is placed on the wall in each room of the house/apartment (it doesn’t matter at what level, the main thing is that it is at the same level) all rooms);
Positioning the plane builder.
- the level is transferred to the center of one of the rooms, the beam is tied to a previously made mark and the distance from the beam to the floor is measured with a tape measure (in the corners and in the center of each wall);
- then the level is transferred to another room, the beam is tied to the previously applied mark, and the distance from the beam to the floor is again measured at each corner of the room and in the center of each wall.
The point of the actions described above is to find the highest point in the apartment/house. Where the distance from the laser beam to the floor is minimal, there is the highest point of the floor. It is from the highest point in the apartment that the finished floor level is measured, based on the requirements for the minimum layer thickness. For cement mortar, the minimum layer is 3 cm, so we add 3 cm to the highest point, this will be the level of our screed. All beacons must be placed at this level.
Example: For simplicity, we will not consider an apartment or a house; we will show an example for one rectangular room. Let's say, based on the results of measurements in the corners of the room, we got: 1st corner - 65.5 cm; The 2nd corner is 66 cm, the 3rd corner is 63 cm, the 4th corner is 62 cm. This means that the highest point is where we have 62 cm. It follows that in order to fill the cement screed you need to pour it to the level of 62-3 = 59 cm from the plane of the laser beam.
Then you need to place the beacons in the found level, i.e. the distance to the beacons is measured precisely from the virtual plane constructed by the level. For convenience, you can make a template from wood or other material on which the required distance is marked; this will allow you not to measure with a tape measure every time. The designs of beacons and methods for adjusting their level will be discussed further.
Advice! For the convenience of measurements, we recommend drawing a plan of the apartment/house on a piece of paper and putting each measurement on this plan, this will be more clear and practical. Alternatively, you can apply the measurement results directly to the walls, next to the measurement site.
Important! The floors of the apartment consist of laid large-format floor slabs, so the highest point most often (in 99%) will be located on one side of the slab, and not in the middle.
When using some modifications of the self-leveling floor, the screed can be brought “to zero” or lowered by a maximum of 5 cm if the lowest point is at the front door and to level the horizontal line you will have to make a step at the entrance to the apartment.
Advice! Instead of a laser device, a hydraulic level can be used; the technology is completely identical to that indicated, but constructions take much longer and are less accurate. If you don’t have a laser level, you can rent one for a very reasonable price.
Photo gallery
For a more visual presentation, I have collected all the materials in this section into one gallery. Which presents the tools, materials and beacons for floor screeding in the photo.
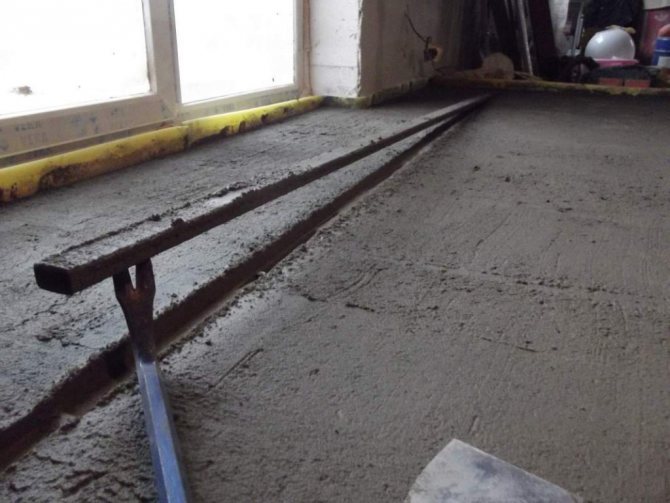
Floor screed using mortar beacons
This method can rightfully be called the most reliable and widespread. The process of semi-dry screed is faster, because when making beacons, the floor is simultaneously leveled. There are several types of solution beacons. One level is enough for professionals to make beacons from a solution. This method helps to avoid pulling out all kinds of guides from the frozen screed. For everyone else - wooden slats, metal profiles - these are your upper guides. After using them, you will have to level out the resulting depressions after the screed has dried. To make the work easier, use metal profiles; unlike wooden ones, they can be left in concrete.
Beacons will help to make a gentle screed and waterproofing without causing damage to it. This screed is not performed very quickly, but its quality is excellent, and the beacons in this case are already part of the screed. If the screed is not subject to heavy loads, alabaster beacons are suitable for you. But alabaster is a capricious material, it hardens quickly, and is suitable for work by those who already have experience working with it. Otherwise, if you do not complete all the manipulations before hardening, you will have to redo the work, which will require certain financial costs. The usual high-quality solution for beacons must be prepared 1:1 sand and cement, when, as for a regular solution, the ratio is 1:3 - one part cement + three parts sand. If you plan to harden quickly, then add more cement. When you press the solution, it is unacceptable to release moisture, that is, do not overdo it with water.
To get a high-quality screed you need to follow some rules and not violate technology:
- Using a water or laser level, having found the zero level, make marks on the wall.
- Along the entire length of the working surface, it is necessary to mark the location of the beacons, taking into account the length of the rule.
- Using a solution of cement and sand that holds its shape well, lay out the starting line of the lighthouse.
- Place a metal profile or wooden strip on a level, slowly pressing it into the solution. The solution that ends up above the slats must be removed.
- After a little hardening, start screeding. It is important here not to press the rule too hard against the slats.
Conclusion
So you are convinced that installing floor screed beacons is not a difficult process. Yes, it is certainly worth making some effort. But the result will make you very happy and if you do everything yourself, you can save a decent amount of money!
If you doubt your experience and skills in carrying out a floor screed, I would recommend that you do not save money and invite a specialist to this stage of repair who can choose the right type of screed and help you install beacons for floor screed, do not forget that a screed is The first and main chapter of the renovation and you shouldn’t skimp on it!
All that remains is to wish you the immediate completion of your renovation. If you still have any questions, do not hesitate to write them in the comments and I will be happy to answer them.
How to properly set, install and secure?
The base must meet technical strength indicators
Before deciding how to correctly position the beacons for floor screed, you should complete a full range of preparatory measures, calculation work, preparation of equipment and materials.
To install the guides, you will need the following as tools and materials:
- Hammer and drill;
- Roulette and level;
- U-shaped profile 60×27 mm;
- Cord, dowels and screws.
If the thickness of the concrete mixture is small, the 60×27 mm profile can be replaced with 28×27 mm or use a plaster T-shaped analogue measuring 22×20 mm. When using timber, it is better to use material with a cross-section of 50 or 60 mm.
Beacons for floor screed - the main stages of installation and pouring the mixture
The sequence for installing beacons for liquid concrete screed will look like this:
- The starting point of installation is the highest point on the floor surface. In this area, using a hammer drill or a drill, we drill a recess for the dowel. At the other end of the room, the exact same recess is made. A plastic dowel is inserted and hammered into the resulting holes;
- We carry out the necessary calculations, according to the length of the room and in compliance with the basic rules. According to the data received, schematic markings are made on the floor surface using a level and a pencil;
- At the beginning and end of each line, a hole is drilled and dowels are driven in, as was done in step 1.;
- Markings are made for self-tapping screws, in the center of the U-shaped profile. To do this, use a pencil and tape measure. After marking, the self-tapping screw is screwed into the profile to its full length;
- The profile with self-tapping screws is installed into the driven dowels and lightly fixed using a drill. Next, at the beginning and end of the room, a cord or wire is pulled along the “zero level” line;
- Adjustment is made according to the tension of the cord. To check, it is advisable to use a building level. Then repeat the operations performed for the remaining guides;
- Prepare cement or concrete mortar with the addition of alabaster. Next, place the required amount of mixture under the profile so that it can be freely pressed into the solution, while maintaining the required level along the upper edge;
- After fixing all parallel guides, perform a final check according to the level. Remove the stretched cords and wait for the cement mortar to dry.
For fixation, it is recommended to use a mixture of cement, sand and alabaster. The drying time of the mixture is usually quite long, and adding alabaster will help reduce it to a minimum.
When setting guides for other types of screeds, you can use a similar method. The stages of preparation and tightening the screws can be omitted altogether and focus on the stretched cord. But this approach requires experience in placing beacons and is not recommended for beginners.