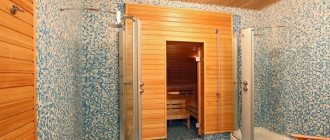
Concrete is a durable material with high wear resistance. Floors made from this material are poured in underground parking lots and factory workshops, warehouses, garages and hangars. Ceilings, walls, floors and decorative details made from this material fit perfectly into apartments decorated in an industrial style. Typically, concrete lasts for decades, but under high dynamic loads it begins to collapse. The reason may be either a one-time impact impact or constant small loads that manifest themselves as abrasion.

The structure of the hardened concrete mass is heterogeneous, since the solution contains not only cement, but also sand. Vibration compaction is not always of high quality; micropores filled with air remain in the fill. The strength of a concrete surface can be increased using special mixtures. The process of surface treatment is called topping. Strengthening compounds are also called.
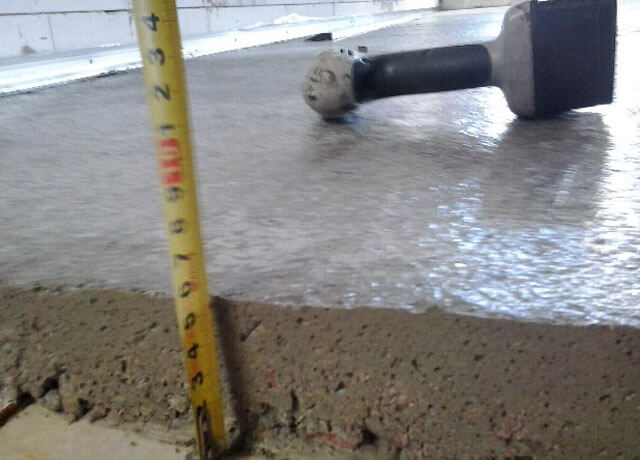
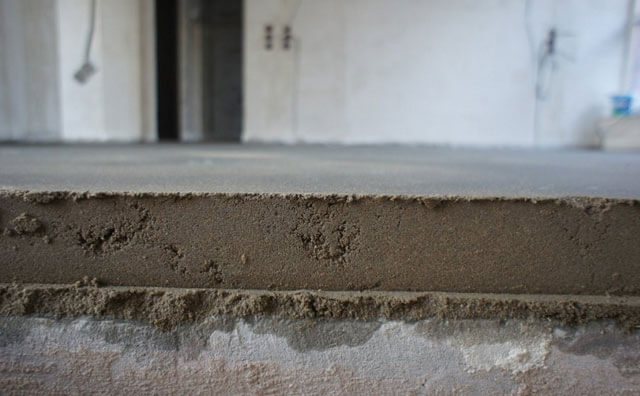
What is the minimum layer of floor screed that can be used?
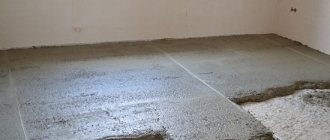
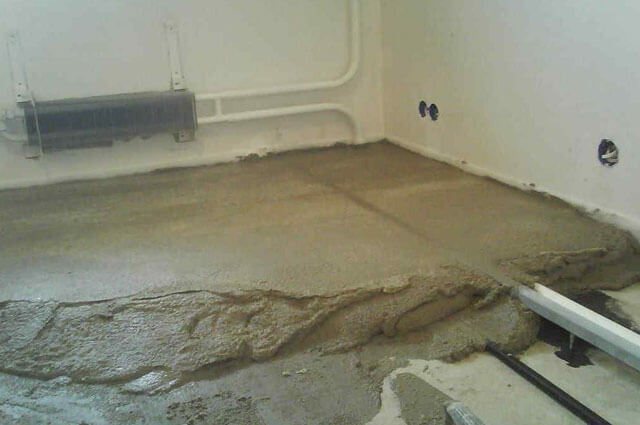
The concrete surface, which is called a screed, serves as the basis for the final finishing of the floor in apartments and houses, both old and recently built. To make your own flooring, you need to find out what building materials you need to purchase and in what quantity. You should also determine how many cm the floor screed should be.
Why do you need a screed?
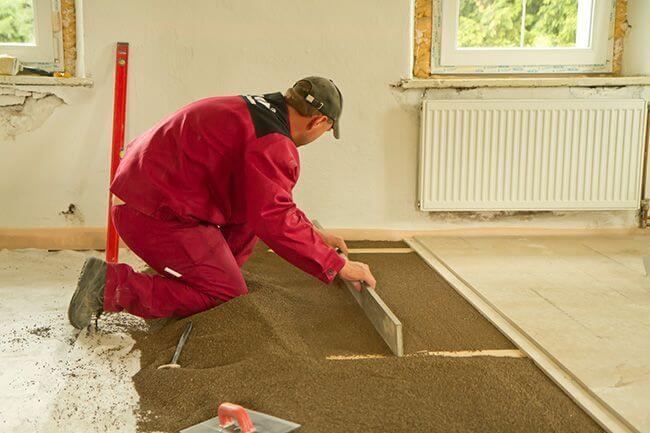
The concrete base shown in the photo is assigned certain functions.
A layer of cement screed, which is an important component of the floor structure:
- ensures the strength of the floor covering;
- creates a flat and smooth surface, which is required for proper installation of tiles, linoleum or laminate;
- provides the opportunity to evenly distribute the load on the interfloor floors located underneath, which extends their service life;
- helps in arranging slopes if they are provided for in the design documentation.
Requirements regarding what type of floor screed should be:
- durable and capable of withstanding considerable loads that arise when people move on the surface and from furniture placed in the room;
- have the same density over the entire floor covering - voids in it, cracks and chips are unacceptable;
- with a flat horizontal surface (the maximum permissible slope should not exceed 0.2%.).
The lifespan of the floor and its strength are directly affected by the height of the floor screed in an apartment or private household. Not a single specialist can name a figure indicating the optimal amount of screed for a rough covering.
This parameter depends on:
- the purpose of the premises in which the renovation is being carried out;
- the magnitude of the expected loads;
- type of soil (if it is used as a base).

The above characteristics determine not only how many cm the floor screed will be, but also the choice of a specific brand of cement used for mixing the mortar and the need to use reinforcing elements.
DIY ceiling: plasterboard coverings and plaster
If a man is independent, then this is good, but if he is also constantly learning something new, then this is a godsend for his wife. Not everyone can make a ceiling canopy with their own hands, but everyone can learn how to do it, but this requires desire .
If you feel it, then you have come to the right place - here you will find several valuable lessons from an experienced master for the home owner.
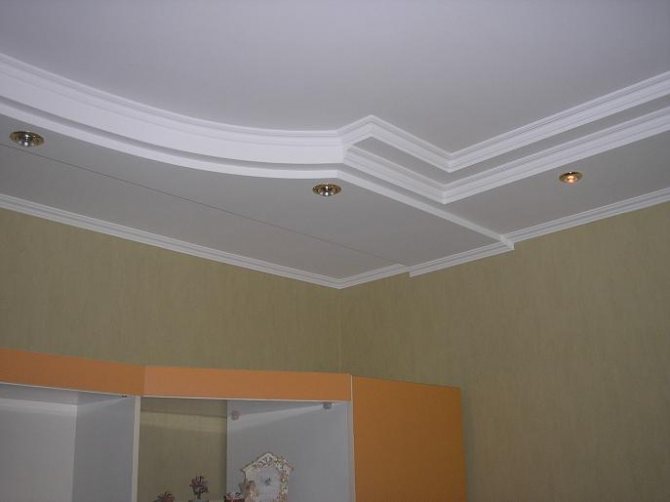
Part of a multi-level plasterboard ceiling
Screed arrangement options
In practice, three types of screeds are used depending on their thickness:
- The first type
is a thin base. In this case, a material such as a self-leveling mixture is used, which after pouring does not exceed a height of 2 centimeters. In this case, reinforcing elements are not used. - The second type
is a rough base, having a thickness of no more than 7 centimeters. This layer height allows you to lay reinforcing mesh or use reinforcement. They make such a base for a reinforced concrete floor structure. - The third type
is a layer of maximum thickness, but not more than 15 centimeters, which is a monolith with reinforcement located inside it. A screed of this height is used when it will be both the floor and the foundation of the building at the same time.
As a result, the thickness of the base of the floor structure depends on the type of materials that will be used in arranging the subfloor. If it is planned to pour concrete mortar with the addition of crushed stone, then the minimum layer of screed cannot be applied. The fact is that the size of the crushed stone fractions does not allow making a thin base for the floor covering.
To fill a minimum thickness screed, the best choice would be to choose self-leveling and other mixtures that are intended for finishing surfaces before installing the floor covering (read: “What is the minimum thickness of a floor screed - standards and rules”). This type of composition allows you to create a thin and perfectly even layer.
When you plan to create a floor heating system, you should pay special attention to such a parameter of the screed as its thickness. The main requirement in this case is complete coverage of the heating elements with a concrete layer. Since the standard pipe diameter is 25 millimeters, the thickness of the screed for a structural heated floor device should be 50-70 millimeters.
Experts are of the opinion that to ensure proper functioning of the system and high-quality heating of the room, it is enough to pour a concrete layer of about 40 millimeters over the pipeline. A higher screed will complicate the process of adjusting the supply of thermal energy, since most of it will be spent on heating the concrete.
In addition, the thicker the concrete layer, the greater the mechanical impact on the walls of the room. To eliminate negative consequences, before pouring the solution, it is necessary to cover the walls around the perimeter of the room with special tape.
How to pour concrete on a ceiling
After installing the formwork and strengthening the structure, you must fill everything with concrete. Therefore, you must rent a machine equipped with a pump and several hoses to pour concrete into the ceiling form.
Additionally, you must order the required amount of concrete from your local company (they will deliver it by car). You should be aware that there are several types of concrete, so make sure you order the one specified in your building plan (generally for ceilings, you should use B250). Ideally, you should hire an engineer to supervise the workers who are pouring the concrete ceiling.
Smart tip: if the surface to be filled is large, it is better to start from the farthest corner. In this case, you won't have to run through liquid concrete with a hose. Additionally, you should wear rubber boots to protect your feet from getting dirty from the concrete.
After finishing pouring the concrete into the formwork, you must level it from one end to the other. But first you must pound the concrete to make sure there are no air pockets left in the concrete.
Make sure you level the surfaces properly, make sure it is level. However, in most cases you will need to screed after the concrete ceiling has dried to make it completely level.
Next, you must wait a couple of months until the concrete ceiling is completely dry. Once the ceiling is dry, you can remove the formwork and continue building the walls and the rest of your home.
Smart tip: If the outside temperature is high, you should spray the concrete with water at least twice a day.
Spray the concrete with water, otherwise the ceiling may crack. In the worst case, you'll have to do it all over again if the cracks are too deep (cracks can affect the rigidity of the ceiling).
Smart tip: don't remove the formwork too early, otherwise the ceiling will crack or become crooked. This is why it is important to consult a qualified structural engineer.
Once the ceiling has dried properly, you can begin to build the walls and roof of your home. Pouring a concrete ceiling is not very difficult if you follow the directions from your structural plans.
Smart tip: Just make sure you install the fortifications properly. Make sure you use the right tools and materials to ensure your project is done to a high standard.
Minimum thickness screed
In accordance with SNiP standards, the minimum layer of floor screed can be 2 centimeters. Moreover, this parameter varies depending on the material used. When the screed is made on the basis of metal cement, then 2 centimeters is enough. In the event that it is not planned to use a reinforcing element for pouring, the minimum layer of concrete cannot be less than 4 centimeters. The fact is that a thin base is not able to provide the necessary operational parameters.
A thin floor screed is poured onto a concrete base, provided that no reinforcement is used and there is a smooth rough surface. It is not recommended to use it when carrying out repairs in technical buildings and where it is planned to place increased mechanical load on the floor. In houses and apartments this is a corridor, a bathroom and a kitchen.
The process of arranging a screed with a minimum thickness on a ground surface consists of sequential actions:
- A bed of sand and crushed stone is poured, leveled and thoroughly compacted.
- Lay a waterproofing material, for example, a polyethylene film.
- Fix the reinforcing mesh.
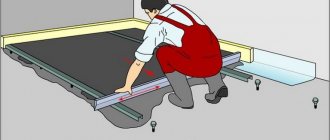
- Guide beacons are installed.
- Prepare a solution.
- Pour in the mixture.
As already mentioned, the thickness of the screed with reinforcement must be at least 4 centimeters. Due to the presence of a mesh and the minimum height of the concrete layer, fine crushed stone or gravel is used when preparing the mortar for pouring. In order to increase the strength of the coating, plasticizers should be added to the mixture.
Maximum height tie
No standards establish the maximum possible thickness of the screed. This parameter depends on several factors and is determined specifically for each concrete coating. But, as practice shows, in most cases it is not advisable to fill a screed with a height of more than 15 centimeters, since this will be quite a costly undertaking in terms of building materials and time.
It is entirely justified to install a coating of maximum thickness only in rooms where a large load will be placed on the floor covering, for example, in garages.
Also, high screeds are poured when they will be part of the load-bearing structures in buildings. As a result, a monolithic surface of maximum thickness will become both the floor and the foundation. According to experts, the height of the screed should be increased when the base of the floor structure is problematic soil.
In a number of situations, the thickness of the concrete layer is increased in order to hide significant differences existing on the surface of the subfloor. Before making a decision regarding pouring a 15-centimeter-high screed, professionals recommend evaluating the possibility of using crushed stone or expanded clay to eliminate unevenness. You can also remove sudden changes using a powerful jackhammer.
To eliminate significant defects in the rough surface, in this case the minimum (thin floor screed) is not suitable, but the amount of building materials required will be less. If you use only concrete mortar to eliminate large differences equal to 15 centimeters, then the cost of building materials and wages for builders will amount to a huge amount.
You should not pour a screed of maximum thickness when installing a warm water floor system, since such a height of the concrete layer located above the heating element will not allow the floor surface to warm up quickly. As a result, the design's efficiency for heating will be minimal with significant amounts of heating costs.
Carrying out work to create a thin floor screed - methods, materials
The usual height of a concrete or cement-sand screed is 4-10 cm. But for various reasons, sometimes a thinner layer of mortar is required - up to 3 cm. For example, when installing a floor heating system, when installing a floor on a balcony or loggia. The minimum thickness of the concrete screed according to SNiP rules is 2 cm.
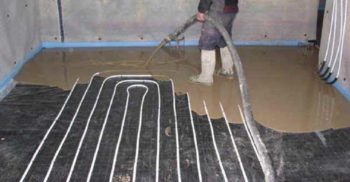
Pouring heated floor pipes
Thin-layer screed is unsuitable for technical rooms and living rooms where a large load on the flooring is expected (kitchen, corridor, bathroom). This is due to the fact that for pouring a minimum height screed, it is desirable that there is no reinforcing layer. This layer of metal mesh increases the strength of the floor. The second condition is a flat base surface.
Thin screed made of self-leveling mixture
In addition to concrete, cement-sand or ready-made dry mixture, self-leveling (leveling) mixtures can be used to fill a thin screed. These are compositions that, when poured, under the influence of gravity, without the use of tools, can independently create a flat surface. An additional advantage is that the hardening speed is much higher than that of concrete mortar.
There are two types of self-leveling mixtures:
- Starter (coarse levelers). They are used for serious defects and large differences in floor height. After drying, a durable surface is obtained. Some types are intended for subsequent coating with a finishing mixture, others do not require an additional layer - they are coated with concrete paints. The minimum thickness of the leveling layer is 2 mm. Approximate consumption - 25 kg per 0.5 sq. m with a layer height of 3 cm. Already 7 hours after application, you can walk on a screed made from a coarse leveling agent. If a second layer is needed, it can be applied every other day. The floor covering can be installed in one to two weeks, and complete hardening occurs in a month.
Rough leveler
- Finishers. These mixtures consist of small particles and form a perfectly smooth surface. Some types of these coatings have a decorative appearance, that is, they do not require additional finishing. You can walk on the surface after 4 - 6 hours. Layer thickness - from 1 mm. Approximate consumption at this height is 1.7 kg per square meter. m
Self-leveling floor
The most popular ceilings in the house
This article will consider two types of ceiling repairs - a suspended ceiling made of plasterboard and leveling (plaster) with putty solutions. There is also a video clip at your service that will allow you to visually consolidate the acquired knowledge.
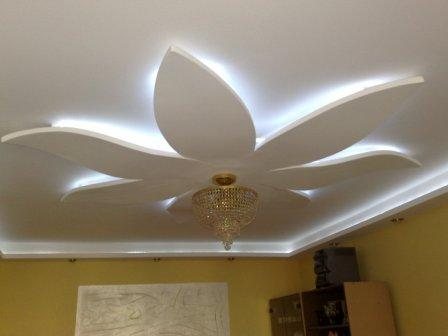
The second tier of the ceiling is made like a flower
Due to the fact that it is simply impossible to post absolutely all the information about these issues, here are the basics of these two types of finishing, the use of which will allow you to grow as a master.
Plasterboard ceiling
Water building level
- To make a ceiling canopy with your own hands, you definitely need to learn how to use a water level . This is not difficult, but there is one caveat - given that we will have to place marks right under the ceiling, the plastic cones that are attached to the ends of the tube will interfere, resting against the ceiling. There are two options - put the marks 10-15 cm lower , and then raise them using a tape measure, or simply get rid of the cones , which is much preferable.
- So, let's put the first mark on the wall . Please note that the minimum distance from the main ceiling must be no less than the thickness of the CD profile for the suspended frame, which is 25mm . So if you want to raise the suspended structure as much as possible, then these figures will be the limit for you, and besides, the calculation must be made from the lowest point on the main ceiling.
Made from concrete, ready-made dry or cement-sand mixture
A thin screed can be made from any material suitable for ordinary use - concrete, cement-sand mixture, you can buy a ready-made dry mixture. Carrying out the work requires attention to preparing the surface, ensuring reliable adhesion of the mortar to the base of the floor - the ceiling or the underlying layer on the ground. Procedure:
- Clear the concrete base of debris.
- Apply deep penetration primer with a brush or roller. Let dry.
- Apply floor tile adhesive using a notched trowel. Let dry again.
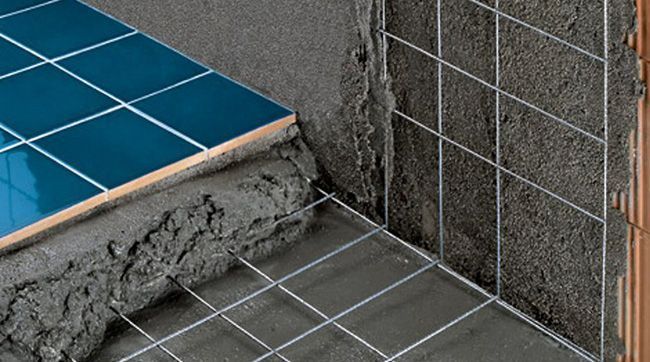
- If possible, lay a reinforcing mesh.
- Place beacons from a metal profile to ensure uniform layer thickness.
- Prepare the solution. To increase strength, it is allowed to add tile adhesive to it, but not more than one part per four parts of concrete or mixture.
- Apply the prepared mixture along the beacons and level with the rule.
- After a day, the rule is to cut off the growths. If there are many defects on the surface, then a very thin layer of self-leveling mixture can be applied.
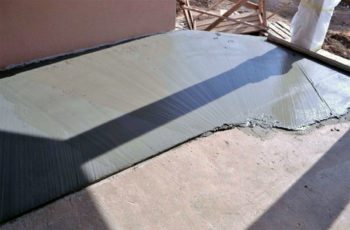
Screed on the balcony
Important! Ready-made dry mixtures with reinforcing fiber are available on sale. They are also suitable for creating thin screeds, as they significantly increase its strength without the use of metal reinforcement.
What should be the minimum thickness of the floor screed?
Screed is a key point in the process of constructing or repairing the floor of any room, since the finishing floor covering is laid only on a flat surface. In order for the screed to be done efficiently, you need to make the right choice:
- its optimal thickness;
- type of screed;
- necessary materials included in the mixture.
The main thing at the first stage is to determine what the minimum thickness of the floor screed is and what the maximum is: these are the parameters that determine reliability and durability. A thin layer may not provide the strength you expect; and too thick will lead to excessive consumption of materials and, possibly, to exceeding the permissible loads on the floor.
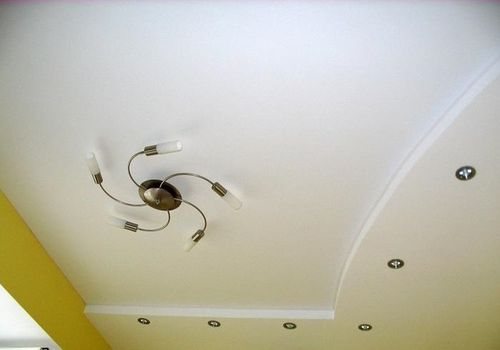
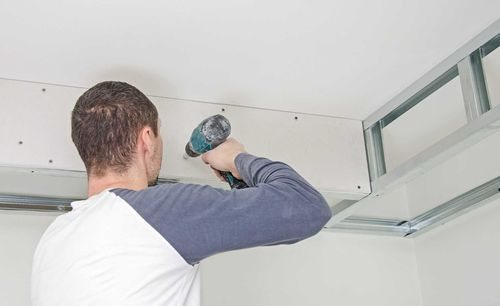
How to make a ceiling screed yourself
Before decorating the ceiling, its surface must be made perfectly flat. Only in this case the quality of work will be high. First of all, this condition must be observed for ceilings made of prefabricated reinforced concrete slabs, which are not always perfectly installed. Therefore, first we screed the ceiling, and only then move on to the decorative design.
General requirements
When screeding a floor, it is recommended to adhere to the following rules:
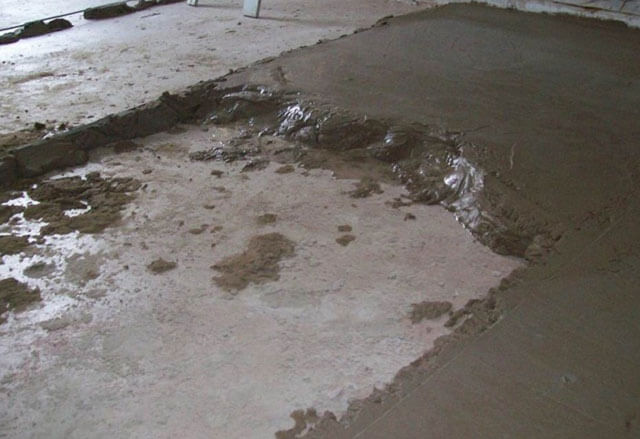
- At the base preparation stage, it is necessary to carefully seal all cracks and holes so that the lower floors are not damaged during the pouring process, since the mixture contains water.
- Pouring is prohibited in rooms with temperatures below 5 °C, since failure to comply with this recommendation will lead to a decrease in its strength.
- The density of the screed should be the same throughout the entire volume. Any cracks, chips and voids inside it are not acceptable.
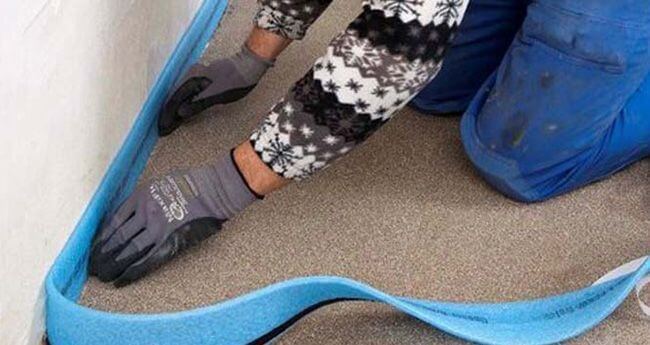
- When laying over insulation, it is recommended to leave a gap of 20-40 mm between the fill and the walls, which is filled with insulating material.
- Monolithic screeds are separated from the walls by damper tape.
- The final floor covering is laid only when the subfloor is completely dry (minimum drying time is 24 hours).
Advice! The light gray color of the coating indicates that the mixture has dried completely.
- SNiP allows that the subfloor may have deviations: for parquet, laminate, linoleum and self-leveling floors - up to 2 mm per 2 meters; for other types of coatings - up to 4 mm per 2 meters.
- If the height of the screed is more than 40 mm, then reinforcement is necessary. In rooms where heavy loads on the floors are not expected, the absence of reinforcing components is allowed for a layer thickness of up to 70 mm.
Optimal screed thickness
How thick the floor screed should be, its type, and the required mixture composition depend on the following factors:
- the presence of unevenness and differences in height of the base base;
- what exactly the mixture is poured onto (on the floor slab, on the insulation layer or on the pipes - in the case of a heated floor);
- what kind of coating the surface is being prepared for;
- characteristics of the room (floor load, humidity, temperature, etc.).
Basic base
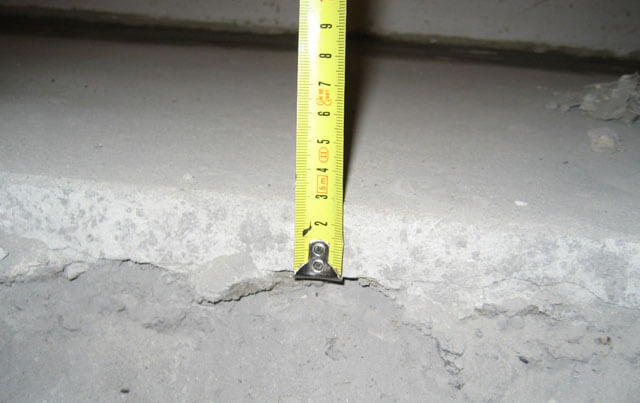
The more significant the unevenness and height difference, the thicker the layer of mortar is needed. For minor defects, the minimum thickness of the floor screed will be 20 mm. If you have to deal with large differences (more than 60 mm), then there is no need to talk about the minimum thickness. In this case, it makes sense to make a solution from a mixture of coarse sand, cement and water; its height will vary from 100 to 150 mm.
Advice! If you want to save on concrete mix, use expanded clay or crushed stone as a partial leveling.
If you think that you can determine the unevenness of the floor “by eye,” then do not be fooled: your eyesight may let you down. It is better to use a special level for this.
Classification
There are 3 types of screed depending on its thickness.
The first type is a thin subfloor. To fill it, self-leveling mixtures are used, which allow you to create a layer of up to 20 mm. In this case there is no need to use reinforcement.
The second type is a screed up to 70 mm high. In this case, reinforcement from metal mesh or reinforcement bars is necessary.
The third type is a layer of maximum thickness up to 150 mm, which is a monolith with internal reinforcement.
Composition of the screed mixture
For unevenness and height differences of less than 20 mm, it is better to use self-leveling mixtures, with which you can achieve an even and thin layer. After drying, you can immediately lay the floor covering on it. Self-leveling mixtures spread over the floor independently, without human intervention. They include:
- gypsum or cement;
- fine sand;
- plasticizers that improve quality indicators;
- glue;
- pigments.
Attention! The minimum and maximum thickness of the screed of a certain composition are indicated on the packaging by the manufacturer.
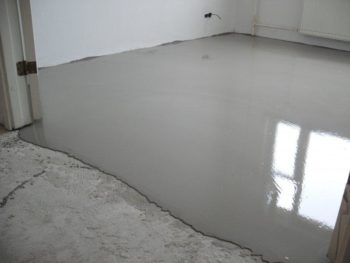
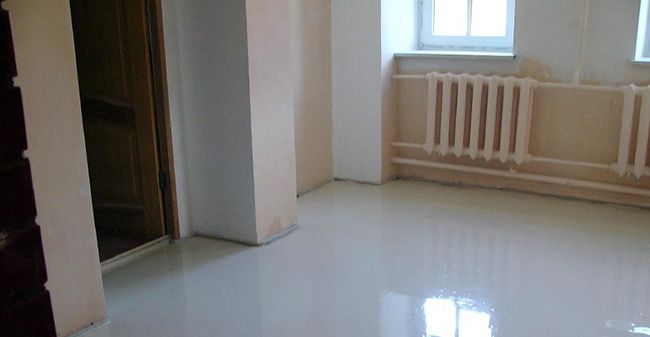
Self-leveling floor is a type of self-leveling mixture that is applied to a concrete base or cement-sand fill. This composition is used as a finishing coating or as a thin layer of screed from 2 to 20 mm.
Advice! For a self-leveling floor, the recommended thickness is no more than 20-30 mm: otherwise, it may crack over time.
Concrete remains an indispensable material for rough pouring due to its relative cheapness. SNiP recommends the following mixture composition:
- sifted sand;
- cement;
- gravel or crushed stone (fraction size from 5 to 15 mm);
- water.
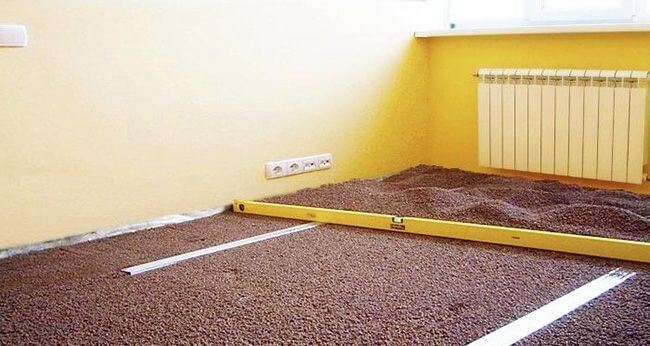
Today, very often, instead of crushed stone, lighter fillers are used, which also have thermal insulation properties. The most common of them are expanded clay and expanded polystyrene (pellets). The first is used only as a component for pouring the subfloor, and the second is used for finishing. The height of laying the mortar is in the range from 30 to 50 mm and is used in cases where there is a need to remove irregularities whose size is more than 20 mm.
For significant differences (more than 60 mm), sand concrete is used, which contains coarse sand instead of ordinary sand. The height of such a layer ranges from 100 to 150 mm.
In order to speed up the process of repairing the floor and in the presence of significant damage to the base, a dry screed is very often produced, which includes materials that do not require drying for a long time. It includes a layer of backfill material, for example, expanded clay, and on top of it there is sheet material (chipboard, plywood, GVLV). If necessary, hydro-, heat- and noise insulation is carried out. The thickness of such a “pie” can be 35-60 mm.
Alignment methods
Before you begin screeding the ceiling surface, you need to decide on the method you will use. There are two types of ceiling surface screed: “wet” and “dry”. The first method involves the use of solutions or mixtures. This could be a concrete ceiling screed made from cement mortar.
The second method requires the use of sheet materials such as plasterboard, plywood, fiberboard or chipboard. How to determine the right method for making a screed with your own hands? Of several criteria, it is worth paying attention to one main one. To do this, measure the difference at the junction of the plates. If it exceeds 5 cm, then wet screed will not work, since the thickness of the applied plaster will exceed the normalized value. This is fraught with the fact that, under the weight of its own weight, the plaster layer simply cannot withstand it and falls, and this can lead to human injuries.
In addition, a large thickness of plaster can exceed the normalized load for which the ceiling was designed, which will also lead to negative consequences. To prevent all this from happening, you should use a dry screed. Of course, she also has her shortcomings. For example, this method “steals” quite a lot of height from the room, so already low rooms will become even lower.
Plastering the ceiling
Plaster is a hardened concrete mixture, the application process of which is quite labor-intensive, especially on the ceiling surface. But this method of screeding the ceiling does not lose its relevance, because sometimes it is the only way to create a flat surface. In addition, you can plaster any coating: wood, concrete or metal. But in any case, it is necessary to carry out preparatory work. They include several stages:
- Cleaning the surface of contaminants, for example, mold or other fungal stains that need to be disinfected;
- Removing old coating in the form of paint, whitewash, etc.;
- Priming the concrete surface using strengthening mixtures;
- For wooden and metal structures, the installation of reinforcing mesh is required.
Then they move on to the installation of beacons, which are then used to plaster the ceiling. Using a paint cord, you need to mark the zero level, which determines the lowest level of the ceiling surface. It will be the first lighthouse. The rest are installed every 30-50 cm on plaster marks. The height of the beacons should not be greater than the thickness of the plaster, that is, 5 cm.
Applying plaster on beacons
After installing the beacons, you can begin plastering. To do this, you need to make a working solution based on gypsum, cement or lime. Then follow these simple instructions shown in the video:
- Apply the first layer of spray without leveling;
- Distribute several primer layers, gradually leveling the plaster;
- After applying the last layer, remove the marks with beacons and fill the recesses remaining from them with the solution;
- Using a rule applied along, across and diagonally to the ceiling, check the evenness of the surface (excess plaster is cut off, and, on the contrary, more mortar is added to the missing places);
- Use a trowel to seal the internal corners and joints between the ceiling and the walls;
- Apply a final, carefully leveled coat to create a smooth surface.
When applying plaster, be sure to ensure that no defects in the form of shells or pits are formed. After the rough screed, you can apply the finishing coat in the form of putty.
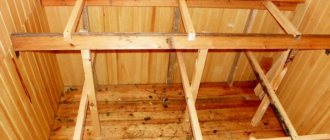
Dry screed
Do-it-yourself dry ceiling screed can be made from plasterboard, which serves as a high-quality alternative to the long and labor-intensive method using plaster.
As you can see in the photo, with the help of plasterboard sheets, designers implement various ideas and plans in interior design, which is a definite advantage.
In addition, simplicity and speed of installation can also be attributed to the advantages of dry screed. The sequence of work includes only three stages:
- Marking the ceiling surface, when the zero level is placed on the walls, the corners and frame are marked, and options for laying out plasterboard sheets are determined so that their shift is equal to the pitch of the sheathing;
- Installation of the frame structure is a stage that involves fastening guides, which can be made of wood (attached with screws or direct hangers) or metal (fastened only with direct hangers);
- Cutting and installation of plasterboard sheets according to the drawing.
Minimum thickness of floor screed
When calculating the minimum thickness of a floor screed, two factors are taken into account:
- on which the screed is directly laid (base);
- composition of the mixtures (materials) used.
If the mortar is laid directly on concrete slabs, then the minimum thickness for concrete screeds will be 20 mm.
In the case of laying the screed on heat and sound insulation made of bulk materials or solid heat-insulating products, the layer cannot be less than 40 mm. In this case, reinforcement with metal mesh is necessary. The same recommendations should be followed on the waterproofing layer in the bathroom or kitchen.
How to make formwork for a concrete ceiling
In order to build a concrete ceiling, you need to make the right formwork. Building formwork is a complex process, but if you have experience working with wood, you will succeed.
Complete information about formwork, as well as reinforcement, must be provided in the plans of your house. Remember that constructing a concrete ceiling is essential to the longevity of your home, so you should consult a qualified professional before starting such a project. In addition, you must follow all the rules and obtain all necessary construction permits so as not to expose yourself to unnecessary threats.
Warm floor
When laying heated floors, the following must be considered:
- The height (thickness) of the heating elements, which will subsequently be filled with the mixture. Based on the fact that the diameter of the pipes for such floors does not exceed 25 mm, the thickness of the concrete screed for a warm water floor will vary from 50 to 70 mm.
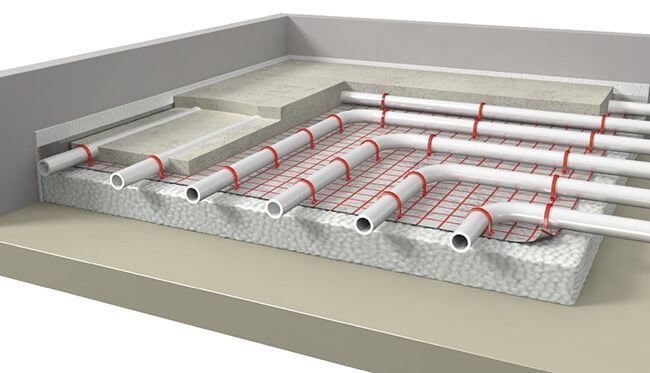
- We must not forget that underfloor heating elements heat up, and, consequently, so does the concrete. This leads to its expansion, and it, in turn, puts pressure on the walls, which can create an emergency situation.
- When we make a screed under a water-heated floor, we should not make too thin a layer over the pipes, since in this case the heating of the surface will be uneven. But a very thick layer of pouring (more than 50 mm) is also not recommended, since this leads to the fact that most of the thermal energy will be used to heat the concrete. The optimal thickness of the screed is 40 mm above the pipes, and when using electric heating elements - 30-40 mm.
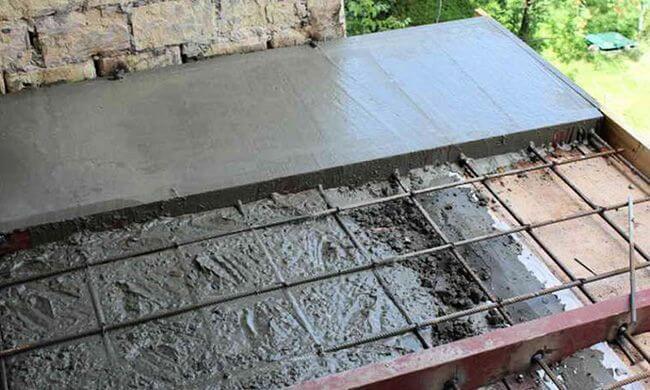
Strengthening the building structure for a concrete ceiling
After you have built the formwork for pouring concrete, you must create and fix the reinforcement in the desired position. The concrete ceiling is almost floating, it is supported only by a few walls and pillars, so you must use a lot of reinforcement (the architect will calculate the required amount)
Smart tip: If your formwork is made of wood planks, it would be a good idea to stretch plastic sheeting over the entire surface to prevent concrete leakage.
In this photo you can see a close-up of the reinforcement used to strengthen the concrete ceiling. You may have noticed the thick iron pins, are you wondering what they are for? The reinforcement pins are located at the top of the wall and are connected to the rest of the reinforced concrete ceiling. This way, the concrete ceiling will support the walls and will be more rigid and durable.
Smart Tip: You should always follow the construction plan, otherwise you may endanger your safety.
In this photo you can see the reinforcement of the structure around the stairs. You may have noticed that we used a lot of rebar around the stairs and along the walls.
Smart tip: These kinds of projects need to be carried out by qualified and experienced professionals, so you should learn the basic principles for yourself. We recommend that you hire an experienced architect and a team of qualified workers.