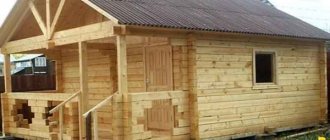
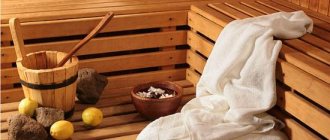
Are you wondering how to insulate the ceiling in a bathhouse with your own hands? Thermal insulation in a bathhouse is the key to a comfortable stay in the room and a reduction in heating costs.
You can read about the features of arranging a bathhouse in terms of thermal insulation in this article. The information below will discuss issues related to insulation. We will focus on popular insulating materials and their properties, and talk about practical tips that will help you learn how to insulate the ceiling of a bathhouse from the outside with minimal financial costs.
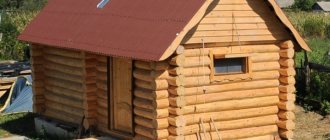
Why insulate the roof
Everyone knows from physics lessons that hot air rises. This is why most of the heat from the bath comes out through the ceiling. Either a multi-layer ceiling design or the use of a special thermal insulation layer will help eliminate problems with the rapid release of heat from the room. If you do not cover the ceiling in the bathhouse correctly, this can lead to condensation on the ceilings and an increase in the time it takes to fully heat the room. If you don’t know what is the best way to insulate the ceiling in a bathhouse, our article contains instructions on choosing materials.
Important! It is best to lay each subsequent layer of insulation perpendicular to the previous one. This is the only way to create a reliable structure that is resistant to deformation.
Insulating the ceiling in a bathhouse with an attic requires more attention than insulating a one-story building. This is due to the fact that the arrangement of the ceiling in a building with an attic provides for a more powerful ceiling structure. As a result, not only the roof space, but also the roof structure gets in the way of the warm air masses; as a result, if there is a second floor, warm air masses are retained much better in the room than when using one floor. However, even if the structure is multi-story, do not forget about thermal insulation. Otherwise, the room will quickly become unusable due to high humidity.
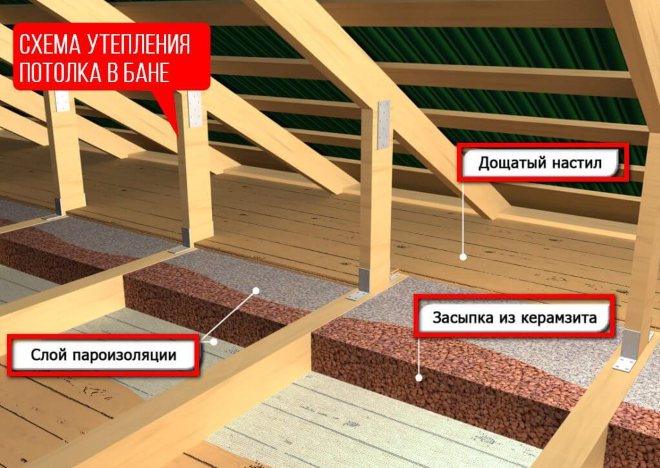
Before insulating the attic of a bathhouse, pay attention to what the ceiling is made of. If it is made of logs, be sure to install a sheathing where the logs will be laid for vapor insulation. Sand is poured over the logs, then the insulation is laid according to the usual pattern.
The importance of proper thermal insulation of a bathhouse roof
Any bathhouse is always a combination of elevated temperatures and pronounced humidity.
This, in fact, predetermines the basic requirements for insulation of all enclosing structures of this building, and the roof is no exception. According to the laws of physics, warm air and hot steam always rise upward. If in their path there is a surface without the necessary thermal insulation, that is, a pronounced boundary between heat and cold, then several negative aspects are inevitable.
- There will never be a truly comfortable environment in such a bathhouse, especially in winter - no matter how much you heat it, the heat will still quickly disappear.
- As is already clear from the first point, attempts to maintain the required bath microclimate in such conditions will lead to a very significant overconsumption of fuel (wood, coal) or energy carriers (electricity, gas). Each “trip to the bathhouse” will have a significant impact on the family budget. It’s easier to allocate funds for reliable thermal insulation once.
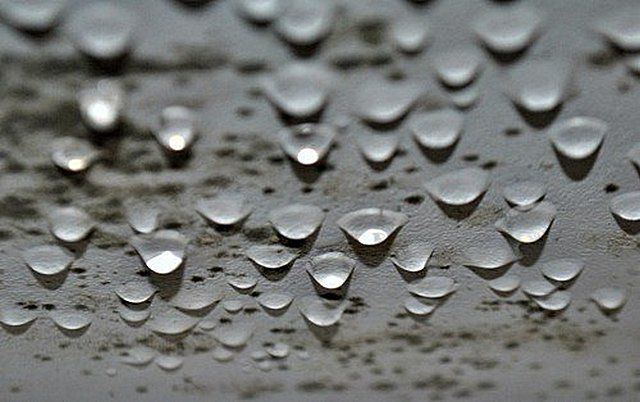
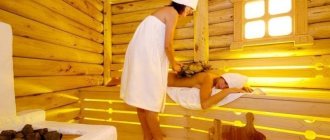
When meeting a cold barrier, the steam condenses, and such drops will ruin anyone’s enjoyment of the bath
- The rising steam, upon contact with an uninsulated ceiling surface, will condense almost immediately, and cold drops of water will hang over the heads of people washing. The little pleasant thing is that from time to time these drops fall down, introducing obvious discomfort into the bath procedures.
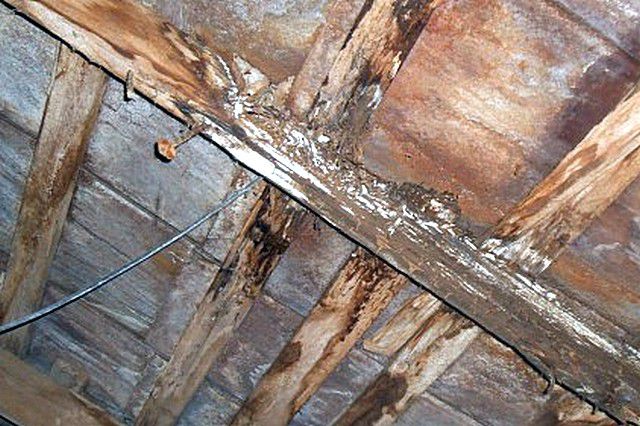
The owners of this roof clearly did not pay attention to the issues of its reliable thermal, hydro and vapor barrier.
- This, so to speak, is a visible inconvenience from condensation, but what is much worse is its effect, which is invisible for the time being - waterlogging of building structures, leading to the beginning of the processes of decay, rotting, corrosion, erosion, the appearance and rapid spread of pathogenic microflora - mold and mildew. Such a frivolous attitude towards issues of comprehensive insulation, hydro- and vapor barrier can end very sadly - the roof structure will require major repairs, or even complete replacement.
In a word, no matter how you approach it, insulating the installed roof in a bathhouse is an extremely important task. And, let us add, it is quite complicated, since it is imperative to consider not only thermal insulation, but also the creation of a reliable barrier to steam.
Ceiling protection with insulation
Insulation must be carried out simultaneously with a layer of vapor insulation, regardless of the type of roof and ceiling.
It is this layer that prevents condensation from settling. Few people know, but moisture from condensation accumulating in the insulation has a negative effect and significantly shortens its service life, while reducing the thermal insulation characteristics. Don’t know how to insulate the ceiling in a bathhouse from the outside? It is better to give preference to materials made from safe and reliable raw materials.
On the modern market, vapor insulation is presented in a wide range, this allows you to choose the right insulation without significant financial costs. In addition to budget insulation products, there are special hydro-vapor barrier products on sale that allow not only to insulate the roof, but also to avoid excessive vapor formation. They cost more, but in terms of performance characteristics they outperform their competitors.
How to insulate the ceiling of a bathhouse from the outside? You can give preference to modern insulation, consisting of mineral wool and a layer of foil.
Important! Don't forget about fire safety rules. So, between the chimney and the layer that can quickly ignite, it is necessary to leave a distance of at least 30 centimeters. A special box is often installed around the pipe, for example, made of steel, filled with non-flammable expanded clay.
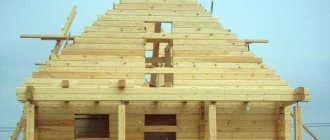
What approaches are applicable for insulating the roof of a bathhouse?
Technologies for insulating a sauna roof can vary greatly, and this primarily depends on how the attic space is planned to be used.
- In the case when the attic is supposed to be left “cold”, not used at all, or considered as an unheated storage room (for, for example, the same bath brooms), then spending money on creating thermal insulation on the roof slopes will be unnecessary. With this option for using a bathhouse, it is better to place the main emphasis on highly effective insulation of the attic floor, and limit the roof to reliable waterproofing. In this case, natural ventilation of the attic must be provided, and in such conditions all wooden parts of the rafter system will remain dry.
If the attic will not be used, then the roof slopes need not be insulated, providing only reliable waterproofing and effective ventilation of the under-roof space
- Limited space on a suburban site often pushes owners to build another habitable “floor” above the bathhouse - an attic. Even if it is not connected to the heating system, and is not planned for “winter” use, the roof slopes will have to be insulated, and according to the “full program”. The importance of thermal insulation for maintaining comfortable conditions in the attic in the summer, with the arrival of a hot period, is no less than in winter.
If you plan to install a useful room above the bathhouse - an attic, then you will have to insulate both the roof slopes and the attic floor.
In this case, there is still no escape from insulating the attic floor, that is, you will have to “build” two thermal insulation systems. The first is under the roof, similar to attics on other buildings, and the second is horizontal along the attic floor or bathhouse ceiling (in some cases, combined, in which the insulation will be installed both above and below the ceiling).
The only “relaxation” in this case is that the layer of thermal insulation on the ceiling can be slightly reduced, since the ceiling will no longer be in direct contact with the cold street air.
What materials are best to use for insulation?
When building a bathhouse, the question often arises of how to insulate the bathhouse ceiling from the outside. You can use the old antiquated method, which involves the use of improvised means without special financial costs, or purchase highly effective modern insulation materials that have the characteristics of thermal insulation and vapor barrier.
How to insulate the ceiling in a bathhouse with your own hands? You can find this information below; we will tell you about the most common insulation materials and how to install them:
Expanded clay
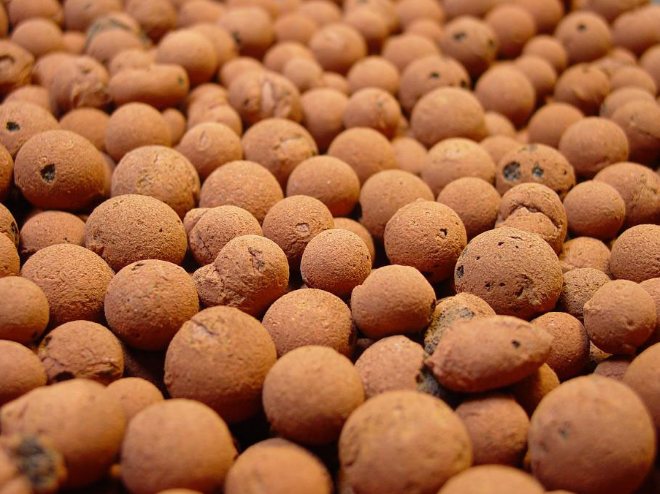
The attic in the bathhouse is often filled with expanded clay; it is not only low in cost, it does not require specific skills to use. Expanded clay is granular clay that has been processed at high temperatures. The material is not interesting for insects and rodents; it is distinguished by its durability and maximum fire safety.
If the attic has wooden floors, you should pay attention to the fact that even a 30-centimeter layer of expanded clay has significant weight, which the floors cannot handle. It is best used with concrete structures.
Mineral wool

Sold in rolls, thickness can vary from 5 to 10 centimeters depending on the chosen model. Does not require special skills when laying from the attic side. It is enough to unwind the roll, place the cotton wool in the required place and cut it to size. The advantages include the fact that during installation there is no need to use additional fasteners.
Ecowool

Insulation of the attic of a bathhouse is often done using ecowool. The advantages include thermal insulation efficiency and durability. In fact, it is free-flowing, but to facilitate transportation and storage, the cotton wool is slightly compressed and sold in the form of briquettes.
Before use, it is advisable to unpack the ecowool, dry it and fluff it up. As a result, the material will increase in volume by 3-4 times.
Insulation of the attic of a bathhouse with ecowool occurs according to the following principle: the cotton wool is slightly moistened and sprayed using special equipment. Then the spray zone is filled with dry ecowool, and special compressors are used to strengthen the structure.
Polypropylene
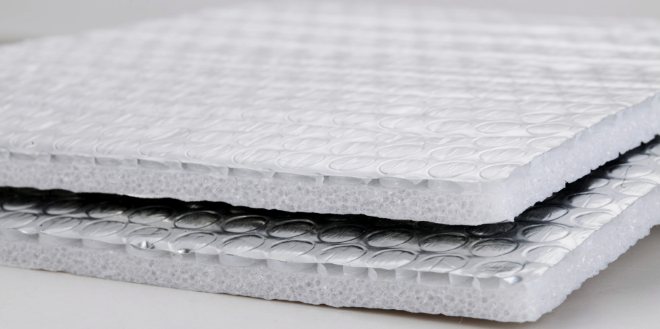
If the question arises of how to insulate the ceiling in a bathhouse with your own hands, a material such as polypropylene often comes to mind. The insulation is presented in the form of foam material; it provides decent thermal insulation of the room and does not require special skills when installing. Often, to improve the degree of insulation of a room, the material is used in combination with mineral wool.
Penoizol
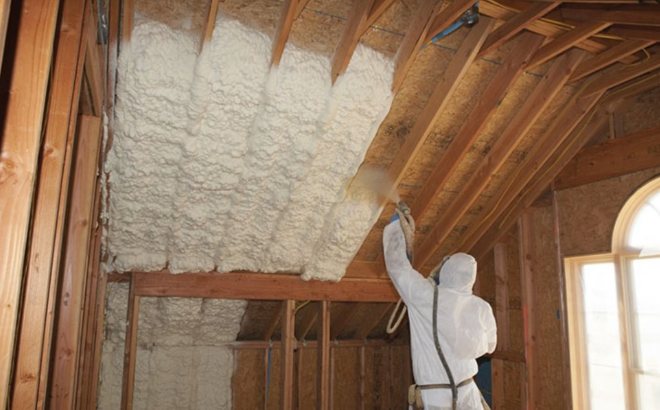
A modern thermal insulation material, which is foamed polypropylene, the bottom layer of which is made of foil. The advantages of this material include the fact that it does not require an additional layer of hydro- and vapor barrier.
The technology for laying penoizol is that the material is sprayed and fills the voids in a liquid state. During the hardening process, the material foams. It is unlikely that you will be able to use penoizol yourself; for installation you will have to involve specialized construction companies with the necessary equipment.
It is recommended to use insulation with concrete floors; in the case of a wooden ceiling, the environmental friendliness of the structure suffers.
Growing aerated concrete
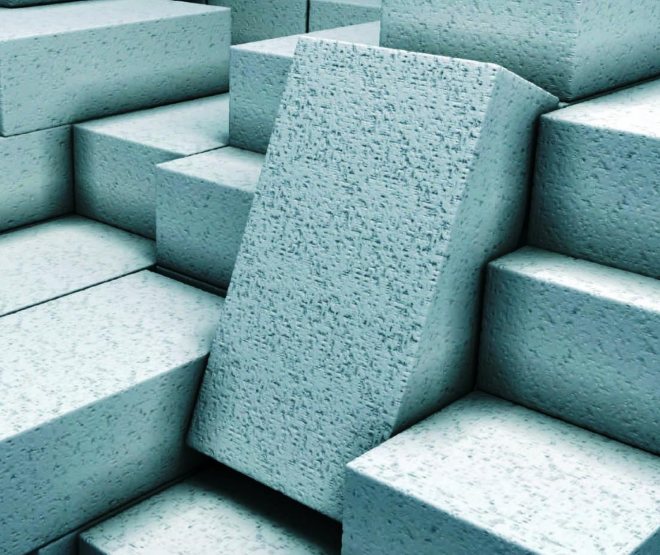
Material for concrete floors. Two types of aerated concrete are used - thermal insulation and structural. The material is a vapor-forming mixture mixed with concrete. The material is sold in hardware stores in the form of a dry mixture; to use it, just add water in the proportions specified in the instructions.
Insulation using growing aerated concrete differs significantly from classical surface insulation. Basically, the material simply seals the surface, filling all the cracks and voids. Due to this, heat loss in the room is significantly reduced.
Experts recommend installing permanent formwork made of glass-magnesium sheets at the site before using aerated concrete, so the surface will be smooth and all defects in the floor will be filled with the material.
Roofing installation
For ordinary baths, any coating can be used as roofing material, from metal to soft. Due to the fact that the attic space will be used, we do not recommend using metal coverings; they create too much noise during rain or hail. Ondulin can be considered the best option in terms of quality and price; we will tell you how to cover a roof with this material below.
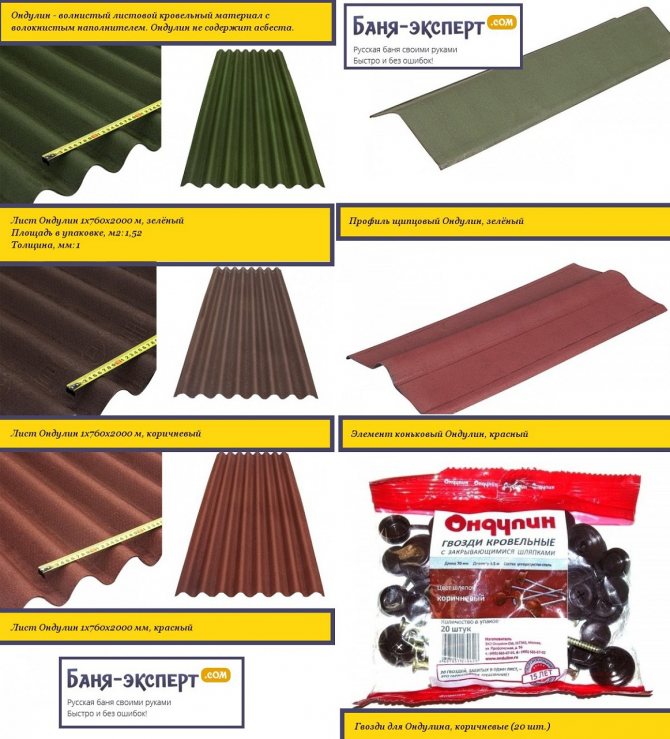
Ondulin
Prices for roofing sheets
roofing sheet
Ondulin coating
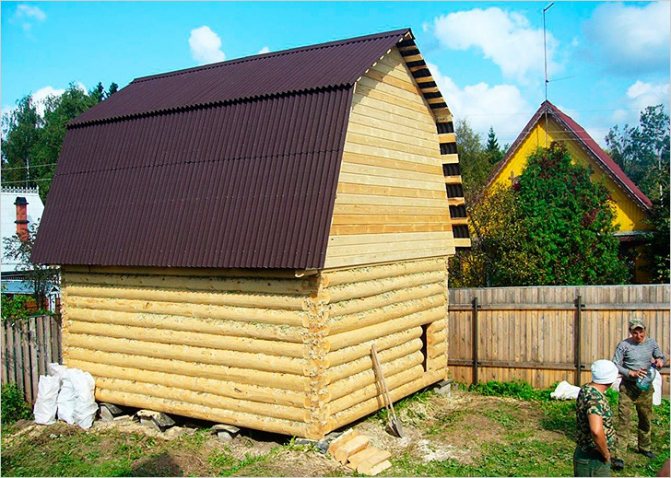
Broken roof, coating – ondulin
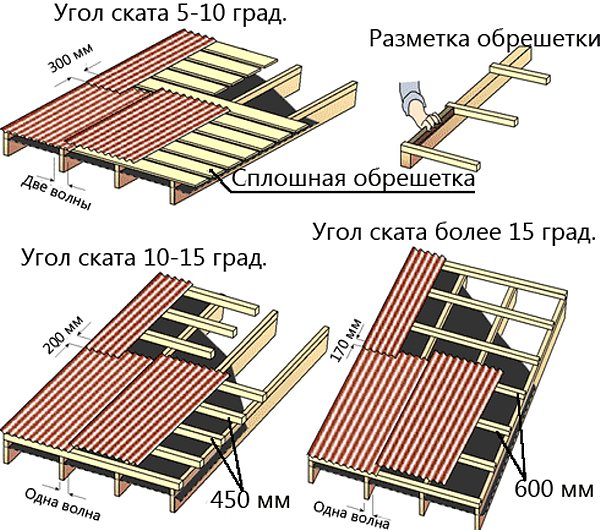
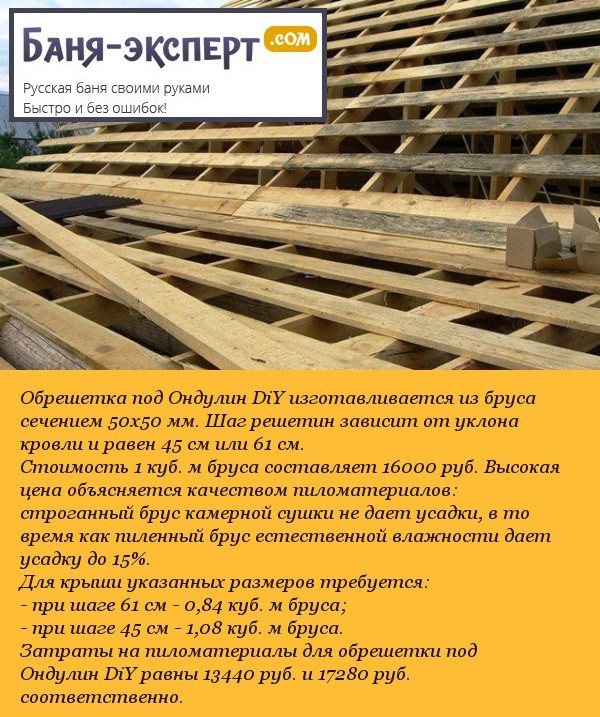
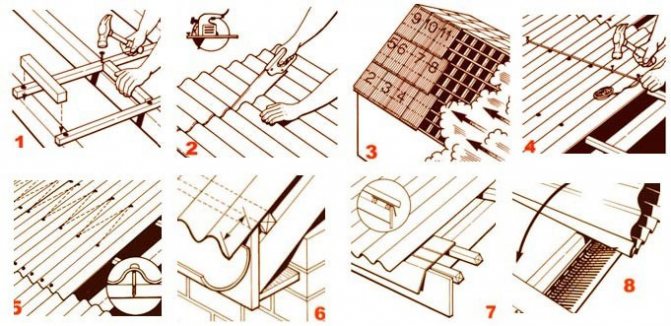
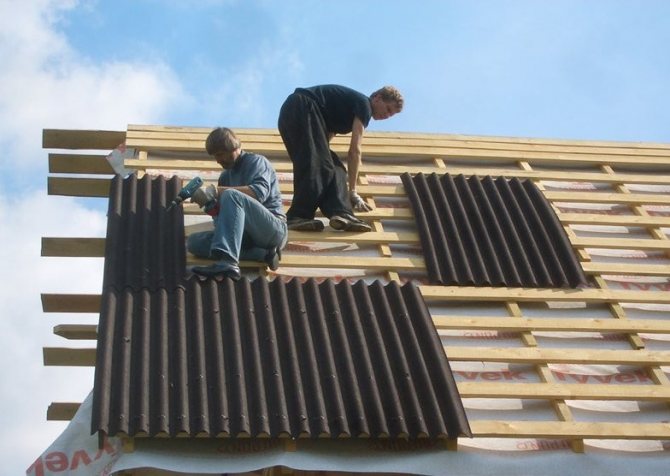
Step 1. Calculate the total area of the roof, sum up the sizes of the two slopes of the sloping roof. In this case, increase the final results by 6÷8 percent for unproductive waste. Purchase ondulin at the same time as all additional elements. For lathing, you can use cheap types of boards or bars. It is not necessary to purchase new lumber; you can use various sections remaining after construction. The main thing is that they have the same thickness.
The correct sequence of laying ondulin on the roof
Step 2: Nail the sheathing.
Lathing for ondulin
The step depends on the angle of inclination of the slopes and the climatic zone of residence. The lower slope has a large angle of inclination; snow cover will never linger on it. The upper slope of the sloping roof in our version has an inclination angle of approximately 40°, which also significantly reduces the likely snow load. Due to these characteristics, the distance between the lathing slats can be increased to 60÷70 centimeters. Nail the sheathing from bottom to top one at a time on each slope of the sloping roof. To ensure that all the slats are parallel, use a template, make it from short scraps. The length of the template should be equal to the distance between the slats. Nail additional battens under the ridge and gable (at the very edge of the bottom of the rafter legs). You need to retreat 5÷10 centimeters from the ridge. The specific distance depends on the angle of the slopes; it is advisable to try on the skate first.
The main condition is that the skate must be nailed to the slats. If they are much further from the ridge, then its standard width will not be enough.
Step 3. To decorate the cornice, use drip aprons, they are sold in the roofing kit. The aprons have special horizontal grooves that allow you to make an even bend at the required distance. Bend them and secure them to the bottom batten of the sheathing with screws or nails. The overlap of the aprons can be no more than five centimeters; water will not get into the joints.
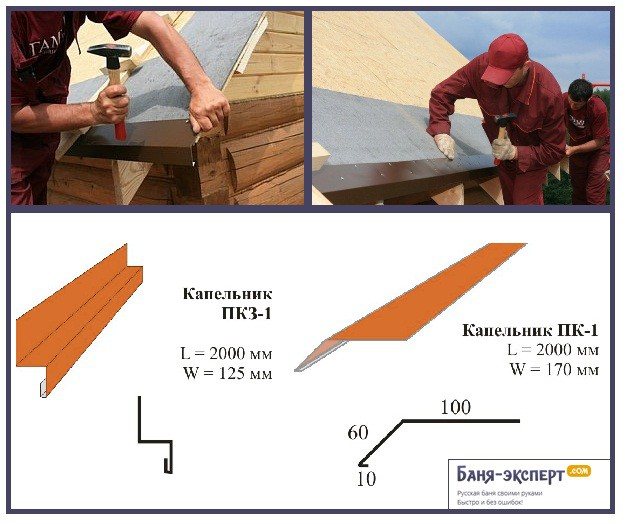
Kapelnik
Step 4. Nail the wind boards on the side of the eaves; their height should be three centimeters above the level of the sheathing. Before nailing the wind boards, you need to align all the ends of the slats along one line. To fill the line, it is better to use a rope with blue.
Wind board device
Step 5. Ondulin sheets can be cut with a hand-held electric saw, hacksaw or jigsaw. The material does not have great strength, it cuts easily, without chips or cracks.

Cutting ondulin
Start installation from the bottom row of the lower roof slope. The first sheet should be convex and completely cover the protruding wind board - the risks of undermining the roof during strong gusts of wind are minimized. This is an important condition; always remember it when installing any roof and on any buildings.
Stages of installation of an ondulin roof
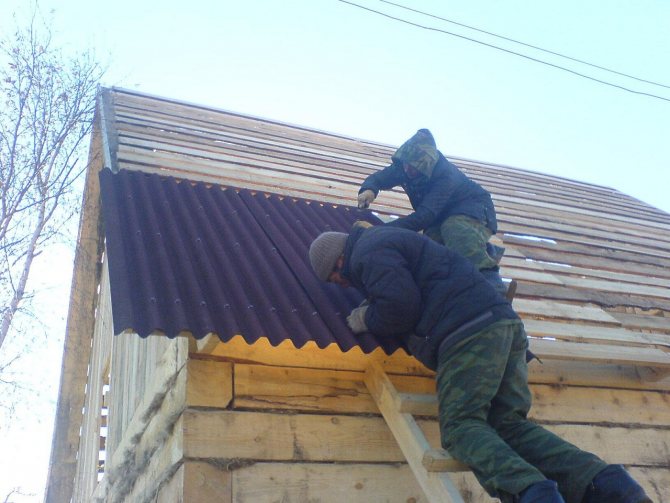
Installation of sheets
Installation of ondulin roofing
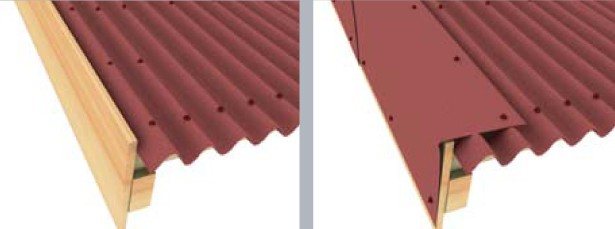
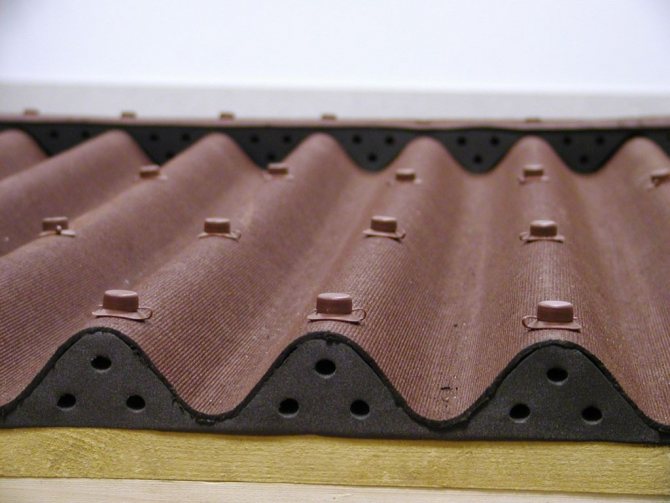
Step 6. If you have droppers, then the first row of sheets can be nailed flush with the rafter system; if you do not have them, then the sheets should extend five centimeters beyond the rafter system. In order to reduce the amount of dust in the under-roof space, you can install cornice fillers under the ondulin sheets. These are special rubber devices that are inserted into the ondulin waves; they have holes to provide ventilation.
Cornice filler (ventilated)
Step 7. To hammer in sheets, you need to use special nails with rubber gaskets. Drive the nails in carefully, do not allow the sheet to bend, as leaks may appear in these places later. It is advisable to nail the sheets into each upper wave, at least every other wave, but in no case less frequently.
Practical advice. It will be much easier to hit narrow slats with nails if you stretch a rope between the extreme ends or draw a straight line along the axis of the slats on each sheet before fixing it.
Step 8. If you want to install gable elements, then the wind board should be nailed close to the edge of the ondulin sheet. The overlap of the tongs is about ten centimeters. Tongs are a special decorative element that simultaneously performs the functions of a wind board.
Onduline roofing
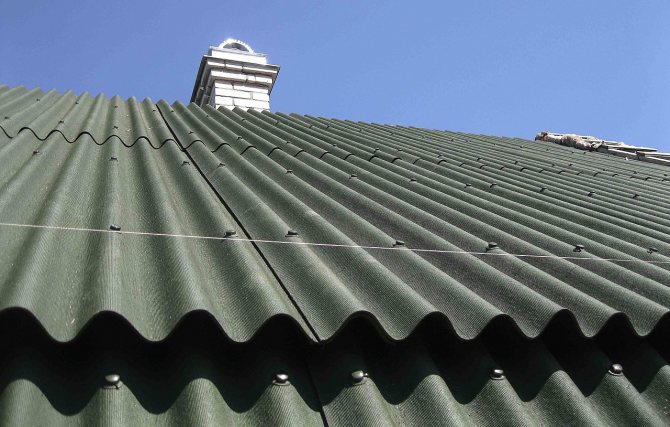
Step 9. Mount the skates on the opposite side of the predominant wind direction, with an overlap of at least ten centimeters. Eaves fillers can also be installed under the ridge. Factory skates have hydraulic barriers; during installation, align them according to the instructions. Skates must be nailed to each wave of ondulin.
Installation of ondulin
Video – Installation of ONDULINA
For such small roofs it is not necessary to make drainage systems; it is enough to make a concrete blind area around the bathhouse. The width of the blind area is 50÷60 centimeters, make breaks every 1÷1.5 meters. The thickness of the concrete layer is within ten centimeters.

Insulated concrete blind area - photo of layers
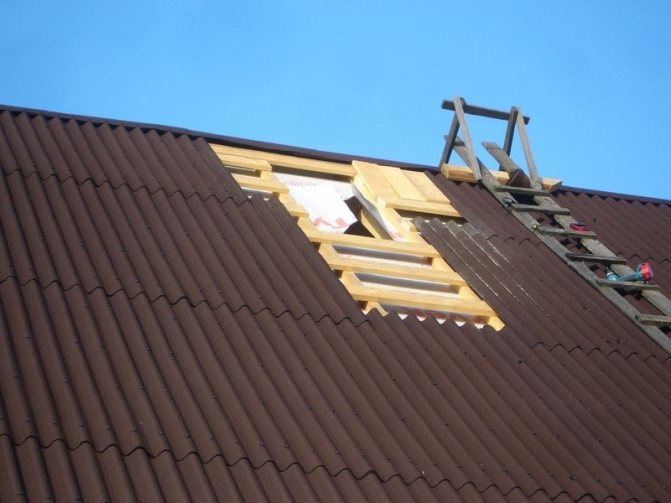
Now all that remains is to install the windows and trim the gables. To cover the fronts, we recommend using plastic lining; wooden lining requires periodic maintenance, and this is difficult to do at high altitudes. There is no need to make additional load-bearing structures for the lining; the frame that holds the window is quite enough.
Use of the attic and access to the premises
There are two questions left to resolve: whether the attic space will be used in winter and how to get into it. Let's start in order.
We doubt that such premises will be used in winter. If you agree with us, then decorate the walls and ceiling with any materials. For these purposes, you can use plasterboard, plywood, OSB sheets, natural or plastic lining.
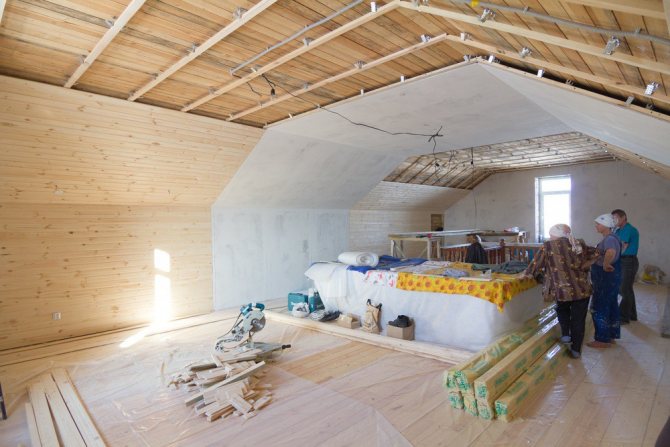
Attic interior decoration
If you still want to use the attic in cold weather, the walls and ceiling of the room will have to be insulated. Nail the “rough” wall on the back side of the vertical supports. The distance between the vertical supports of the frame is ≈85 centimeters, which allows you to immediately lay insulation in the niches. Insulation can be done with rolled or pressed mineral wool or polystyrene foam. If mineral wool is used for insulation, it is necessary to provide a vapor barrier. For these purposes, any modern coatings can be used. The same operations should be done to insulate the ceiling.

An example of attic insulation
Ceiling insulation
In the absence of these materials, you can give preference to polystyrene foam. The material is easy to install and does not require special equipment for installation.
Important! Do not choose ordinary polystyrene foam for insulation; it has been repeatedly proven that when heated, it releases harmful substances that can negatively affect the health of bathhouse visitors.
When using liquid insulating materials, it is desirable to construct formwork. Most often, permanent structures made of glass-magnesium sheets are used for these purposes. The sheets are secured to each other using ordinary self-tapping screws. If aerated concrete is used, do not forget that the components react with each other, and the volume of the solution doubles. This fact should be taken into account when choosing the height of future formwork.
More detailed information about the strength gain of the material and the resting time before the insulation completely hardens and is put into operation can be found in the instructions for use for the material you are using.
To improve the insulation characteristics, on top of the main layer, if the dimensions of the attic allow, you can use another layer of other materials, which we described above.
Let's sum it up
In the article, we dwelled in detail on the issues of how to insulate the ceiling of a bathhouse, talked about the main materials, their characteristics, advantages and disadvantages. When choosing suitable insulation, rely on its performance properties and your financial capabilities. It is worth remembering about fire safety when arranging a bathhouse.
Do not forget that some materials emit hazardous substances when heated, so using them in a bathhouse is highly undesirable.
Be sure to follow the instructions from the insulation manufacturer and take care of personal protection. Good luck!