A bathhouse in the country is the dream of almost all residents of city apartments. Often, due to lack of finances, a bathhouse is built at the dacha with your own hands - it turns out cheaper. However, you should not start the construction process if you are not confident in your strengths, skills and theoretical training. Now we will only briefly look at the main points that you should consider when weighing the PROS and CONS of building a bathhouse yourself.
IN THE ARTICLE:
- Bathhouse project
- Selection of wall material
- Construction process
- Bath equipment
- Choosing a sauna stove
- Pool or plunge pool?
- Shelves
- Ventilation and lighting
Design and foundation
Even a small bathhouse cannot be built without at least the simplest project, so the first stage of work is drawing up a plan diagram. Here you need to indicate the location of the main objects and their dimensions.
As a rule, there are four zones in a bathhouse:
- dressing room - enough space with an area of 1.5 x 2 m;
- rest room - about 2 x 2 m;
- shower room - at least 1 x 1 m;
- steam room - no more than 1.5 x 2 m.
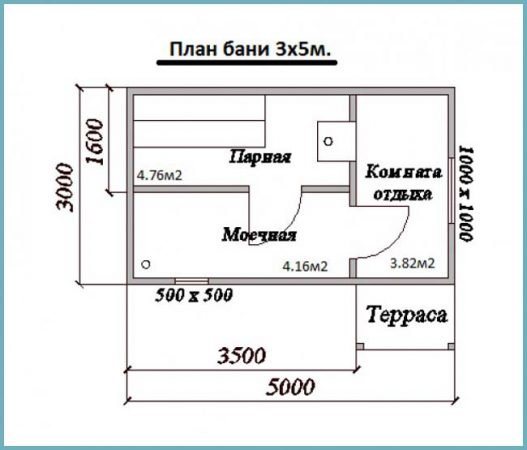
Plan of a small bathhouse for a summer residence
Thus, we obtain the minimum dimensions of the bathhouse: length - 6 m, height - 2 m, width - 2.5 m. This is quite enough for arranging a comfortable and practical steam room.
The second stage of work is pouring the foundation. When deciding on the type of foundation, focus on the type of soil in the area.
If the mini-bath is being built on hard and dry ground, you can limit yourself to a lightweight foundation: lay flat stones over the entire area of the future bath, cover them with clay, compact them, and on top, arrange a dense layer of wooden beams and treat them with waterproofing bitumen.
If your site has soft soil, lay a strip foundation: dig a trench, fill it alternately with layers of sand and crushed stone, compact the base and secure a reinforcing mesh on top, and then fill the pit with cement mortar.
Important! The strip foundation must be covered with a layer of waterproofing. The simplest option is sheets of roofing felt.
On soil with a high sand content, a foundation of concrete blocks can be laid under a miniature bathhouse. For a lightweight design, 10 blocks of standard dimensions 20 x 20 x 40 cm are enough.
About the distribution of space in small baths
Project of a small bathhouse building.
If your goal is a small bathhouse in your country house with your own hands, then to save space you should listen to these tips:
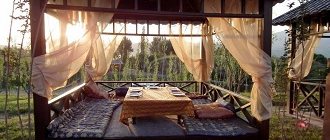
- The dressing room and rest room are most often combined into one large room. Naturally, if you do not plan to use the bathhouse by several people at once, then it is better to make the rest room a small, cozy room, placing a table for four people and four stools here.
Advice! Only simple wooden furniture should be used. Upholstered furniture covered with leather or fabric is not suitable for such rooms, since constant humidity will have an extremely negative effect on the appearance of such upholstery.
You also need to decide from which room the fuel will be loaded into the stove.
Often the oven is loaded from the rest room, because:
- It is more convenient to store firewood here; in this case, there is no need to bring it into the steam room.
- Due to the small size of the steam room, loading fuel from this room will be inconvenient.
If you decide that the stove will be loaded from the rest room, then the layout of the room can be arranged as follows:
- Along one wall there is a place for storing firewood, a stove door and a door to the steam room.
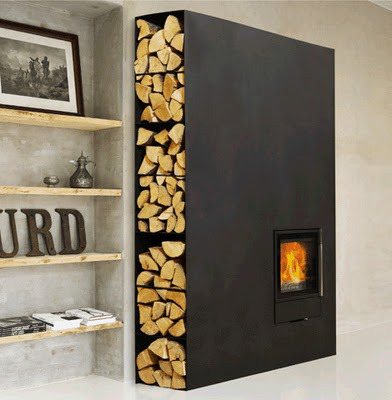
Compact cabinet for storing firewood.
- On the opposite wall there is a wardrobe and a table with chairs.
Advice! The interior of the rest room should be as simple as possible. Before decorating it with various objects, think about whether they are suitable for the given room. Skins and stuffed animals are clearly a bad choice.
- If you are planning to build a very small bathhouse (for example, 3 by 3 meters), then you can completely abandon the rest room.
In this case, you need to do the following:
- At the entrance there is a small hallway that contains a closet and space for storing fuel.
- Fuel is loaded in the steam room.
- The interior consists of three rooms: an entrance hall, a sink and a steam room.
Calculation of space for bathhouse premises
The construction plan must take into account the number of people who can simultaneously take bath procedures.
When wanting to build a small bathhouse, it is very important not to overdo it, because considerations of saving space should not be higher than the functionality of the room.
The following instructions will help you calculate acceptable room sizes:
- The volume of the rest room should be calculated taking into account the fact that each visitor has 2-3 square meters of area.
- The area of the washing room is calculated similarly to the rest room.
- The steam room can be more cramped; one and a half to two square meters per person will be enough here.
It is advisable that there is one small window in each room. This will save you energy costs when taking bath procedures during the daytime.
Advice! Windows should be located at a height above the height of the average person, that is, at a distance of 185-190 cm from the floor.
Windows in a bathhouse are usually small in size.
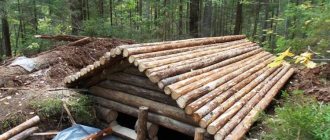
Construction of a bath frame
The best method of constructing a mini-bath is frame. It is lightweight, fast and economical. To build the frame you will need:
- bars 5 x 5 cm;
- boards 2.5 cm thick;
- waterproofing film or foil;
- thermal insulation material.
Construction of a bathhouse
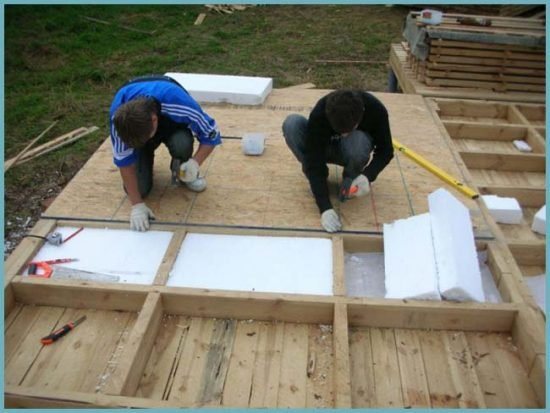
First, a frame is assembled from beams, corresponding in its dimensions and configuration to the previously developed project. The inside of the frame is covered with boards. To connect the elements together, use all kinds of anchors and various screws. Insulating materials are mounted on top of the boards: mineral wool, expanded clay or sawdust can be used as thermal insulation, and bitumen or polymer mastics can be used as waterproofing. It is necessary to insulate not only the walls, but also the floor and ceiling.
Advice. It is advisable to additionally cover the thermal and waterproofing of the ceiling with roll-up boards - a row of wooden boards.
After insulation procedures, you need to take care of the roof. You can use corrugated sheeting, slate or metal tiles as a covering: first mount the rafter system on the frame, and then secure the roof to it with self-tapping screws. When constructing the roof, leave an opening for the chimney.
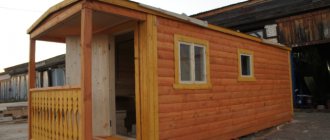
The outside of the mini-bath can be covered with a block house or clapboard - these materials will give the structure an aesthetic appearance.
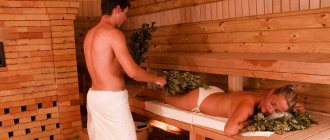
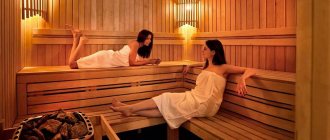
Bath equipment
Choosing a sauna stove
The main equipment for a bathhouse is, of course, a stove . You can make your own heater from metal, or you can buy it, and the second option is preferable - purchased heaters have higher efficiency, but this also depends on the manufacturer.
It is better to resolve the issue with the heater before building the bathhouse - different models have their own restrictions on the minimum distances to wooden elements (walls, lining, shelves), in addition, you can immediately take into account the dimensions and power of the electric stove to calculate the electrical wiring.
Pool or plunge pool?
The second important point is the pool or plunge pool. A do-it-yourself bathhouse in a dacha is usually made without a swimming pool, since its construction requires a lot of space and is associated with large material and labor costs.
The font may need a separate foundation.
You can also use a dousing bucket in the bathhouse , then you won’t have to do any specific work during the construction of the bathhouse, but the effect, of course, will not be the same.
Shelves
Carefully choose wood for the shelves in the steam room - not only their durability, but also the comfort of bath procedures depends on this.
Ventilation and lighting
Be sure to provide an exhaust hood in the steam room - the steam room must be ventilated after finishing the procedures so as not to expose the wood to unnecessary moisture.
For lighting in the steam room, use lamps with dim diffused light, specially designed for working in conditions of high humidity.
Back to contents
As you can see, a bathhouse at the dacha with your own hands is a rather troublesome and specific task.
Think again: build a sauna with your own hands or order a turnkey one from specialists? Did you like the article? Recommend to friends:
Arrangement of communications
The final stage of work on the mini-bath is the arrangement of the necessary communication systems.
Water supply and drainage. Feeding can be done by gravity:
- Prepare two 50 liter tanks, a hose and a pipe with a mixer.
- Install the hot water tank 0.5 m lower than the cold water tank.
- Connect the tanks together with a hose: fix one end in the lower zone of the “cold” tank, the other in the upper zone of the “hot” tank.
- Additionally, connect the tanks with a pipe with a mixer at the end.
To ensure water drainage you will need a drainage system:
- Dig a drainage well near the steam room.
- Make holes in the floor of the bathhouse for drainage.
- Bring the pipes to the holes, installing them with a slight slope.
- Direct the pipe into the drainage well.
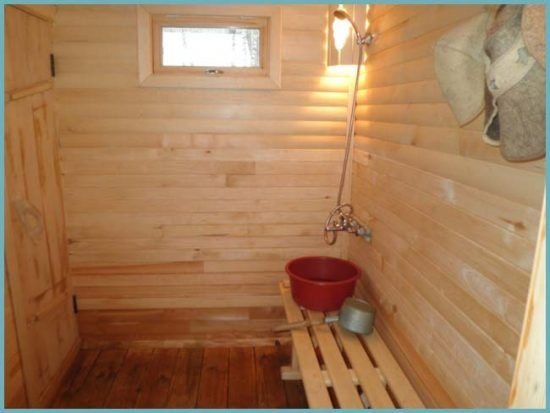
Arrangement of a washing room
Water heating system . To heat water, you can use a mini-stove or heating elements. In the first case, you must first install the device, and then in its hottest place, going around the base of the chimney, install a U-shaped metal pipe: the supply end of the pipe should be placed on the body, and the outlet end 5 cm higher. In the second case, it is necessary to install heating elements under the “cold” tank and connect them to the water supply system with hoses and pipes.
Ventilation system . To ensure ventilation in a small bathhouse, it is enough to make holes with a damper in the wall opposite the entrance.
A mini-sauna is the choice of those who do not want to give up a full-fledged steam room due to the modest dimensions of their summer cottage. As you can see, building it with your own hands is not difficult: foundation, frame, communications - you will successfully cope with these tasks if you follow simple recommendations and rules.
Choosing bath material
A traditional bathhouse is a wooden bathhouse. However, a do-it-yourself wooden bathhouse at the dacha requires much more knowledge and skills than a bathhouse made of brick or foam blocks. There are advantages and disadvantages in each option; we will only briefly compare the possible materials.
- a wooden bathhouse only a year after construction (it shrinks for six months and cannot be heated for another six months). A bathhouse made of brick or foam block can be used immediately after completion of construction.
- A bathhouse made of brick (foam block) needs internal and external finishing, as well as additional thermal insulation. A wooden bathhouse does not need this.
- When choosing between a beam and a log , keep in mind that a log is more durable and stronger, but a beam is cheaper and easier to work with. Glued laminated timber is not used for the construction of baths.
- In a comparison of brick and foam block , the latter wins - it is “warmer” and easier to work with.
Back to contents