Buying a spa hydromassage pool is not a cheap pleasure. And this is not the limit. And you really want to have your own small spa on your property or in your house, especially if you have health problems and it is simply necessary for medical reasons. Therefore, you can try to make a hydromassage pool with your own hands.
How to make a hydromassage pool with your own hands at the dacha? How to arrange a spa corner with a swimming pool yourself? Find out here.
The price for a spa hydromassage pool varies from 200,000 and can reach up to 1,500,000 rubles.
So, let's start with the fact that hydromassage units can be already built into the pool system or sold separately. Therefore, you initially need to decide on the choice of bowl for your site or home. If you decide to make a stationary hydromassage pool, then the installation of such equipment must be thought out in advance and installed during the construction process.
The kit itself is much cheaper than ready-made options, so purchasing it will be more profitable. In addition, you have the opportunity to choose the number of nozzles and their installation location. A ready-made set of 4 injectors and a pump can be purchased for just a few thousand rubles and its installation is not difficult. Moreover, the kit includes installation instructions. If you do not have great financial resources, then this is a suitable option. After all, in a swimming pool, only one wall can be equipped with a hydromassage function. There is another option. These are inflatable hydromassage spa pools. They will cost more than a separate installation, but in general, if you compare the costs of building a stationary pool and a ready-made inflatable one, it turns out to be equivalent. The choice is yours. In any case, the benefits of hydromassage in an inflatable pool and in a stationary one will be the same. Hydromassage will help you relax after a hard day at work and will support your nervous and immune systems. Improves metabolic processes and blood circulation. Relaxes muscles and musculoskeletal system.
The design of a hydromassage pool necessarily includes filters (one or more) designed to purify the water. If the filters are of high quality, the water can be replaced after a few months. It is advisable that the pool structure has an ozone generator. It not only improves water quality, but also extends the service life of the structure.
Types of pools
Having decided to install a pool in a bathhouse, you need to clearly understand what type of pool will be suitable in your situation. Much depends on its dimensions, location and configuration. In addition, they are divided by type:
- Stationary;
- Collapsible;
- Hydromassage;
- Font.
If your goal involves a swimming pool in a sauna for centuries, you should pay attention to the stationary option. The construction of such a pool is more complicated: laying a foundation is required, and the bowl itself must be made of reinforced concrete. But this type of reservoir will last for many years, and its dimensions can be absolutely any.
But the point of the collapsible type is that, if necessary, the pool can be removed from the bathhouse and installed again with your own hands when it is needed. This is a lightweight and mobile design, but it is not as durable and has its drawbacks. Construction is not required in this case, but if you decide to settle on something solid and reliable, this option will not suit you.
Some bathhouse owners limit themselves to small hydromassage baths, which successfully replace swimming pools, but you need to understand that they are absolutely not suitable for swimming. But instead of building them, you can buy them and install them immediately, even in a small room.
If you have nowhere to install a large reservoir, choose a font. Its volume reaches only 1500 liters and, of course, cannot be compared with a full-fledged stationary reservoir, but as a small-sized reservoir it will be just right. Fonts can be made of different materials, but wood is most valued.
Selection of equipment for an inflatable pool
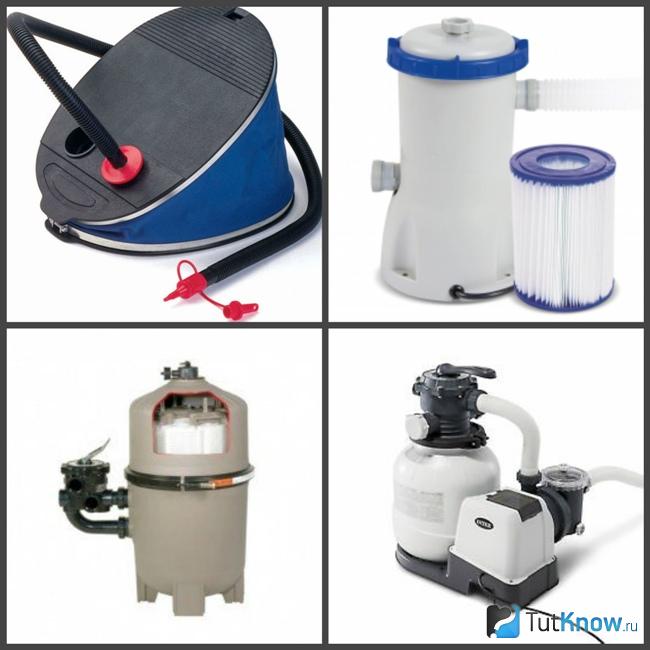
The photo shows equipment for an inflatable pool
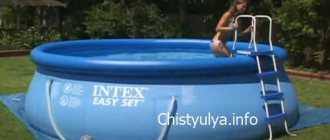
The very first thing you need to operate an inflatable pool is a pump to inflate the bowl. As a rule, it is included in the standard package, but not all filter pumps come with replaceable cartridges, and they do not always cope with water purification “excellently”.
When purchasing a pump for an inflatable pool, keep in mind that the output pressure should not exceed the limits allowed for a particular model. This information must be indicated in the product instructions.
There are 3 types of such devices:
- Filter cartridge pump . Performs simultaneously the functions of supplying and purifying water from large debris, and has a replaceable cartridge. As a rule, it is included in the standard set of supplies for inflatable pools.
- Diatom filter pump . Also a multifunctional device for supplying and purifying water. The filtering agent is a variety of polymer rocks and sedimentary minerals, as a result you can count on perfectly clear water inside the bowl.
- Sand filter pump . It works on the principle of a cartridge device, but the water passes through the container where the sand is located.
The newest models are constantly connected to a pump to always maintain the required pressure inside the inflatable pool.
Additional accessories and equipment for inflatable pools are presented in the table:
| Name | Description |
| Awning | Needed to cover the tank to prevent water evaporation and contamination of the bowl with leaves, branches, dust, and midges. The product must completely cover the pool. |
| Canopy | It protects swimmers from the scorching sun, and the pool itself from the harmful effects of UV radiation, which reduces the technical characteristics of the PVC sheet. An awning is especially relevant when arranging a swimming pool for children. |
| Ladder | Required for pools with side heights of 100 cm and above. In some models it is included in the standard delivery set. |
| Water heater | Needed to heat water in cloudy weather to maintain comfortable conditions for swimming and playing. |
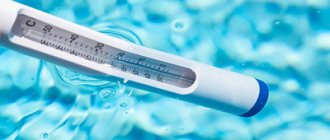
| Thermometer | The accessory will help monitor the water temperature in the pool where your children swim. Also relevant for adults. |
| Water vacuum cleaner | The device will help clean the pool bowl from various debris, leaves, insects, and dust. Equipped with a retractable handle and a litter bag included. |
| Maintenance accessories | To manually care for an inflatable pool and clean its walls, you will need a net, a brush, and sponges. |
| Litter under the bottom | Extends the life of the inflatable pool; you can replace it with a tourist mat or lay a thick mat. |
| Chlorine generator | This device produces chlorine ions from table salt, due to which the water in the pool approaches the properties of sea water and is disinfected. Typically, such devices are used in tanks with a large diameter - from 4.5 m. |
| Repair kit | Patches for the bowl of inflatable pools for inexpensive and quick repairs and elimination of minor damage. |
Note! The service life of an inflatable pool is determined not only by the initial characteristics of the product, but also by the intensity of use and quality of care. Depending on these factors, it ranges from 1 month to 5 years.
Selecting a location
The choice of place for construction determines everything: its type, size and possibilities of use. The structure can be located not only inside the bathhouse, but also outside. In the second case, you will have access to a large swimming pool, although even indoors you can build the desired pond with your own hands.
If you are aware of the presence of groundwater, be sure to install a special foundation, otherwise there may be unpleasant consequences. A large pool takes up a lot of space, so prepare the area in advance, making sure that nothing interferes with the creation of a pit for the future reservoir.
You cannot build a pool close to the walls of a bathhouse, as this can lead to the destruction of the walls from water pressure.
Inflatable pool maintenance
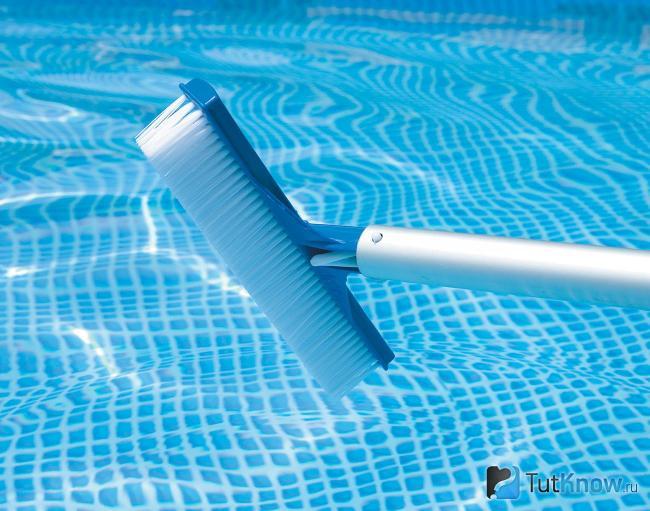
Without the necessary care, the inflatable pool quickly becomes dirty, leaves, branches, insects, and other debris accumulate in the bowl, and the water becomes cloudy. If you do not clean, slippery green algae will appear on the bottom and walls of the tank, and the accumulation of microorganisms contributes to water blooms. Therefore, it is important to carry out regular maintenance of the structure.
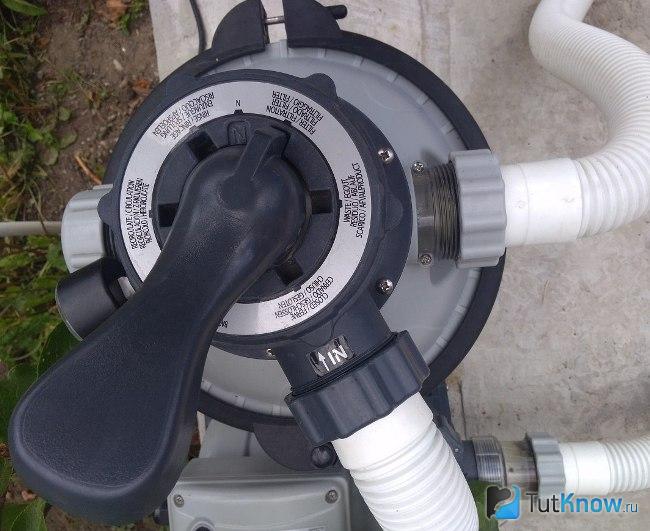
The photo shows a sand pump-filter for an inflatable pool
Basic rules for caring for an inflatable pool:
- Filtration . As a rule, the design does not include a filter system, so it is purchased separately. The best option would be a sand filter that captures particles as small as 20 microns, but some debris will still float on the surface. If you want more efficient and fine filtration, choose a diatomaceous earth filter. When using a cartridge filter pump, you should change the cartridges from time to time.
- Clearing debris . Small debris, branches, leaves, and midges constantly accumulate on the surface of the water, so it is important to remove all debris in a timely manner. To do this, you can use a water vacuum cleaner or a net.
- Disinfection . To ensure that the water in the bowl remains clean and clear, use special chemicals for swimming pools, which kills all harmful bacteria, prevents the development of microbes, fungi, algae, the occurrence of unpleasant odors, and cleanses the water from sweat and sunscreen. Pool chemicals are sold in the form of tablets, liquids, granules, they are added to a reservoir filled with water, which is cleaned with a brush after they are dissolved. Depending on the size of your inflatable pool, disinfectants are used 1-2 times a week. In addition, to clean the bowl, you can use a solution of hydrogen peroxide, which is added to the water and left for a day at a temperature of +28°C - during this time it is prohibited to use the pool.
- Replacing water . Inflatable models make this event possible quickly and easily. When using special chemicals to clean the pool, you should completely replace the water every 2-3 weeks, although the frequency of the procedure depends on the intensity of use of the pool and proper care. If the water becomes cloudy, drain the pool and replace it immediately. If you do not carry out chemical disinfection, you need to drain the water more often, and for small children's pools - daily. It can be used to water the garden, trees, shrubs, flowers, but provided that you do not use chemicals. This procedure can be combined with cleaning the pool bowl from dirt and deposits on its walls.
- Shelter . For this purpose, special lightweight floating bubble blankets are used; they protect the bowl from various debris, and the water from evaporation, blooming, and cooling at night. For large pools, lids or covers are used; the container is closed immediately after swimming.
Note! The top inflatable edge of the pool must be inflated periodically.
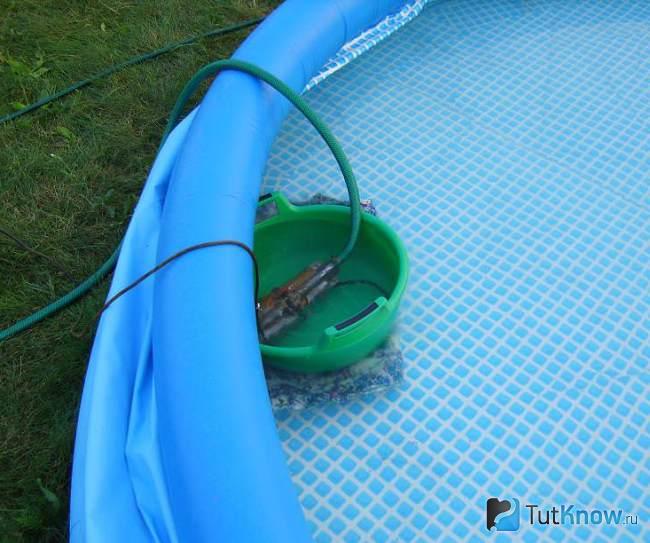
The photo shows how to drain water from an inflatable pool
The inflatable pool cannot be preserved at the end of the swimming season. It needs to be collected and sent for storage. This is quite simple to do: you just have to pump out the water, wash and deflate the product. When cleaning the container, pay special attention to wrinkles. Remember not to press on the walls so as not to damage the PVC sheet. Dry, carefully fold the bowl with a minimum number of kinks; it is recommended to store the product in a dry, heated, ventilated place. Additional items should also be dried and packaged.
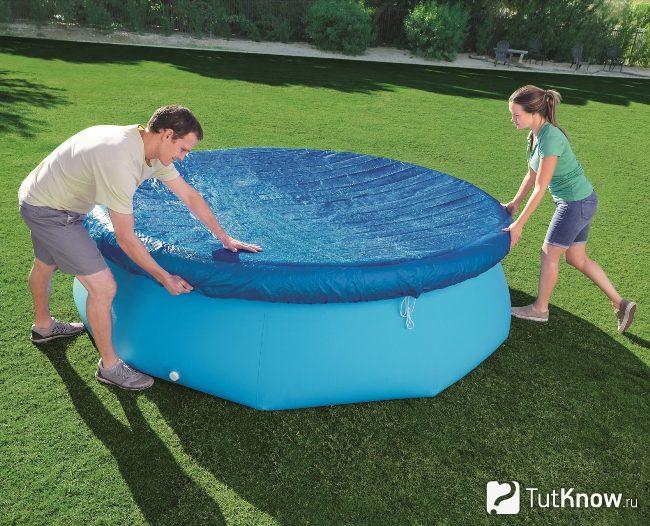
The photo shows an awning for an inflatable pool
Digging a pit
An important stage in building a swimming pool in a bathhouse with your own hands is the foundation pit. Its dimensions should be slightly larger than the proposed pool, the bottom should be inclined, and it should be located at a distance from the walls of the bathhouse. If the pit is large, it will take several days to complete the work, but the main thing is to install the drain pipe in advance. The sewerage system cannot be located in close proximity to the future reservoir. The distance to it should be at least 5 meters.
The bottom of the pit is leveled, compacted with sand and crushed stone, and only then can the installation of a reinforced concrete boiler begin. The first layer of concrete is 10 centimeters, after which reinforcement is placed on this base and covered again with a layer of concrete. This design is suitable for large pools, and you can reproduce it yourself.
How to make a pool in a bathhouse
After the scorching hot air, you want to plunge into cool water and refresh your body. Therefore, a good steam room requires the presence of a swimming pool. In order not to spend significant amounts of money on creating this pleasure, many people decide to build a pool themselves. Let's look at the construction process.
1
Types of pools. Before you start making the structure, familiarize yourself with the types of pools:
- Stationary. They are the most durable. The construction of such a pool involves the installation of a reinforced concrete box on the base. Structures can be located both in the ground and on it.
- Prefabricated. Very convenient in terms of mobility. If necessary, the pool can be easily disassembled and reassembled. They are less durable than stationary ones, since they are mostly made of PVC. But the low cost and ease of installation more than compensate for this drawback.
- Spa pools. They are small in size because they are intended exclusively for relaxation and hydromassage. Sold ready-made (like the previous version).
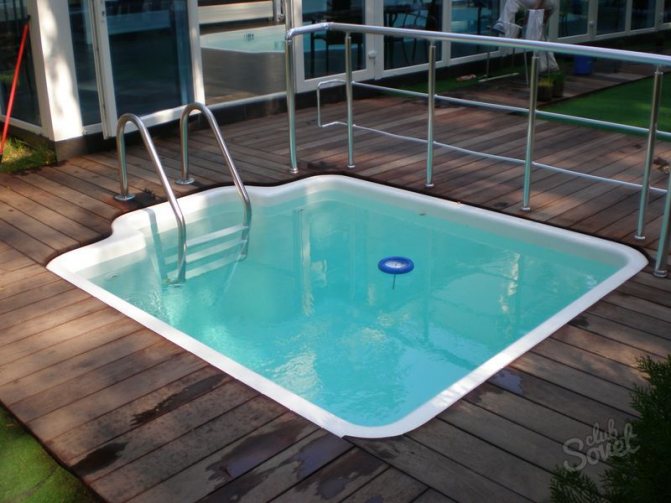
2
Creating a project. Decide on the size of the pool. Decide on the method of supplying and draining water. You can build the structure from scratch or integrate it into an existing sauna. If you have difficulty at this stage, order a pool project with hydraulic diagrams and installation instructions. Write down the necessary materials for construction, determine their quantity and set the exact price. This is what the approximate project plan for a bathhouse with a swimming pool looks like:
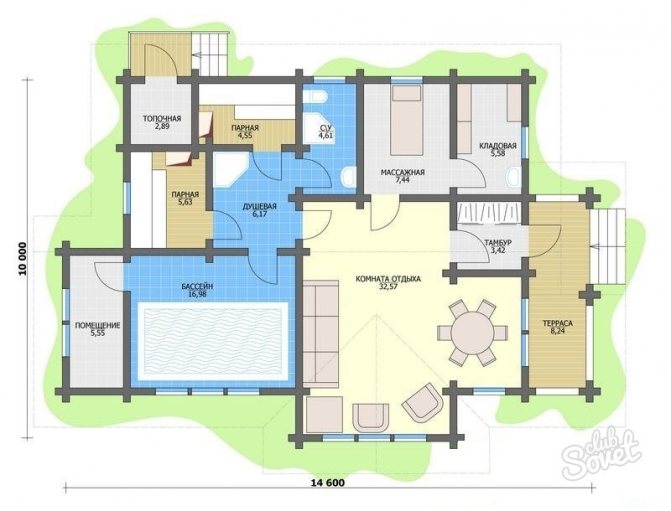
3
Digging a pit. The trench should be approximately 0.5 m larger than all sides of the pool itself, and the depth should be 35-45 cm. Make the bottom with a slight slope for the drain pipe (7-10 cm in diameter). At this point, lay the pipe towards the side of the drainage hole. It is worth noting that the drainage pit must be located at least 5 m from the pool.
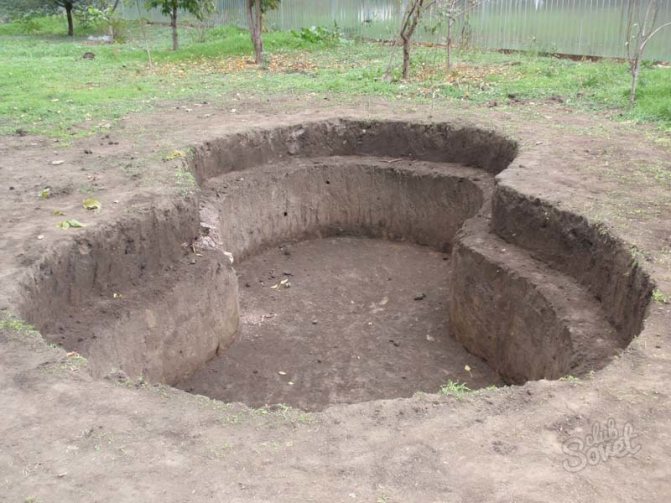
4
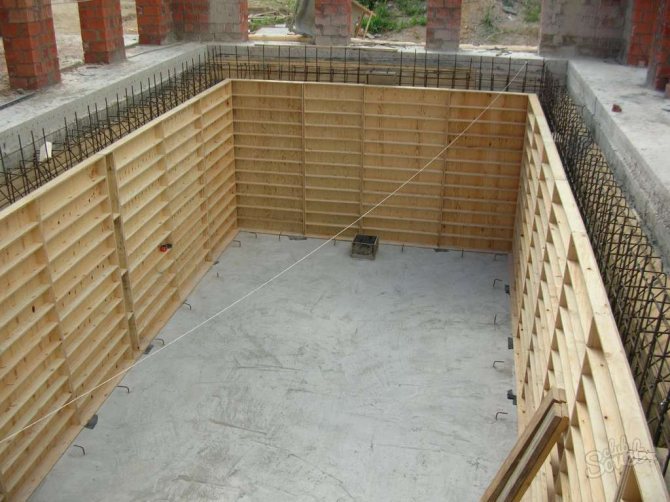
Filling the form. When everything is done, create a formwork for the bottom, pour sand (4-5 cm) there, then level it and compress it. Do the same steps with gravel (10 cm). Then pour concrete (10 cm), create a mesh of reinforcement and pour the same amount of concrete again. Install formwork for the walls, add a “cushion” of sand and gravel, then lay down a mesh of reinforcement and concrete the walls. Remember that they must be poured in one go. A few words of pouring will reduce the strength of the pool several times. Before the concrete sets, use a vibrating hammer to “kick out” any air bubbles.
5
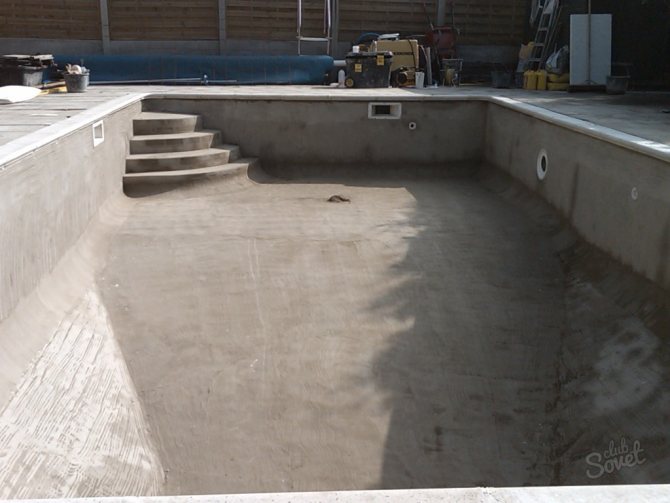
Plastering. Level the surface and leave the pool for a month, or better yet, several. Moisten it periodically to avoid cracks. When the structure is completely dry, remove the formwork and plaster the surface with cement mortar 22-25 mm thick. If you want the plaster to be durable and more elastic, use waterproof latex compounds.
6
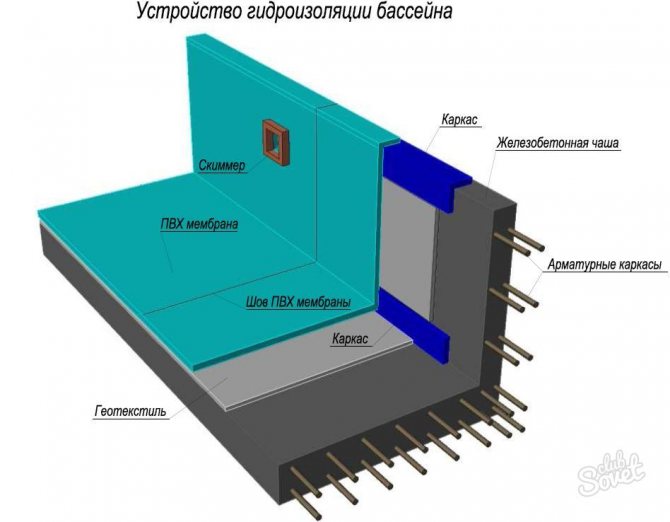
Waterproofing. You can cover the surface of the bowl with a special covering made of PVC film. A more reliable way is to apply two layers of waterproofing to the outer surface. You still need to apply an adhesive mixture with latex on top.
7
Facing. Let's look at the most popular options:
- Tile. For your pool, choose exclusively porcelain tiles. It does not absorb water and is much stronger than ceramic products. Its cost is $25-35 per 1 sq. m. m.
- Mosaic. The best option is products cast from glass. The advantage of mosaic over other types of cladding is the large selection of stylistic and color solutions. The price varies from $24 to $146 per 1 sq. m.
- Film. It is the most economical option and has excellent waterproofing properties. In addition, it is easy to clean and has good resistance to harmful microorganisms. Its cost is $10-40 per 1 sq. m.
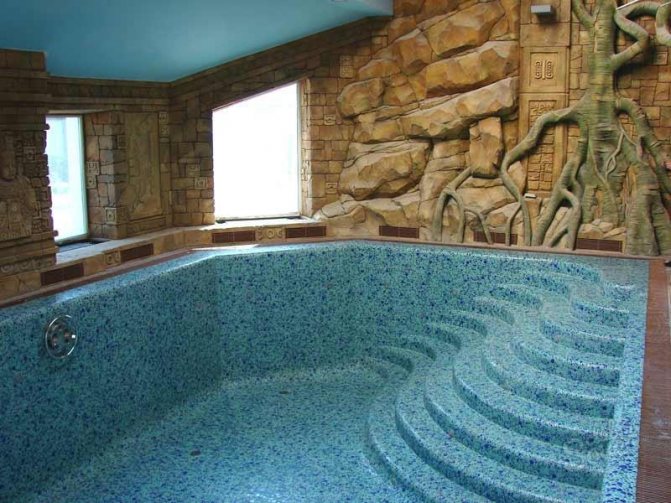
Careful implementation of all the above points will help you build a high-quality and beautiful pool. You will be able to create excellent conditions for good rest and recovery for all members of your family!
Pool lining
Construction of a swimming pool in a bathhouse is a lengthy process. It only takes about a month for the concrete to harden, but you still need to carry out cladding and other work, for example, waterproofing. It is necessary to avoid mold and leakage. A film is used as a waterproofing material or the bottom is covered with a special mixture.
The cladding can also be different, but first the walls and bottom of the pool should be plastered. For finishing, you can use, for example, tiles or other materials that meet your requirements. If you have the skills, laying it with your own hands will not be difficult.
Steps to build a concrete pool
If you plan to make a recessed structure, then the dimensions of the pit should be approximately 50 cm larger than the pool itself. A recess 40 cm below the bottom of the bowl is also necessary. And the walls need a slope so that they do not collapse in the future.
Gravel 10 cm thick is laid at the bottom of the pit and filled with cement. Afterwards comes a layer of waterproofing and insulating material. The bottom is concreted. Afterwards, the installation of a metal mesh is prescribed; the cells should be within 2 cm. It is also installed on the walls of the bowl.
Experts recommend concreting the structure completely. This ensures proper quality of operation. Concrete settles for about 7 days. Over the next four weeks, it is saturated with moisture to prevent cracks from occurring.
