Everyone dreams of a spacious bathhouse with many rooms, but not every site is suitable for a large bathhouse, and besides, not everyone can afford it.
The 4 by 4 bathhouse project is an excellent alternative. It will not take up much space, you can choose different layouts, and its construction will be quite inexpensive. Some people prefer to make a bathhouse with a large steam room and washing room, while others reduce the size of these rooms and make a separate relaxation room.
A 4x4 sauna with a veranda is popular. This will be discussed in this article.
Site preparation and marking
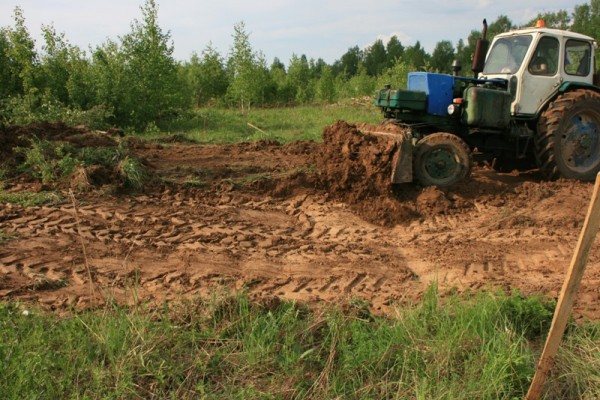
Choose a site for the bathhouse on level ground or on a small hill, be sure to remove the fertile layer. This soil can be taken out for garden beds or used to level the area.
Cleaning grass and topsoil
If the bathhouse will not be used very often, there is no need to make a special water drain; in other cases, you can make a simple receiver from a plastic or metal barrel dug into the ground. To allow water to escape, make holes in the bottom and side surfaces.
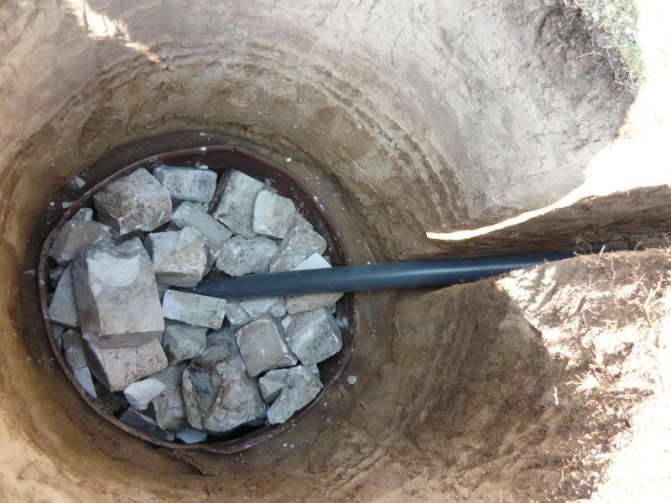
The photo shows a simple cesspool with drainage into the ground
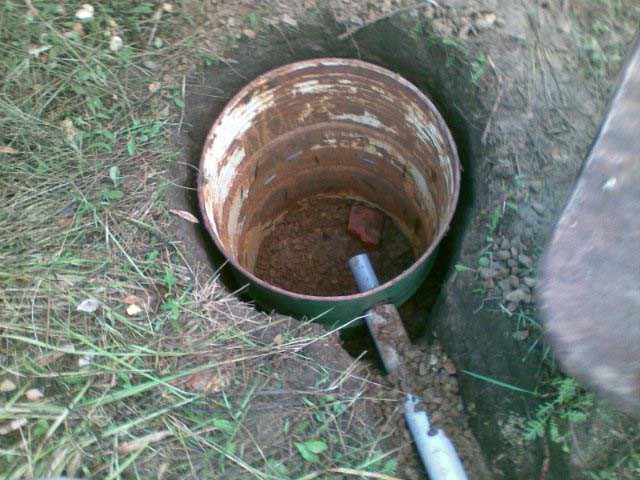
Drain pit from a barrel
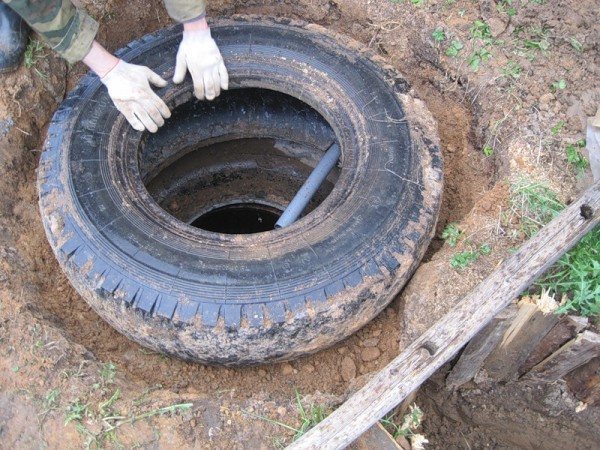
Example of a cesspool made from tires 1 – external foundation of a bathhouse, 2 – foundation partition between the washing and steam rooms, 3 – concrete covering of the drain “funnel”, 4 – sand and gravel cushion, 5 – hole in the partition for draining water from the steam room, 6 – drain pipe, 7 – soil, 8 – pit cover, 9 – used car tires, 10 – filter backfill
The smoother the area, the less concrete work you will have to do; try to level the perimeter of the bathhouse more carefully.
Leveling the area
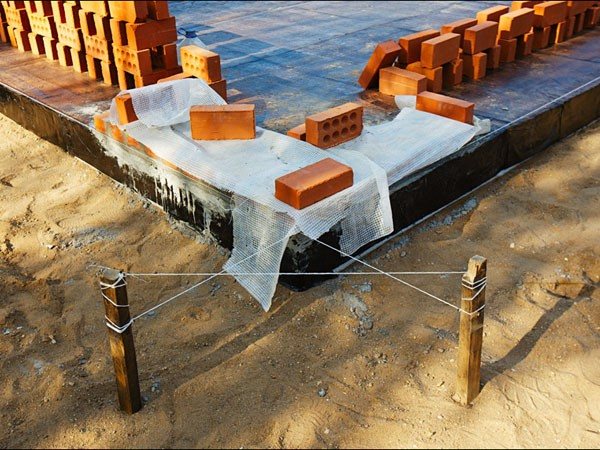
Carefully make markings according to the selected project. All angles must be exactly 90°, check them using diagonals. The difference between the diagonals cannot exceed 2÷3 cm; this error can still be eliminated during laying. If the difference between the diagonals exceeds this value, then you will need to “adjust” the angles again. Mark the foundation plan with wooden pegs and rope. The width of the foundation should be several centimeters greater than the width of the walls; in our case, this parameter is thirty centimeters.
Video - Marking the foundation
Video - Method of marking a strip foundation
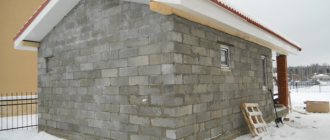
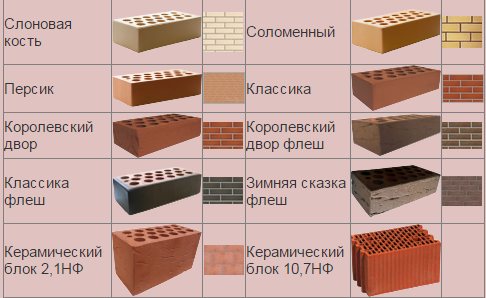
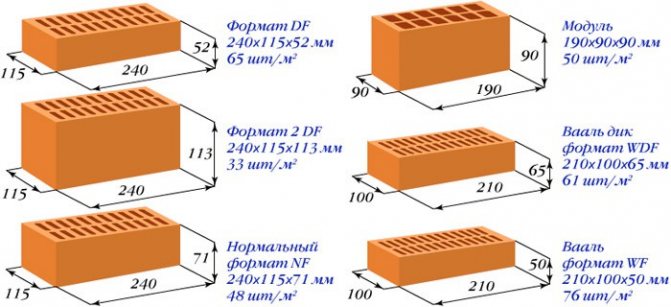
For laying the facade walls, two types of bricks will be used: smooth facing and ordinary red. It is better to choose a hollow facing one; in terms of strength, it is quite suitable for a small 4x4 bathhouse, especially since the second row of the wall will be made of solid brick.
| Name | Brand | Size | Appearance | Retail price | Picture |
| Solid single brick | M100 | 250x120x65 | Ceramic, solid, grooved | 10.11 rub. | Solid single brick M-100 |
| Solid single brick M-125 | M125 | 250x120x65 | Ceramic, full body, single, grooved | 11.48 rub. | Solid single brick M-125 |
| Solid single brick M-100 (dry press) | M100 | 250x120x65 | Full-bodied, smooth | 12.55 rub. | Solid single brick M-100 (dry press) |
| Solid single brick (dry press) M-175 | M175 | 250x120x65 | Full-bodied, smooth | 14.12 rub. | Solid single brick (dry press) M-175 |
| Ceramic ordinary hollow single brick | M100, M125, M150 | 250x120x65mm | Fluted | 19.6 rub. | Ceramic ordinary hollow single brick |
Hollow facing brick
There are state standards for brick sizes, but not all manufacturers comply with them. Many set their own technical conditions and produce bricks with sizes that are most profitable for production. The width of the foundation can be made 30 centimeters, this will be enough for masonry as thick as a brick. The site has been prepared, the markings have been made - you can begin building the foundation.
Prices for hollow bricks
hollow brick
What types of baths are there?
The construction of modern bathhouses has become a real culture. Today there are several types of baths, among which it should be noted:
- Dry. In the steam room of this bath, the air humidity does not exceed 25%, and the temperature should be kept at exactly 120 degrees Celsius. It is very difficult to be in such conditions, so she is not in particular demand among her compatriots.
- Wet. This is a classic version of the Russian steam room, where the steam humidity reaches 100% and the air temperature ranges from 50 to 90 degrees Celsius.
- Water. This is an analogue of a Turkish sauna, where the important key points are a large amount of water vapor.
We invite you to familiarize yourself with Yucca: home care, transplantation and propagation, types
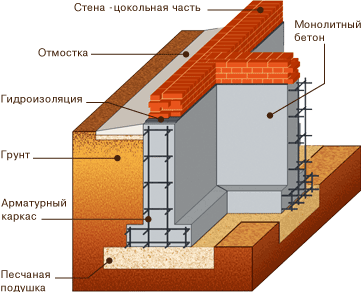
Foundation
Scheme of a strip foundation with reinforcement
Recessed strip reinforced monolithic foundation
Recessed base
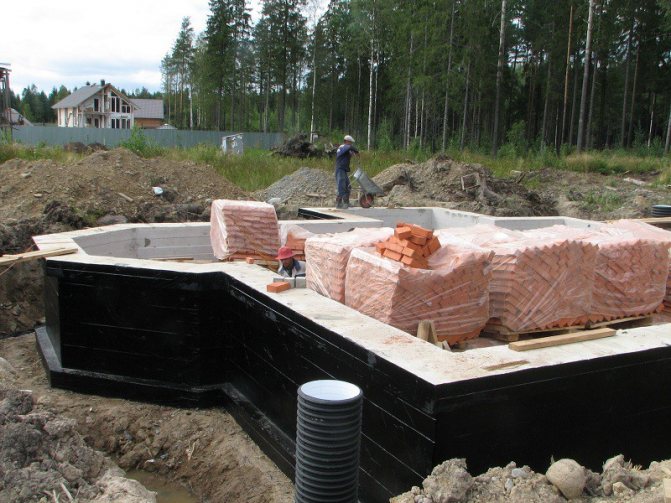
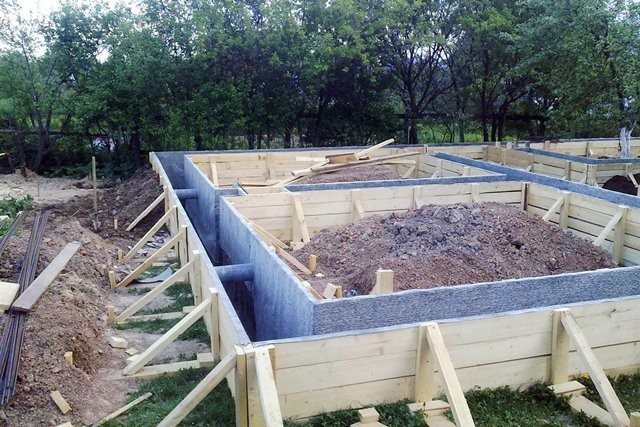
Example of a laid foundation
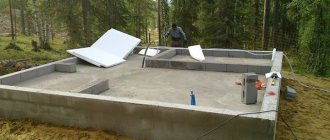
As we have already said, for a brick bath you need to choose a strong reinforced strip foundation. It is not difficult to dig it by hand, the length of the trench around the perimeter will be only 16 meters, one lintel 4 meters long under a half-brick partition. The earth does not need to be removed; the height of the foundation above the horizon is approximately 30 cm, this is enough to “receive” it. Moreover, a continuous concrete pour will be made under the steam room; it is better to raise the fill - less concrete work will be required.
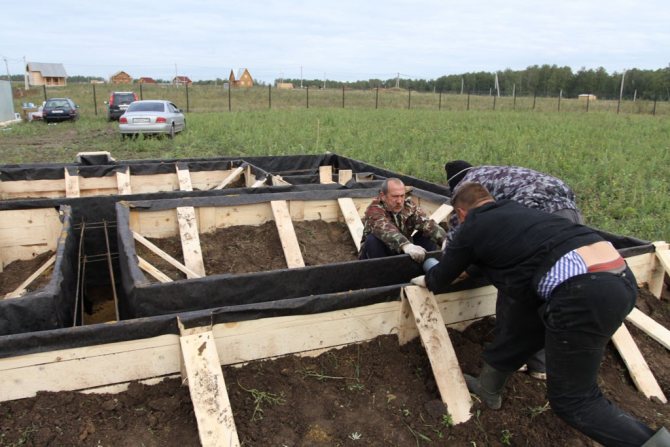
Step 1. Dig trenches according to the markings. If your soil is light and the walls of the trench are crumbling, you will have to strengthen them.
![]()
An example of digging a trench for a foundation
![]()
Trench for the foundation of the bathhouse
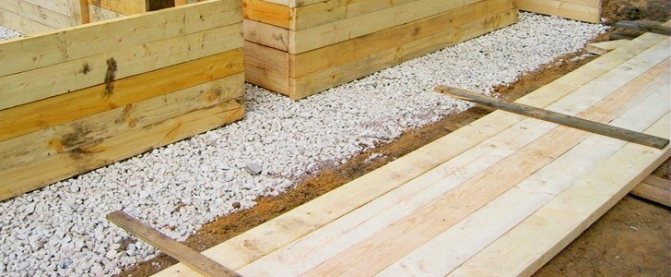
Practical advice. It is not necessary to construct complex, expensive formwork; reinforcement can be made using various scraps of boards, plywood or particle boards. Insert them into the trench and install spacers between them from any materials. After the concrete is poured, these “structures” remain in the ground. Ditch walls can be strengthened only in those places where they are least stable.
![]()
Strengthening the walls of the trench
Another way to quickly and cheaply strengthen trench walls is to use foam plastic slabs 1÷2 centimeters thick. This method, by the way, additionally compensates for the compressive loads of the soil on the foundation in winter.

Permanent formwork
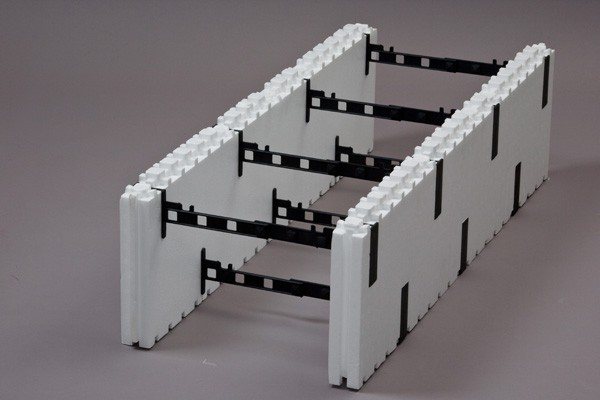
Fixed polystyrene foam formwork
The depth of the foundation is approximately 1 m; to compensate for swelling of the soil during freezing, make a sand cushion approximately twenty centimeters thick. This depth is suitable for most climatic zones of our country; the sand cushion is able to “take over” the rise of the soil within 2–3 cm.
![]()
The bottom of the trench is filled with sand and compacted
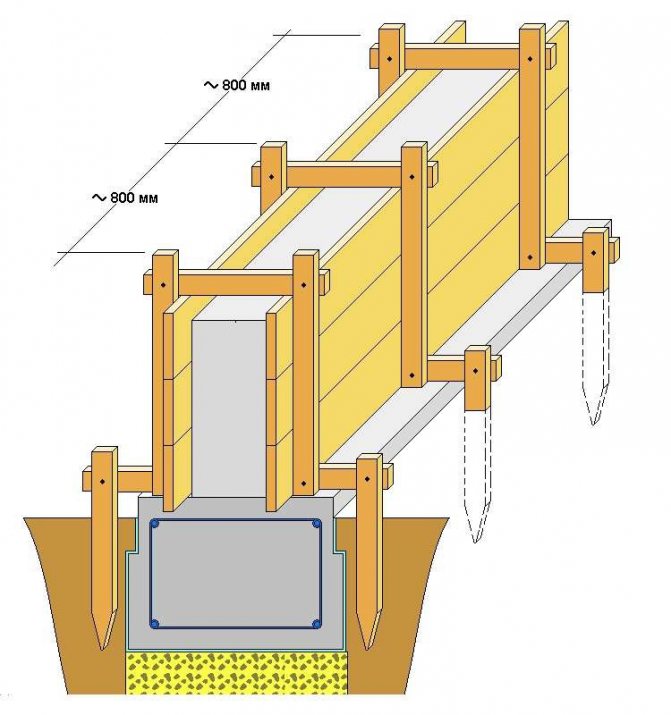
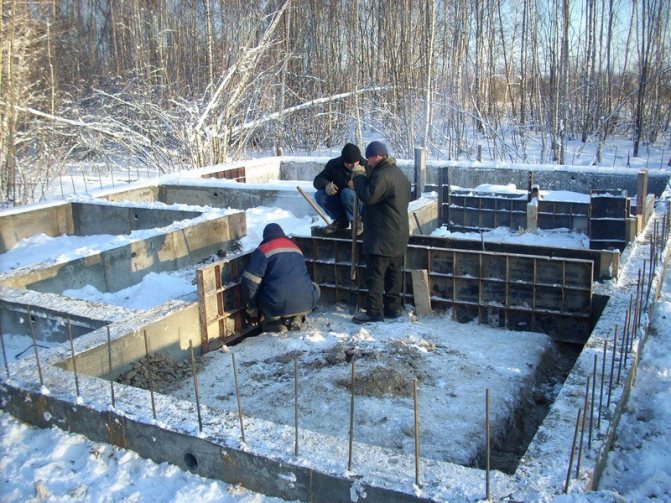
Step 2. Installation of the top formwork. It only needs to be done for the above-ground part of the foundation.
Example of installation of formwork panels
Installed formwork
Removable wooden formwork for foundation
Location of vents in the foundation
Installation of vents in formwork
To make formwork, you should use edged boards or special moisture-resistant plywood. The height of the foundation above the ground is about thirty centimeters. Place the formwork on ropes, firmly fasten the side walls, they should not bend under the weight of liquid concrete. Keep in mind that after removing the formwork, the boards can be cleaned and subsequently used at the construction site. Check the position and stability of the formwork again and eliminate any problem areas found.
Important: do not forget to install plastic pipes Ø 50÷100 mm for ventilation and draining water from the steam room.
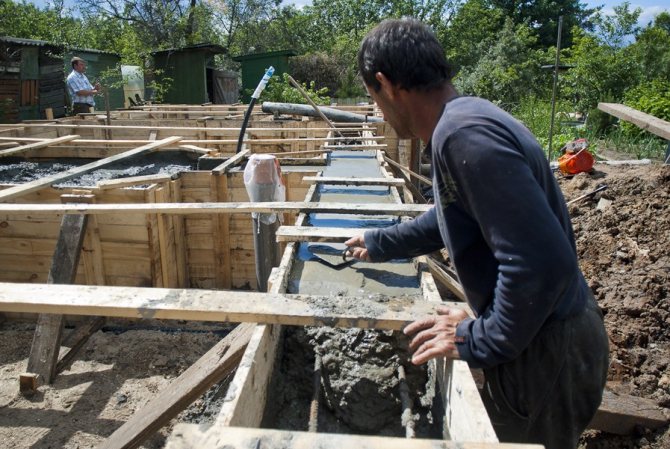
Step 3. Reinforcement and pouring concrete.
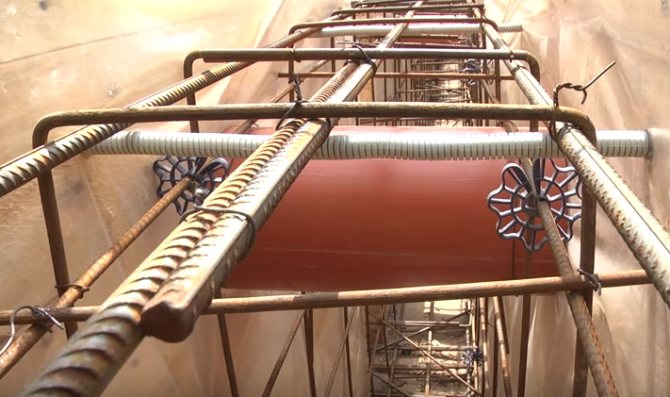
Reinforcement, vents laid in corrugated communications
Prices for fittings
fittings
Video - Reinforcement of a strip foundation
Video - Reinforcement and formwork of a shallow strip foundation
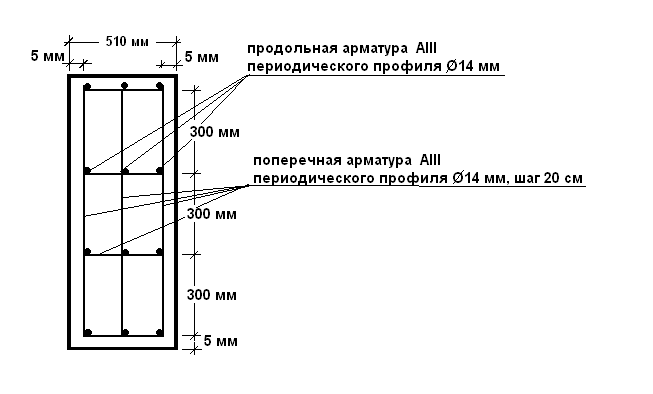
If you do not have time to pour the foundation in one day, then you need to evenly distribute the concrete around the perimeter of the trench. Do not make sudden changes in height - this greatly reduces the strength of the foundation. To improve the physical characteristics of the structure, it is necessary to use reinforcement from periodic profile building reinforcement. To do this, you need to tie the reinforcement, install the finished structure in the trench, level its position, and make minimal gaps between the mesh and the formwork or trench walls. Only after this should you start pouring the foundation with concrete. Such work will take you at least two days. We do things differently.
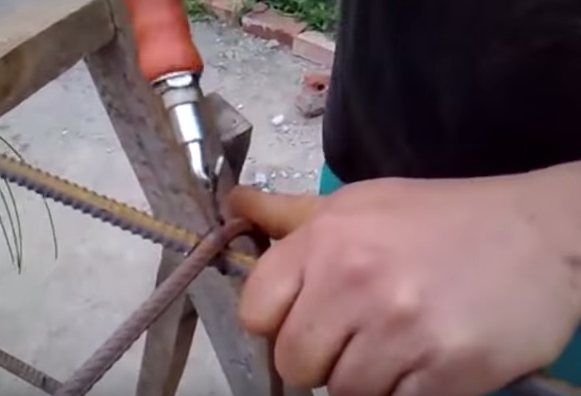
Knitting reinforcement
Practical advice . First, a short lesson in physics. All strip foundations work under tension or bending, such forces are absorbed by horizontal rods, vertical rods serve only as load-bearing frame elements during knitting. And they have a negative impact on the overall strength of the foundation - in these places the integrity of the concrete structure is compromised and stress concentrations appear, which causes cracks.
For such small foundations, we advise not to knit a reinforcing mesh, but to lay horizontal rods on the concrete. Fill the bottom of the trench with an even layer of concrete approximately 40 cm thick, lay reinforcing bars of a periodic profile Ø8÷10 cm around the entire perimeter, with an overlap of the ends of at least 10÷15 centimeters. Maintain a distance of at least five centimeters to the walls of the trench and formwork. Next, you again need to pour an even layer of concrete 40÷50 cm thick, lay out two more rows of reinforcement and fill the foundation strip to a given height. The work is done quickly, cheaply and efficiently. Anyone who has knitted and placed reinforcing mesh in formwork himself can evaluate our advice and draw his own conclusion.
Metal fittings
Step 4. Level the horizontal surface of the foundation strip, perform the work carefully, check the vertical position of the corners with a hydraulic level.
Leveling the surface of the tape with a trowel during concrete pouring
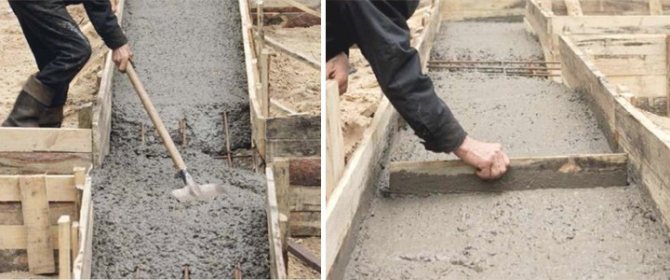
Pouring and leveling concrete
The spread in height of the corners of the foundation should not exceed 1÷2 centimeters. When the concrete has cooled down, dismantle the formwork and cover the tape with two layers of roofing material.
Dismantling of formwork
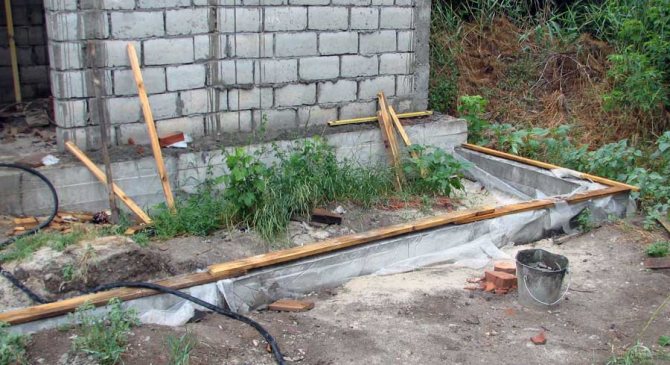
Step 5. Filling the underground under the steam room.
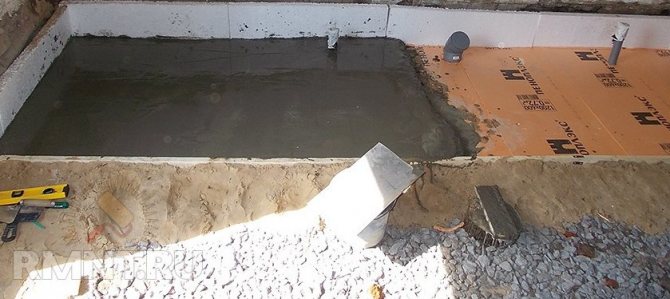
Pouring the underground under the steam room
We chose this method of drainage for several reasons. Firstly, in this way, erosion of the foundation is completely eliminated; all water is removed beyond its perimeter. Secondly, due to the rapid removal of wastewater, the service life of floor coverings significantly increases.
The water will flow through a plastic pipe; you need to prepare an elbow and a section of pipe.
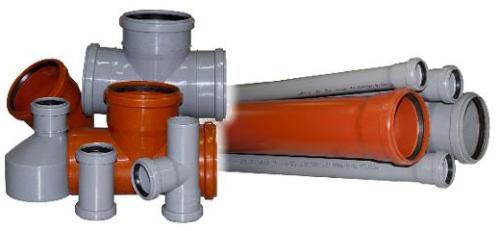
Sewer pipes and fittings
The length of the outlet is approximately 2 meters; the pipe outlet must be made into the hole in the strip foundation. Level the ground, make a small formwork on one side under the steam room, compact the ground, make a slope in it in the form of a shallow funnel. Install the pipe outlet in the center of the funnel, its second end should extend beyond the perimeter of the bath. Pour a layer of concrete up to ten centimeters thick, using a trowel to gradually level it with a slope of up to 10 cm, but the main thing is that the water drains away and does not stagnate.
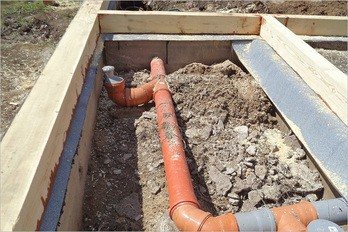
An example of installing a sewer pipe in a bathhouse
That's all, the foundation of the bathhouse is ready, start laying the walls.

Ready foundation
Prices for external sewer pipes
external pipes for sewerage
Wall masonry
These works are quite complicated for beginners, we will try to go into them in as much detail as possible.
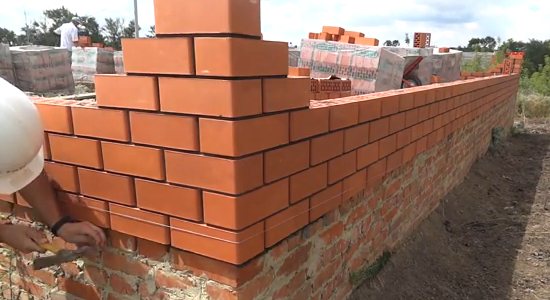
On the front side of the bathhouse walls we will finish with hollow facing bricks, the rest of the masonry is done with ordinary red brick.
Internal seaming is easier to do and looks great.
Seam options
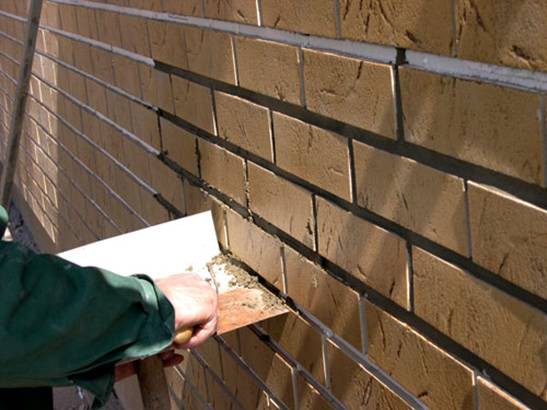
Joint jointing of brickwork
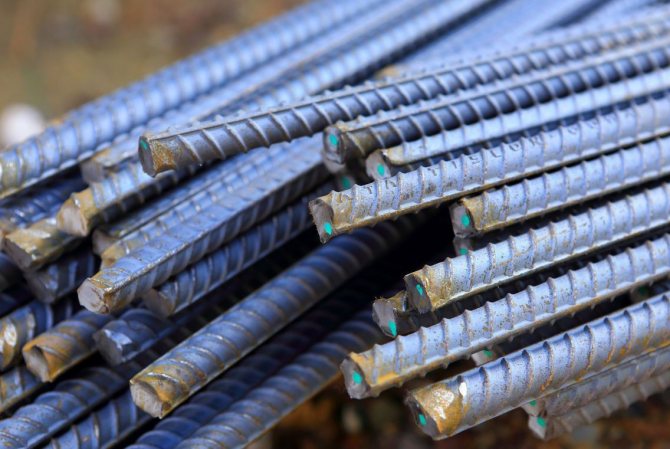
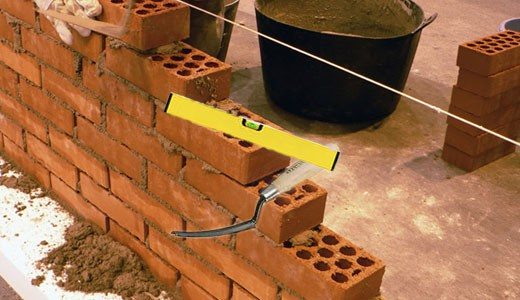
During masonry we will use devices in the form of metal hexagonal rods with an edge height of 8 mm. The length of the rods is about a meter, this is enough for three bricks in length.
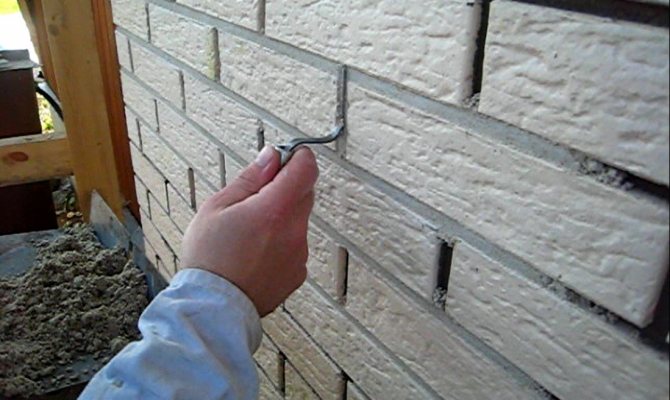
Tool – jointing
Method of jointing masonry with rods
To control vertical seams, we use hexagons approximately twenty centimeters long. You can also use a wooden device in the shape of the letter “T”. The thickness of the boards is also 8 millimeters. There is no big difference in the devices; each of them has its own advantages and disadvantages. Choose which tool is more convenient for you to work with. In stores you can find industrial devices for laying bricks for jointing. If you really want to, you can use them, but you won’t be doing this for long. The fact is that for such devices the brick must be the same size and absolutely even in all planes. Have you often come across such domestically produced bricks? And we didn't meet often.
Brickwork device
Bricklaying tool diagram
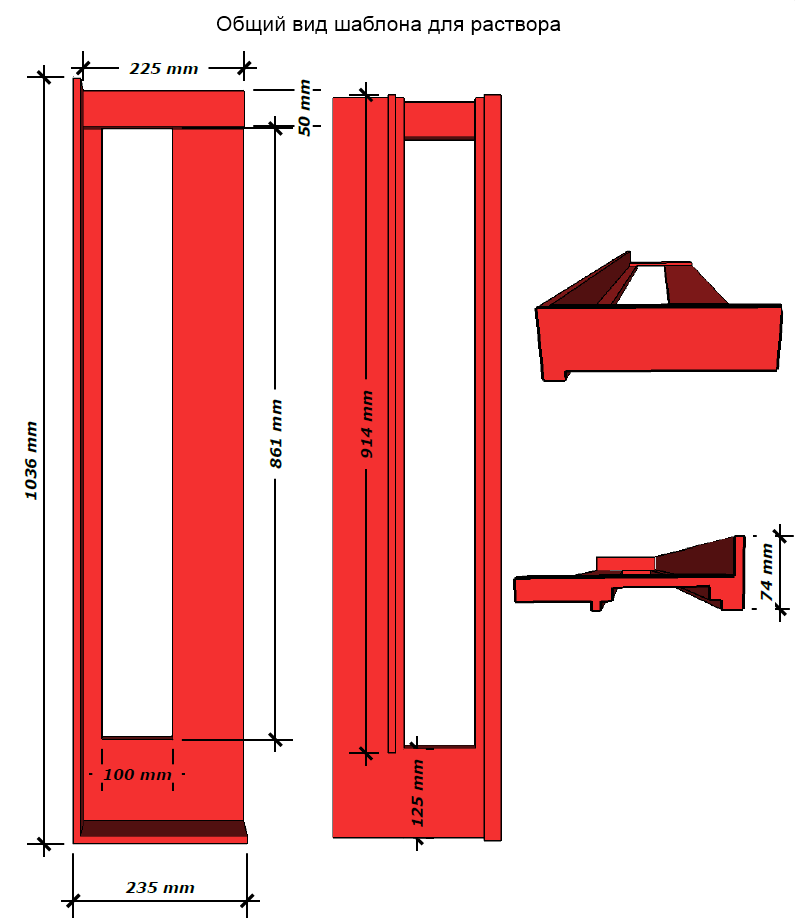
BRICKY - tool for bricklaying Device for bricklaying - photo
Very important. Don't rush to buy any brick. Check the position of all its edges with a square. Unfortunately, approximately 40% of domestically produced bricks are of quality below any criticism. The non-parallelism of edges and discrepancy in size even on one brick can be close to a centimeter. Working with such “products” becomes much more complicated.
Dimensions of facing hollow bricks Checking the edges of the brick
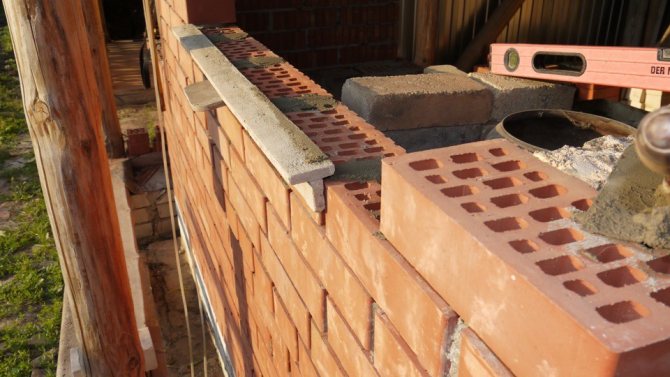
You can start laying with ordinary bricks, and then do the cladding, or vice versa. The choice of method does not affect the quality, it all depends on your preferences. Don’t forget to embed metal perforated plates after several rows to connect the two halves of the walls.
Step 1. Lay out the first row of facing bricks to dry. At the same time, use the device to maintain the distance between them.
Bricklaying
Why is this being done? The fact is that the width of the seam of the last brick can reach 3–4 cm; it will have to be gradually leveled during laying. This takes a long time and is always noticeable for experimental gas. It is better to bring the corners of the bathhouse a little closer/remote and thus achieve the same thickness of the seam over the entire surface of the wall. We assure you that the lost time will pay off many times over during the laying. By the way, an experienced mason lays approximately three hundred bricks per shift on a prepared wall and at even distances. You can imagine how productivity drops if you have to additionally adjust seams or cut bricks into pieces.
Wooden jig
We will carry out all the work under a rope stretched between the extreme corners. With experience, you will no longer need to use a rope, but at first it is extremely necessary. Brick laying begins at opposite corners. This is the most difficult part of the work, treat it with maximum responsibility.
Laying bricks along a stretched rope
Brickwork technology
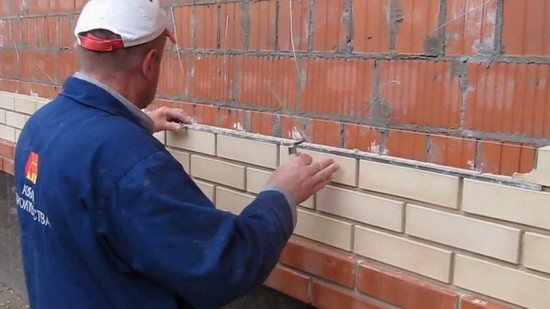
Step 2. Laying corners.
Brickwork corners
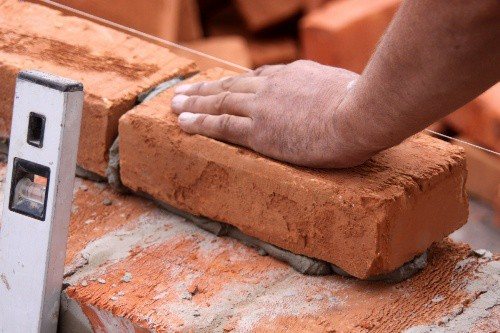
You will need to make at least four rows. In the corners, tie up the bricks and apply the mortar under a metal rod. Check the position of each brick along all edges, vertically and horizontally. Remove the rod along the masonry, this will make the visible part of the seam even. By the way, perfect alignment of the seam can be done with a narrow paint brush; insert it into the seam that has not completely cooled down and remove any remaining excess mass with horizontal movements. All small gaps will be filled at the same time. Be sure to check the angle of the bath not only with a level, but also with a plumb line; it gives more accurate position values.
How to lay bricks correctly
Repeat all operations on the opposite corner of the bathhouse. Keep in mind that facing facade walls with bricks is one of the most difficult jobs for masons. Don’t “relax”, don’t consider yourself a master after a few successfully laid bricks. You will have some experience in performing the work only after finishing the cladding of the entire bathhouse. And then this experience can only be used for “internal use.”
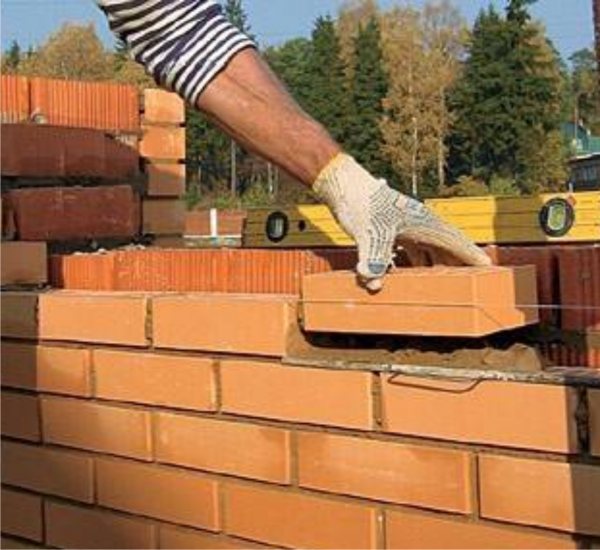
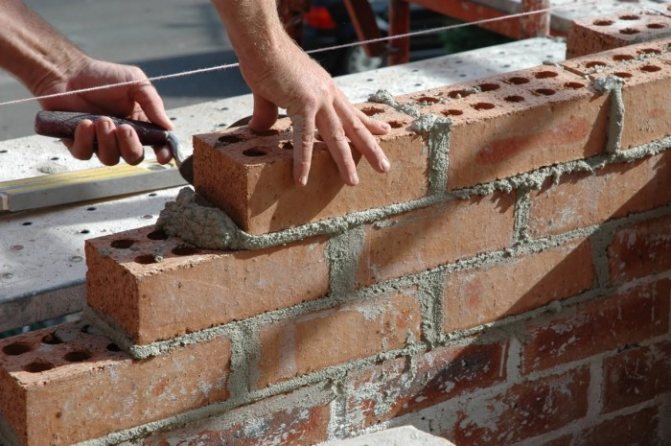
Step 3. Laying the walls. Pull a strong thread between the corners and check its horizontal position.
Brick wall laying
Very important. During work, do not take bricks from only one pallet, try to mix them with different packages. The fact is that the slightest deviations in production technology affect the color shade of the bricks. This may not be noticeable to the eye, but everything will be clearly visible on the wall; large areas with different color shades may appear on it.
Place a metal rod on the waterproofing of the foundation strip, apply mortar along its height, and level it. We recommend preparing a solution for about three to four bricks. Over time, experience will appear and labor productivity will increase. Also apply the mortar onto the side faces of the bricks using a metal rod. Do all the work very carefully, immediately wipe the front surface of the bricks from any mortar that gets into it.
Building brick walls with your own hands
The next brick can be laid only after the previous one has already been adjusted. Use a level and a mason's hammer; to check several rows you need to have a long, level lath. From time to time, use a plumb line for control; do not forget to embed a perforated metal tape to tie the inner (or outer) row of ordinary bricks.
There are two options for carrying out the work. The first is to finish the cladding first, and then make the inner wall (or vice versa) or work immediately along the entire thickness of the facade walls of the bathhouse. Lay several rows of facing bricks and several rows of ordinary bricks at once. There is not much difference; decide on the choice of technology yourself. At the location of the partition, you need to place bricks for dressing; do this every 4–5 rows.
Video - How to build brick walls correctly
Video - Laying a brick corner
Video - How to lay bricks correctly
Video - Bricklaying with an automatic tool
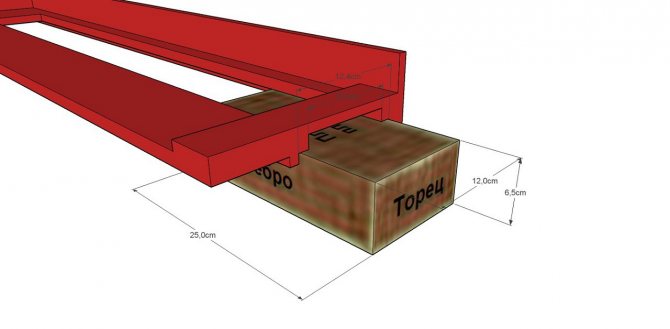
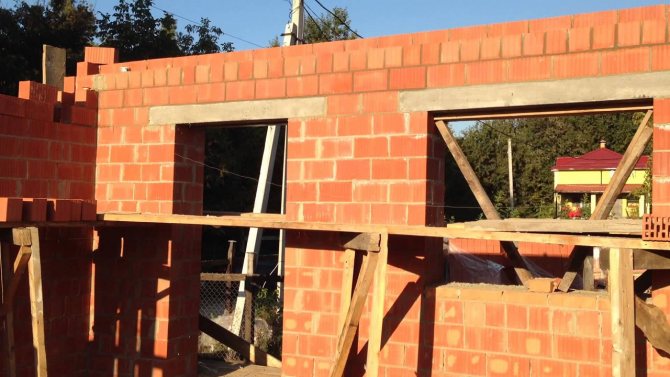
Step 4. Place window and door openings according to the selected project. We suggest making three windows in the bathhouse: one small one in the steam room (60x60 cm) and one each in the relaxation room and wash room (80x80 cm). The bathhouse has three doors in brickwork and one entrance door on the veranda.
For lintels, you can use ready-made reinforced concrete structures, or you can make them yourself from various available materials: metal, wood, etc. On the front side, window and door lintels need to be hidden with facing bricks. The height of the walls of the bathhouse is 2.1 meters, this height is enough for convenient washing.
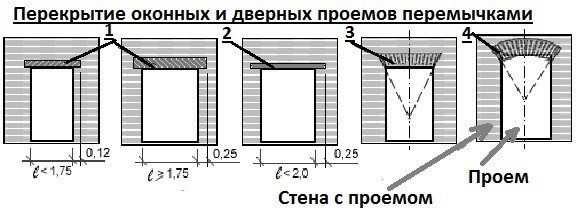
Lintels: 1. Reinforced concrete 2. Made of steel profile or angle. 3. Wedge brick. 4. Arched brick.
How to make jumpers
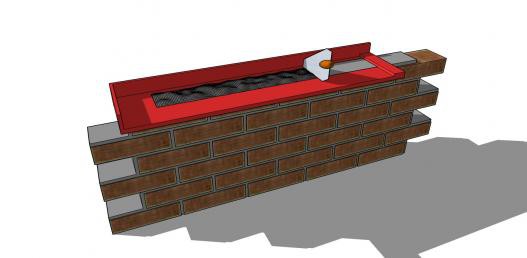
| Job title | Description | Scheme |
| 1. Construction of formwork | Having brought the facing masonry to the level of the lintel, formwork is constructed on which the first row of bricks is laid. | |
| 2. Installation of the first row | Clamps SK 50-170 are located in every second vertical seam row of masonry, i.e. 1 clamp for every second brick. | |
| 3. Input of fittings | The Murfor RND/Z-50 fittings are inserted into the corresponding grooves on the clamps. The reinforcement must extend beyond the edges of the opening by at least 250 mm. round trip. | |
| 4. Installation of clamps SU 50-45 | In the second row of masonry, in every second vertical seam, SU 50-45 clamps are located. | |
| 5. Murfor reinforcement in the following rows | Murfor RND/Z-50 reinforcement is also located in the second row of masonry. In both rows, the reinforcement must extend beyond the edges of the opening by at least 250 mm. round trip. Then every 300…..500 mm. Murfor RND/Z-50 reinforcement should be placed along the height of the masonry to achieve uniform load on the lintel. | |
| 6. Removing formwork | The formwork is dismantled after 2 weeks. |
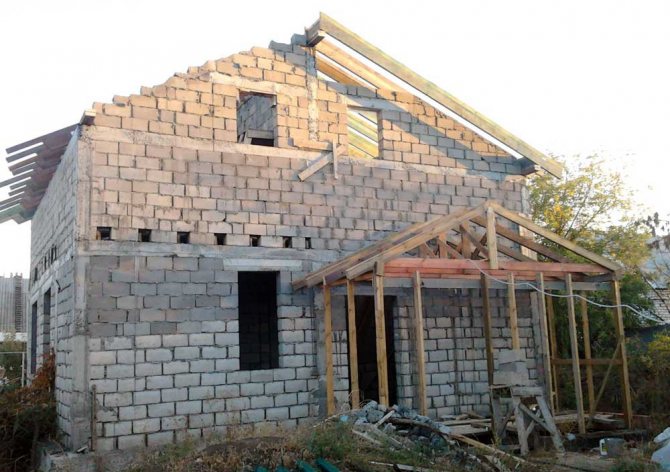
Roof
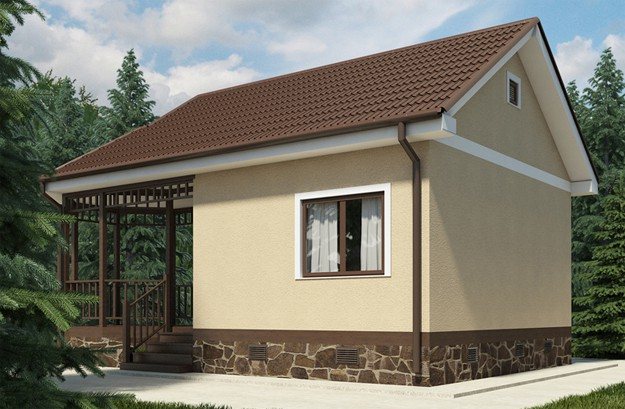
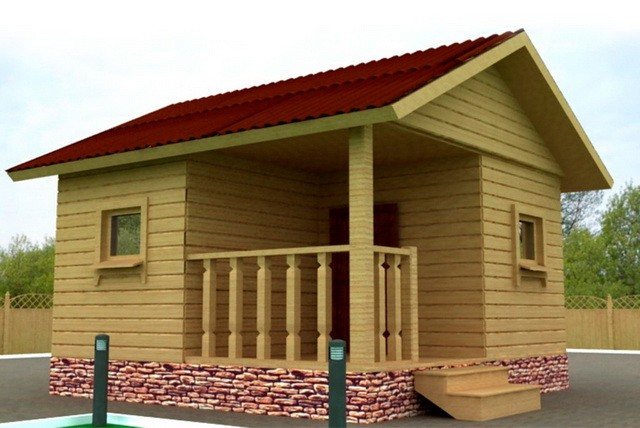
Example of a bathhouse with a gable roof
The roof of the bathhouse is gable, the rafter system is made of edged boards 50×150 mm, the lathing is made of slats 20×50 mm. We chose ondulin as a roofing covering - a good material in all respects. Ondulin is made using modified bitumen and plastics, has a very low dead weight, is produced in various shades, and has a service life of more than 25 years.
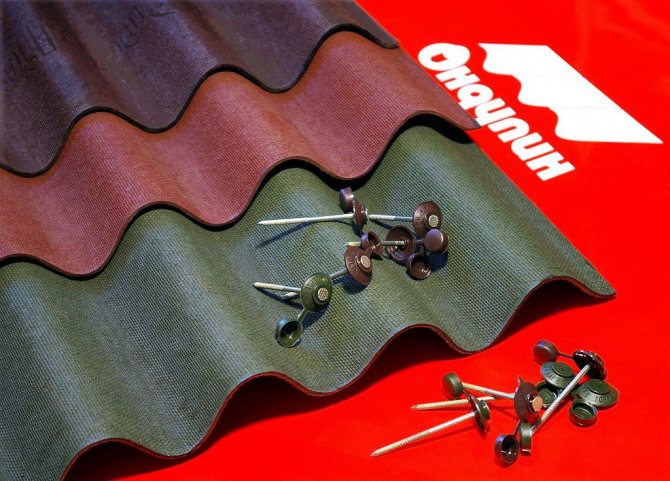
Ondulin
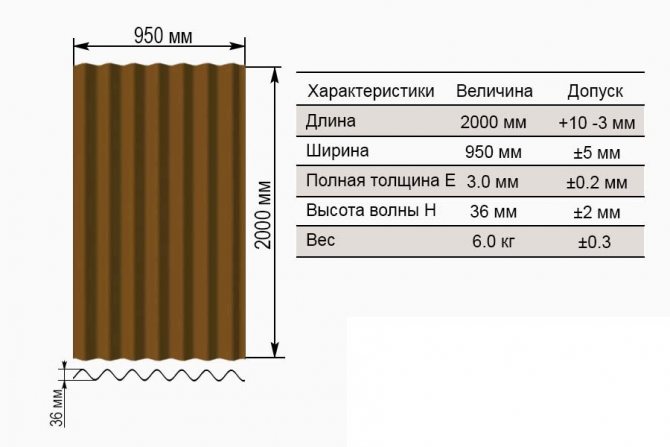
Onduline sheet size
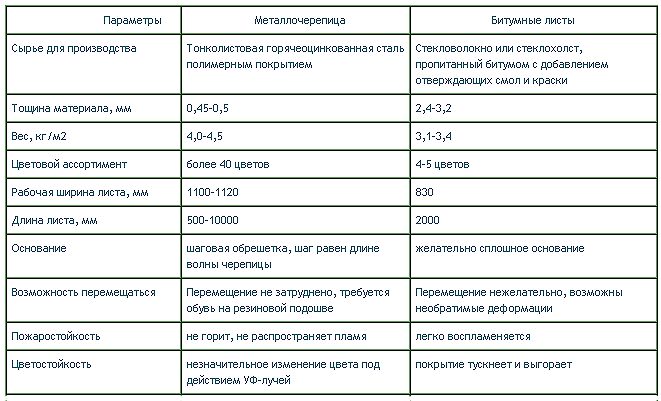
Characteristics of ondulin and metal tiles

Material advantages
The distance between the rafters is 90 cm, the rafter system is the simplest hanging, the attic rooms of the bathhouse are not used.
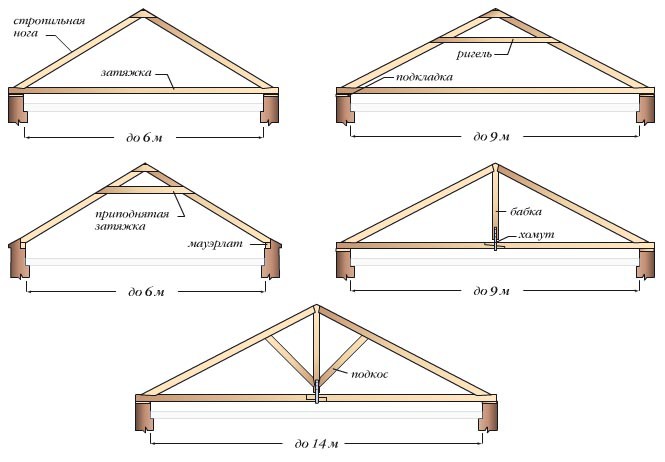
Types of hanging rafter systems
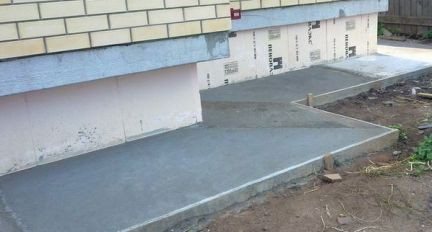
The slope angle is within 20°; a water drainage system may not be installed. Make a blind area around the bathhouse using cement-sand mortar; this will completely protect the structure from water.
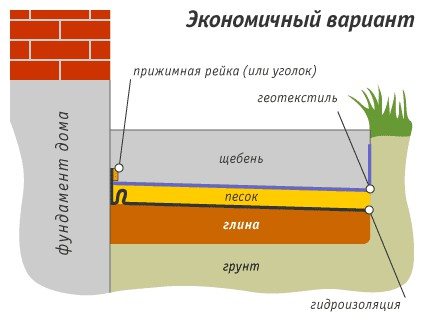
Blind area
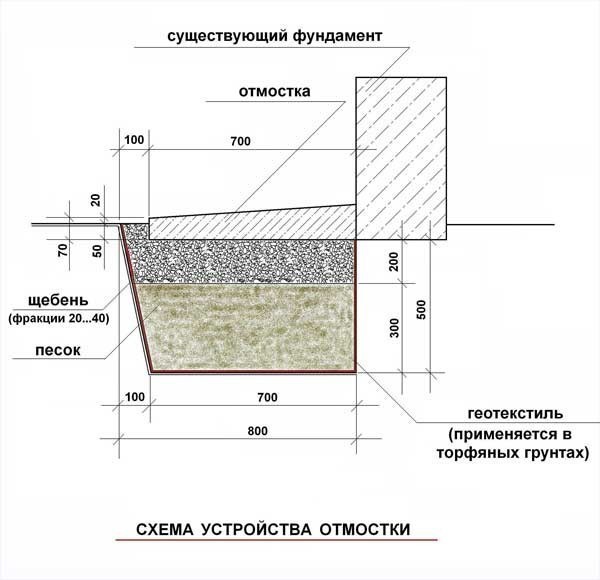
Scheme of the blind area
How to make a blind area
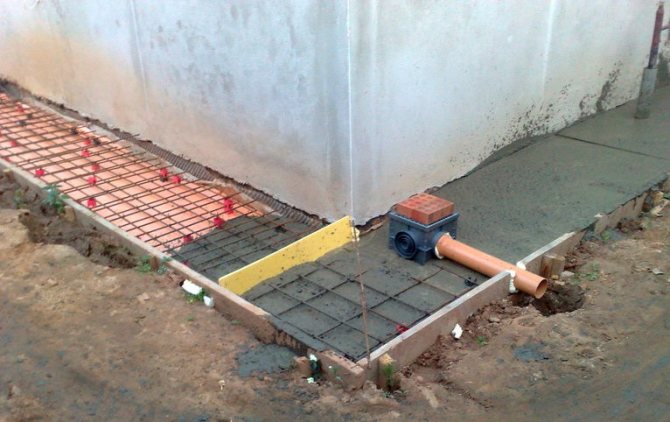
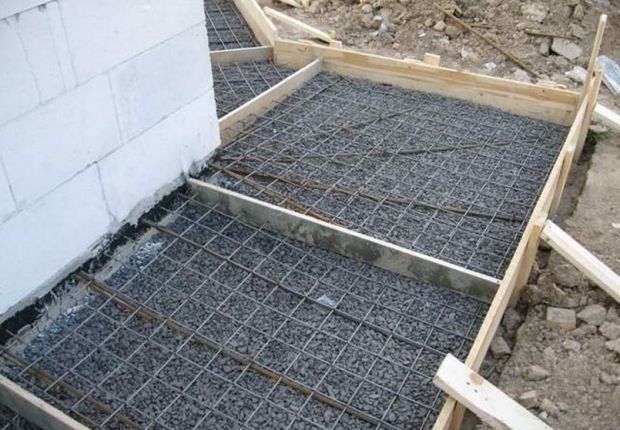
Photo of filling the blind area
Pouring the blind area
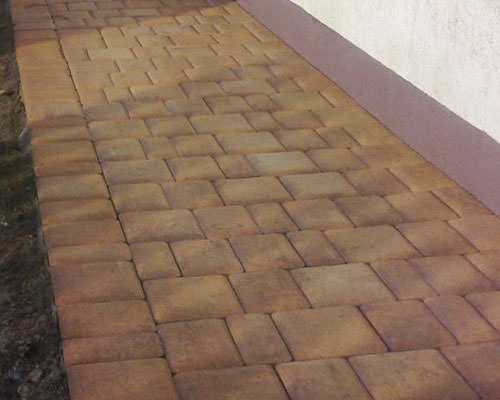
Blind area made of paving slabs, paving stones
Important. The blind area cannot be made continuous around the entire perimeter; in this form it will definitely give cracks. Make breaks at a distance of no more than one meter; ordinary, even wooden slats can be used as breaks.
Ondulin is fixed in rows from bottom to top, carefully mark the first row. If you have little experience in roofing work, make a mark on the sheathing for each row of ondulin. The overlap of the sheets is ≈10 cm; it is not necessary to install additional waterproofing under the sheets. If you do all the work correctly, there will be no leaks. And if you commit gross violations of technology, then no waterproofing materials will help you.
Prices for ondulin
ondulin
Video – Installation of ONDULIN roof
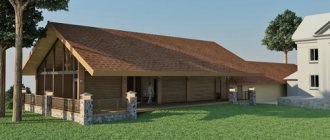
Bathhouse 5 by 8 meters
It perfectly suits the ground floor, but it would also be appropriate to build an attic on the second floor, which is also divided into several zones - a billiard room, a bedroom and even a balcony. But as the space increases, additional questions arise:
- how to provide heat to all rooms;
- how to make waterproofing;
- how to take care of the safety of the premises from a possible fire;
- how to properly arrange a steam room.
You cannot solve all these issues on your own. Therefore, you need to contact a specialist. There are companies that will make such a turnkey bathhouse.
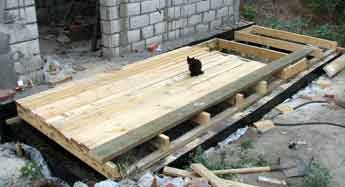
Floor coverings
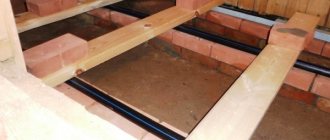
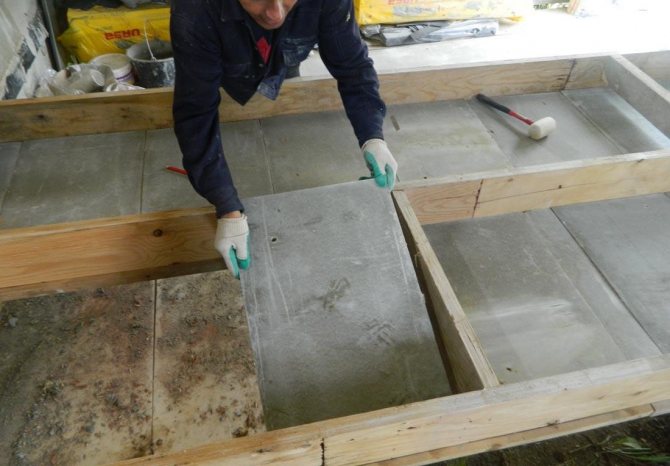
The floors in the bathhouse can be laid directly on floor beams; to make them you need to take 50x150 mm boards. In the steam room, stronger beams (beams 100×150 mm) should be installed; they will support the weight of the stove. It is better to make all floor coverings from natural boards 30÷35 mm thick.
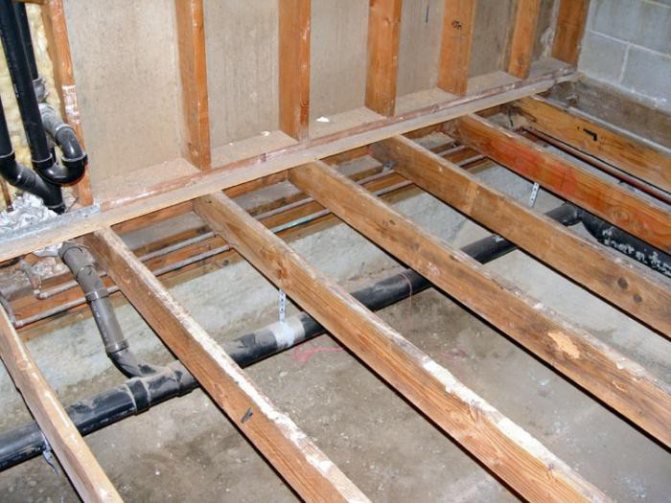
An example of installing floor beams. The ends rest on the edge of the strip base
Attaching the floorboard to the joists
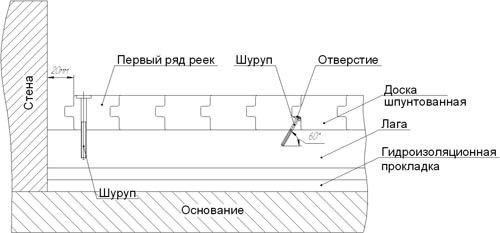
Fastening boards to joists
In the steam room, gaps a few millimeters wide should be left between the boards for water to drain; such a drain floor is made without a slope. All wooden structures under the steam room should be treated with antiseptics.
In other rooms it is better to make heated floors, consisting of a subfloor, insulation and a finished floor. For the subfloor, you can use unedged boards 20 mm thick, mineral wool insulation, and a finished floor made of tongue-and-groove flooring boards. Do not use polystyrene foam to insulate baths. The fact is that rodents really “like” it; in a few years they will turn the foam into crumbs. It is very difficult to protect yourself from them; even metal grilles on the foundation ventilation ducts do not always help.
Bathroom floor insulation
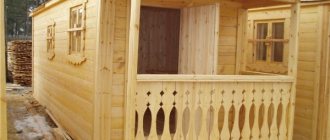
Do-it-yourself frame bath 4.8x2.6
This miniature building is something between a small bathhouse and a mobile bathhouse, which can be loaded onto a car at any time and taken on the road to be installed later in a new permanent location.
According to the project, the building, despite its obviously critically small size, is nevertheless divided into three rooms.
There are two plans on the diagram. The first (which is on top) shows a side view of the building, and the second (bottom) is a floor plan or top view.
Entering through the front door into a dressing room measuring 2.1 x 1 m, you can leave things and clothes in it and go through the door to the washing department. The washing room, which is slightly larger in size (2.1 x 1.5 m), also performs the functions of a furnace and is equipped with a comfortable bench, as well as a water tank.
https://www.youtube.com/watch?v=LnXxlNIZo4E
Construction is carried out using frame technology. The foundation is made of a metal frame based on a 65 mm channel.
The floor made of beams with a cross section of 150x50 mm is treated with Senezh antiseptic to protect against rotting.
The metal foundation frame is combined with a wooden grillage using special brackets.
The roof is made in compliance with fire safety regulations.
The roof structure is gable, the external covering material is slate.
The walls are insulated with Rockwool mineral wool slabs 50 mm thick. For thermal protection of the ceiling, a thicker layer was used - 100 mm. There was no thermal insulation in the floor.
The wall on the steam room side is covered with a windproof layer and painted three times, as it is constantly exposed to strong wind and precipitation.
The washing compartment is equipped with a comfortable bench 1.5 meters long. A water tank and also a mini-tank for a steam gun are mounted on the walls.
The steam room is heated by a Malyutka stove from Feringer with a lamella finish. The shelf is 1.2 meters wide and 2.2 meters long for convenient steaming procedures in Russian bath mode.
We suggest you familiarize yourself with what material is best to make a bathhouse from.
Particular attention is paid to the high-quality thermal protection of the chimney at the point where it passes through wooden structures.
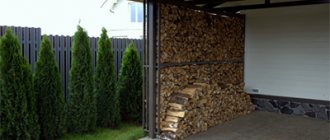
A woodshed was made as a place to store firewood.
The design of the firewood rack is as simple as possible, but at the same time quite spacious. Roofing felt was laid on the ground, on top of which four pallets were laid. The roof is simple, pitched and covered with slate.
Cladding of internal walls and ceilings
If the lining of the rest room does not create problems, then the steam room should be given more attention.
Steam room
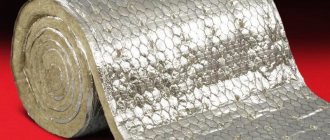
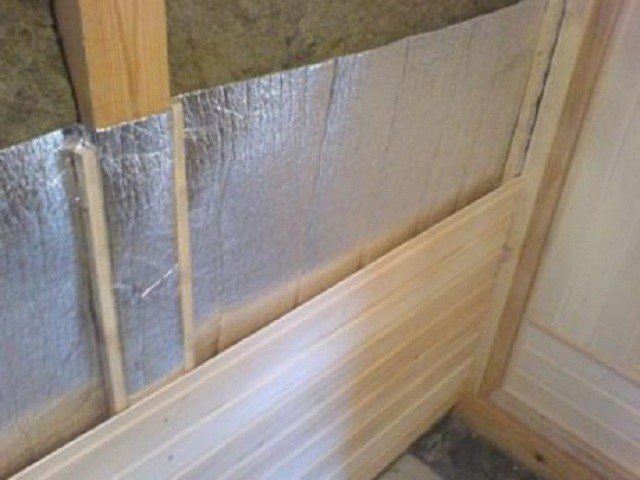
This room must be well insulated and reliably protected from moisture. It is better to use foiled mineral wool as insulation; for vapor protection it is optimal to use aluminum foil.
The walls and ceiling of the steam room are hermetically covered with foil; ensure that the overlaps are sealed. To cover the ceiling and walls, you need to use natural lining.
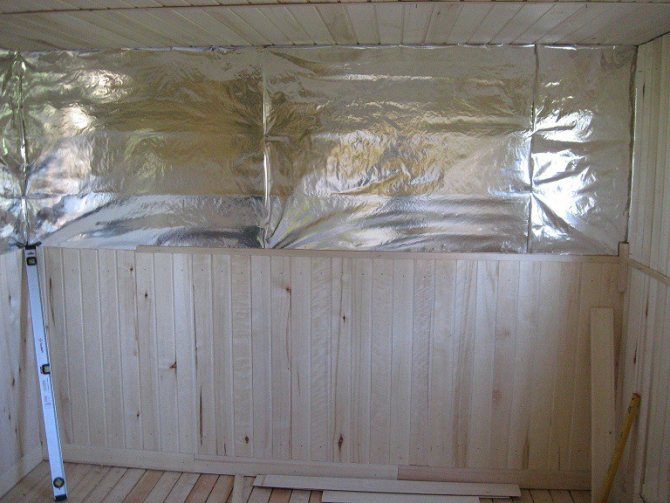
Vapor barrier and lining
Very important. Condensation will form on the foil and flow down vertical surfaces in large quantities. Natural ventilation of the walls should be provided; leave a small gap between the sheathing and the floor. Otherwise, the lower structures will be exposed to high humidity conditions for a long time, and this will negatively affect the duration of their operation. It is for ventilation purposes that we suggest making a small opening window in the steam room, glazing it with frosted glass. After visiting the steam room, the window opens for quick ventilation.
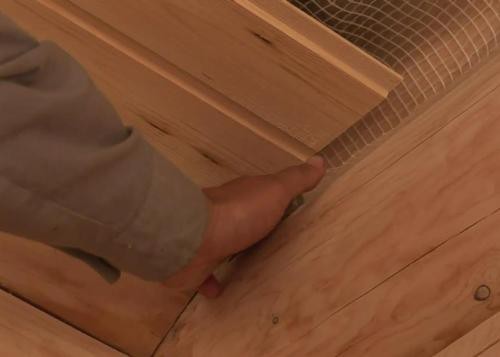
DIY clapboard ceiling. The gap between the lining and the wall is up to 2 cm
There is also a gap between the floor and the lining

Opening window for steam room
Rest room and washing area
These rooms have normal operating conditions; there is no need to use particularly complex and expensive technologies when covering walls and ceilings. You can sheathe the walls and ceiling with plastic lining or other moisture-resistant materials, insulate with mineral wool, and non-woven materials can be used for vapor protection.
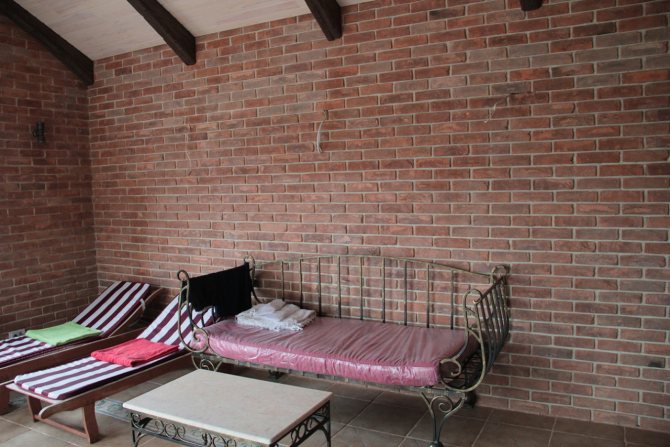
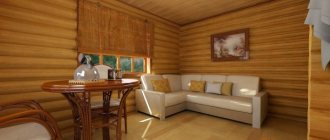
An example of a relaxation room in a brick bathhouse
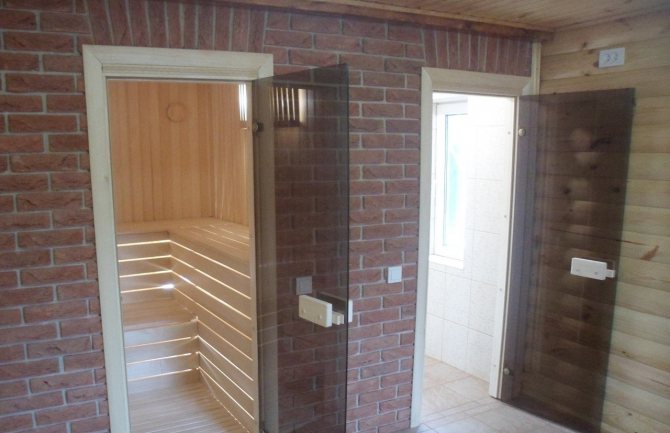
Entrance to the steam room and washing area
Veranda
The glassed-in veranda is a place where you can have a great time not only after the bath; this room is used for ordinary relaxation.

Glazed veranda

Veranda design
Vertical supports are made of 100×100 mm timber, the cladding on both sides is made of natural or plastic lining. For the frame, you can take boards 50x100 mm. All fastenings of individual structural elements are made using metal corners and screws or dowels.
An example of laying piping on the foundation of a veranda
Veranda floor
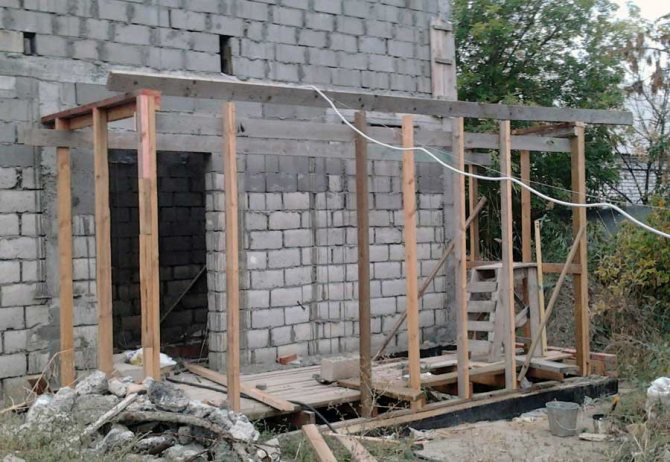
Veranda frame, assembly
Example of a veranda roof
Horizontal lintels on the veranda must be made taking into account the size of the window and doors. These same jumpers will also serve as boxes; securely fix them on several sides. You can insulate the walls of the veranda with mineral wool, but this is not necessary. It is unlikely that you will want to use the veranda for relaxation in winter. The window and door can be ordered metal-plastic. If you want, buy or make wooden ones yourself.
Prices for timber
timber
Video - DIY veranda. Part 1. Foundation, frame
Video - DIY veranda. Part 2. Frame
Video - DIY veranda. Part 3. Lathing and windows
Video - DIY veranda. Part 4. Roofing, flashings, imitation timber
Video - DIY veranda. Part 5. Imitation of timber, windows, impregnation
Video - DIY veranda. Part 6. Door, trim, glazing
Some general tips
We have described only one of the options for building a 4 × 4 m brick bathhouse. You can change it, build facade walls from ordinary bricks or foam blocks, cover external walls with various materials, etc. Choose specific options for building a bathhouse and finishing external walls, taking into account design of buildings already existing on the dacha plot.
If some construction operations are completely unfamiliar to you, it is better to practice separately, “get your hands on it,” and only then apply your skills directly to the construction of a bathhouse.
And one last thing. Never rush. There is a fairly direct relationship: the more haste the construction work is carried out, the less time the building is in use, the faster it will have to be repaired.
Layout of a small bathhouse with sink and steam room
https://www.youtube.com/watch?v=
That’s right, a cleverly designed small bathhouse is in no way inferior in comfort to larger ones. The only thing, of course, is that if you do everything to the minimum, then only 1-2 people will be able to steam in it at the same time. But sometimes that's exactly what you need.
When the size of the room is small, the question arises as to whether it would be cost-effective to divide it additionally with a partition, making a separate bathhouse with steam room and sink. But even for the smallest options, there are also bathhouses with a washing room and a steam room, both together and separately. Therefore, we will give both options.