Nowadays, a bathhouse is not some kind of archaism; it successfully withstands the competition that is imposed on it from bathtubs and showers. The bathhouse relieves many ailments, provides an opportunity to fully relax, and a visit to the bathhouse brings many other benefits. Therefore, the question regarding how much it costs to build a bathhouse with your own hands is now very relevant.
The following points are also relevant: which design to prefer, how to choose a place to build it, how to plan the premises in the bathhouse. And of course there are many questions related to its construction and care. Let's look at the main issues related to building a bathhouse with your own hands.
>
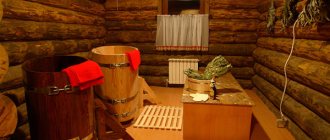
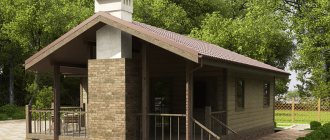
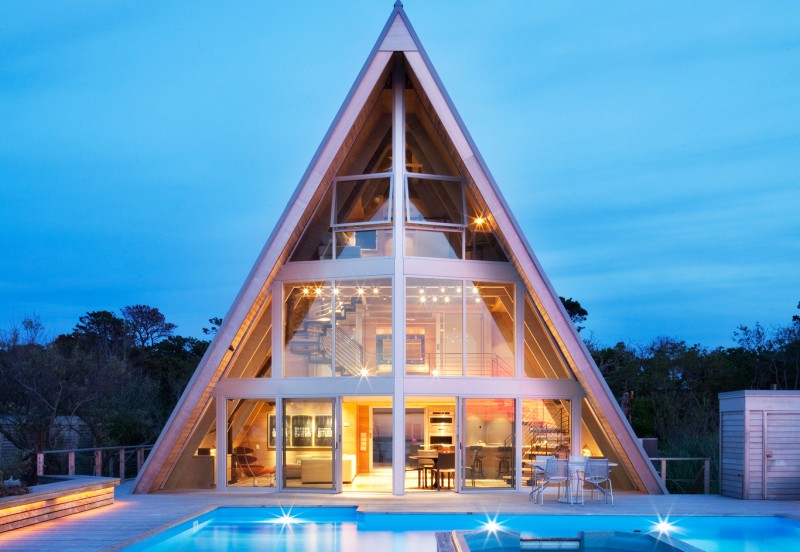
Photo of a rounded bathhouse - beautiful, comfortable and prestigious
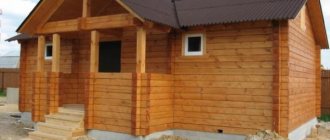
Wooden bathhouse
A DIY wooden sauna on a budget is a classic option. Wood is valued for such useful properties as:
- easy processing;
- environmental Safety;
- release of useful essential resins during heating;
- nice appearance.
It should be remembered that it is necessary to build frame walls and/or a log house for a bathhouse only from high quality materials. Logs or beams must be well dried and smooth. Otherwise, with natural shrinkage, the structure will inevitably move.

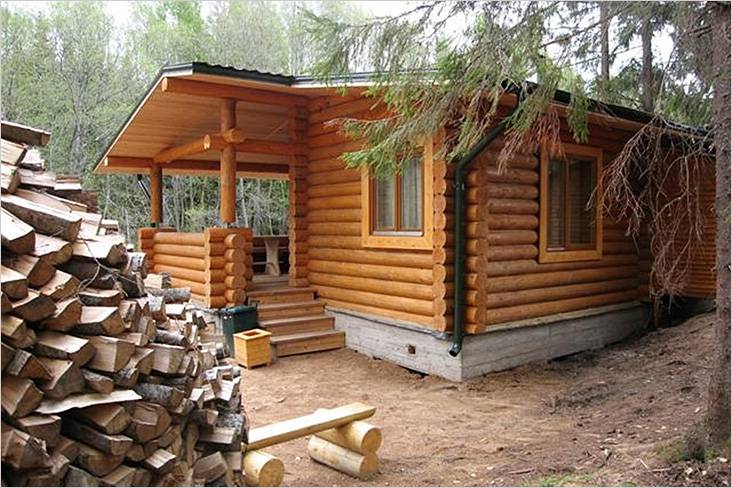
Wooden sauna
The construction of a wooden frame will require a lot of labor. You won't be able to do this alone. An assistant is definitely needed, especially when laying the upper and lower crowns.
For a wooden building you will definitely need:
- fasteners;
- moisture-proof treatment of the material;
- fire-bioprotective impregnation;
- fire separation;
- material for fire-retardant flooring on the floor in front of the firebox and other surfaces.
To make building a bathhouse with your own hands cheaper, you can use recycled material for construction: timber and/or logs after dismantling other structures. The main thing is that the wood is in good condition. Minor flaws need to be corrected. Good savings will be achieved by eliminating the heating system and thermal protection. This is possible when we build a bathhouse only for seasonal use.
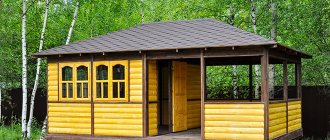
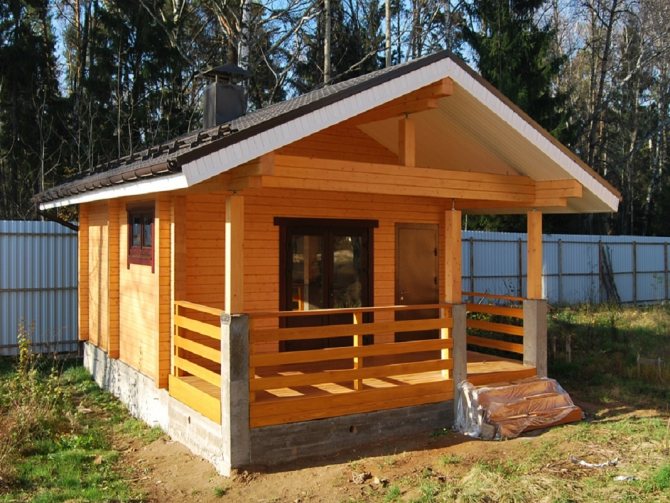
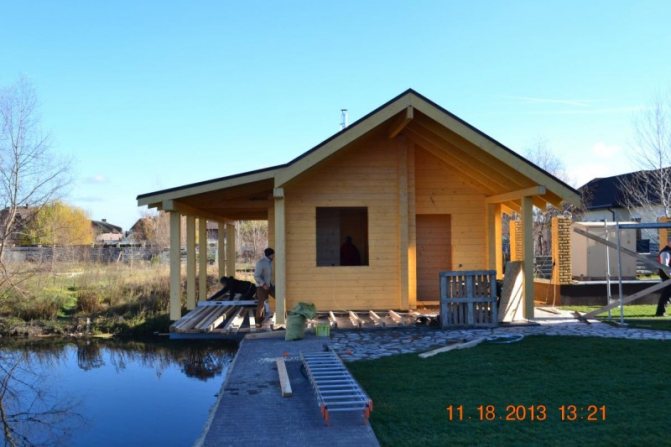
Construction of a budget bathhouse at the dacha using frame technology
Since mini-baths are lightweight, you can choose a lightweight foundation for them. Columnar type or screw piles are quite suitable.
Choosing a location for the construction of a bathhouse and the type of foundation are closely interrelated tasks. The foundation must be suitable for the soil of the site on which construction is planned.
For soft soil, a strip foundation is preferable. A trench is dug for it and alternately filled with layers of sand and crushed stone. Then you need to compact the foundation and fix the reinforcing mesh on top. The next stage is pouring cement mortar. It is important not to forget about the need for waterproofing. For this you can use sheets of roofing felt.
Wall insulation
Foam plastic is well suited for insulating a building. Vapor barrier materials are also required.
For the construction of baths, any raw material is used: bricks (for example, foam blocks), boards, timber. Frame technology is considered the easiest. It is built in a matter of days. For its construction, you need beams measuring 5x5 cm, boards 2.5 cm thick, waterproofing film or foil, and thermal insulation material.

First, the frame is assembled in accordance with the parameters established in the project. To connect its individual parts, anchors and screws of different sizes are used. Insulating materials are placed on top. Mineral wool and expanded clay are used as insulation. You can also use sawdust. Bitumen or polymer mastics are suitable for waterproofing.
Roof
To cover the roof of a mini-bath, corrugated sheeting, slate or metal tiles are used. First of all, the rafter system is installed, and then the roofing material is fixed to it using self-tapping screws. During the construction of the roof, it is necessary to leave an opening for the chimney.
Mini-bath ceiling
When building a frame structure, the ceiling surface should be given no less attention than the walls. It is recommended to use the same insulating materials for the ceiling as for the walls.
The water supply can be made homemade. To do this, you need two 50 liter tanks, a hose and a pipe with a mixer. The hot water tank is located 0.5 m lower than for cold water. Both containers are connected to each other using a hose. One end of it is fixed at the bottom of the cold water tank, and the other at the top of the hot water tank. The containers are connected by a pipe to the mixer.
The drain problem requires a solution regardless of the size of the room. Drainage is a mandatory stage of the work process during the construction of premises of this kind. A drainage system is required to drain the water. The bathhouse is not a frequently visited room, therefore the water consumption in it is insignificant. Installing a drainage system will not require large financial costs; it is easy to operate and maintain.
It is also necessary to install a pit to collect water and a water seal to protect against odors. For a drainage well, building materials such as crushed stone, gravel, sand and expanded clay are usually used. This raw material is a kind of filter. Water will flow into the soil purified from various contaminants.
It is advisable to use a septic tank to drain the water in the bathhouse. Thanks to its device, it will be possible to simultaneously use water in the sink, kitchen and bathroom. However, this requires considerable financial costs. Expenses are justified only if the owners live on the site all year round.
A septic tank is a system consisting of three wells, each of which has its own specific functions. The first purifies water due to its fermentation. In the second well, it is filtered from various particles with a specific odor. In the third, the water goes through the final stage of purification. Afterwards it falls into the ground.
You can use a stove or heating elements to heat water. In the first case, you will need to install the device, and then install a U-shaped metal pipe at its hottest point. Its feeding end should be on the body, and its exiting end should be 5 cm higher. If heating elements are used for heating, they are installed under the cold water tank and connected to the supply system with hoses and pipes.
Finishing a mini-bath
Small baths, just like rooms with a large area, require external and internal decoration. The inside is sheathed with boards or clapboard. For the external finishing of the frame structure, a block house, board or OSB is used.
We invite you to read: Installing a stove in a bathhouse step-by-step instructions
Mini-baths are in no way inferior to spacious rooms except for their size; they also require windows and doors. Openings for them are made in accordance with the developed project.
A mini-bath is an excellent option for people who do not have enough free space or funds to build a large room. The compactness of the design does not in any way affect its functionality. And you can build a small bathhouse with your own hands quickly and easily, following the recommendations of experts and established rules.
On a small site, it is better to build a bathhouse near existing buildings - a residential building, a summer kitchen, a sanitary unit. This option has many advantages, since it allows not only to effectively connect the usable area of various buildings, but also to significantly save on construction and finishing materials.
When building a bathhouse, it is necessary to take into account the following basic recommendations:
- The bathhouse should be located at a safe distance from any bodies of water to avoid possible flooding of the premises.
- The distance of the building from the hydraulic structure should be 15 meters, from neighboring areas - 5 meters.
- It is better to locate the bathhouse in the backyard or south side of the site.
- You should not build a building near a road, field or garden.
- When combining a bathhouse with residential buildings, all fire safety rules must be observed.
- When developing the project, the competent organization of ventilation and wastewater systems, as well as the safe arrangement of steam and heat insulation protection, are taken into account.
- Preparing the site for construction.
- Construction of the foundation.
- Tying a wooden frame.
- External wall cladding.
- Thermal insulation.
- Arrangement of communications.
- Installation of heating equipment and furniture.
At the initial stage, it is necessary to prepare the site for construction. The area is cleared of dirt and vegetation and leveled. Next, the foundation for the bathhouse is arranged.
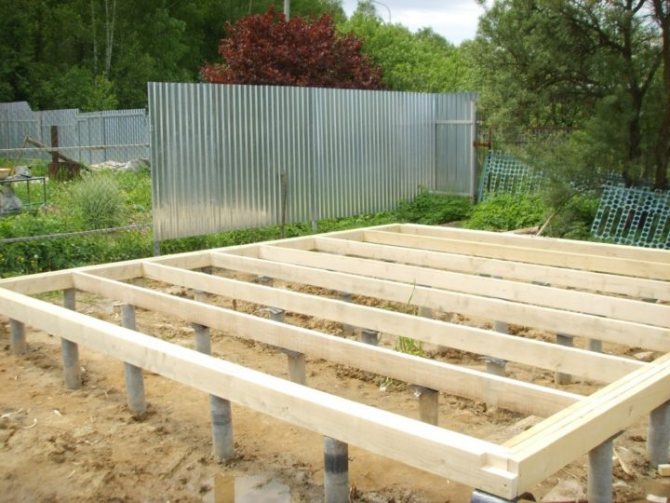
A cheap option for a foundation for a frame bath is a columnar one; it is strong and durable. It is recommended to use asbestos cement pipes as supports.
The required number of recesses are prepared for the pipes around the perimeter and at the junctions of the walls.
The installation step of the supports is selected taking into account the type of soil and the maximum load exerted on the foundation.
Shrinkage of the supports is carried out to a depth of up to 150 cm, while a drainage (15 cm) cushion based on sand and fine crushed stone is first poured into the bottom of the pit.
The pipes are installed in a vertical position, with fittings placed in each. The cavity of the pipes is concreted, the area around each pipe is also filled with mortar.
After the concrete has hardened, a wooden or metal grillage under the frame is installed on each support.
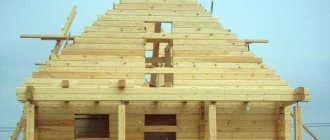
The frame for a budget wooden bath is made of timber 15x15 cm in size, dried and treated with moisture-proofing compounds. The initial crown is laid on the waterproofed base with alignment around the perimeter. Laying method - in the paw.
The walls are erected to the required height with the organization of door and window openings. The crowns are fixed to each other using wooden dowels. The beams are insulated with jute fiber or tow.
On the upper crown, the rafters are fixed to metal brackets, taking into account the configuration of the future roof. For a single-pitched roof, the rafters are fixed with external and internal supports; for a gable roof, the rafters are mounted at the bottom to the load-bearing walls, and at the top they are brought together in the form of a roof ridge.
Next, a lath is installed for installing steam, heat and waterproofing protection. Finally, the roofing material is installed.
Even a simple and compact bathhouse needs high-quality thermal insulation and external cladding. For the frame structure, you can use available and cheap materials - OSB and CSP (cement-bonded particle boards), moisture-resistant plywood and boards.
The sheathing is mounted on the finished frame using self-tapping screws, and the joints are filled with foam or sealant.
Reliable thermal insulation will provide additional protection for the wooden structure from increased moisture and temperature changes. Mineral and ecological wool, polystyrene foam sheets, reed boards and jute can be used as a heat insulator.
Thermal insulation materials are installed in the free space between the inner and outer cladding, preventing the formation of cracks that could lead to heat loss.
A vapor barrier layer made of glassine or polyethylene film is mounted on the insulation.
At this stage, all main communications are laid - water supply (cold and hot), sewage and ventilation systems, electrical wiring.
The laying of the sewage system - the construction of a drainage well, a septic tank or a tie-in into the central sewer system - must be provided for at the stage of constructing the foundation.
Next, the bath floor is installed - concrete or wooden. An additional decorative cladding – porcelain stoneware or tiles – is additionally laid on the concrete base.
It is better to make a wooden base a leaky structure with a small hole for drainage. The floor is arranged with a minimum slope of 5 degrees.
Brick bath
With a little experience, brickwork is easy and inexpensive to do yourself. A bathhouse can be built of any shape (even irregular) or size. Masonry is usually done in 1 row. When calculating the required amount of brick, you must add 10-15% in case of damage to the material.
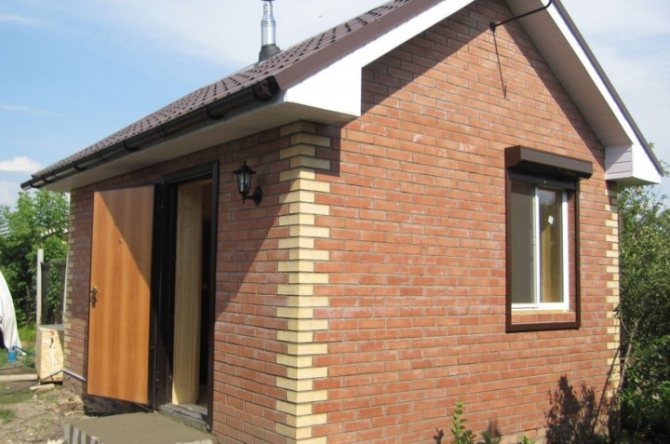
Brick bathhouse
Additionally you will need:
- dry mixture or components for solution;
- jointing for processing seams;
- material for exterior and interior decoration.
Bricks of different textures, colors or sizes will give an interesting appearance to the entire structure. You can use used but well-preserved material. Use glass blocks instead of windows. This will save money.
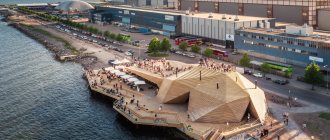
Original author's ideas
For those who have not yet decided on a timber bathhouse model, here is a selection of the most original options:
- Bathhouse with terrace.
- Unusual shaped baths. One of the most famous and original models is a steam room in the shape of a horizontal barrel.
Non-standard sizes and shapes, as well as interesting approaches to design, are great for construction when there is a shortage of free space.
Photos of finished baths can be found on landscape design websites, where it is easy to choose a unique option for every taste.

Building blocks
When choosing what to build a bathhouse from, you should think about foam and gas blocks. This is a relatively inexpensive modern material. The construction of walls can be done very quickly and inexpensively. The shape and dimensions of the structure are selected arbitrarily.
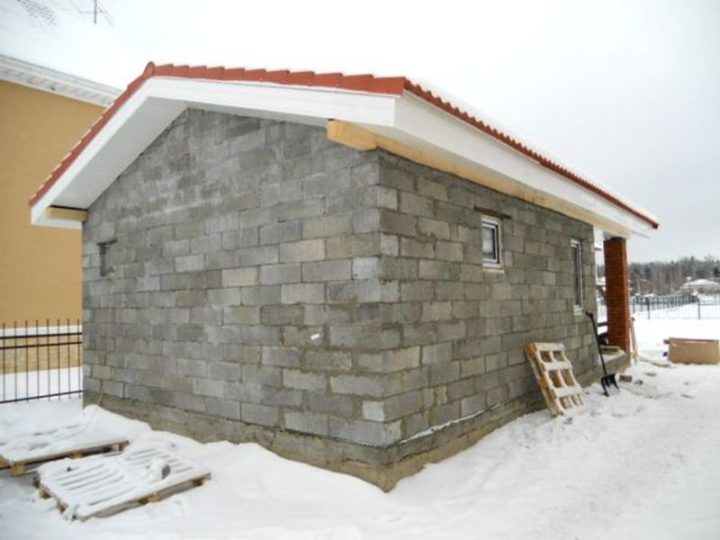
Bathhouse made of foam blocks
To work you will additionally need:
- fittings (used can be used);
- special glue or mortar made of sand and cement;
- finishing material.
Using blocks is a good way to build a sauna cheaply. Reinforcement increases the strength of the structure several times. A bathhouse built from blocks will last a long time.
Approximate design of a bathhouse
For a small bath, an area of 4 m² is sufficient. The internal space of such a building is divided into 2 main rooms - a steam room and a dressing room. If you try, you can equip a small shower stall.
The optimal size for a budget bath is 5x6 m. In such a building, you can easily equip a steam room, a shower room, a full-fledged relaxation room and a small wardrobe.
It is necessary to equip the bathhouse with an effective ventilation system, especially if there are glass blocks instead of windows. Electrical wiring must be insulated to prevent accidental ingress of moisture.
If it is not possible to provide water supply and sewerage, you can install an outdoor standpipe near the bathhouse. To remove used water, install a drainage system.
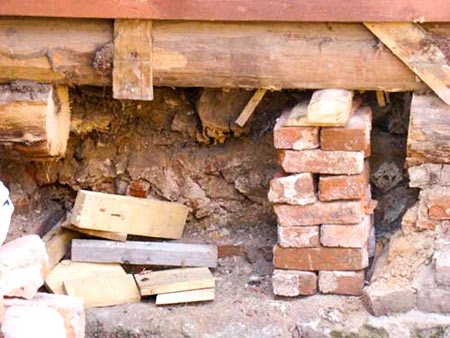
Repairing the floor
When inspecting the floor, we pay attention to the condition of the beams, lower crown, joists and boards. If an unpleasant odor emanates from the underground, then the wood has begun to rot, although a visual inspection does not reveal any damage. You can use an awl to check the integrity of the logs; they can be easily pierced if the tree has rotted at the core. Joists quickly begin to rot if waterproofing has not been installed.

Scheme for repairing damaged areas of the floor in the bathhouse
The process of rotting logs is especially dangerous for bathhouses made of logs and frame houses, since the damage can spread to the walls. If there is no need to completely change the coating, you can make partial repairs. Damaged areas are cut out, and new ones are installed in their place. The logs are fastened using aluminum plates and self-tapping screws. Then nail and mount new boards and the floor is completely dismantled and leveled with a plane.
If rot has damaged the beams, subfloor, joists and crowns, then you will have to replace it all:
- the floor is completely dismantled;
- logs and beams are removed;
- the two lower crowns are cut out in parts and replaced with a new beam;
- install new beams onto which to attach the logs;
- install flooring from new boards - subfloor;
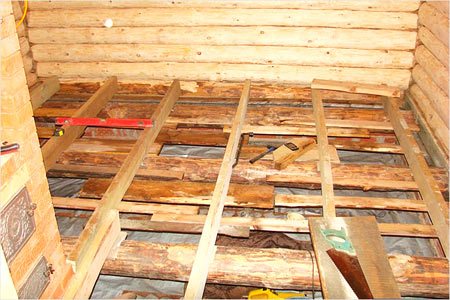
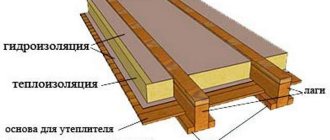
The process of laying a subfloor in a bathhouse - waterproofing and insulation are installed: 15 cm polystyrene foam for the dressing room, polystyrene foam for the washing compartment.
Advice! If a visual inspection does not reveal any damage, just hit the boards with a hammer; good material will have a clear sound; the joists are also checked. A dull sound indicates the presence of rot.
We suggest you familiarize yourself with: Filling the blind area with your own hands
Selection, site preparation and foundation
Before building a bathhouse, you need to choose a location. It is better to choose a site for building a bathhouse near a residential building. The dimensions of the construction site should be slightly larger than the expected dimensions of the finished structure.
The area must be cleared of debris and random objects. Uproot stumps, remove unnecessary plantings or move them to another place. Remove the top layer of soil, also removing growing grass. Level the prepared area and compact it carefully. Next, you need to make markings on the site.
Columnar foundation
There is no need to make a massive foundation for a small bathhouse. The tape or columnar version is much cheaper and easier to implement. The foundation for the bathhouse is made with your own hands, shallowly buried. Therefore, there is no need to dig a deep trench for the tape or recesses for the pillars.
The technology in both options is approximately the same. First, a cushion of crushed stone and sand is poured. It needs to be leveled, moistened and compacted.
A formwork made of thick boards and other available materials is built under the concrete strip. You can use used wood. The strip foundation is poured from a ready-made dry mixture, diluted according to the instructions. The pillars are laid out from bricks set in high-quality mortar.
The finished tape or the tops of the pillars must be covered with a roll of waterproofing material. Typically, roofing felt is used for this. It will be reliable and cheap.
Under a columnar or pile foundation, you need to make markings taking into account the location of not only the external walls, but also the internal partitions. The pillars are laid out of brick using conventional technology. Piles are made from asbestos pipe covered with a frame of reinforcement and/or wood. Concrete is poured around it.
Photo examples of ready-made baths in the country
Did you know that before building a bathhouse it is important to orient it to the cardinal directions?
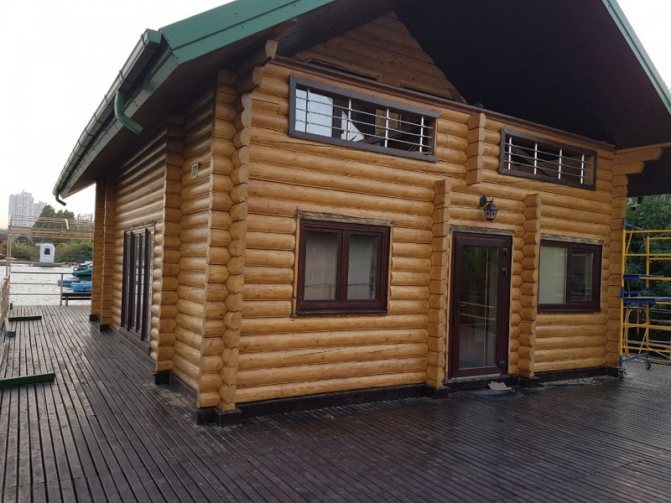
Usually the door to the bathhouse is located on the south side - in winter the snow melts there earlier and you don’t have to clear it often. But it is better to place the windows in the west - in the evening there will be more light in them, because we usually go to the bathhouse in the evenings. The bathhouse is built from wood, brick, natural stone or concrete structures. The advantage of wooden baths is that they retain heat excellently and are built from environmentally friendly material - spruce or pine. For a bathhouse made of wooden beams, no additional ventilation is required. Wood “breathes” perfectly; just install a ventilation grill.
Winter wood is used to build a log bathhouse - it is denser and less susceptible to rotting. Do not rush to start a bathhouse when the log house is ready - it must sit for a year, and only then can you begin finishing work. At the initial stage of construction, it is necessary to resolve the issue of choosing a place for the type of bathhouse.
It can be erected as a free-standing structure or attached to a house or other residential building. Many people believe that connecting a bathhouse and a house can add dampness and an unpleasant odor to the house. But, if the bathhouse has proper waterproofing, ventilation and sewerage, then the above-mentioned problems should not exist.
On the other hand, a bathhouse made as a separate building is more fireproof, and a small veranda near the bathhouse can completely replace a garden gazebo. A very important point when building a bathhouse is laying the foundation. The foundation can be strip, columnar or pile. For building a bathhouse with your own hands, a columnar foundation is considered the best, which consists of concrete piles set to a depth of about 1.5 meters. Such a foundation is made of stone, brick or concrete.
To decorate the inside of a bathhouse, it is better to use material from such tree species as poplar, alder or aspen, as they have high moisture resistance and low thermal conductivity. We also recommend making floors from wood, since it heats up slightly. But wood has a tendency to rot, so it is better to make a collapsible floor and ventilate it and dry it in the sun at least once a year.
The shelves in the bathhouse may not be very large. The main thing is that you can sit on them freely or lie comfortably. The size of the steam room should be about 6 square meters. m. - so you don’t need a lot of firewood to warm it up, and it’s not cramped. In a proper Russian bath, the air temperature is about 60 degrees and the humidity is 40%. Let's compare it to a Finnish sauna, where the temperature is 90 degrees and humidity is 10%.
To build a sauna with your own hands, an important point is the choice of a stove for heating the steam room. The “lightness” of steam depends on the type of oven. A brick oven takes longer to heat up and needs to sit for about an hour - but the steam is perfect and light. An iron stove heats up quickly and does not pose a risk of burning, but the steam is harsher.
The stove must be installed on a foundation. Under no circumstances should it touch the walls of the bathhouse. Take into account the fact that the stove must be positioned so that all rooms of the bathhouse are heated at once. Today, stoves with an elongated firebox are very popular. Such stoves allow you to heat in a steam room from the dressing room. A good stove distributes heat evenly throughout the entire bath.
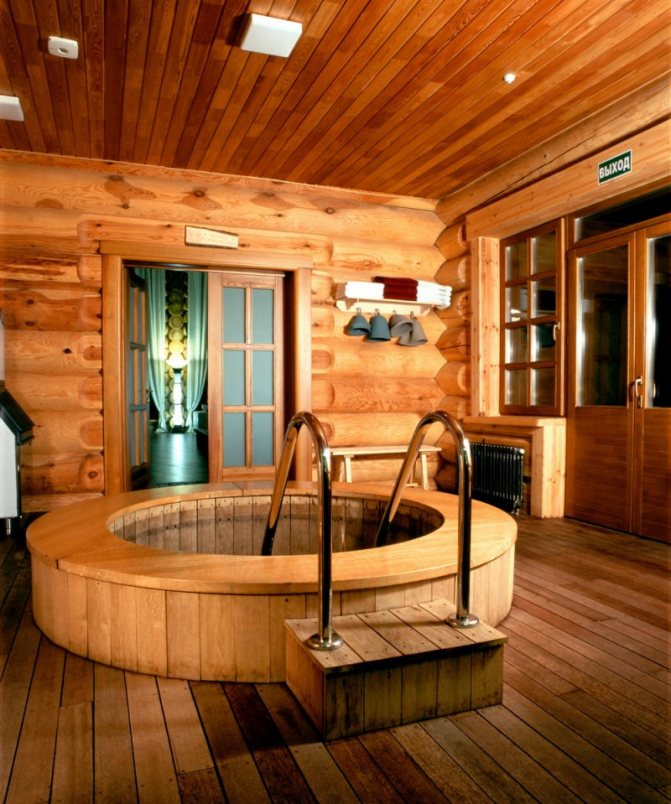
The layout of the bathhouse includes three main rooms: a steam room, a shower room and a relaxation room. In addition to these rooms, the bathhouse may include a small outdoor pool, because a bathhouse is not only steam and heat, but also hardening in the fresh air. After all, after a steam room, you need to close the pores - and this is best done with cold water from an external reservoir.
If you do not have the opportunity to build a bathhouse from logs, you can choose another construction option from the so-called “wooden bricks.” During this construction, wooden blocks are laid in cement mortar like bricks.
This way you will not only save on building a bathhouse, but also get a more fireproof option. Such a bathhouse looks quite decent inside, and, in addition, in this way you can easily build a tent bathhouse that is so rare.
Bathhouse layout 5.
After a day full of agricultural chores, any person needs proper rest; this is the only way he can restore his strength. Some people are afraid of the cost of ready-made baths, but it can be reduced if you do all the work yourself. There is nothing complicated about this, and this article discusses this process in detail. We build a bathhouse with our own hands at the dacha correctly and according to these instructions.
https://www.youtube.com/watch?v=Mvp7o6Q7AHo
Nowadays, you can choose a bathhouse to suit any budget and any size of the site; there are such baths as:
- from timber;
- using frame construction methods;
- from large barrels - a kind of mini-sauna in the country with your own hands;
In the photo there is a bathhouse in the form of a barrel
- mobile (mounted on a car trailer);
- inflatables are the choice of lazy summer residents.
Despite the abundance of proposals, country bathhouses made of timber are especially popular - after all, the classics do not age. Other options can be considered a necessary measure when there is no time or not enough money to build a familiar bathhouse.
We suggest you read: How to treat a bathhouse from mold and mildew
A bathhouse is considered small if the total usable area inside the building does not exceed 20 square meters. Usually, if you want to build a small bathhouse on your site, then the minimum comfortable dimensions are taken to be 6x4 meters, which is 24 m². In such an area it is quite possible to fit all three bath rooms - a steam room, a washing room and a relaxation room. In small baths, as a rule, there is no rest room, and instead it only manages to accommodate a small dressing room.
Not everyone has the desire or ability to invest a lot of money in the construction of a bathhouse. And in most parts of our country, sometimes it’s simply necessary to warm up. The only way out is to build a sauna inexpensively, with your own hands. There are a sufficient number of building materials and technologies that can be called budget.
If we talk about the construction of full-fledged, albeit small, but free-standing baths, then frame and monolithic are considered the most budget-friendly technologies. Cheap baths are often made on a wooden frame, lined with plywood, OSB, boards - whoever has what. Insulation is placed inside between the two skins.
One of the options for a frame structure is with board cladding
In monolithic construction, the most popular for the construction of baths is arbolite - a mixture of cement and sawdust. Sawdust can be completely free or cost very little. Little cement is required in wood concrete, so this type of construction is unlikely to hit your pocket hard. Removable formwork is placed around the perimeter of the building, the mixture is loaded into it, and compacted.
Sawdust concrete or wood concrete is a warm, natural material that consists of sawdust, sand, cement and water
Polystyrene concrete (granulated foam plastic mixed with cement and water) is not much more expensive, but not everyone likes the use of “chemistry” - foam plastic - in the construction of a bathhouse. However, this material itself makes it possible to obtain a cheap and lightweight building, which, if properly finished, will only delight the owners.
All three technologies provide a combination of low price and good thermal characteristics, that is, heating such buildings requires little fuel, which in baths is the main indicator of efficiency.
This is what polystyrene concrete looks like up close
There are regions where wood is still the cheapest material. It might be cheaper to put a chopped sauna in them. From round timber or from timber - this is optional. The advantage of this solution is that it is a natural material (although it must be impregnated with chemicals to preserve its appearance and protect against diseases and insects).
But chopped saunas have their drawbacks - you can start steaming no earlier than a year after the walls are built and the roof is installed. We must wait until the main shrinkage has passed and only then begin insulation and finishing work. The second disadvantage is that the protective coating must be regularly updated, otherwise the building will become gray and unsightly. But the wooden baths themselves are very good with their special atmosphere.
When designing baths, you should take into account many factors - from location to area. Financial opportunities also play a significant role; if the bathhouse is planned primarily as a place for family recreation, then it is not necessary to build a palace.
For full functioning, 2-3 rooms are enough - a dressing room, a steam room and a washing room. The last two rooms are sometimes combined into one to save space.
Layout of a small bathhouse
In an effort to reduce the space occupied by a bathhouse, you should not be too zealous - there are certain standards. So, two people should fit freely in the steam room, taking into account the fact that they use brooms. If it is very crowded, then you will hardly be able to enjoy going to the bathhouse.
Small log sauna
The layout of a small bathhouse begins with the choice of material for its construction - it can be a log, timber, brick or foam blocks. Wooden construction is the most preferable, as it allows you to breathe easily and freely, and naturally maintains a balance between humidity and high air temperature.
What you should especially pay attention to:
- Foundation - the weight of the structure does not require the construction of a powerful foundation; the best option is a strip or support-pile foundation. There will be no need to carry out significant excavation work for them;
- The convenient arrangement of the rooms inside will facilitate both the process of visiting the bathhouse and the preparation for it;
- It is advisable to install the stove in the dressing room so that it can be lit without interfering with others going into the steam room or washing room. The firebox must be protected from the possibility of accidental fire;
- An important point is ventilation. It is carried out through windows and doors. It is better to give preference to wooden window structures - this is an environmentally friendly material that emits a pleasant aroma. In addition, it is a source of natural air exchange;
- Small baths are built according to the same rules as their large-scale counterparts - the shelves are located along a blank wall, the door threshold is high, and the frame is low. This is important so that less steam comes out when opening;
- There should be no locks, and all doors in the bathhouse open outward.
How to prepare mortar for masonry?
In order for the brickwork to be strong and neat, it is necessary to mix the mortar correctly. To prepare it you will need:
- large tank (for example, an old bathtub);
- measuring container (bucket);
- sand sieve;
- concrete mixer or construction mixer.
The proportions are standard, but they must be observed with special care:
- cement grade M 400 - 1 part;
- fine-grained river sand (sifted) - 2 parts;
- dishwashing gel - 50-100 ml per 3 buckets of dry mixture.
Water and liquid detergent are poured into the reservoir. Then the bulk material is added little by little with constant stirring. Cooking time - no more than 5 minutes. A properly prepared solution has the consistency of thick sour cream. After running your finger across the surface, a clear mark remains that does not blur.
The base for the bathhouse is laid out of brick on top of the foundation. The work begins with the formation of the corners of the building. The brick is placed along the outer edge of the concrete. The width of the masonry is 1.5 bricks. The solution is applied and leveled with a trowel. The laid elements are tamped and leveled. Excess solution is removed with a trowel. The outer row of bricks is laid out with a spoon facing outwards. The inner row is placed with a poke towards the inner space. For control, a plumb line, level and/or mooring thread are used.
Roof repair
Roof repairs are carried out based on the covering material:
- Slate. If the slate cracks, the cracks can be sealed with a mixture prepared independently:
- Cement – 1/3;
- PVA glue – 1 part;
- Water – 1 part.
Asbestos – 1/3;
The slate needs to be cleaned and covered with primer. Once the soil has dried, you can begin to seal the cracks. The mixture is applied two millimeters thick in several stages. In this case, each layer must dry well before applying the next one;
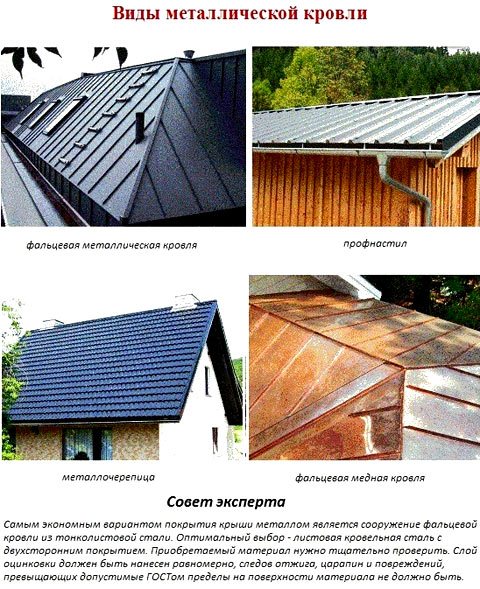
The metal roof must be treated with bitumen mastic and two layers of roofing felt laid;
We suggest you read: Which bathhouse is better to build at the dacha
Floor and walls of the structure
The floor coverings begin to be laid on top of the 2nd row of bricks. They are made from a beam of a suitable cross-section. To do this, when laying out the base, it is necessary to arrange special nests. Beams need to be laid on edge. The span (step) width is from 50 to 100 cm, depending on the section.
All wooden elements are pre-treated with special compounds to protect against corrosion, moisture, fungus and premature destruction. The ends of the beams must be wrapped with roofing felt.
The layout is carried out in strict compliance with the scheme. On top of the floors, 2 more brick rows are formed. The finished base needs to be covered with roofing felt.
Laying walls made of bricks or blocks starts from the corner. The technology used is similar. The solution is mixed as described above. For the initial row of masonry, it is better to use cement grade M 600. It gives minimal shrinkage. When laying brick or block walls, it is necessary to form door and/or window openings according to preliminary drawings and markings.
The masonry of blocks must be reinforced with a corrugated rod of grade A 3 and a diameter of 8 mm. The elements are stacked parallel in 2 rows. To do this, you need grooves cut with a wall chaser and cleared of debris with a damp brush.
The rod is placed in the cut grooves for fitting. The connection of individual reinforcement elements should be located at a distance of 30 cm from the corners of the building. Then the rod needs to be pulled out and the grooves filled with a special adhesive compound, diluted according to the instructions. You need to drown the prepared reinforcement in the solution. Level and remove excess adhesive.
Elimination of defects in the design of the bathhouse
These elements include: walls, foundation, roof, ceiling, floor.
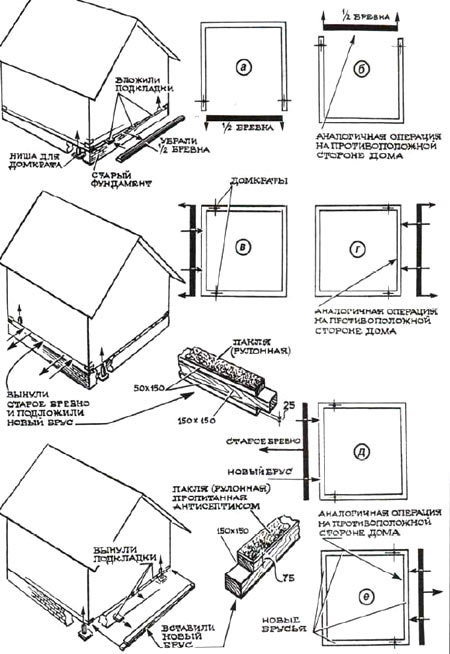
Scheme for replacing the foundation under a wooden bathhouse
How to carry out repair work correctly? We need to act according to plan.
Base repair
The foundation is subject to repair if:
- there is a strong distortion of the structure;
- cracks, especially if they are deep;
- the beginning of the destruction of load-bearing walls.
If during the inspection these signs were identified, then the first thing to do is to install a storm drainage system, which will help drain rain and groundwater from the base. Once the cause of the subsidence has been eliminated, you can begin to repair the base of the bathhouse, it can be done like this:
- Prepare the building for lifting; for this you need to completely vacate the room; it is worth disassembling the sauna stove if it is made of brick;
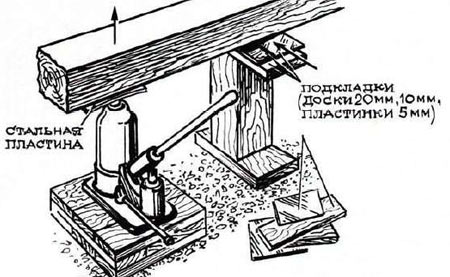
- Prepare jacks, beams, boards, small blocks - all this will be useful for lifting. The bathhouse is not as large a structure as a house, but the work ahead is large and painstaking.
Drawing of raising a bathhouse to replace the foundation
The building must be raised gradually so as not to compromise the integrity of the structure.
How to raise a bathhouse
There are several ways to raise a bathhouse yourself:
- On the second crown from the ground on one wall, two holes are sawed at a distance of 20 centimeters from the corner, under the timber. They make the same ones on the opposite wall. A long beam is pushed into these holes, which will hold the entire structure. The area under the ends of the beam is cleared, on which a small sheet of plywood is laid to stabilize the jack. Place jacks under both ends of one beam and carefully begin lifting one side of the building. As soon as one side of the building is raised to a small height, you need to place previously prepared blocks under the beams, and do the same manipulations on the opposite side. You need to repeat the manipulations until the bathhouse is raised half a meter above the destroyed foundation.

- You can lift the bathhouse using only one jack. To do this, start lifting from one corner. It cannot be raised to a great height; the structure may change its geometry. Having raised one corner, we move to the other, moving from corner to corner and placing supports under them.
We suggest you read: How to decorate walls in a bathhouse
As soon as the bathhouse is raised to the desired height, you can proceed to the next stage - dismantling the old foundation.
Dismantling the foundation
If the base is severely damaged, it will have to be completely dismantled and the trench cleared. If there is strong subsidence of the old foundation, it is better to dig a trench 20-30 cm deep. If the foundation is partially damaged, then repair work can be carried out without completely dismantling the old foundation; it is enough to remove only the damaged area. You can also arrange a foundation corset around the perimeter of the old base with additional reinforcement of the base.
The process of dismantling the old bathhouse foundation
Preparing for pouring:
- A sand cushion is placed in a deep trench, which must be compacted well.
- Install foundation waterproofing.
- Make formwork from wooden panels or plywood.
- Install a frame made of reinforcement.
- To save concrete, you can lay coarse gravel at the bottom of the trench.
- Pour the concrete mixture.
As soon as the concrete hardens, you need to dismantle the formwork and treat the base with coating waterproofing. The foundation will be ready for use after three weeks, after which the structure can be lowered and repair work can continue. If the foundation has partially collapsed, then the formwork is installed only on the site of the damaged area that was dismantled. Partial pouring is no different from the usual one. If a decision is made to build a concrete corset, then the old foundation is not dismantled:
- It is necessary to dig an additional trench along the outer perimeter of the base.
- Arrange foundation formwork and reinforcement.
- Pour concrete.
Important! A trench needs to be dug 20 cm deeper than the old foundation, and a sand cushion must be built. It is better to use reinforcement with a cross-section of 16 mm. In this case, the width of the trench can reach up to 30 cm.
Frame bath
Before building a bathhouse on a frame, you need to stock up on good quality and dry timber. To form corners and intersections you will need reinforced material. The frame beams are installed vertically with a span width of approximately 1 m. Window and door openings are formed in parallel.
Horizontal frame elements are made from boards, bars or pieces of main timber. All wooden material is pre-treated with special compounds to protect against moisture, rot and microorganisms.
Fasteners should only be used of good quality, made of stainless steel. Otherwise, rust will not only ruin the appearance of the bathhouse, but over time it can destroy the entire structure.
Features of material selection
When purchasing material, you should consider the following characteristics:
- Timber harvesting season. Ideally, the material should be prepared in winter. This indicator may affect the quality of construction.
- Storage period before use. This characteristic has the same basis as the harvesting season. You can check this information with the seller of the materials.
- Appearance. You should definitely evaluate the condition of the workpieces: stains, dampness, and traces of pests may alert you. The quality of trimming and the degree of alignment of the cuts are also assessed.
- Type of raw material.
- Wood species. The best options for building a bathhouse are hardwoods. It is better not to use raw materials from pine needles due to the presence of various resins in the structure.
Assessing these parameters is mandatory, as it will help avoid possible problems during the construction process.
Log house for a bathhouse
The initial crown for the log house is formed from a massive heavy log. To increase thermal insulation, the material is laid with ring seals on the outside of the structure. The underside of the log should be flat. The crown is laid on a layer of roofing felt.
It is necessary to equip a moon groove along the entire length of the bars. This will ensure the durability of the structure and the tight fit of individual elements.
Before the final installation of each beam, it is necessary to carry out fitting. Defects can be corrected with a wood hacksaw, saw and axe.
To prevent the walls from moving horizontally, it is necessary to periodically hammer in wooden dowels (steps from 80 to 100 cm). Immersion depth - 2.5 crowns.
Additional dowels need to be installed near window and door openings with a deviation of 10 cm from the outer edge. The finished walls must be caulked, firmly driving the insulation between the structural elements.
Erection of the roof
A budget bathhouse can be made with a 1-pitched roof. It will be easy, cheap and fast. The main thing is to make the finishing (upper) crown of the walls raised from the facade side.
Roofing felt or bikrost is laid on bricks or blocks to insulate from moisture. Then a mauerlat of beams is installed. For fastening, bolts (anchors) and/or studs (walled up) are used. The sheathing is attached to the Mauerlat using corners.
The ceilings are covered with foil for vapor barrier. The ceiling is sewn on them. To insulate it, mineral wool coated with polyethylene is used.
A gable roof for a bathhouse will cost more and require more labor. However, if you make the ridge higher, you can create a cozy attic in the interior space, for example, for a relaxation room. Many owners build baths themselves and are satisfied with the result. You just need to try a little and everything will work out.