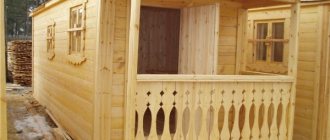
If you are setting up a bathhouse in your yard and deciding how to heat the bathhouse, you must remember that the stove can perform several functions. It is intended not only to produce steam in the steam room and heat water, but is also used for heating all rooms. If this is not enough, then other heating options can be provided.
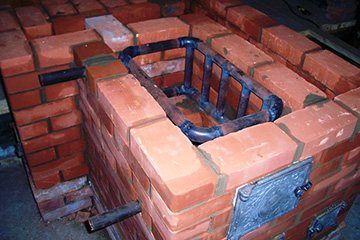
A good brick stove in a steam room can warm up all the rooms in the bathhouse.
>
What is a heat exchanger and why is it needed?
A heat exchanger for a sauna stove can be useful not only where people like a sauna, but also where a shower is installed. Today it is increasingly popular because it is convenient.
As already mentioned, water heated by the heat of the stove will supply hot water to the shower in the adjacent room.
Heat exchangers come in a variety of designs, but in general they are a system of pipes placed “in” or “on” a heating device.
Water circulates through the pipes.
Types of heat exchangers:
- Interior.
- External.
- Combined.
Internal - in this case, the pipes pass inside the heating furnace (coil, water jacket).
The external one is also called a remote tank - it is mounted on a pipe and is heated by hot flue gases (energy is consumed that would fly out “into the pipe”).
There may also be a mixed option, when a rather large tank on a pipe is also supplied with pipes passing through the firebox.
Circulation can be:
- Forced (with pump).
- Natural (hot water rises and is replaced by colder water).
Most often, natural circulation is done, since it is quite sufficient. The pump can be built in if:
- For some reason, the tank needs to be installed below the heat exchanger.
- In practice, it turned out that the pipes are of insufficient diameter, the water does not have time to circulate and begins to boil and make noise.
- Long pipeline length from boiler to shower.
You can connect a regular radiator to the heat exchanger and take it to an unheated room, for example, a locker room.
Basic principles for designing a ventilation system in a bathhouse
Bathhouse ventilation has two main tasks: the flow of fresh, clean air while people are in the bathhouse and the drying of all rooms after use. At the same time, the ventilation system in this room should not:
- violate the temperature regime (due to the arrival of fresh air masses);
- separate warm and cold air flows (warm air usually rises upward, and cold air sinks closer to the floor);
- remove fresh unexhausted air, leading to its shortage (which, in turn, will contribute to the appearance of unpleasant odors, mold, and fungi).
To organize an optimal ventilation system in the steam room of a Russian bath, you need to adhere to the following principles:
To allow fresh air to flow in, the openings should be located at the bottom of the premises. If the design of the bathhouse allows, then it is better to make the ventilation holes as close to the stove as possible - this will contribute to the rapid heating of cold air masses.
Exhaust openings should be located on the opposite wall from the supply openings. You can make several exhaust openings at different heights in one room to ensure air flow control.
The draft directly depends on the location of the exhaust hole: the higher it is, the stronger the draft will be. If, due to the characteristics of the room, it is not possible to build a hood at the maximum height, then it is necessary to use a ventilation pipe.
In order to control the movement of air masses, special dampers (doors, valves) must be equipped at the exhaust openings, which must be periodically closed and opened. For example, when the bathhouse is not used for a long time, the ventilation grilles can be closed or a small hole left in them.
Ventilation in the bathhouse in the washing room must include ventilation hoods that can remove excess moisture.
The renewal of air masses in the steam room should occur every 2-3 hours.
You can receive a free draft design and cost of ventilation for your home
Go
How to calculate the area of the heat exchanger?
If an industrial boiler is installed in the bathhouse, then it is enough to simply calculate the power of the heat exchanger - it should not exceed 10% of the power of the heating device.
With a regular stove, everything is more complicated and you won’t be able to calculate accurately. There are too many factors to consider:
- Room dimensions.
- How much water is required?
- For how long and how much does it need to be heated?
- Tube diameter.
- Will it be a shower or heating.
- Boiler power, etc.
It is recommended that the length of pipes does not exceed 3 meters. If you make a tank that is too large for a small coil, the water will not heat up. If it’s the other way around, it will boil quickly. 1 dm3 of tank volume is 1 liter of water. On average, a tank of 30-60 liters is suitable for a family and for a small stove.
The thickness of the pipes should be no more than an inch - water will not move quickly enough through pipes that are too thick.
Features of natural ventilation in a Russian bath
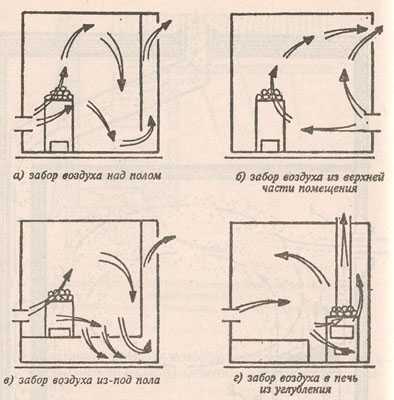
Natural ventilation in the steam room of the bath is achieved through small openings in the wall. So, to supply clean air, at a distance of approximately 50 cm from the stove, you need to make a hole with a retractable damper, with which you can regulate the amount of fresh air flow. This hole should be located slightly below the middle of the wall - this way you can achieve the fastest possible heating of the air. If the opening is too low, the draft will be insufficient.
Natural ventilation is also achieved by placing two openings on opposite walls. Moreover, if the air exhaust is forced, then the supply opening should be slightly higher than the exhaust opening.
The picture below shows possible ways to organize natural ventilation in a steam bath.
.
Also, natural ventilation in a Russian steam bath can be achieved due to wind pressure: the stronger the wind on the windward side, the greater the rarefaction of air on the windless side. So, through cracks, gaps and special openings, clean air enters the room and displaces warm air to the windless wall on which the exhaust ventilation holes are located. But this type of ventilation is not always relevant, because there is also windless weather. In addition, strong winds can cause drafts.
Making a heat exchanger for a bathhouse with your own hands
- A coil is made. A section of a suitable pipe is bent so that it fits inside the furnace (in a spiral, in a zigzag - whichever is more convenient in a particular case). An excellent material would be copper or stainless steel. The budget option is regular steel.
- Two holes are made in the oven according to the location of the ends of the coil (the hot water outlet should be higher).
- The pipes going to the tank are welded. There should be no counter-slope, i.e. The water container should not be lower than the coil (with the exception of a pump).
- At the lowest point, a tap is installed on the tee to drain water.
- A container of the required volume is welded. You can also use ready-made tanks, for example, from washing machines, broken boilers, etc.
- We determine the location of the tank by where the pipes go. We check and attach it to the wall.
- Pipes from the heat exchanger to the tank are welded. It is also advisable to make the hot water inlet higher than the cold water outlet.
- If you need to connect the tank to the shower, then another hole is made and a pipe or hose is routed through the mixer.
On all threaded connections (taps and couplings), it is recommended to use FUM tape or other heat-resistant sealant.
All seams must be perfect - a small gap and a leak will ruin the entire bath structure. You can check the tightness of the connections even before starting operation by filling the system with compressed air and checking the pressure with a pressure gauge.
It is better to exit the tank for a shower not at the lowest point (otherwise all the sediment that inevitably accumulates in the container will drain), but not too high so that a large amount of liquid does not remain.
To increase the efficiency of homemade stoves, as well as in indirect heating boilers, a heat exchanger is used. Do-it-yourself heat exchanger: how it works, why and how you can make this device, read the article.
We will consider the types of fireplace stoves for summer cottages according to shape, material and fuel types here.
Perhaps the following topic will interest you: https://microklimat.pro/otopitelnoe-oborudovanie/kotly/dlya-bani-svoimi-rukami.html. Step-by-step instructions for making a boiler for a sauna with your own hands.
Types of heating
The main types of heating are:
- oven;
- electrical;
- gas;
- liquid fuel;
- mixed.
In areas where people live permanently, heating is often carried out from the house to the bathhouse in such a way that it is warm all the time and does not freeze in frosty weather. This is very convenient if gas is supplied to the house.
When choosing one heating model or another, you must proceed from its availability to you and the cost of the fuel used in each option.
The main points can be noted:
- Heating with wood is quite troublesome, but it follows tradition. The crackling of wood in the stove puts a person in a great mood and puts him in the mood for relaxation;
- using electricity to heat a bathhouse is very convenient, you can heat floors, you can heat water, you can come up with a lot of things, but all this is quite expensive;
- the use of liquid fuel stoves, for example, with diesel fuel, is very dangerous and is not recommended for the private sector;
- natural gas is an ideal solution to the problem, but it is not always possible, since it is not supplied everywhere, and the use of a bottled option is not always effective.
Gas
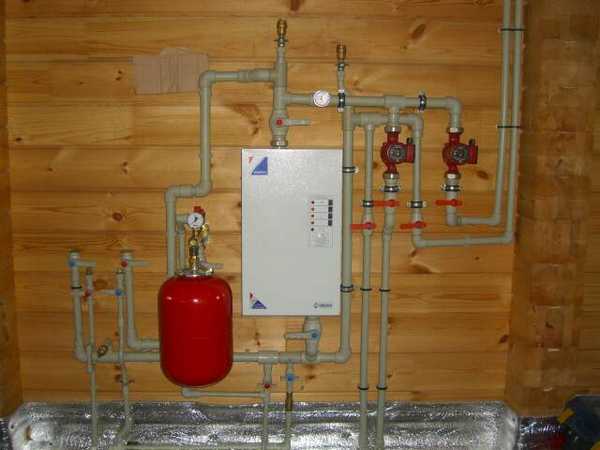
If gas is supplied to the site, then the bathhouse heating system can be built with its help.
Gas systems are economical, efficient and allow you to create a constant comfortable environment in the room. There is no need to think about hot water for washing, since it is also heated by gas.
To install gas heating in a bathhouse separately or together with home heating, a competent project is required. The initial costs of designing and installing the system will be offset by convenience during operation.
When using such a system, you must follow safety rules. Instructions for using the equipment should always be at hand. And it is advisable to study it thoroughly.
Important. A bathhouse that is heated with gas must be equipped with an automatic system that stops the gas supply if the flame goes out unexpectedly.
Pechnoe
Wood burning stove made of metal.
The most common option for obtaining heat is the installation of sauna heaters. The sauna stove, while it is heating, also heats up all the rooms of the sauna.
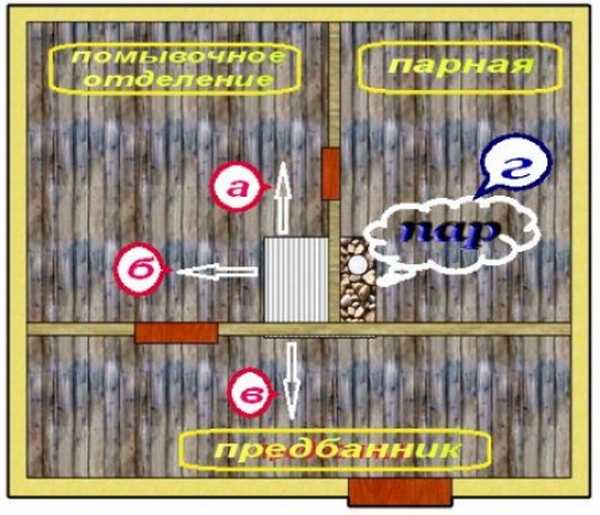
An option to place the heater in such a way that its heat is enough to heat all the rooms.
A wood-burning stove for saunas and heating locker rooms are a classic of sauna traditions. If the bathhouse is located far outside the city, and there are no other heating sources, then firewood is the most versatile and affordable fuel.
Wood stoves provide uniform heating of the air, as well as rapid heating of the required amount of water. They are very compact, which makes it possible to use them in a small steam room space.
In small country baths, the heating from the sauna stove is quite sufficient to completely warm up all the rooms. This also applies to old village baths.
More modern developers, of course, are trying to improve everything, but this requires year-round living on this site. And for the seasonal option, a regular wood-burning stove is the most popular.
Wood-burning stoves are used in practice in two types; they differ in the material they are made of.
Depending on the material used they are:
- brick, these are special structures with fairly thick walls, they can be laid out in two versions, which are called closed and open type options;
- metal, the design feature of such a device is that the rigidity of its body is not subject to deformation from exposure to high temperatures. They can be produced with or without combustion boilers.
Important. When installing a metal stove, please note that it must be placed on a non-combustible base made of concrete, fireclay brick or sheet metal. The floor covering in front of the firebox is also made of non-combustible material. But this already applies to all wood-burning stoves.
The disadvantage of building a brick kiln is that it requires a strong foundation to be laid under it. And the price that a stove maker will demand for the work will be very high, and in our time few people can handle masonry with their own hands.
Electrical
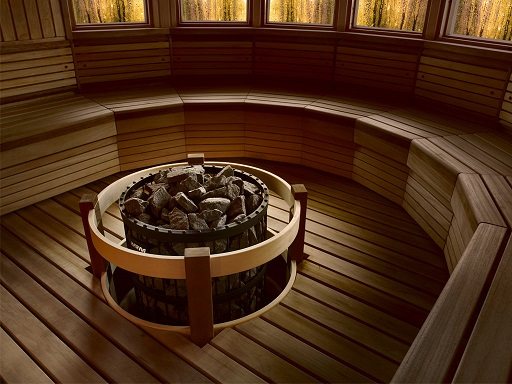
The photo shows an option for installing an electric heater in a steam room.
The simplest and most affordable option for heating a bathhouse is to use electricity. If it is possible to install a supply cable of sufficient cross-section to the bathhouse, then the issue of heating the bathhouse on an ongoing basis can be completely resolved.
Naturally, in this case it is impossible to organize heating of the house with a sauna stove. It will be necessary to install several radiators in the relaxation room, storage water heaters can be installed in the shower room, and an electric heater can be installed in the steam room.
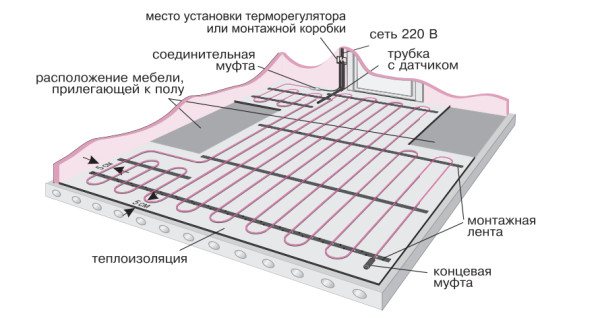
Floor heating cable layout for ceramic tiles.
When choosing this heating option, it is possible to use heated floors to heat the bathhouse premises. This is especially convenient when the floors in the shower, bathrooms and rest room are made of ceramic tiles.
The floors will be warm all the time, the rooms will warm up evenly, as warm air will rise up from the floor.
Mixed
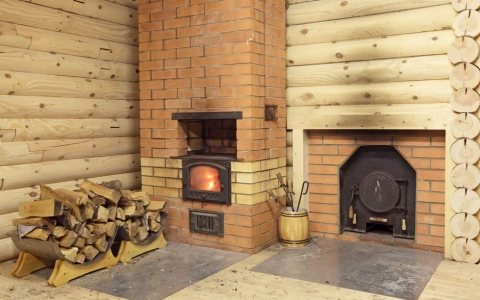
It is necessary to select a heating option for all premises that will be optimally balanced in terms of the necessary costs for its implementation and operating efficiency.
It is quite possible to organize heating of a bath from a stove in a steam room, especially if the stove is made of brick. But this works flawlessly if your bathhouse is small, and also if you rarely come to your summer cottage in winter.
If the bathhouse has a large rest room and a bathroom, then you won’t heat it with just one stove. Stove heating will not provide you with constant heat in the bathhouse.
You will not be able to install an electric water heater or toilet in the room, since severe frosts can cause the water in these accessories to freeze and rupture them. The solution to this issue is to use combined heating.
Important. If water devices are installed in the bathhouse or water pipelines are installed, then in the absence of constant heating in winter, the water must be drained to avoid freezing and rupture.
You can arrange electric heating for your bathhouse in winter if you use it constantly for showering, washing and relaxing. And only light the stove when you want to get a good steam bath.
Exhaust ventilation
Exhaust ventilation in a steam room is used to remove polluted exhaust air from the room. This type of forced ventilation is based on ventilation systems that include fans with electric motors and cleaning filters.
Exhaust ventilation quickly removes not only exhaust air, but also excess moisture. But it also has a disadvantage: the forced removal of contaminated air flows contributes to air thinning, and fresh air masses can fill the room so quickly that drafts form.
Supply and exhaust ventilation
The most relevant for a bathhouse is a supply and exhaust ventilation system, which is characterized by a forced influx of fresh air and forced exhaust of waste streams. To ensure such ventilation, supply and exhaust units are used, which can be equipped with additional functions: air cleaning, air ionization, and heat recovery.
If the bathhouse is large enough, then you can use a combined ventilation project, which looks like this. In the steam room, it is necessary to ensure the natural outflow and inflow of air masses, and for ventilation in the washing bath, install an exhaust fan. In the rest room and dressing room you need to use natural ventilation, and in the restroom - an exhaust fan that starts working when the lights are turned on.
The above is one of the optimal ways to install ventilation in a sauna or bathhouse, but in each case you need to take into account the individual characteristics of the room.
Get a free consultation from a fitness club ventilation engineer
Get
Heat exchangers near the chimney
The simplest, but very effective heat exchanger made of copper tube.
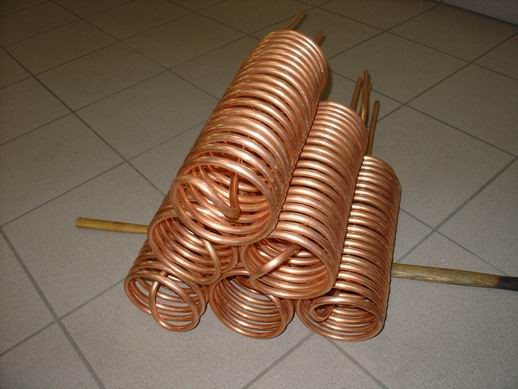
Copper tube heat exchanger
Depending on the diameter of the chimney, you need to purchase 1.5÷2.0 meters of copper pipe with a diameter of approximately 10 millimeters. The smaller the diameter of the tube, the larger the surface of its direct contact with the pipe, the faster the water heats up. But, on the other hand, the small diameter of the tube significantly reduces the speed of water flow, and this can cause it to boil. Taking into account both factors, we recommend taking a tube with a diameter of 10 mm.
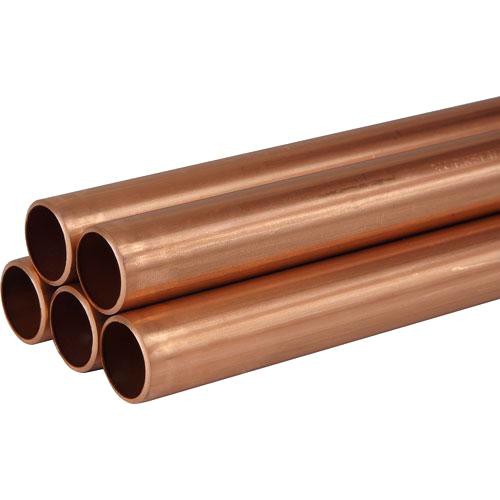
Copper tube
Adapters should be put on the ends of the tube and flared. There are special devices for flaring.
Flaring
Flared copper pipes
Steel pipes can be connected to the ends of the tubes. Fittings are screwed to the nuts
Fittings. The cone of the fitting should fit snugly against the flared end of the tube
Do the flaring carefully; the plane of the flared end must be even and smooth, otherwise there will be leaks at the junctions of the pipelines.
Prices for copper tubes
copper tubes
Video - Bending copper tubes
A more difficult to manufacture heat exchanger can be made from two metal pipes. The diameter of the first should be slightly larger than the diameter of the chimney, and the diameter of the second should be 5–10 cm larger than the first. How to make such a heat exchanger?
Step 1. Using a grinder, cut two pieces of pipe of different diameters, 20÷30 centimeters long. The ends of the pipes must lie in the same plane, be even and neat.
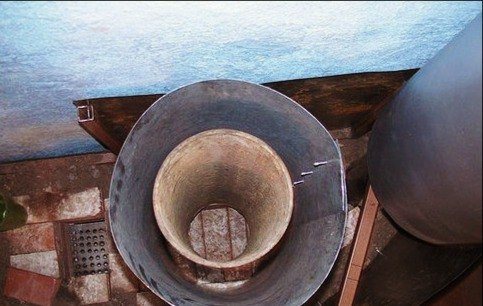
Example of tubes
Step 2. Cut two circles from sheet steel with the diameter of the larger pipe. In these circles, cut holes exactly in the middle with the diameter of a smaller pipe.
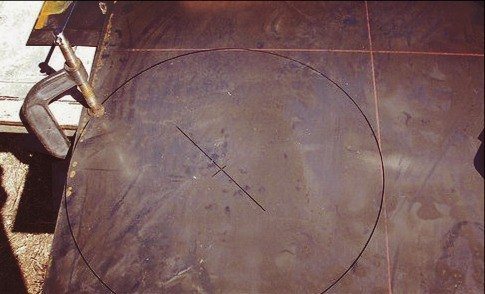
Cutting a circle from steel
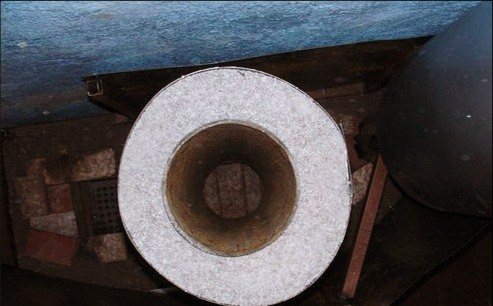
The heat exchanger is almost ready
Step 3. Insert pipe sections into the holes and weld them. Weld carefully, do not skip a seam.
Step 4. At the top and bottom of the structure, weld metal pipes with threads at the ends; a hole needs to be made for each pipe. Check the heat exchanger for leaks.
Example of a finished heat exchanger
Heat exchanger for pipe
Heat exchanger for furnace
Connection diagram of the tank and heat exchanger
The structure is ready, you can install it on the chimney and install pipes. It is advisable to insulate both heat exchangers with mineral wool with a top coating of aluminum foil. This will greatly reduce unproductive heat losses and speed up water heating.
A warm waiting room is no longer a myth, but a reality
If the stove is planned to be installed in a bathhouse located at a distance from a residential building, the functionality of the fireplace can also be used to the maximum. Thus, a sauna stove with a heat exchanger can heat not only the steam room, but also the dressing room, recreation areas and other areas of the building. Heating is produced according to the same principle - by circulating coolant through the functional elements of the system. This opportunity is of significant importance for Russia, because cold dressing rooms, in which people are forced to quickly change clothes, have long been a reason for ridicule. Laughter is laughter, and a cold dressing room brings not only discomfort, but also a danger to human health - jumping from cold to warm and back again is fraught with a cold. The problem of a cold dressing room has long been solved by manufacturers of stoves with a heat exchanger, which fills the area, now truly relaxing, with comfortable warmth.


