Is it allowed to use OSB when finishing the inside of a bathhouse?
Is it possible to use OSB board for interior decoration of a bathhouse?
Most likely you are interested not in the rough finishing, but in the finishing of the bathhouse with OSB 3 sheets (moisture resistant). The material consists of 90-95% sawdust, the rest is a polymer thermosetting resin containing paraffin, which gives increased moisture-resistant properties to OSB. The expected level of constant humidity during OSB operation should not exceed 60%, temperature – about +20 °C.
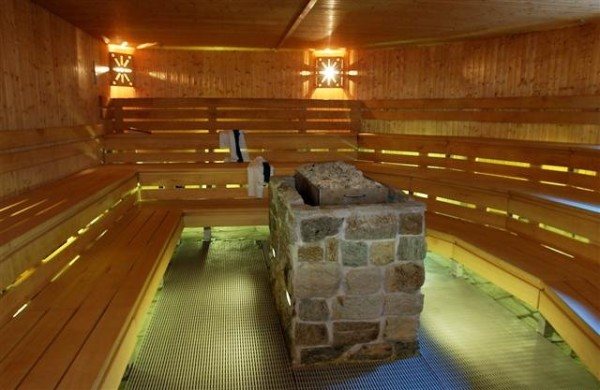
In the bathhouse, except for the locker room, the humidity reaches 100%, the temperature is +80 °C. Only natural wood, but not its derivative, can withstand such changes without deformation or delamination.
In addition, under these conditions, the release of harmful substances contained in OSB, such as formaldehyde, ammonia, and phenol, sharply increases. Therefore, instead of a pine aroma, you will get poisoning, accompanied by headache and nausea.
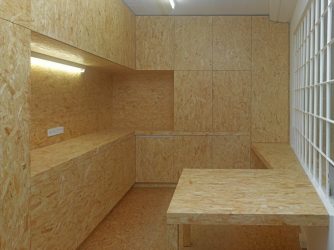
Another thing is the use of OSB 3 for walls and ceilings for finishing with tiles or clapboard.
The sheets are protected on the outside with a vapor barrier membrane, and on the inside with a waterproofing film. You cannot make a subfloor from OSB boards in a bathhouse.
Interior decoration
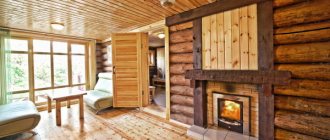
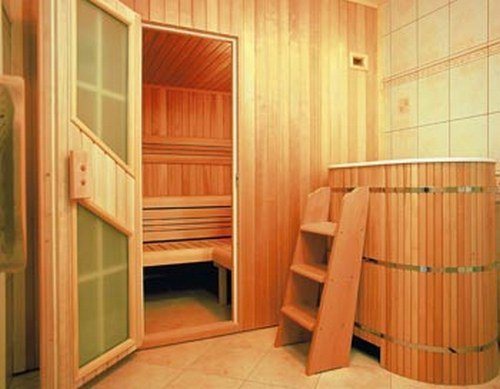
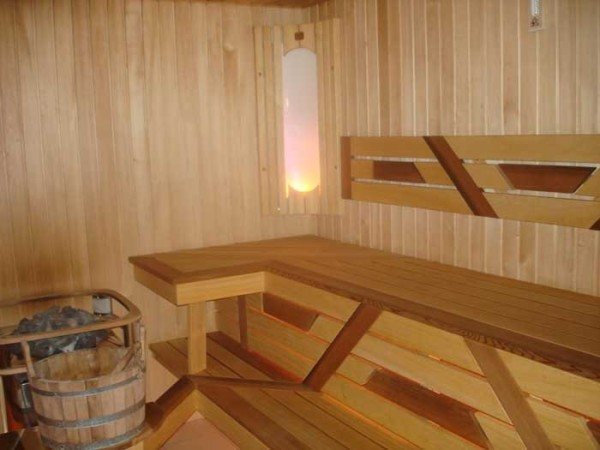
The main question is how the interior decoration of baths and saunas is made. Experts advise not to limit yourself to one type of wood, because by combining different species, you can bring special comfort and charm to the bathhouse.
The properties of the selected materials are a point that cannot be ignored. Otherwise, staying, for example, in a steam room can result in a burn if you use pine or spruce, which releases resin when heated.
Options for finishing a bath with larch
The steam room and shower room are finished with linden or larch wood. They retain their color for a long time and do not heat up even in the hottest room, making it impossible to get burns.
And pine is best used in finishing rooms that are not in contact with high temperatures. The price of the material is inexpensive, it is easy to process and has a beautiful structure.
Items in the bath
Even before construction, it is necessary to decide on the placement of shelves and accessories for bath procedures in the bathhouse. This is important as an element of the ancient rite of ablution. You should not clutter the room with bath appliances, especially if it is small, otherwise the risk of injury when visiting the sauna will increase.
Wall decoration
Interior decoration in the bathhouse is not carried out by all types of wood, especially the use of artificial linoleum and chipboard based on formaldehyde glue is prohibited. They are classified as flammable materials; when heated, they release toxic substances into the air that are hazardous to health.
Better opt for:
- alder;
- larch;
- birch;
- aspen;
- poplar;
- cedar;
- lipa;
- Abashi.
This type of wood has low thermal conductivity and does not heat up in very hot rooms, for example, in a steam room. It also does not release resin, which can cause burns, and it dries quickly.
Decorating a Russian bathhouse with wood
Advice: do not coat wood for interior decoration with synthetic-based varnishes and paints; when heated, they release harmful substances into the air.
Lining for walls
The material is very often used to decorate walls in bathhouses. The process is not complicated, you can easily carry it out yourself without involving third parties. Finishing a bathhouse from lining allows you to achieve a beautiful interior without frills.
For finishing we select tools:
- jigsaw or wood saw;
- mounting stapler;
- screwdriver;
- building level;
- square;
- roulette;
- fishing line;
- staples;
- self-tapping screws;
- nails.
Before covering the bathhouse with clapboard, install the necessary electrical equipment - sockets, lamps, switches, electrical machines.
Advice: if you doubt your abilities or have little experience in electrical installation work, it is better to invite an electrician.
Interior finishing of a log bathhouse with clapboard
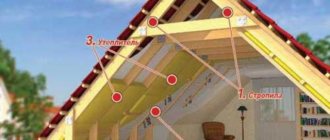
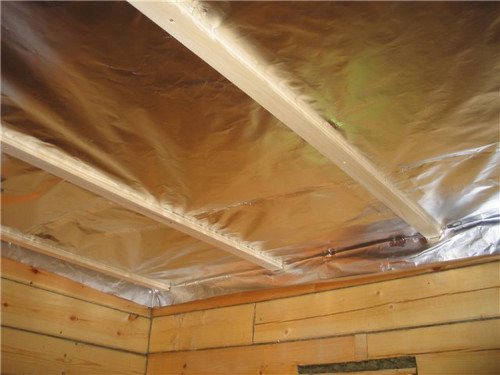
Thermal insulation is one of the ways to achieve the desired temperature in the steam room and save resources.
The following instructions will tell you how to do this quickly and correctly:
- Attach aluminum foil or penofol to the main wall over the entire area of the steam bath with a stapler.
- Attach a lathing made of wooden beams with a cross-section of 50x50 mm and treat it with an antiseptic. The best option is horizontal placement, then the lining will be mounted vertically.
- Install a thermal insulation layer with a thickness of at least 100 mm in the space of the sheathing; in the rest of the bathhouse, 50 mm is sufficient.
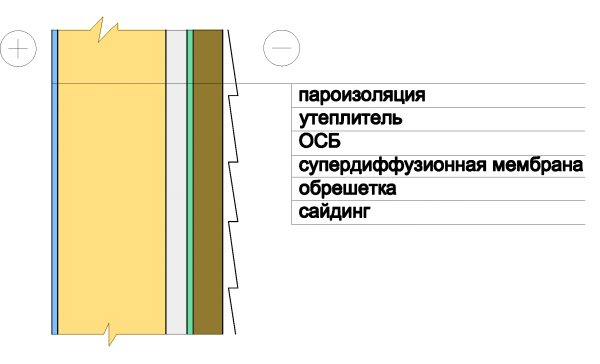
- Cover the structure with a vapor barrier.
Let's proceed to the actual installation:
- Bring the material into the room where installation will be carried out and leave it for 12 hours. During this time, the lining will gain the required humidity.
- Measure the height of the walls and cut the boards to the desired size.
- Start attaching the sauna clapboard from a corner or from a heating device. Nail the panels or screw them directly into the lock. Install the paneling row by row, cutting the last one in the row to the desired width.
- Make slopes for windows and doors in the same way as when installing metal-plastic.
- After installing the panel, coat it with an antiseptic compound.
Ceiling finishing
Lining is also used for the ceiling, but it should be taken into account that boards containing resins cannot be installed on it in the steam room. Therefore, immediately forget about spruce and pine, they will show themselves perfectly in other rooms - the relaxation room and the dressing room.
Washing department
Today, it is very often used in a shower stall, where several shelves are installed for bath accessories.
When decorating a room, preference should be given to moisture-resistant materials, for example:
- use ceramic tiles for walls;
- for the floor - self-leveling materials or tiles.
These finishing options are the most durable and practical. Safety when moving on the floor can be guaranteed by rubber mats or wooden stands.
Is it possible to build a bathhouse from OSB-3 boards? What are the nuances?
OSB is oriented strand board.
OSB-3 boards are used in the construction of partitions, as well as load-bearing walls; they can be used in rooms with high humidity.
That is, yes, it is possible to build a bathhouse from OSB-3 using frame technology.
You can buy these right away
Such a bathhouse is quickly erected, the structure is light, you can use something like this for such a bathhouse
Cheapness is questionable, because high-quality insulation of such a bathhouse requires significant expenses, which reduces that very cheapness to zero.
The structure is less durable.
In my personal opinion, buildings erected using frame technology can hardly be called capital buildings.
Well, plus, in the production of OSB boards, phenol-formaldehyde resins are used, which in the case of a bathhouse is simply a critical minus.
And the nuances are as follows:
First, a bathhouse design is made.
Next, markings are made on the site.
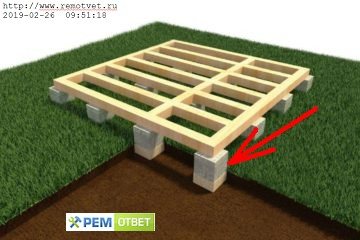
Then the foundation is made, as an option, asbestos-cement pipes are used (holes are drilled for their installation with a drill), then the cavity of the pipes is filled with concrete.
The entire forest is pre-impregnated with antiseptic and fire-retardant impregnations (timber, boards).
Next, the lower frame is made from the prepared timber, the floor joists are attached, and there is waterproofing between the frame and the joists.
Next is the installation of corner posts, as well as the installation of intermediate posts.
Top trim (installation).
The frame is sheathed with OSB-3 boards, a rafter system is manufactured, and roofing material is laid.
Then they begin the interior decoration of the bathhouse.
The bathhouse is built according to the project, this is the main point, but like any structure, construction begins with the foundation.
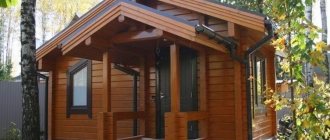
Exterior decoration
Above we learned how to decorate a bathhouse from the inside, now it’s time to take care of its appearance. After all, it is not always possible to build a bathhouse from profiled laminated timber or facing red brick, which do not require any additional finishing.
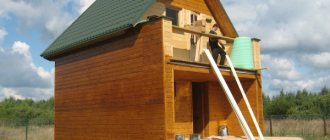
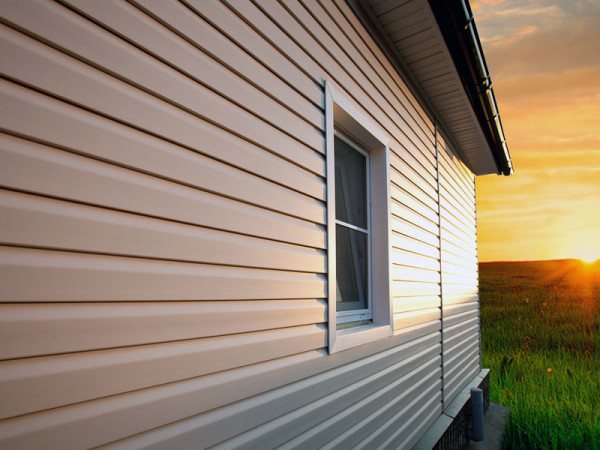
If you decide to build a building using frame technology using OSB boards, then the bathhouse is finished with siding. Thanks to this material, even the most unprepossessing room acquires an excellent appearance.
Siding will additionally protect the walls from precipitation, increase the service life of the building and reduce the cost of its operation. This type of finishing is now relevant and popular due to its low cost and ease of installation, which can be done with your own hands without inviting professionals.
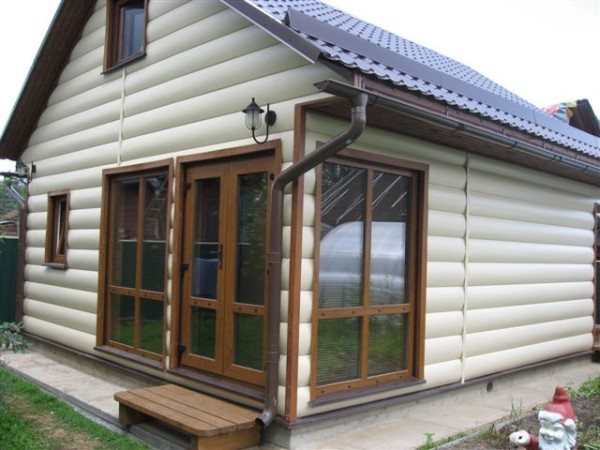
Facing the sauna with siding
Material characteristics
Siding is made from artificial and natural materials.
Each of them has its fans who focus on consumer qualities; the main thing can be highlighted:
- resistance to UV radiation;
- not responding to large temperature changes;
- resistance to rot, mildew and insects;
- does not absorb moisture.
The material is also resistant to:
- pollution;
- dyes;
- mechanical influences;
- elastic;
- elastic.
Siding is made from materials that are completely harmless to health, fireproof and do not contain toxic substances. This makes it possible to use it when decorating the interior of a room.
The decorative properties of siding are also presented on the market, where it can appear in the form of wood, stone or brick. The wide color range of the material makes it possible to provide the building with an excellent appearance.
Wooden siding is made smooth and embossed, in various colors and with imitation of different types of trees. During production, the panels are treated with special compounds and resins, which give the material strength, wear resistance and moisture resistance.
External wall decoration with vinyl siding
Vinyl siding consists of two layers - a top layer that is weather-resistant and a bottom layer with improved mechanical properties. Several types of PVC are used for its manufacture.
Tip: For wooden walls, choose cladding panels made from wood chips.
Features of siding installation
- Before installation, it is necessary to level the walls.
- You can sheathe a wooden bathhouse with siding only after it has completely settled.
- Prepare your tools:
- spring punch;
- building level;
- hammer;
- metal scissors;
- roulette
Advice: regardless of the type of finish, fasteners should only be made of stainless steel and aluminum, and the diameter of the caps should be from 8 mm.
- Leave a temperature gap of 10 mm between the cap and the panel.
- Place fasteners in the center of the holes and insert them perpendicular to the panels.
- Fasten the panels so that they have free movement within the holes.
- Start installation from the center to the edges.
Siding installation diagram on OSB
Installation
- Install the starting strip and profiles, then work on the internal and external corners.
- Install a sheathing of vertical metal slats with a pitch of 300 mm.
- Begin installation of siding panels.
- Install them horizontally, overlapping the slats. Lift the panel up until it connects with the starting profile. When you hear the sound of the lock latching, it is installed correctly. Connect the following panels to each other by clicking them into one another.
- Fasten them to the sheathing with self-tapping screws or nails, having previously made holes for them in the upper part of the panels. Every 5-6 rows, check that the siding is installed horizontally.
- Attach the finishing strip.
If necessary, simultaneously with wall cladding, they can be thermally insulated. Its thickness must correspond to the climatic conditions of the area.
Interior decoration of a bathhouse - what is used besides lining?
Bath buildings are built from logs, concrete and cinder blocks, bricks and other building materials. The lining of the interior with clapboard remains unchanged. In this article we will tell you what other finishing and decorative products can be used in a bathhouse.

In addition to lining, what can you use to cover bathhouse buildings?
The choice of finish depends on the purpose of the room. Inside the building, in addition to the steam room, there is a relaxation room, an entrance hall (dressing room), a bathroom or a washing room. If desired, the project includes a terrace, a residential attic, or several square meters for a small pool.
Lining is a universal material; with proper processing, it can cover all walls and ceilings, but it will turn out too monotonous. Therefore, diverse interior decoration of the bathhouse is chosen.
Already from the name it is clear that this room is periodically maintained at 100% humidity and high temperature. We need a finishing material that can withstand such changes and also does not emit substances harmful to humans during heating: formaldehyde, ammonia, phenol and others.
- According to the specified parameters, only solid wood is suitable, so the owners always try to line the inside of the bathhouse with clapboard made of linden, aspen, cedar, and abasha (African oak). Often planed products from larch or pine are used, but in this case it is necessary to choose slow-growing varieties, since so-called resin pockets do not form in them. Accordingly, the resin will not constantly be released on the surface.
- The bathhouse, in addition to lining, can be finished with more budget-friendly options - edged or unedged boards made of various types of wood - linden, cedar, alder, aspen. Only untreated wood will need to be pre-prepared for installation - remove the bark and sapwood, sand it and coat it with wood-protective water-based varnishes or impregnations with a biocidal effect.
- Covering the walls inside a brick bathhouse with planed boards gives a much better heat-intensive effect, since the thickness of the molded products exceeds the section of the lining by 1.5-3 times.
- Do not try to cover the steam room and other rooms with sheets of sawdust: plywood, chipboard, OSB and other analogues, even moisture-resistant ones. During the heating process, thermosetting resins containing sawdust begin to emit toxic fumes. The result is poisoning of the body instead of healing.
- For the ceiling, in addition to lining or edged boards, designers offer a non-standard option - tempered frosted glass, under which lighting is mounted. The bathhouse will turn out to be very unusual, but modern.
- The floor can be covered with clinker or heat-resistant ceramic floor tiles with a special anti-slip coating. It is hygienic and will withstand high temperatures perfectly.
- And lastly: if the bathhouse is made of rounded or profiled logs, then the finishing technology inside the building does not require covering the ceiling and walls with anything. It is enough to treat all surfaces with fire-retardant compounds on a water or oil-wax basis with a moisture-resistant effect.
How to properly finish OSB inside and outside the house: decoration nuances
Today we will talk about how OSB finishing is carried out inside and outside the house. Let's figure out what this wood material is, what qualities it has, and why it is used to cover walls and ceilings. You will understand the information received, you will know what and how the craftsmen who were entrusted to carry out the finishing will do.
Two-story house covered with OSB boards Source de.decorexpro.com
A little about the material
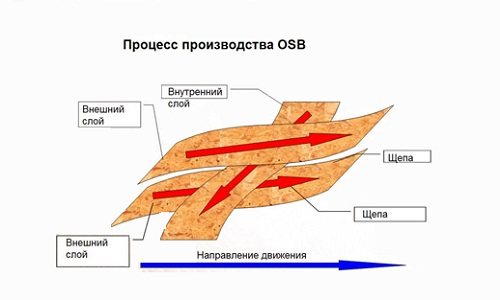
Oriented strand boards, abbreviated as OSB or OSB, in the latter case from the English “oriented strand board”, is a material that has replaced the same wood products as plywood, MDF and chipboard. From the name itself it becomes clear that the material is based on shavings. Their length ranges from 75-150 mm and width 15-25 mm. They are located in the slab itself in different directions: longitudinally in the outer layers, transversely in the inner layers. It is this arrangement that gives the material its technical and operational characteristics.
The raw materials for the production of OSB are not waste from wood processing enterprises, but target wood. That is, tree trunks are split into chips and shavings, which are used in production. Hence the high quality of the products.
The production process itself is based on pressing the raw materials with the addition of binding components. These are paraffin-based glue, wax, phenol-formaldehyde resin, boric acid, each of which is added to the chips at different stages with thorough mixing. After which the raw material mass is molded, pressed and cut into panels.
OSB boards of different thicknesses Source makler.md
OSB classification
Manufacturers today offer four types of OSB boards:
- OSB-1
. It cannot be used for heavy loads; it is a purely finishing material with a low moisture resistance coefficient. Therefore, it is recommended to use only in dry rooms. Not applicable for exterior decoration. Its degree of swelling is 25%.
- OSB-2
. A material with higher strength, so it can be used as an element of a supporting structure. But moisture resistance is the same as the previous brand. The degree of swelling is 20%.
- OSB-3
. This variety is most often used in construction, especially in finishing work for leveling surfaces. It has good strength and moisture-resistant characteristics. The degree of swelling is 15%.
- OSB-4
. The most expensive material with excellent technical properties. Easily withstands fairly heavy loads and high humidity. The degree of swelling is 12%.
So, if you are faced with OSB sheathing, then it is probably an OSB-3 class material.
OSB-3 as an element of the load-bearing structure of a frame house Source dom-formula.ru
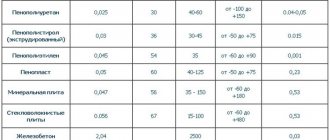
And one more important point that concerns comfortable living in a house lined with OSB boards. There is such a characteristic - vapor permeability. It shows how much the walls or ceiling can let air through, that is, “breathe.” The higher this indicator, the better, because the air exchange of the building occurs.
In this regard, OSB is not the best option. Its vapor permeability is 0.0031 mg/m h Pa. In fact, in this indicator it is comparable to linoleum. That is, it practically does not allow air to pass through. This means that when choosing OSB, you must ensure good ventilation.
And the last thing that worries consumers of OSB boards is formaldehyde resins used as adhesives. Everyone knows that this type of resin, when the temperature rises, releases free formaldehyde, which is very dangerous for humans. But there is not very much of it in the oriented strand board recipe - a maximum of 3%. For example, in chipboard this glue is up to 14%. Therefore, there is no reason to be afraid. But European manufacturers are already offering boards that use harmless adhesives, some of which are even replaced by polymers.
OSB boards for interior cladding of a house Source optolov.ru
Rules for finishing OSB boards
So, having dealt with the material itself, we move on to the main issue of the topic of the article - OSB finishing. Available in the form of the slabs themselves. Let's start with the fact that manufacturers today offer two types of them: polished and unpolished. If the walls or ceiling of your house are sheathed with the second type, then it will have to be prepared - sanded. To do this, use either a grinding machine or an angle grinder, on which a grinding wheel is placed.
What is OSB board?
OSB is an oriented strand board. The material consists of panels made from pressed shavings of coniferous and deciduous trees. Chip sizes can range from 60 to 150 mm.
OSB boards have high strength and density due to the combination of several layers. In the middle, the chips are located across the sheet, and in the lower and upper layers - along.
All layers of material are pressed under high temperature and pressure and impregnated with waterproof resins and paraffin.
are used as binders . The finished slabs have a uniform structure - without cracks, chips or cavities.
Read more about the characteristics of OSB in our article.
How to make a partition from OSB inside a house and what screws to use?
OSB is a completely suitable material for the construction of internal room partitions. The strength and light weight of the sheets are clear evidence in favor of this product. OSB boards can be mounted on a metal profile (like gypsum plasterboard) or on a wooden frame.
If the second option is used, the wood should be treated with protective materials against mold and mildew, as well as fire retardants.
Now regarding the partition installation diagram , which will be discussed using the example of a wooden frame:
- Markings are made at the installation site of the structure. Lines are drawn along the floor and ceiling, which will serve as guidelines for installing horizontal guides.
- Beams with a cross section of 4x6 cm are attached along the marking lines. If the wall will be subjected to serious loads (for example, you plan to hang furniture on it), it is better to use thicker bars - 5-8 cm. The guides are attached using dowels.
- Vertical posts are installed, which are fixed to horizontal beams using metal corners and self-tapping screws.
The pitch between the racks depends on the width of the slab, which varies. So, if the transverse size of the OSB sheet is 125 cm (the value characteristic of European brands), then the optimal distance between the axes of the vertical beams is 62.5 cm. In this case, it will be possible to screw the edges and the middle of the slab to the frame.
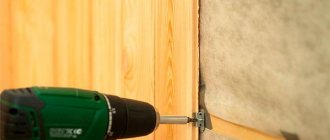
- After installing the racks, OSB panels are installed.
They are attached using self-tapping screws, the length of which depends on the thickness of the sheets and should be 45-50 mm greater than this value. For example, when using material with a thickness of 12 mm, the recommended length of screws will be 60-65 mm.
In the middle of the slab, self-tapping screws are screwed in increments of 30 cm , along the edges - every 15 cm. The distance from the edge is 1 cm. A gap of 1 cm is left between the slabs and the floor. The same gap should remain between the OSB and the ceiling.
Also, the panels should not be installed closely, but at a distance of 3 mm from each other. This will protect the sheets from deformation due to changes in humidity.
Making a partition from bars and OSB - watch the video:
Using OSB boards for interior decoration of a house
The use of sheet materials in construction and home decoration has long been known. But if in the past it was necessary to make do with only chipboard, fiberboard or plywood, today the ranks of traditional samples have been replenished with new analogues with improved properties, which makes them more suitable for certain types of work.
One example of such products is OSB boards for interior decoration, which will be discussed further.
What is OSB board?
OSB is an oriented strand board. The material consists of panels made from pressed shavings of coniferous and deciduous trees. Chip sizes can range from 60 to 150 mm.
OSB boards have high strength and density due to the combination of several layers. In the middle, the chips are located across the sheet, and in the lower and upper layers - along.
All layers of material are pressed under high temperature and pressure and impregnated with waterproof resins and paraffin. are used as binders . The finished slabs have a uniform structure - without cracks, chips or cavities.
Read more about the characteristics of OSB in our article.
Is it harmful to use slabs for interior decoration?
The possibility of using OSB for interior decoration depends on the labeling of the product, which in turn is determined by the amount of synthetic resins in the material, which emit harmful fumes during operation.
The largest amount of toxic substances (from 10 to 30 mg per 100 g of dry matter) is contained in slabs of class E2 and E3. OSB panels marked E0 and E1 contain a minimum proportion of harmful components - from 6.5 to 10 mg. These are, as a rule, products of foreign manufacturers: Glunz (Germany), Norbord (Canada), Egger (Austria).
Thus, the products of the last two brands are most suitable for use for interior decoration.
Materials of class E2 and E3 can only be used for outdoor work.
To protect yourself from purchasing “hazardous” material, it is worth considering some points that partially determine the correct choice of OSB:
- the smell of stoves. With a high content of harmful substances, the material smells strongly of formaldehyde and cheap plastic;
- products must have a certificate certified by a seal from the manufacturer or supplier. A copy of the document can be requested from the seller;
- It would also be a good idea to inspect the packaging, if available. Products from serious manufacturers are usually labeled and equipped with information inserts.
How to make a partition from OSB inside a house and what screws to use?
OSB is a completely suitable material for the construction of internal room partitions. The strength and light weight of the sheets are clear evidence in favor of this product. OSB boards can be mounted on a metal profile (like gypsum plasterboard) or on a wooden frame.
If the second option is used, the wood should be treated with protective materials against mold and mildew, as well as fire retardants.
Now regarding the partition installation diagram , which will be discussed using the example of a wooden frame:
- Markings are made at the installation site of the structure. Lines are drawn along the floor and ceiling, which will serve as guidelines for installing horizontal guides.
- Beams with a cross section of 4x6 cm are attached along the marking lines. If the wall will be subjected to serious loads (for example, you plan to hang furniture on it), it is better to use thicker bars - 5-8 cm. The guides are attached using dowels.
- Vertical posts are installed, which are fixed to horizontal beams using metal corners and self-tapping screws.
- After installing the racks, OSB panels are installed.
The pitch between the racks depends on the width of the slab, which varies. So, if the transverse size of the OSB sheet is 125 cm (the value characteristic of European brands), then the optimal distance between the axes of the vertical beams is 62.5 cm. In this case, it will be possible to screw the edges and the middle of the slab to the frame.
They are attached using self-tapping screws, the length of which depends on the thickness of the sheets and should be 45-50 mm greater than this value. For example, when using material with a thickness of 12 mm, the recommended length of screws will be 60-65 mm.
In the middle of the slab, self-tapping screws are screwed in increments of 30 cm , along the edges - every 15 cm. The distance from the edge is 1 cm. A gap of 1 cm is left between the slabs and the floor. The same gap should remain between the OSB and the ceiling.
Also, the panels should not be installed closely, but at a distance of 3 mm from each other. This will protect the sheets from deformation due to changes in humidity.
Making a partition from bars and OSB - watch the video:
Internal wall cladding
This process, just like the procedure described above, requires the preliminary construction of a frame, for which the same wooden beams or profile are used. the metal version will serve as an example for arranging the sheathing , since the wooden frame was discussed earlier.
Finishing walls with OSB boards consists of the following steps:
- The first step is, as always, marking.
- Next, vertical CD profiles are inserted into the installed guides and also fixed - to the wall using self-tapping screws and metal hangers, to the horizontal guides - with drilling screws. The pitch between the posts is the same as in the case of a wooden frame.
- To give rigidity to the sheathing, the vertical posts are reinforced with transverse profiles. With a standard ceiling height (2.5 m), it will be enough to install two elements for each span.
If the wall is uneven, you should find the part that sticks out the most, from which you should start. Lines are drawn along the wall, after which the starting UD profile is attached to the floor and ceiling using self-tapping screws or dowels.
The installation of the slabs is carried out in accordance with the rules mentioned in the instructions for the construction of partitions.
How to finish the slab indoors?
The interior decoration of wooden country houses as in the photo can be completely different in cost and design. to finish surfaces made of OSB sheets. Let's consider them further.
Is it possible to attach drywall to OSB?
Can. Moreover, for this it is not necessary to use a metal profile, but simply screw the material to the base with self-tapping screws.
The main thing here is that the level of humidity in the room is not high , since otherwise this can lead to deformation of the OSB and, consequently, the plasterboard sheathing itself. Self-tapping screws are screwed in around the perimeter and in the center of the gypsum board in increments of 10-15 cm.
Internal wall cladding
This process, just like the procedure described above, requires the preliminary construction of a frame, for which the same wooden beams or profile are used. the metal version will serve as an example for arranging the sheathing , since the wooden frame was discussed earlier.
Finishing walls with OSB boards consists of the following steps:
- The first step is, as always, marking.
If the wall is uneven, you should find the part that sticks out the most, from which you should start. Lines are drawn along the wall, after which the starting UD profile is attached to the floor and ceiling using self-tapping screws or dowels.
The installation of the slabs is carried out in accordance with the rules mentioned in the instructions for the construction of partitions.
How to finish the slab indoors?
The interior decoration of wooden country houses as in the photo can be completely different in cost and design. to finish surfaces made of OSB sheets. Let's consider them further.
Is it possible to attach drywall to OSB?
Can. Moreover, for this it is not necessary to use a metal profile, but simply screw the material to the base with self-tapping screws.
The main thing here is that the level of humidity in the room is not high , since otherwise this can lead to deformation of the OSB and, consequently, the plasterboard sheathing itself. Self-tapping screws are screwed in around the perimeter and in the center of the gypsum board in increments of 10-15 cm.
Painting with varnish and acrylic paint
Varnish increases the moisture resistance of OSB boards.
This finishing method is good for use in damp rooms. The boards can be painted with any varnish intended for natural wood. The surface is cleaned of dirt, degreased, sanded and treated with a primer. Varnished OSB has a smooth surface, but retains its texture. Acrylic paint is also a good option for finishing OSB. It rolls well over the surface with a roller and forms a durable and “breathable” coating .
To get the best effect, it is advisable to paint in two layers.
Puttying with gypsum putty
Putty materials do not adhere well to wood. Therefore, it is best to use compounds that have maximum adhesion to wooden surfaces. These can be dry mixtures “Rodband” or “Goldband”, containing polymer additives and most suitable for working with wood. Vitonit KR can be used as a finishing putty.
Before puttying, OSB is primed with a special compound , to which glue, interlining and a little putty mixture are added. If this measure is neglected, the base impregnation may bleed onto the finished surface, causing the finish to become stained.
How to plaster a surface made of OSB boards?
For plastering OSB, it is best to use a special mixture. For example, Knauf Sevener . The plaster finishing technology itself includes the following steps:
Glass wallpaper sticker
If the slabs are smooth (polished) , wallpaper can be glued directly onto them. Otherwise, you will have to plaster and putty the surface, doing this using the technology described above.
Fiberglass wallpaper is glued to special compounds. In this case, the dry mixture “Methylane Fiberglass Premium” and the granular composition “Methylane Granulate Premium” are suitable.
Find out how to hang wallpaper on OSB from the video:
How to glue ceramic tiles?
There are several ways to stick this on:
- fix the expanded mesh to the surface and lay the cladding on any adhesive for ceramic tiles;
- perform installation directly on the OSB board using glue for deformable surfaces;
- use epoxy grout instead of adhesive.
Liquid wallpaper
This type of finishing is applied to OSB in the same way as to a regular wall. You just need to prepare the base by sealing the joints and treating the surface with a primer.
12 hours before the start of work, the liquid wallpaper composition is mixed and left in a plastic bag. The finished material is applied using a spatula in a uniform layer of 3 to 7 mm .
One of the advantages of such a material is that it is not afraid of small surface defects. They simply smooth out when the mixture is applied.
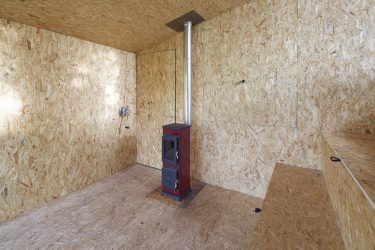
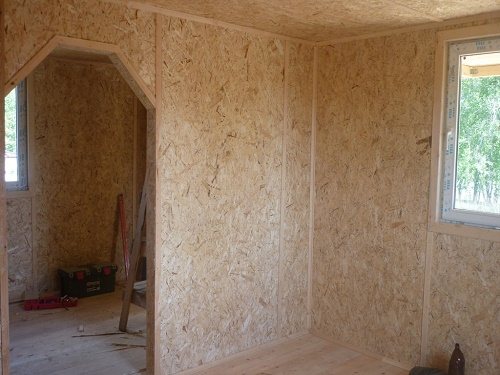
Is it possible to sheathe a bathhouse and a garage inside with an OSB board?
OSB sheets are a material that is suitable not only for finishing residential premises. It can also be successfully used for cladding a bathhouse or garage.
In the first case, of course, you need to use only environmentally friendly brands of material.
OSB in a bath should be treated with 2-3 layers of water-soluble varnish , which will add shine to the surface and protect it from moisture.
As for the sheathing of the garage, OSB of any marking is suitable , since in non-residential premises concern for the environment is the tenth thing and the harmfulness of the material does not matter.
From all of the above, we can conclude that OSB boards are a universal product suitable for use with various types of finishing. This quality, combined with the strength of the panels, makes OSB a worthy representative of the category of sheet materials.
How to putty OSB with your own hands - a detailed course for beginners: