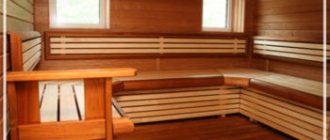
Filling window openings is rightly considered one of the most technologically difficult tasks that arise during the construction of wooden houses. This is largely due to the fact that the building shrinks quite significantly, especially in the first year after the installation of the log house. But even in the future, during the operation of a house, even one made of the highest quality and most popular materials, in particular, rounded logs, some deformations and movements occur. That is why the question of how to insert a window into a log house in order to obtain an effective and durable structure at the end remains relevant almost always.
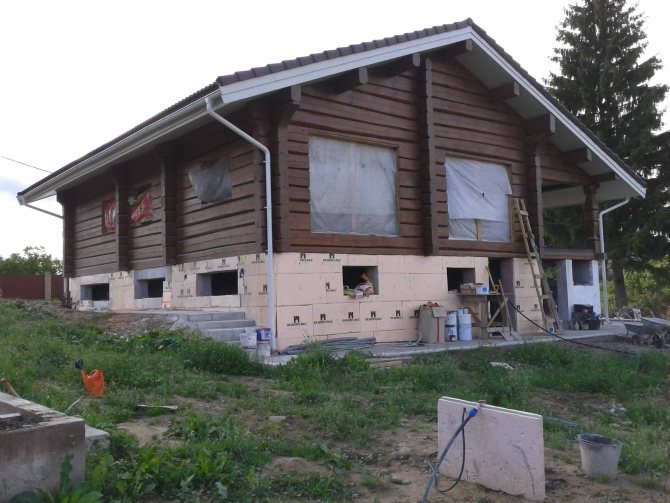
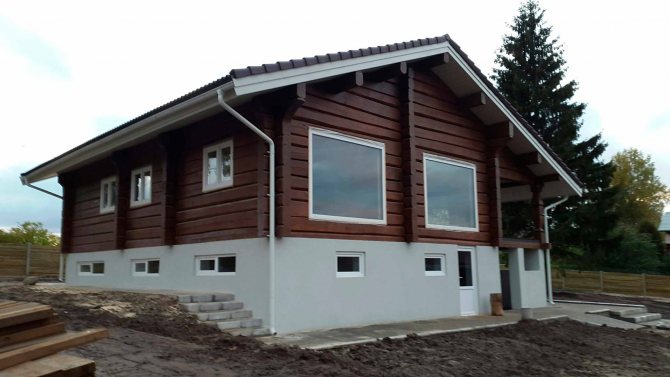
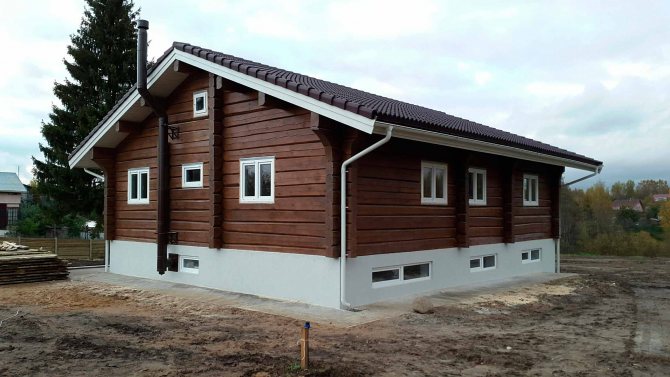
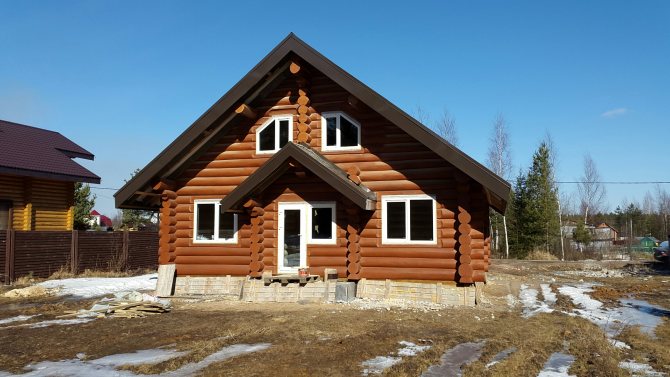
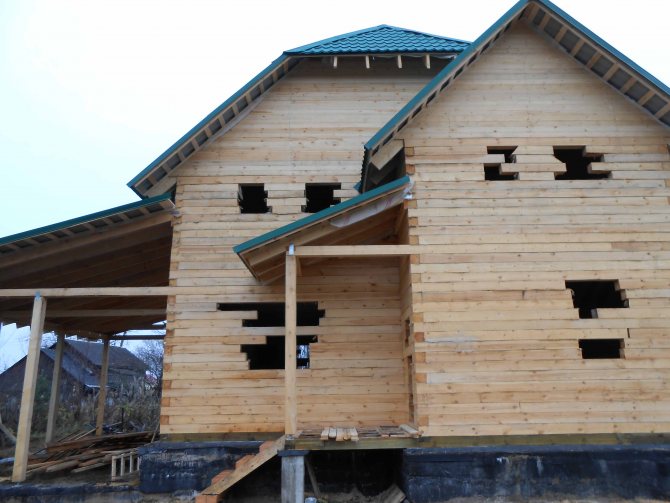
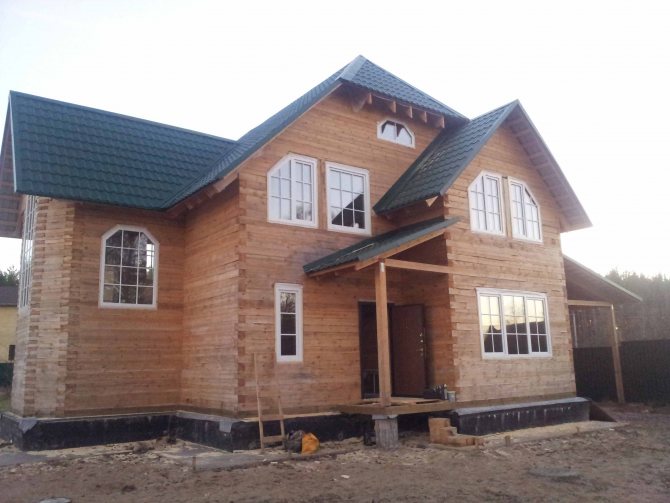
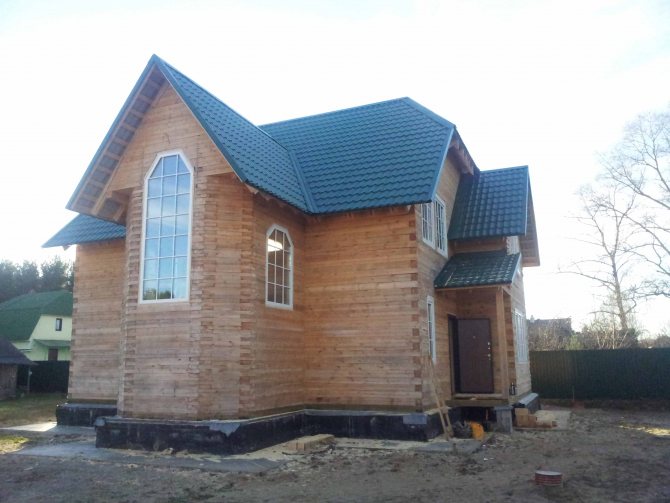
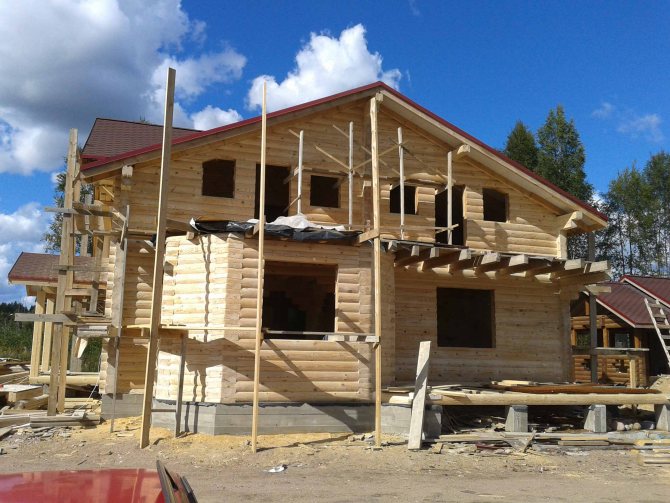
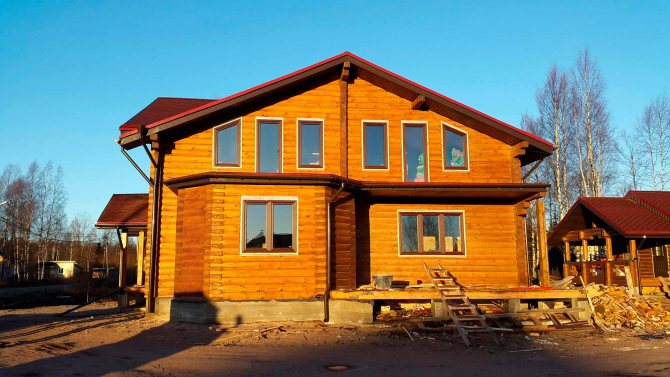
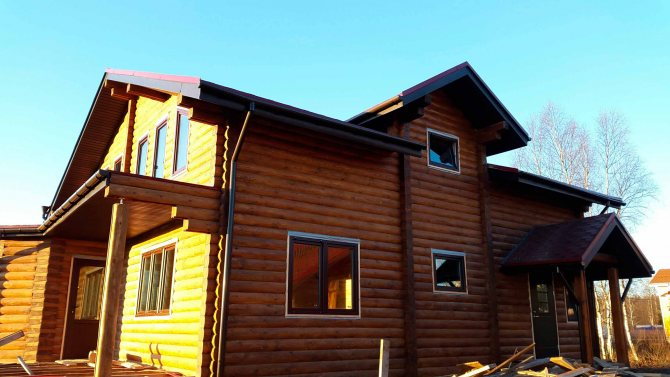
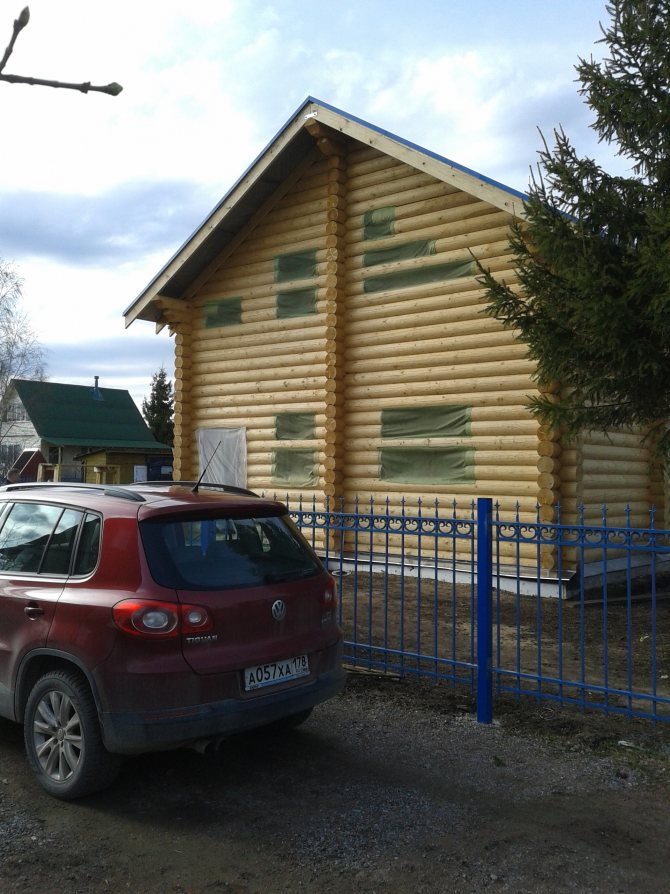
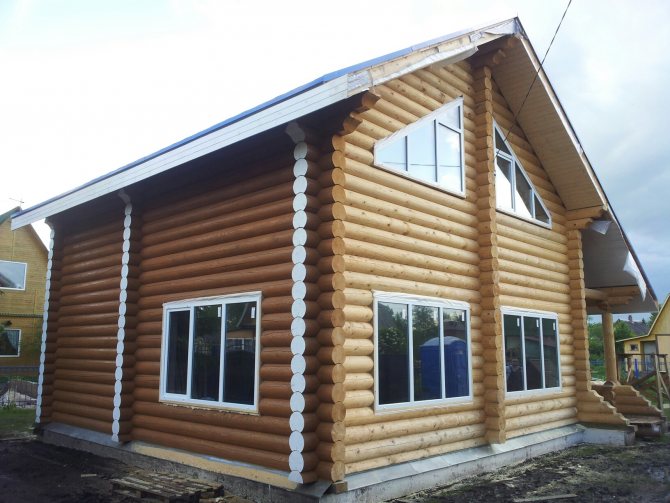
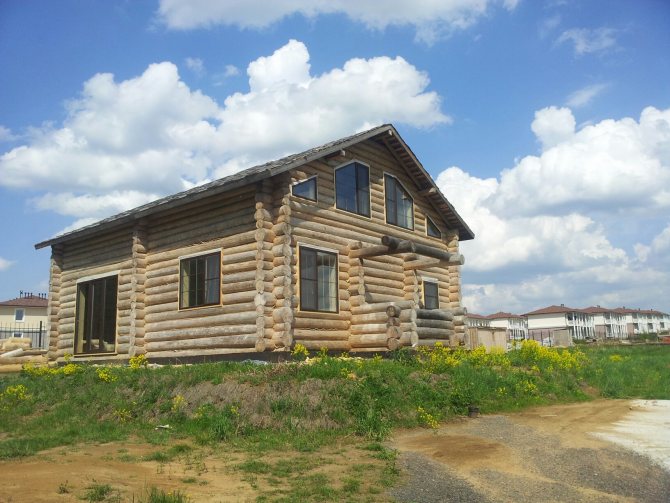
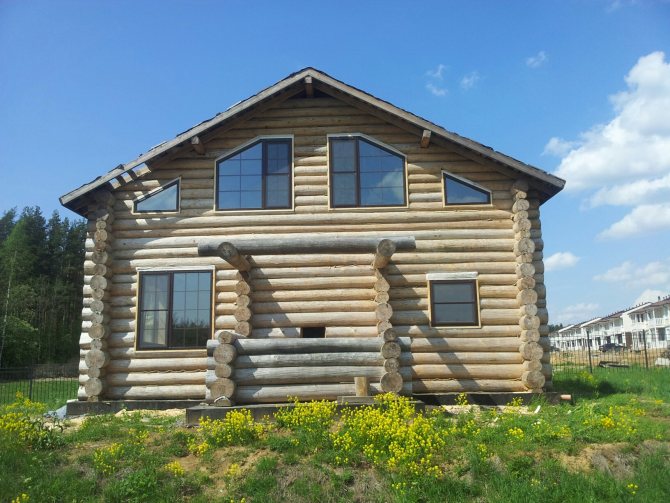
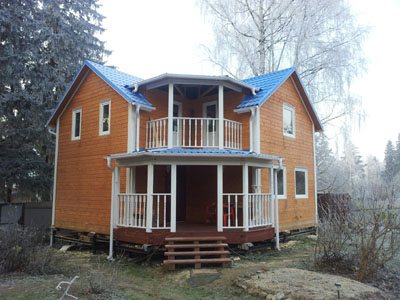
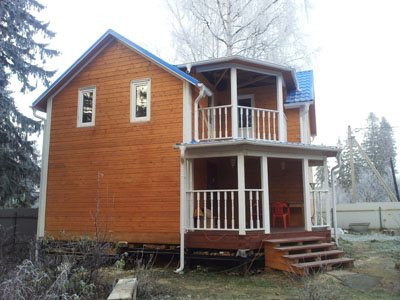
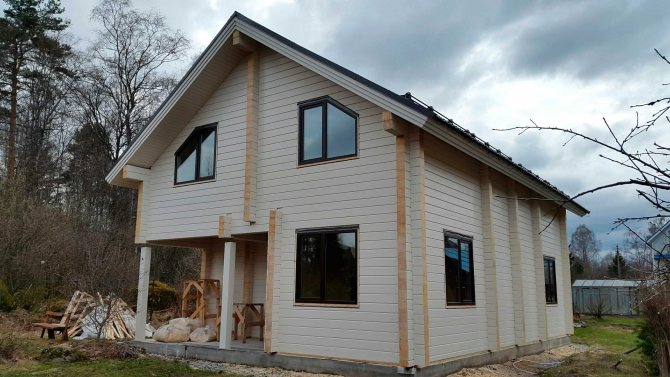
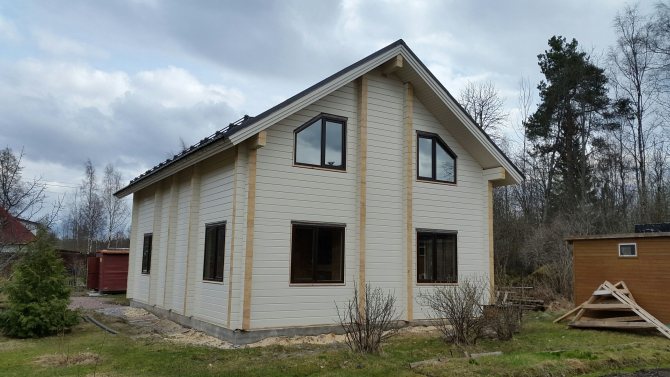
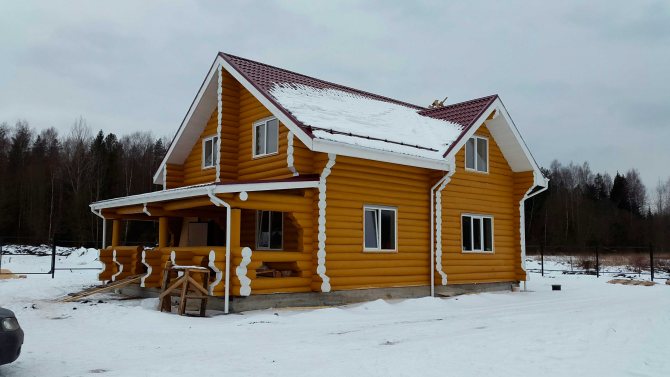
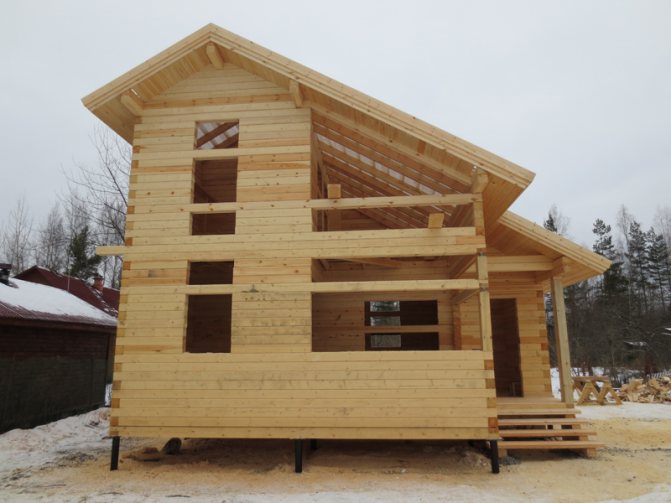
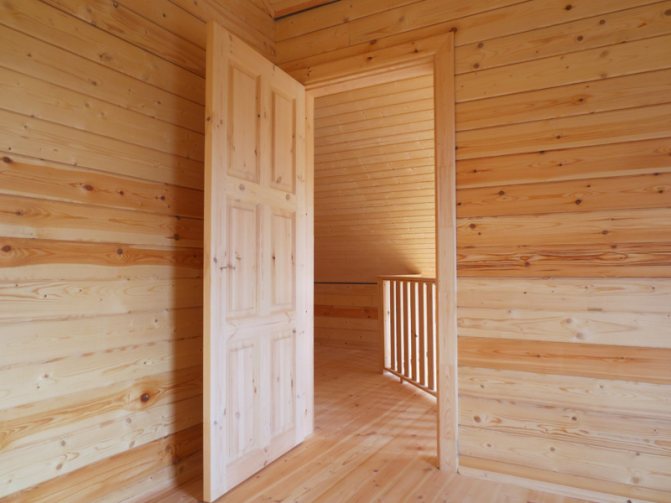
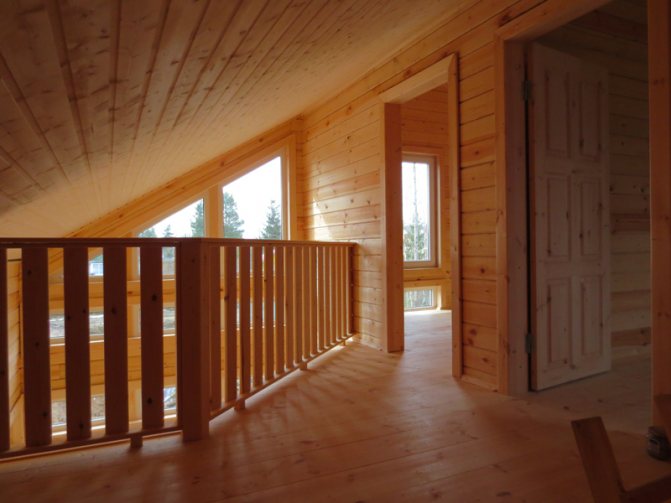
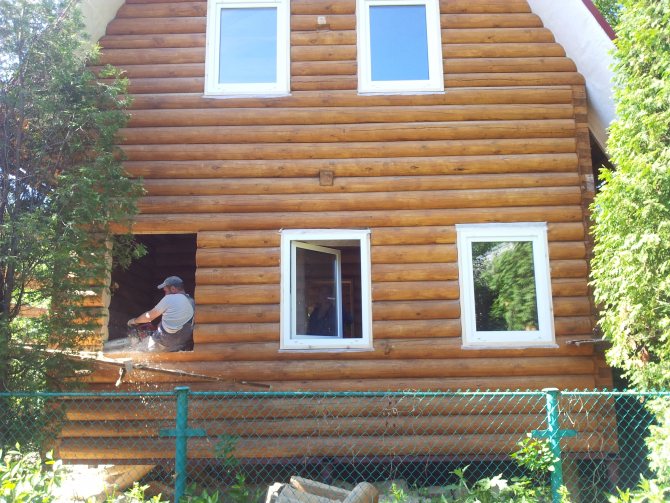
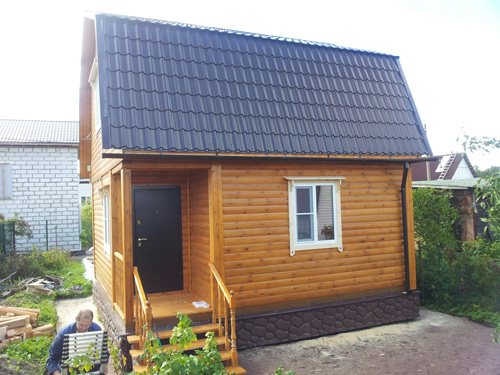
Houses “before” and “after” installation of casing and windows
The following are examples of houses before and after window installation. See how your home can be transformed too
|
|
|
|
|
|

|
|
|
|
|
|
|
|
|

|
|
|
|
|
|
|
|


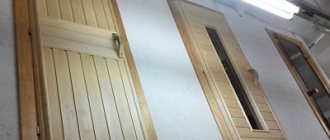
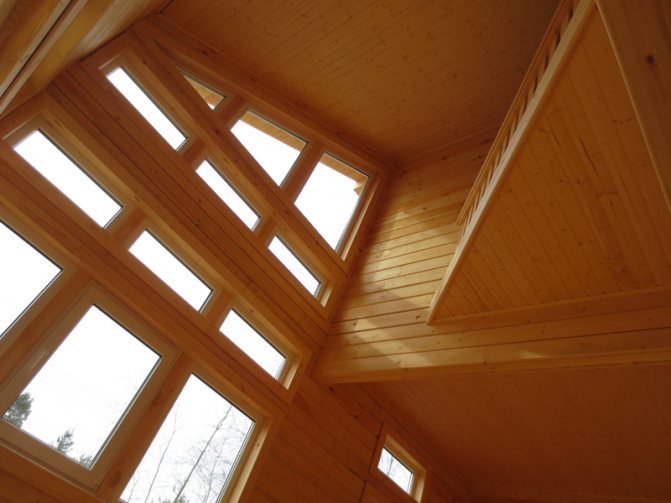
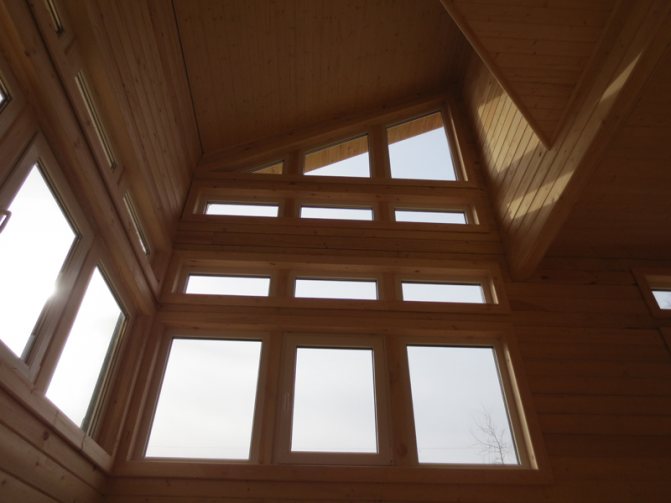
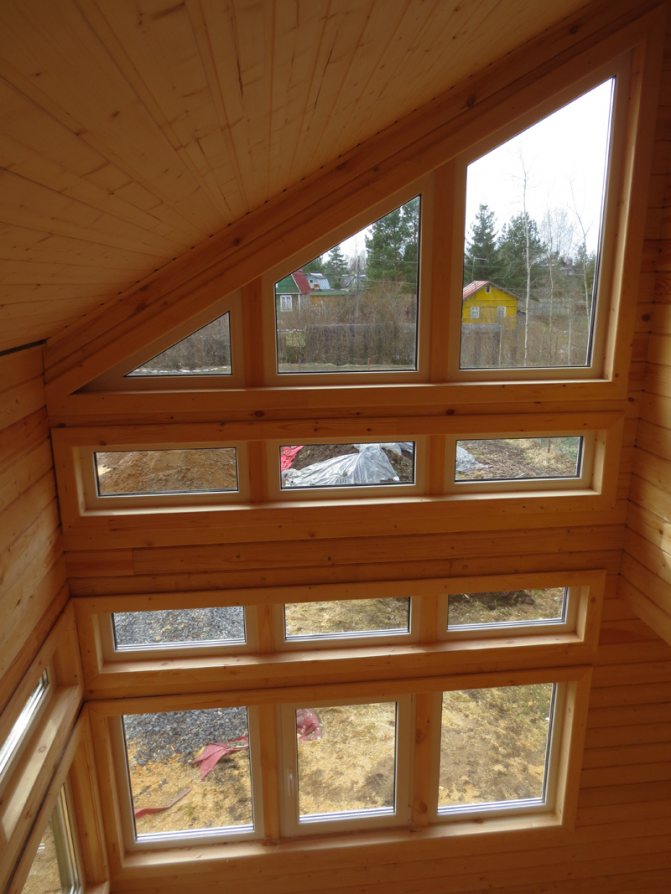
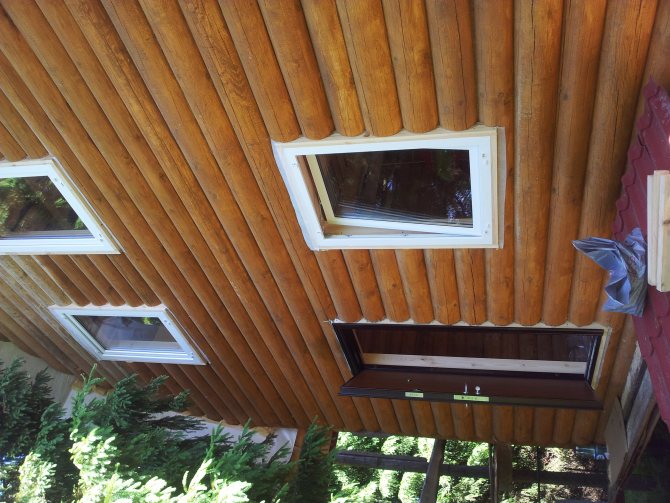
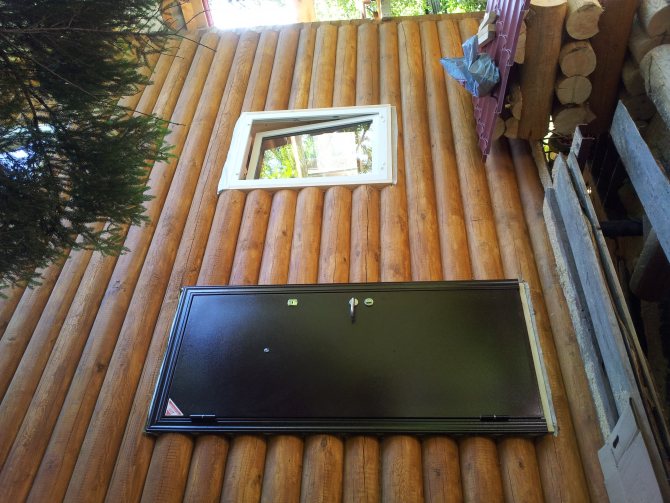
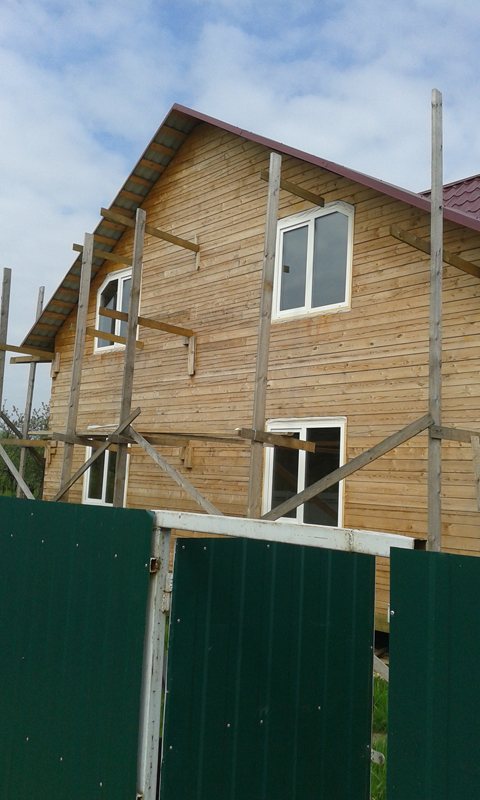
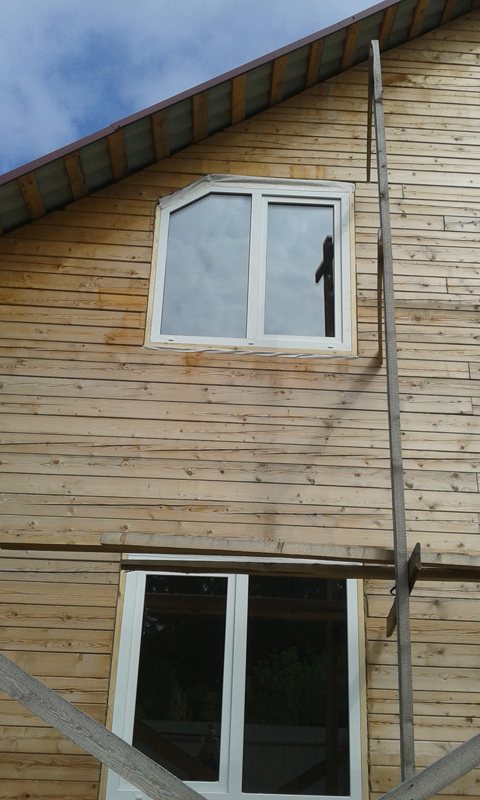
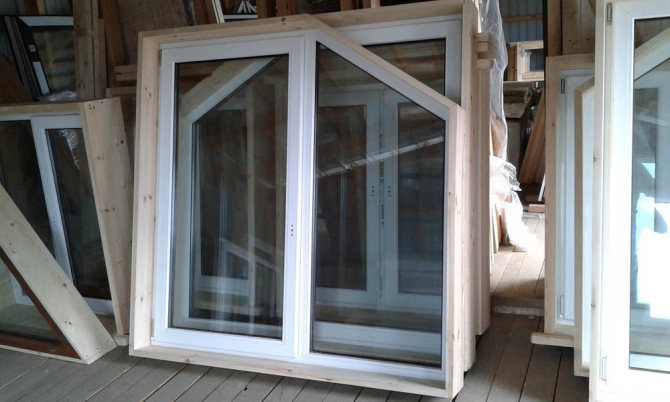
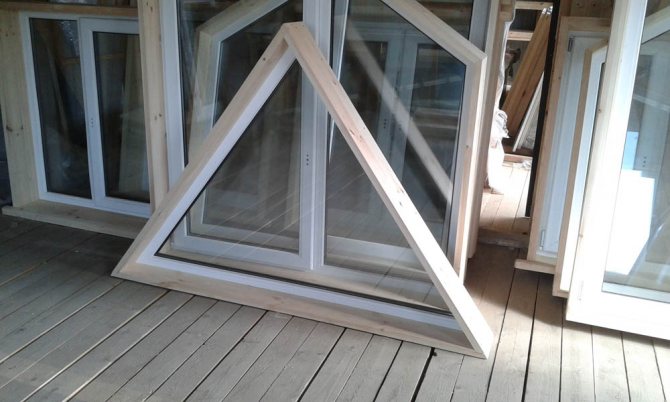
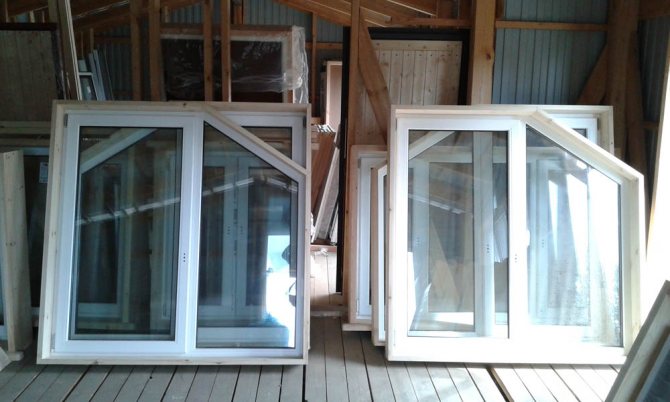
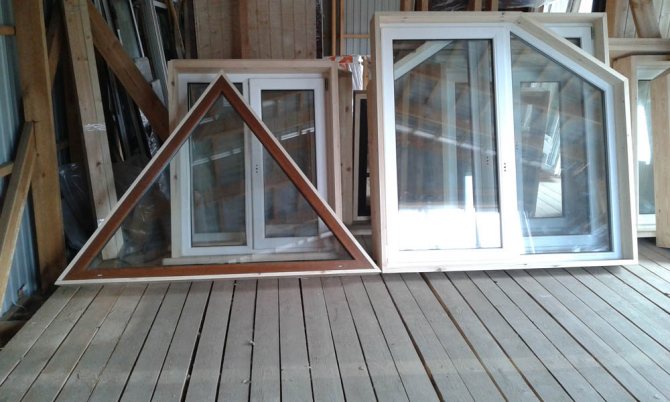
Installation of frames in log houses for trapezoid windows
Almost every second log house in which we install a frame has trapezoid windows. Trapezoid-shaped windows usually have 4, 5, or less often 6 corners (see photo 1). What is the specificity of the frame for such windows, how to prepare the opening in the log house so that the trapezoid windows look organically on the facades of your wooden house? First of all, it should be noted that most of these complex-shaped windows in log houses must have opening sashes. The fact is that in the summer the attic of a wooden house heats up, and it becomes necessary to ventilate the rooms on the 2nd floor. The walls of log houses, especially those made of thick timber or logs, have a high heat capacity, so on warm summer nights you have to open the windows. However, for technological reasons, the tilt-and-turn sash of a metal-plastic window cannot be smaller than a certain size; moreover, it most often must be rectangular. Thus, it is necessary to form an opening in the log house for installing the frame so that the trapezoid window meets several important requirements: 1. The inclined side of the trapezoid window must be parallel to the rafters. 2. The trapezoid window must have a tilt-and-turn sash 3. The window sill of the attic window must be at a safe height 4. There is space left between the frame and the roof overhang trim for installing the casing.
Unfortunately, existing openings in log houses do not always make it possible to install a frame under trapezoid windows without complications. Photo 2 clearly shows what openings the would-be builders left in the timber frame - they didn’t leave room for the platband, and they made a big mistake with the dimensions. Our engineers and carpenters had to work hard to calculate the correct sizes of windows and frames for this log house (see photo 3). Many Customers call city window companies to measure windows in a log house. As a rule, measurers have no idea about casing, shrinkage and technology for installing windows in a frame. The result of such measurements is in photo 4. You can clearly see how the angles of inclination of the trapezoids and rafters do not coincide. Everyone should mind their own business - some professionally install windows in “Khrushchev” and “ship” buildings, and others install windows in wooden log houses.
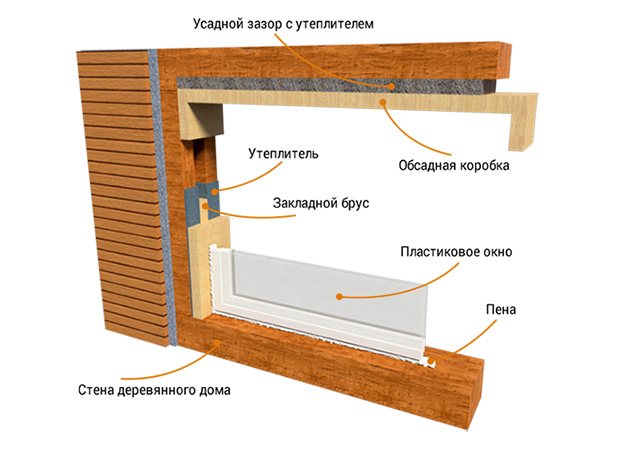
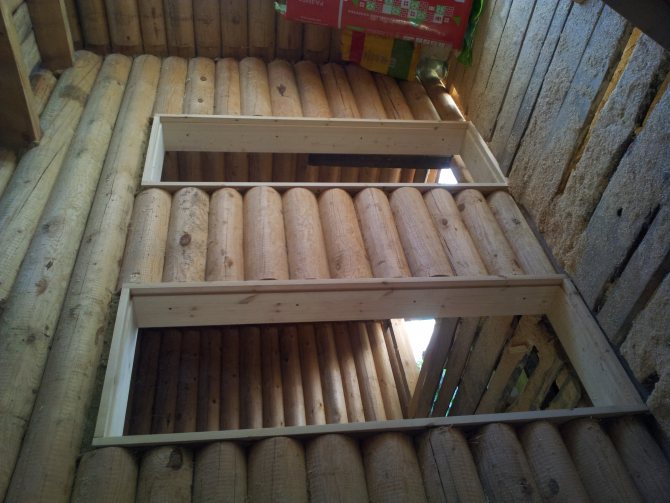
Construction of a window opening in a log house
Construction of a window opening in a log house.
- First you need to decide on the height of the window sill. As a rule, it is 80-90 cm. This height is optimal for comfortably leaning on the windowsill. The window opening is cut approximately 5 cm below the expected height of the future window sill, since the thickness of the polyurethane foam layer is 1-2 cm, and the thickness of the window sill itself is 3-4 cm.
- Next, you need to place the horizontal and vertical lines of the window opening. A building level and plumb line will help with this.
- The lower line of the window opening is placed according to the level, and then the upper one. In this case, the height of the window opening should be at least 14 cm greater than the window itself, since the distance from the bottom edge of the window opening to the window should be left 4 cm for the window sill and foaming, on top - 2 cm for foaming, and for shrinkage of the house - 4-5 cm .
- When marking the vertical lines of a window opening, it is also necessary to take into account that it must be at least 14 cm wider than the window itself, of which 2 cm each goes for foaming, and 10 cm for the casing (jam).
- The window opening is cut according to the markings.
We suggest you read: How to properly make lighting in a bathhouse in a steam room with your own hands
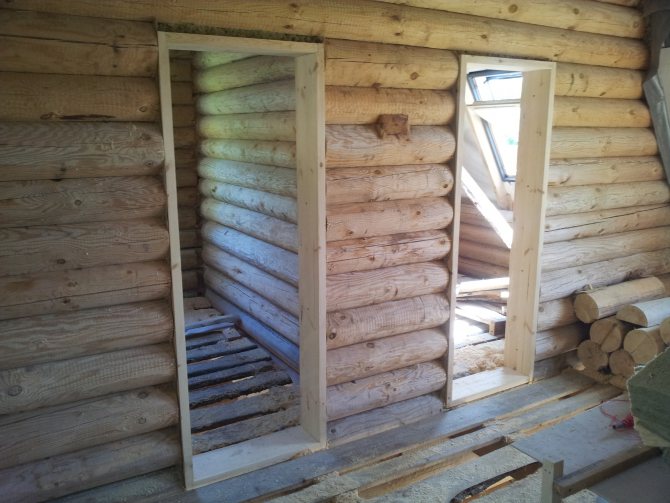
Before cutting, we mark the window opening using a level, because the plastic window will be installed strictly level in all planes, therefore the frame must also be installed in the opening as accurately as possible according to the level initially.
The lower crown in the opening needs to be sawed through so that a flat horizontal platform is obtained.
We determine the dimensions of the opening based on the size of the plastic window, the thickness of the casing bars and the size of the required gaps.
Accordingly, we take a beam with a cross-section of 100x150 mm and cut out a T-shaped profile.
For a U-shaped window frame, we cut out a U-shaped profile from solid timber.
The size of the shrinkage gap (H shrinkage) is not easy to determine, since the amount of shrinkage of the house, as mentioned above, depends on many factors. If we, for example, roughly calculate, taking everything to the maximum, then for a window with a standard height of 1400 mm (plus the thickness of the casing crossbars, plus installation gaps ~ 245 mm) with 15 percent shrinkage, the top gap will be 24.5 cm - a huge hole , the height of which will most likely end up being too large.
• if you are building a new house, then start installing windows in it no earlier than a year after the construction of the log house in order to wait out the period of the most active shrinkage. Then, when manufacturing and installing the frame, the size of the shrinkage gap (H shrinkage) can be safely made 60-50 mm for a log house, 50-40 mm for a timber house and 40 mm for a house made of laminated veneer lumber;
• if your house has stood for more than five years, then the shrinkage gap (H shrinkage) can be made minimal - 40 millimeters, just to compensate for possible seasonal changes in the geometric dimensions of the opening;
So, we calculated the size of the opening, marked it and cut it out. Now you need to cut out a tenon at the ends of the logs (beams) on the sides of the opening. The tenon is also marked using a level in the center of the log (beam).
We make the tenon size 60 mm - width and 40 mm height.
We cover the sides and bottom of the opening with linen or jute using a stapler.
Installation of windows in casings in a house made of profiled timber
Manufacturing casings and installing windows in houses made of timber has been our constant work for more than 15 years. Technologies for the construction of log houses have developed over the years towards the maximum use of modern woodworking equipment. Projects of such timber houses are developed by professional designers using specialized software. Our photographs show a house made of massive chamber-drying profiled timber, in which the cups are cut in production (the log house is made “with residue”). What are the specifics of installing casings in such timber houses? The basic technology is always the same - finished glued casings with installation in a “mortgage” block, however, each manufacturer of house kits has its own technological features. These features must be known and taken into account by the civil engineer who will calculate the sizes of windows and doors and develop the casing design for them. Errors in the design of casings and window sizes will literally cost a lot.
|
|
|
Installation of wooden windows
The frame for ordinary windows is made using a groove in the logs adjacent to the opening, into which a block is inserted. The block becomes one of the sides of the window block. First, insert the bottom one, then the two side ones, and finally the top one. Inter-crown sealant is placed in the grooves and shrinkage gap.
The seal provides heat and sound insulation, protects the wood from dampness and insects. Sometimes polyurethane foam is used as insulation, but it is completely unsuitable for a wooden house. The foam holds the logs tightly together and prevents natural shrinkage. It is better to choose natural flax and jute.
Finally, the shrinkage gap is closed and decorated using fillets and casing. They will give the window a finished look and make the decor aesthetically pleasing. Products can be of any shapes and sizes, colors and shades, with carvings and patterns.
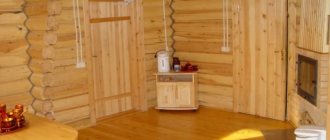
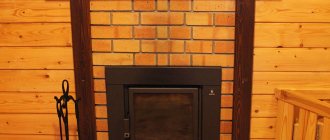
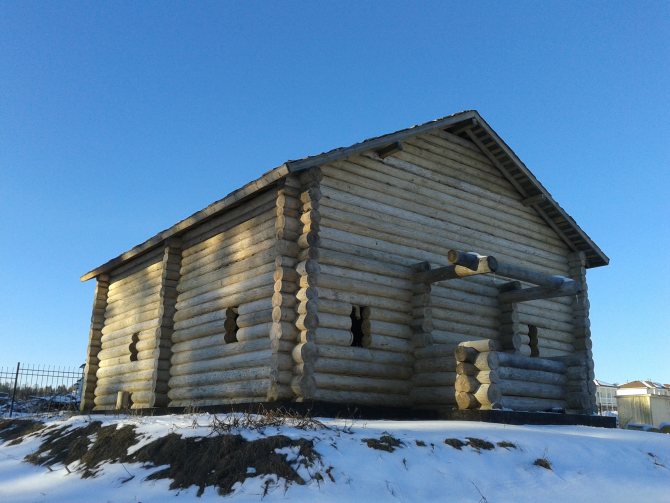
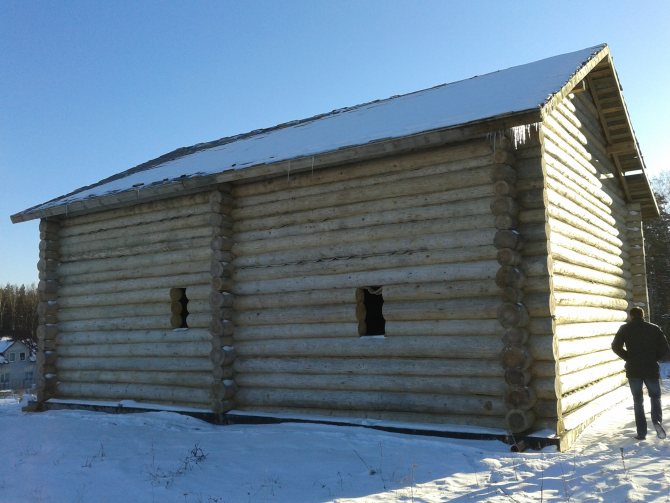
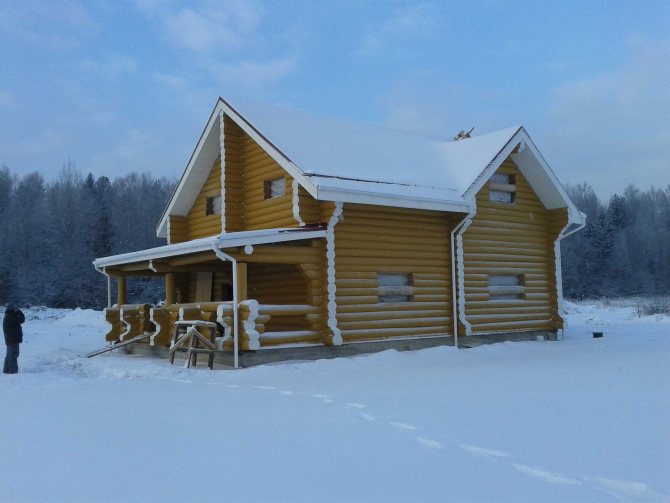
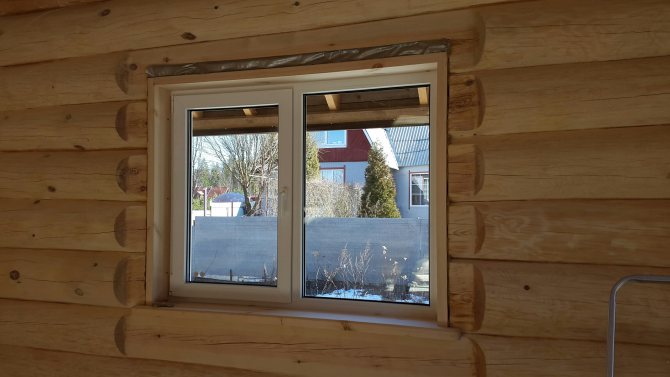
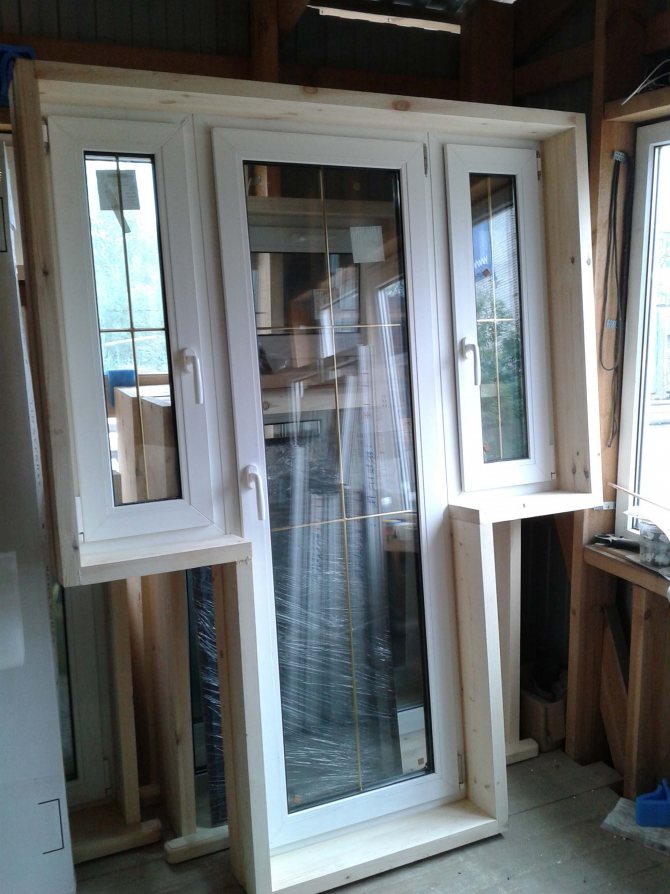
Installation of windows in a log house
We have to install windows in the log walls of log houses quite often. A peculiarity of log houses made outside of St. Petersburg is the absence of prosthetics around window and door openings. In this case, there was also no cutting, and the log was “selected” well - diameters are 27-32 cm. In such cases, we make casings according to the size of the thickest log that “exits” into the opening. The work of preparing openings in walls made of thick logs is much more labor-intensive than in houses made of profiled timber. Marking openings for windows and doors requires a professional approach from engineers and carpenters; this is due to the specifics of log houses. The finished glued casing was installed using the “in-embedded block” technology. Further in the photo block, in the first photo there is a house before installing windows, and in the other two - the same house made of logs with installed windows in casings.
|
|
|

How to properly insert a window into a log house
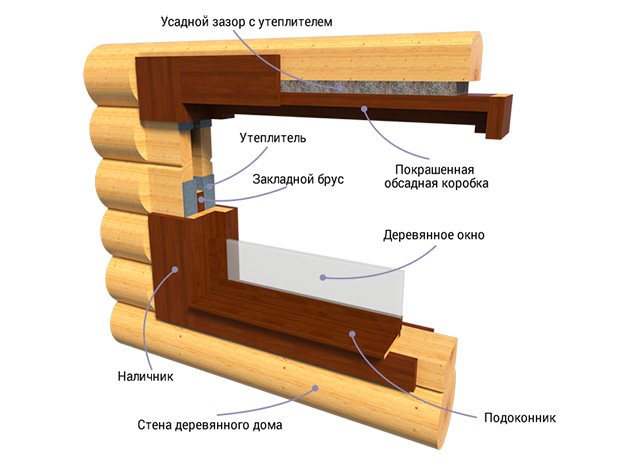
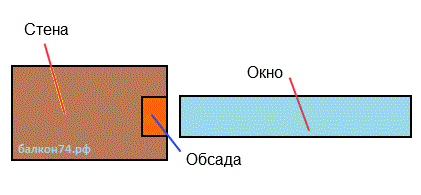
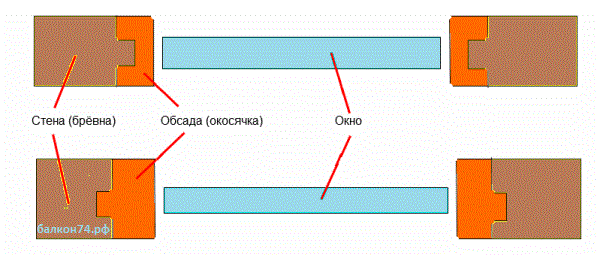
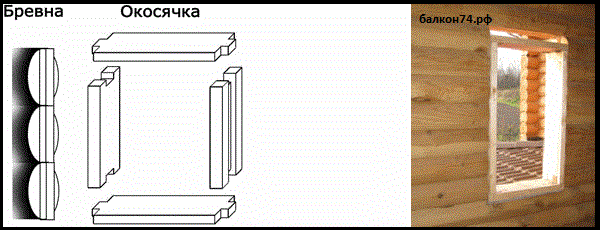
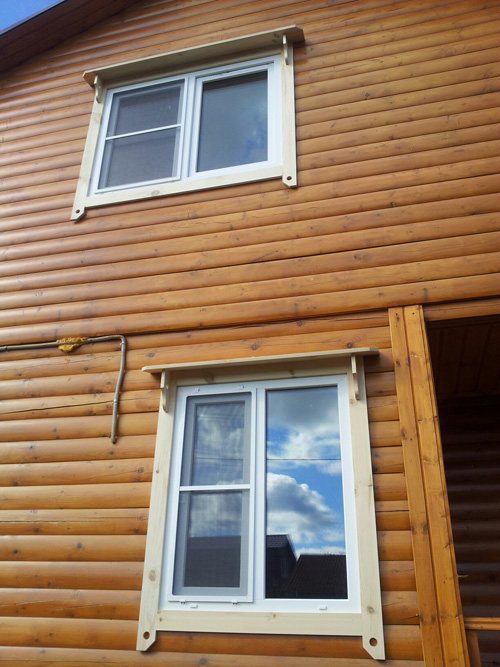
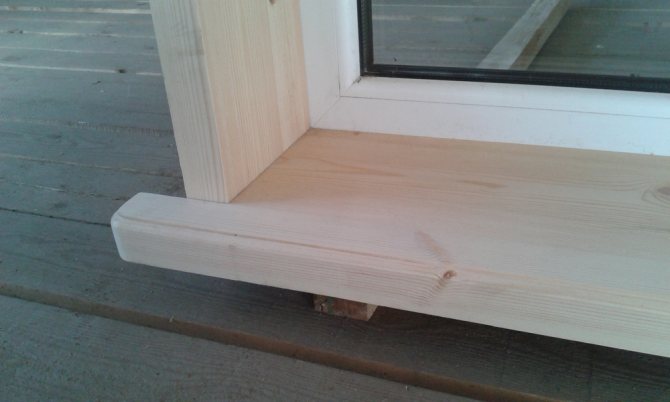
In order to avoid or minimize the possibility of deformation of window structures, special methods are used, the main one of which is the use of the so-called casing. It refers to a wooden frame, which is made of four boards, the thickness of each of them is from 6 to 8 cm. The board located below is a window sill, and the remaining three are the side and top slopes.
The use of such a seemingly simple design allows you to insert a window into a log house, protecting it as much as possible from possible deformations. A similar effect is achieved by connecting the casing to the walls of the log house in a special way, using a longitudinal slot (its depth is 2 cm, width is 6 cm). It is performed on the side elements (slopes). As a result, when the house structures are deformed, the resulting connection, using the veneer principle, allows the gap between the casing and the supporting structures of the wooden frame to be reduced or increased. In this case, there is practically no effect on the window filling.
The system described above allows you to insert a window into the log house, while taking into account the need to properly seal all joints. For this, some kind of thermal insulation material is used, preferably natural. Most often, ordinary tow is used, which significantly reduces the heat loss of the building in the area of the installed window.
The use of polyurethane foam is impractical, since with possible subsidence, the insulation that has gained strength and hardened will simply come off one of the surfaces. As a result, cracks appear and the lack of normal and effective thermal insulation.
Installation of windows in casings in a log house made of planed logs
One of those rare cases when the Customer, having previously studied the issue, placed an order for the production of a log frame from real St. Petersburg carpenters, and did not chase the apparent cheapness of imported Arkhangelsk, Vologda, Pskov and other log houses. This log house differs from the above, like a European car from the early products of the Chinese automobile industry. The main differences between a high-quality log house made from planed logs: - carefully selected logs with a small range of diameters, in this case - logs 28-32 at the top; — the presence of a gap around window and door openings, as well as a groove with embedded bars; ridge logs and log purlins as part of a sliding rafter system; - Protest on the gables. What are the specifics of installing casing windows and doors in such a log house? Essentially, you have to work “through ready-made openings.” On the one hand, the amount of carpentry work is reduced, on the other hand, an engineer’s error in calculating the size of windows and casing is absolutely unacceptable. Indeed, in the event of a miscalculation, there is no possibility of additionally trimming the openings - the window or door will have to be made again according to new dimensions, there is no need to talk about casings... At this site there was one nuance - the design dimensions of the trapezoid windows had to be adjusted according to the actual angles of inclination of the roof and slightly changed casing design, but everything turned out neatly - the owner is happy...
|
Basic casing options (pipelines)
The simplest version of the casing is a 50x50 cm beam inserted into a vertical groove of the same dimensions, cut at the ends of the window opening logs. This version of the frame is used only when installing wooden windows. And since we are considering installing a metal-plastic window in a log house, there is no point in considering this option in detail.
In another version of the jamb, a tenon (the so-called comb) is made at the ends of the logs, onto which a carriage with grooves is placed.
A window carriage is a vertical beam measuring 150 by 100 centimeters, with grooves measuring 50 by 50 cut out at the ends, into which boards measuring 150 by 50 with tenons at the ends (horizontal lintels) are inserted.
Due to the ridge, when the house shrinks, the logs slide inside the groove without pressing down on the window structure or deflecting vertically. Sometimes the tenon is made on the carriage, and the groove in the logs, while the basic principle of operation of this casing option remains unchanged.
Note! When assembled, the window frame should be 7-8 centimeters in height less than the window opening (this gap is left to allow for shrinkage of the house).
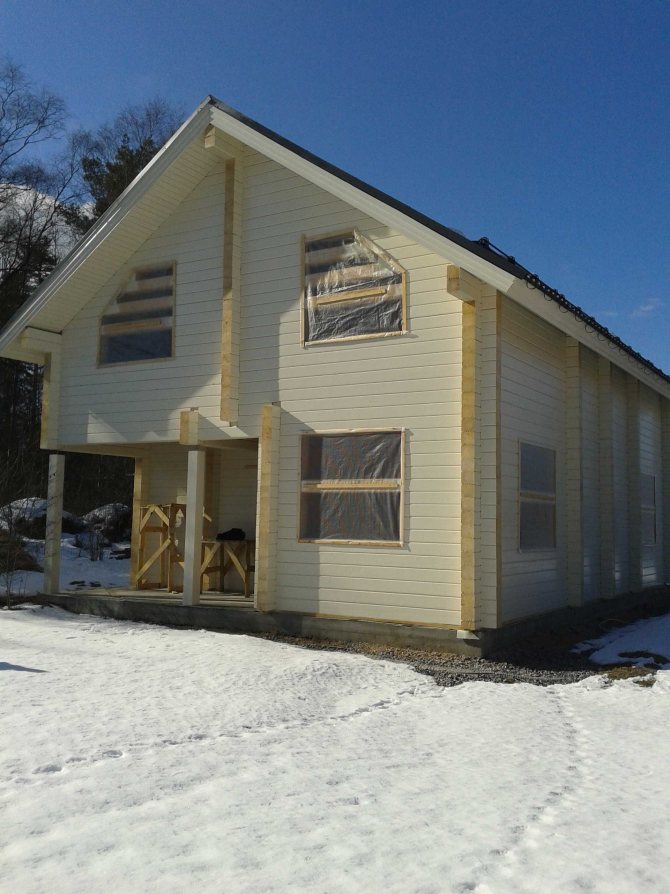
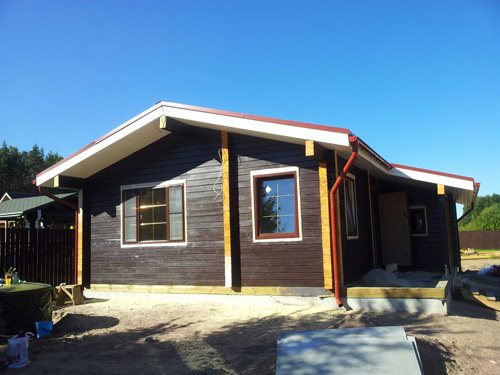
Installation of windows during the construction of a house made of profiled timber
The following is a selection of photographs taken during the installation of casing windows in a house made of profiled timber.
|
|
|
|
|
|
|
|
|


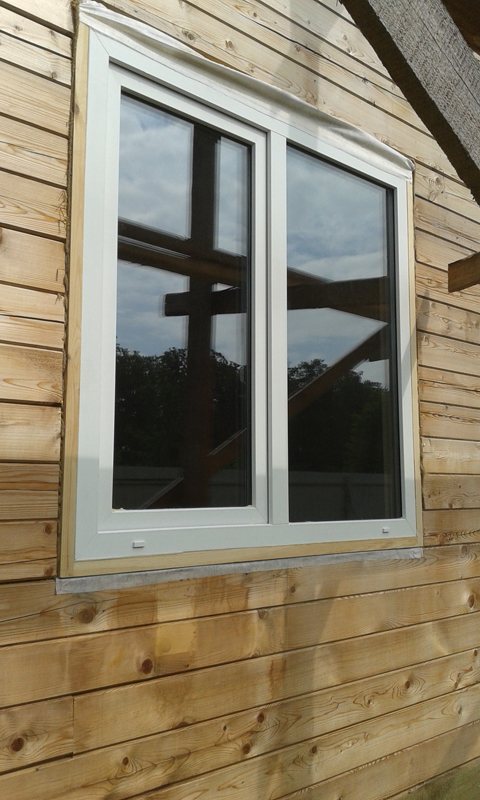
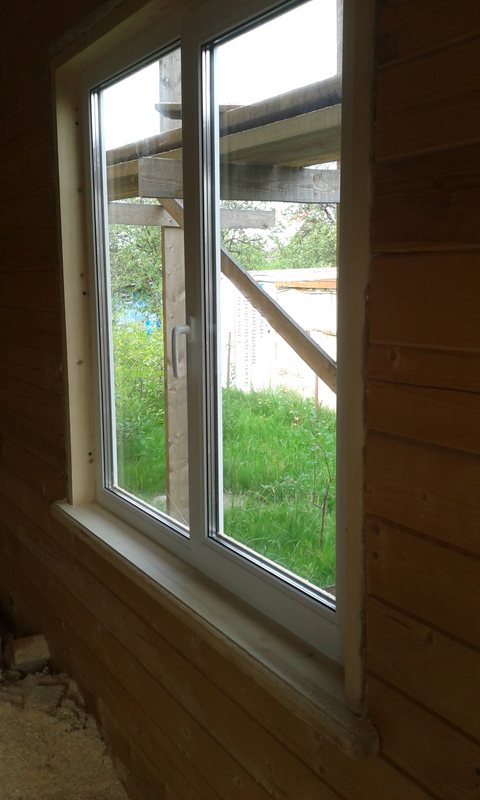
Installation of plastic windows
Installing a casing for plastic windows is a labor-intensive process, as it requires cutting out the ridge and installing a carriage. It is along the carriage that the logs will settle. It must be taken into account that the opening should be 13-15 cm larger than the window frame.
The holes and grooves are filled with mounting foam, then covered with mounting tape. The hermetically sealed connection will not let the cold into the room and will ensure the necessary moisture exchange. Finishing is done using plastic slopes and window sills.
Installing windows in a wooden house is a labor-intensive process that requires a sequence of actions, accuracy and care. Improper installation of the window frame will lead to serious problems. These include frequent drafts and creaks, jammed doors and locks, skewed openings and walls.
To avoid such troubles, entrust the work to the masters of the MariSrub company. They will manufacture and install blocks, insulate openings around the perimeter using thermal insulation materials and vapor barrier film. This will protect against the penetration of wind, cold and excess moisture in the room.
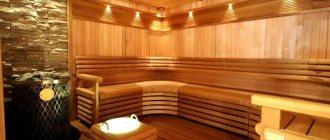
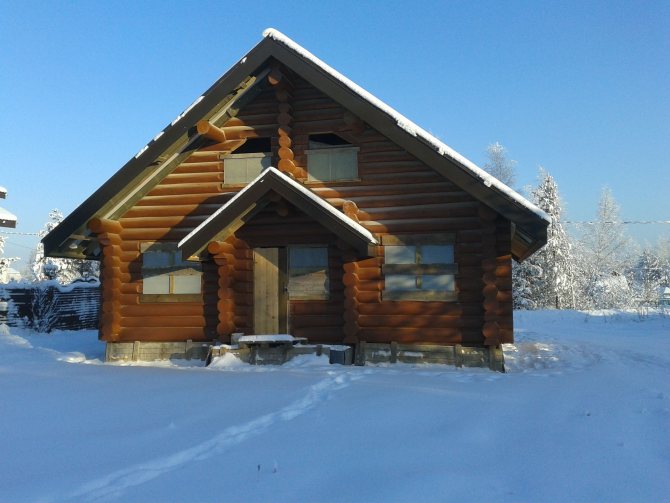
Installation of windows in houses made of rounded and planed logs
Several photographs illustrating the features and quality of installation of windows in log houses made of rounded and planed logs
|
|
|
|
|
|

Windows in casings in houses made of profiled timber
Several examples of installing windows in houses made of profiled timber
|
|
|
|
|
|
|
|
|


How and where to put windows in a bathhouse
When building a bathhouse, the question often arises of how to choose the right place to install windows, how many of them to make, and whether it is worth installing them at all. One thing is clear - the rules applicable to the location of windows in apartments and houses are radically different from the requirements for choosing a location for windows in a bathhouse.
About the need for windows in the steam room
Whether or not to install windows in the steam room is the preference of the bathhouse owner. Those who decide to give up such luxury will need to pay due attention to the organization of ventilation. Those who have chosen to install windows can use them to ventilate the steam room.
In a classic Russian bathhouse, for a comfortable pastime in the steam room there should be two windows. The first is located above the shelves opposite the door. This is necessary in order to periodically introduce fresh air during vaping. This will come in handy if it becomes stuffy or the temperature rises too high. The dimensions of such a window should not be large.
Another first window is necessary to organize “bulk ventilation” during soaring. It happens like this: the door and window open, and there is a sudden change in air. After which everything closes and the room is filled with warmth again. Usually, during such an event, the bathhouse does not have time to cool down much, so the temperature returns quickly.
The problem area in the steam room is the shelves. This is a place where problems with wood often arise, and if you place a window there, constant ventilation will eliminate such troubles. This is precisely why a second window is made in the steam room.
A good place for bath windows
The main “trump card” of the Russian bath is high humidity. This can be achieved by correctly positioning the windows and doors in the steam room. To prevent steam from escaping when the doors are opened, they are made low. And the window is positioned so that its bottom edge is level with the top edge of the door. The window dimensions are approximately half a meter in length and height. It is enough to make the window under the shelf small. The main thing is that there is enough of it to dry.
When installing and making windows for a steam room, it is important to remember that, according to safety regulations, they must be positioned so that they open inward and the doors open outward.
Windows in the washing room - why they are needed and what size to make
The first function of windows in a washing room is to ventilate and refresh the space. And in case of fire, the window serves as an emergency exit, so each owner determines the size and location himself. So the window in the washing room must correspond to the dimensions of all family members and meet safety standards.
Plastic or wood
Despite the fact that the traditional material for a bathhouse is wood, many owners are switching to plastic windows. In fact, it is very practical and modern. Over time, wood loses its original appearance and becomes deformed due to temperature changes. The plastic is resistant to temperatures up to 100° and high humidity. So for lovers of moderate heat and humid steam, plastic windows are an acceptable solution.
In addition, many are interested in how many glasses to install, one or two. The answer is two. A double-glazed window eliminates the accumulation of condensation, therefore, it will not collect and flow onto the lower crown, which will save the wood in that place from dampness, fungus and rot. And, of course, double glass will always better retain heat in a room.
Bathroom window installation technology
The best time to install windows in a bathhouse will be a year after its construction. This is the approximate time for the final shrinkage of the structure. If you decide to install windows earlier, then this must be done with the manufacture of casing, which will take on the entire load when the frame shrinks.
Marking is done using a laser level or plumb line. It is better not to use a building level. The opening is cut with a hand-held circular saw or chain saw. The lower border of the door or window should reach the middle of the beam.
The next step is to assemble the casing. A beam of 10x10 cm or 10x20 cm is suitable. The side strips should be lower than the height of the window in order for shrinkage to occur without damaging the window structure (5-7 cm for a new structure and 2-3 cm for a shrunk one).
The casing assembly design is tongue-and-groove; no other fasteners are used. The tenon is made on the window frame, the groove on the timber. A width of 5 cm is sufficient for the groove, the depth of the tenon is about 4 cm. Then everything must be treated with a specialized impregnation against rotting and insects, intended for baths. Afterwards, the gap between the groove and the tenon is covered with insulation, and then the structure is fastened together.
The remaining gaps are filled, as a rule, with polyurethane foam, but you can use another type of insulation, basalt insulation.
Thus, the assembly of the casing protects the window from damage as a result of shrinkage of the bath.
Classic windows and casings
|
|
|
|
|
|
|
|
|


| Casings | Windows | Window installation | Our works | Contacts | St. Petersburg, Bolshevikov 52, building 1, | Obsady.rf 2013 |