Design features of such a furnace
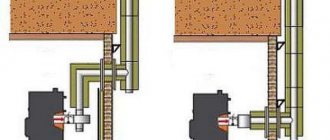
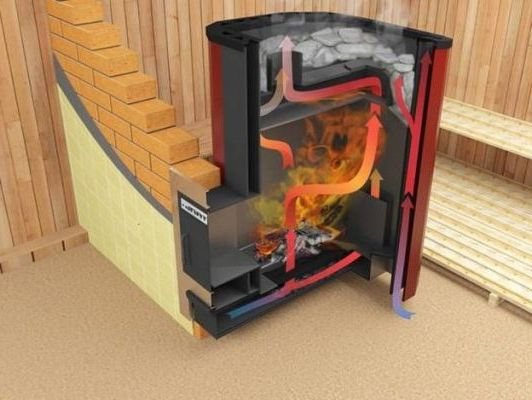
The stove in this scheme is mounted near the partition (it must be finished with heat-insulating materials). Relative to the entrance, the heating device can be located on the right or left - it all depends on the characteristics of the room. The main advantage of this scheme is that it allows you to heat several rooms at once.
Also, the design with firebox doors on the outside is convenient because oxygen will not be used when using the stove. This will allow you not to bother with arranging a forced ventilation system. To properly construct and install a bathhouse according to this scheme, you need to carefully approach the process, taking into account all the recommendations. If you do everything anyhow, the result of such activity will be unsatisfactory.
Advantages and disadvantages of furnaces with remote combustion chambers
This design, like other options, has its pros and cons, which are also worth paying attention to when building a bathhouse.
The advantages of a stove with a remote firebox include:
- A special design with the installation of a firebox in the dressing room will accumulate thermal energy not only in the steam room, but also in the room located in front of it;
- The fuel door on the outside of the steam room will prevent the combustion of oxygen inside. As a result, water procedures will become more useful and enjoyable.
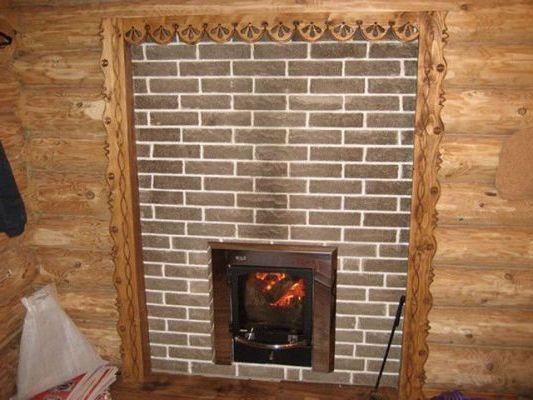
But this scheme also has disadvantages:
- It may be necessary to interrupt water procedures to adjust the burning intensity, because for this you will have to go to the waiting room;
- The process of installing a stove with a remote firebox is quite complicated. If you do not have experience in performing such work, you will have to invite a specialist, which will entail additional financial costs.
Where will we source the firewood from?
Firebox from the steam room
Advantages:
- ease of installation
- If there is a glass door, you can observe the combustion process directly in the steam room
Flaws:
- the stove consumes combustion air directly from the steam room. This is perhaps the most significant drawback and with this type of firebox it is necessary to organize good supply ventilation. Otherwise, it will be difficult for a person in the bath to breathe, and if there is insufficient oxygen, incomplete combustion of fuel may occur, which will lead to the formation of soot in the chimney.
- wood chips and debris in the steam room
Firebox from the street
Advantages:
- absolute safety: in case of problems with draft, smoke will not enter the room
- the stove takes air directly from the street, this will ensure complete combustion of wood and stable operation of the chimney
- there is no need to bring firewood into the bathhouse
Flaws:
- to put firewood you need to go outside
- use of a limited number of stoves with only a long combustion channel
Firebox from a dressing room, rest room or adjacent room
Advantages:
- Stoves with glass doors can serve as a fireplace and are pleasing to the eye in the relaxation room
- the stove takes air from the rest room, not the steam room
- no wood chips or debris in the steam room
Flaws:
- when the firebox exits into the dressing room, you need to additionally carefully trim the passage of the combustion channel, for example, cover it with stone or make a portal
- additional requirements for thermal insulation of a wall if it is made of flammable materials (frame walls)
After considering three options, you can make the right choice for your future bathhouse. Each of them has the right to exist, but it is better to give priority to stoves with firewood from the adjacent room and from the street.
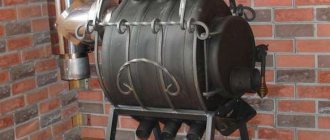
Pros and cons of metal stoves
Usually stone stoves are used for baths, but metal options are also rapidly gaining popularity, because they have many important advantages:
- Fast heating. The metal structure heats up in a very short time. With such a stove, you won’t have to wait for hours until the air in the bathhouse rises to the required temperature;
- Strength. As you know, metal is a very reliable material; it is not afraid of temperature changes, mechanical damage, high pressure levels and other factors;
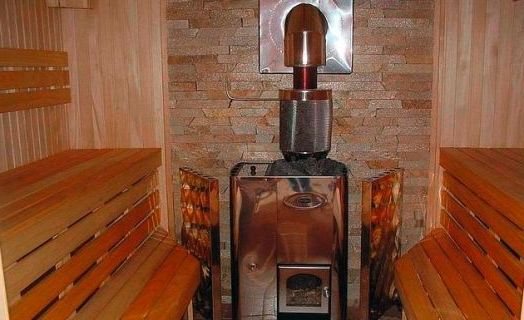
- Easy care. It is very easy to clean such a stove both from the inside and outside; no special products or tools are needed for this;
- Light weight. Compared to analogues made from other materials, such a stove weighs much less, which will greatly facilitate its transportation and installation.
There are indeed many advantages, but such heating units also have their disadvantages:
- Low heat capacity. The structure heats up really quickly, but it will cool down just as quickly;
- High risk of injury. If you touch a heated metal surface, you can immediately get a severe burn;
- Strong infrared radiation;
- Due to the nature of the material, the air after heating will be very dry;
- The main problem with metal is corrosion, and with constant contact with water in a bathhouse, low-quality options can quickly become covered with rust. But it is worth noting that modern stoves are coated with a special anti-corrosion coating;
- Appearance. Of course, a bathhouse is not a living room, and the interior is not the most important thing here, but still stone stoves look much better than metal ones.
Plastering the walls of the furnace structure
When finishing a stove structure, the following are most often used:
- bricks;
- tiles;
- stone (natural or artificial);
- plaster;
- tiles;
- steel case.
If you choose the most inexpensive and simplest option than finishing a stove in a bathhouse, then using plaster will be the optimal solution.
The work is carried out in two stages:
- The walls of the stove are plastered to remove dust and dirt.
- The second time, plaster is used to level surfaces, leveling chips and dents.
Only a master can perform this reliable and durable finish. As a result, the stove structure has a higher degree of heat transfer compared to the use of other finishing materials.
Each of the above materials has its own quality characteristics.
If you choose the most inexpensive and simplest option than finishing a stove in a bathhouse, then using plaster will be the optimal solution.
After completion of work, it is advisable to whitewash the stove structure with lime.
We suggest you read why the lining in the bathhouse swells
Only a master can perform this reliable and durable finish. As a result, the stove structure has a higher degree of heat transfer compared to the use of other finishing materials.
- thermal radiation negatively affects human health and brings certain inconveniences;
- to maintain the required temperature, the furnace must be heated all the time, because the iron cools quickly;
- the metal surface must be insulated due to the possibility of overheating.
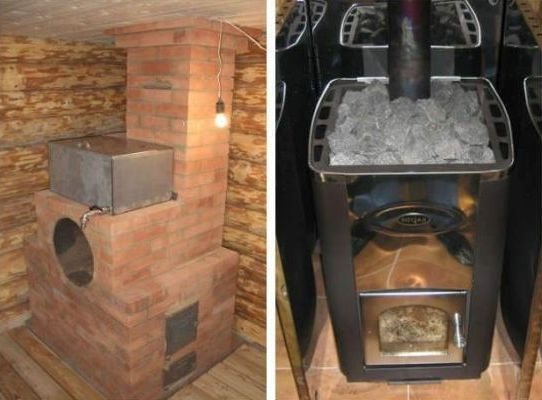
Due to these metal deficiencies, additional lining of the sauna stove is required. Why is brick used for this purpose? Firstly, hot brick is not as dangerous to humans as metal. It does not threaten such serious burns. Secondly, if you cover the stove, it does not cool down so quickly, which significantly reduces heating costs. In addition, the following advantages can be noted:
- a covered metal stove does not dry the air, the steam will be more humid;
- heat in the steam room spreads more evenly - the air is softer and more even;
- Using facing bricks you can give a beautiful, designer appearance to the steam room itself.
Popular models
Fortunately, not all metal stoves look bad; there are many high-quality, modern options on the market with excellent design and wide functionality. Of course, such stoves are not cheap, but you always have to pay for quality.
Narvi Steam Master Tunnel WT
This stove is produced by the Finnish company Narvi, and this particular model is equipped with an external firebox and a special glass door in a beautiful frame. Connoisseurs of high-quality steam will especially like this stove, because the device can work even in large baths with an area of up to 25 cubic meters. The oven allows you to create soft, pleasant steam, this is ensured with the help of an effective air exchange system and a unique lid design, which is installed on the thermal hood.
When heating the heater, the lid must be closed, this will keep the heat in the stone tank and not dry up the oxygen in the bath. To prepare the steam room for use, you need to light the stove; this requires 1.5 hours.
To manufacture this stove model, the Finnish manufacturer uses enameled and very durable steel. Enameled steel is used for the production of the outer casing of the furnace, and especially strong steel is used for the arch of the firebox and pipes. It is worth noting that this model is considered quite expensive; you will have to pay about 70 thousand rubles for it.
Kastor Fero JK
Are there people who understand bathing matters better than the Finns? Probably not. Therefore, the second stove in the rating comes from this country and is produced by Kastor. The model has a remote firebox and is capable of working in saunas with a volume of 12 to 22 cubic meters. A modern cumulative unit with a ceramic firebox and a special casing heats up everything in 1.5 hours. It is better to use regular, dry wood as fuel.
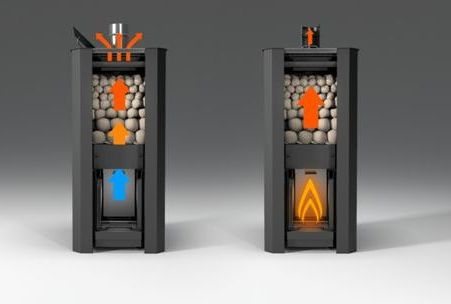
Thanks to the interior finishing with vermiculite, which has good heat resistance, the heater can heat up to the highest temperatures. At the same time, the stones will heat up and will heat the steam room for several hours. Heat-resistant natural or artificial stones are usually used. Such a stove will cost approximately 125 thousand rubles.
Helo 20 KL SL
This stove also comes from Finland, but it differs from previous models in its more affordable price. Despite the low price tag, the unit does not take away from its functionality; the stove is capable of providing heat for baths with a volume of up to 20 cubic meters. The strength of the structure is at a very high level, and all thanks to the use of stainless steel with a thickness of 8 millimeters. Also, the advantages of this model include its efficiency; in this matter, the X-tra heat exchange system plays an important role, which also significantly speeds up the heating of the bath.
If necessary, you can install a chimney on the back or side panel of the heater, which allows you to choose the best place to install the unit. The self-cleaning system eliminates the accumulation of carbon deposits on the walls of the device. And most importantly, the price of such a stove is only 25 thousand rubles, which is several times cheaper than previous options.
How to choose a place for the stove?
Choosing a place to install heating equipment is an important step that cannot be ignored. It is worth considering that choosing a place for a stove in a bathhouse must take into account all the rules and recommendations.
First you need to determine the distance from the stove to any flammable material; it should be at least 50 centimeters. To protect walls and other surfaces, refractory brickwork should be installed. A simpler option would be to decorate the walls with sheets of insulating material.
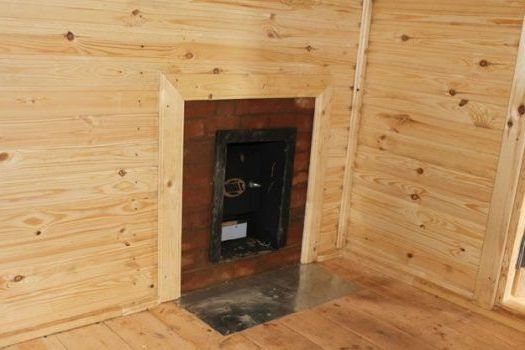
You also need to pay attention to the direction of the door; usually, the oven door is located towards the entrance to the bathhouse. At the same time, the heater door should open towards the corner of the room.
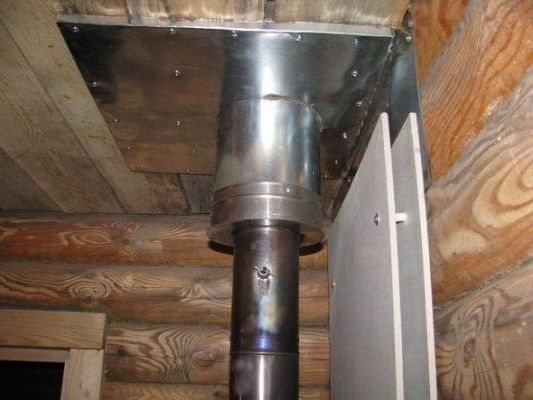
The ceiling in bath rooms has a high fire hazard, so you need to think about protecting this part. It is best to cover the ceiling with a metal sheet with basalt cardboard. It is worth considering that the protective sheet should be several times larger in area than the stove.
If the bathhouse uses a steel stove that operates using electricity, then the installation of such equipment must be coordinated with the fire inspectorate. Also, do not forget about grounding, because safety comes first.
Determining the distances between the oven and surfaces
Furnaces are usually made of metal, and during operation this material gets very hot. This means that during installation it is necessary to comply with all fire safety standards. So, the distance from the back and side walls to the firebox should be at least 0.5 meters.
If you do not use special protective materials, then you need to install the stove taking into account that the distance to the ceiling should be at least 1.2 meters. From the closest door to the firebox you need 1.25 meters of free space.
When elongated versions of fuel chambers are used, which according to the scheme must pass through the walls of the building, then there should be a distance of 0.4 meters from any wooden surfaces. If protective fireproof materials are used, the gap should be at least 0.25 meters.
Installation of heat screens
Usually baths are made small in area, and this creates problems with installing the stove in the future. Since wood is mainly used for bathhouses, this task becomes even more difficult, because all fire safety requirements must be met, and there is simply not enough space for this.
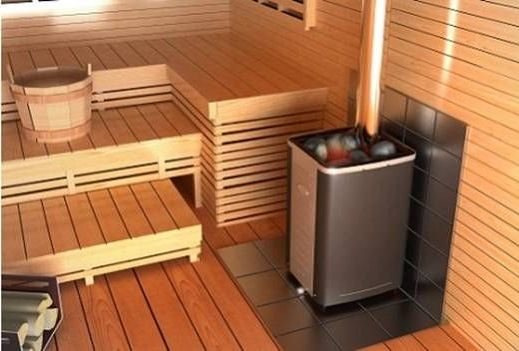
What to do in such a situation? There is no point in demolishing the old one and building a new bathhouse of a larger area, because it will take a lot of time and money. Using an unsafe structure is also not an option. Heat screens, which will act as partitions between the heating device and wooden walls, will help solve this problem. If you do all the work on building a bathhouse and installing a stove yourself, then you can do without specialized screens. So, many craftsmen simply line the stoves with fire-resistant tiles or bricks. You can lay a sheet of steel on a wooden floor, which will eliminate the possibility of fire when coals fall.
Latest topics
Division of land upon arrest.
For what reason do gates with remote control not work?
Wood or brick for the house?
Ceilings with volumetric stucco
Gazebo made from old window frames
Improving the insolation of the living room
How to remove old paint from wooden windows without damaging the glass?
AIR FROM A HOT WATER TAP ON THE TOP FLOOR OF A 9 STOREY HOUSE
Windows to a frame house.
Dish rack
Will tiles stick to drywall?
Gas sauna, pros and cons
Paintings in interior design
Protecting plywood from moisture before using it when installing a floor on a loggia
In the last hour:
370 guests
viewed 4073 pages
And also there were:
Making the foundation
Usually, experts advise making a foundation for a sauna stove; this will increase the strength and safety of the structure. It is possible to do without a foundation only in a situation where the floor base is equipped with a high-quality screed or covered with heat-resistant ceramics. In other situations, whether you want it or not, you will have to make a foundation. All work is carried out in three stages:
- Calculation of foundation dimensions. It is recommended to install the stove on screeds with a height of 20 centimeters. This is the optimal indicator if the stove is equipped with a brick “casing” and a heavy chimney. It is worth considering that the floor level will also rise. In some cases, a special brick “pillow” is made under the structure. As a result, the ceilings of the bathhouse will be greatly reduced.
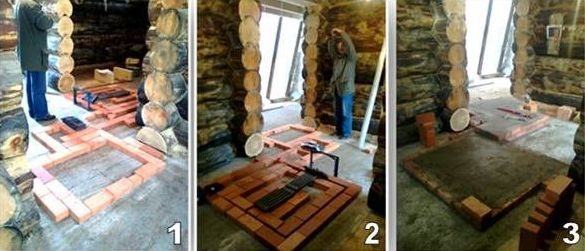
- Foundation configurations. It all depends on the location of the stove. If the structure is installed close to the walls, then it is worth using a non-cohesive base. This means that there will be no points of contact between the foundation and the base of the bathhouse.
- Preparation of screed for the foundation. To do this, you first need to dig a pit and make a kind of formwork in it. Reinforcement can be used to strengthen the structure, but the loads will not be too high, so reinforcement is not necessary. To prepare the screed you need to take 1 part cement and 3 parts sand. After mixing, you need to leave the material to harden. Concrete is laid over a double layer of waterproofing. Roofing felt or roofing felt can be used as an insulating material. You just need to make brickwork on top, and the base for the stove is ready.
There are alternatives to a concrete foundation; some craftsmen use wide boards or logs, but such material is first treated with fire retardants. But such a foundation is recommended only in cases where the weight of the structure does not exceed 700 kilograms. Therefore, it is worth considering that a metal stove weighs a lot, and if you add to this the mass of all the protective structures, then the base of the boards may not withstand it.
Preparatory stage
Required tools and material
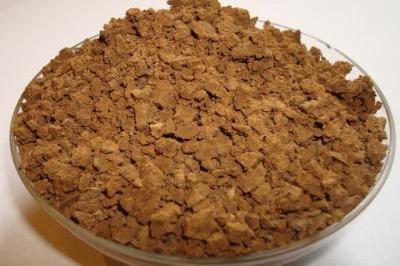
When building stoves, the masonry mortar is made from clay.
To work we will need a certain set of tools and materials:
- Red oven clay, which can be purchased at a construction supermarket in the form of a dry mixture with sand, or dug up by digging a ditch about a meter deep;
- Building bricks, preferably of good quality, otherwise you will often have to cut and trim them. It is undesirable to use double sand-lime brick M 150, since there is insufficient data on its applicability for furnaces;
- Reinforcement for the foundation frame;
- Gravel and broken bricks, small crushed stone;
- A do-it-yourself brick sauna stove is built using traditional mason tools: a trowel, a hammer with a pick, a plumb line, a level, etc.;
- Sifted sand. You can take ordinary sand that was left over after construction and sift it through a sieve or metal mesh with a fine pitch of rods;
- Plastic bucket or trough;
- Water container (bucket);
- Electric drill with mixer;
- A grinder with a wheel for concrete and a cutting wheel for metal, as well as a hard metal brush;
- Asbestos cord;
- Basalt wool;
- Gravel;
- Boards for formwork;
- Roofing felt and tar for foundation waterproofing;
- Doors, angles and other stove fittings;
- Drawings and orders.
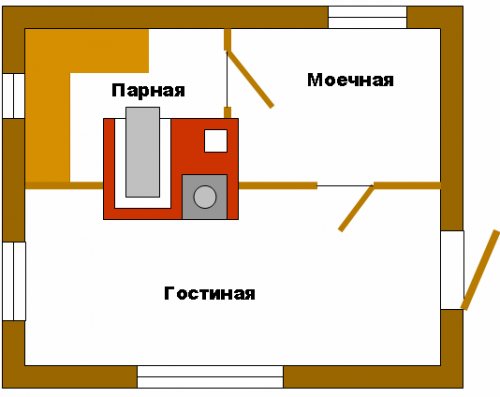
It is better to position the stove so that it heats all the rooms of the bath: steam room, washing room and living room.
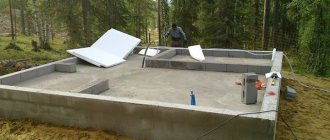
Furnace foundation
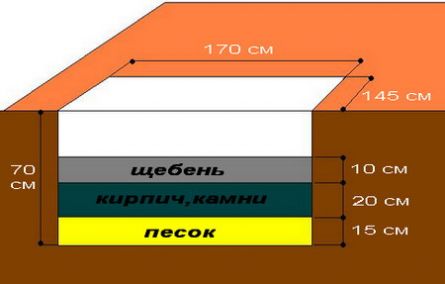
The brick oven must be built on a concrete foundation.
Since a brick fireplace stove weighs a lot, it is customary to place it on a special foundation. To construct it, you will need to dig a hole at least 70–100 cm , the area of which will exceed the area of the stove model you have chosen by several centimeters in each direction.
Next, sand is poured into a 15 cm layer at the bottom of the pit, which is spilled with water to compact it. Gravel (stones) and broken bricks are poured onto the sand in a layer of 20 cm, followed by a 10 cm layer of coarse sand or crushed stone.
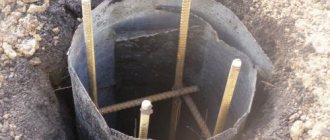
After this, a formwork made of plywood or boards is constructed in the pit, into which the reinforcement frame is laid:
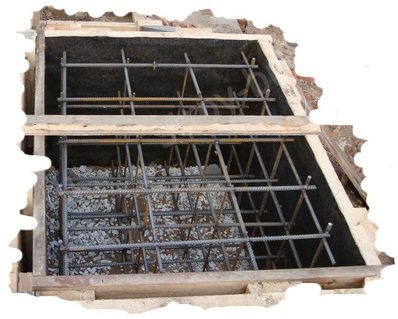
As can be seen in the photo, a reinforcement cage is installed inside the formwork.
Advice! The walls of the formwork can be lined with roofing felt or polyethylene to avoid the boards gluing to the concrete, since then they will be difficult to dismantle.
Concrete is poured into the pit with formwork and frame. It is advisable to use a vibrating screed for greater concrete density and better quality of the resulting foundation.
The instructions require waiting three days for the concrete to harden. It’s better not to rush and follow the rule, since the quality of the finished product depends on all these little things.
Preparation of the solution
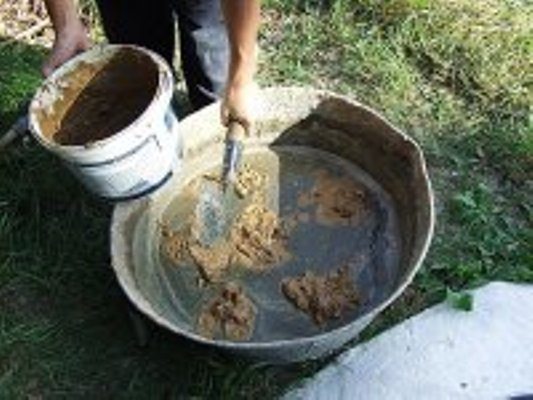
To prepare the solution, it is better to use a spacious trough-type container.
Cement mortar is not suitable for stove masonry, as it cannot withstand high temperatures. Therefore, sand-clay mortar is used for such structures.
The clay is pre-soaked for 2 - 3 days so that it is thoroughly saturated with water. It is better to use wet clay, since dry clay comes in clumps, which are quite difficult to break without a tool.
To prepare the solution, clay is mixed with sand in a ratio of 1:2 - 1:2.5 , where 1 is the amount of clay. Water is added to a well-mixed mixture of clay and sand, which is pushed into the mixture using a trowel.
When the mixture is saturated with water so that it floats above the surface, it’s time to stir the solution with a mixer.
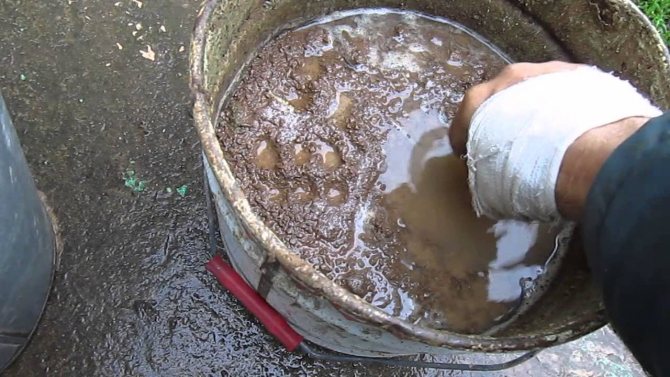
Clay ready for mixing.
Turn on the drill at low speed and mix the solution until it reaches the consistency of thick, fatty sour cream. First stir the top layers, then the bottom ones. When the mixture has turned into a homogeneous paste, let it “saturate” for 15 minutes.
The quality of the solution can be checked this way: put a small amount of solution on a clean trowel and turn it over.
If it falls off easily, leaving a thin coating of 1 mm, it means the solution is good. If a thick layer of clay remains, then you need to add sand.
The solution should be a homogeneous thick mass.
If the solution falls off without sticking, it means there is too much sand and clay must be added. The amount of water should also be normal so that the solution resembles a thick paste.
Installing a heating device into the wall
If the heating device is installed between two rooms and crashes into a wall, then some points must also be taken into account:
- Preparing the walls. In such a situation, it is important that they are made of brick or other fire-resistant material. If you have a wooden bathhouse, then you should install special protective insulators;
- Opening parameters. The distance from the fuel base to the stove firebox must be determined taking into account the power indicators of the device. You can find out these characteristics in the device documentation. If the stove was made independently, then it is necessary to take into account the average characteristics - 40 centimeters without protection and 25 centimeters with insulators;
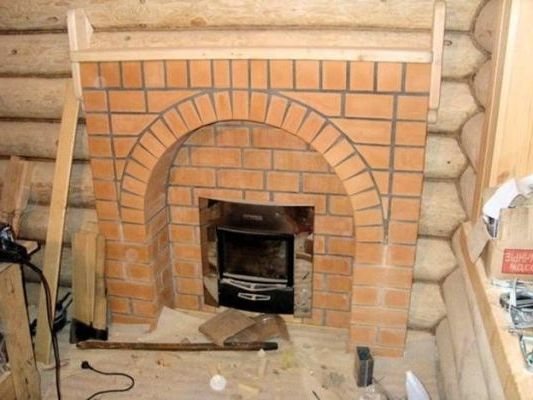
- It is also necessary to make brickwork, but not close to the fuel chamber assembly. The fact is that there must be an air gap between these elements. Its dimensions, by the way, are also indicated in the documentation for the equipment. The air gap must be finished with protective materials; for this, basalt or stone wool is used.
Choosing a chimney
The last stage of installing the stove will be the installation of a chimney. There are several options for solving the problem. For sauna stoves, the chimney is most often made of ceramics, steel or brick:
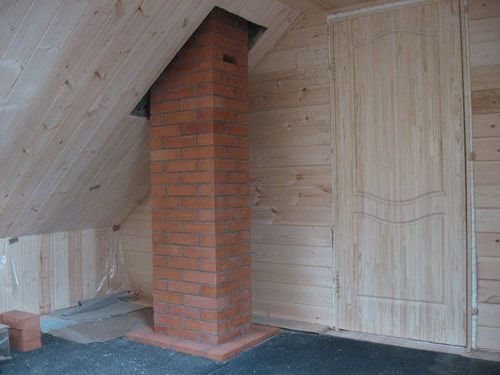
- Brick option. It should become a continuation of the brick “casing” of the stove. The pipe must be made as an independent air duct. But it is worth considering that the structure is heavy, and the installation frame must be strong enough to support it;
- Metal chimney for the stove. The easiest way to install an air duct system in a bathhouse is with the help of metal structures. But it is worth considering that such a chimney is also called the most dangerous. Considering that the temperatures in the bathhouse will be quite high, it is better to make the air duct based on a ceramic or brick structure;
Chimney made of ceramics. This material is not particularly popular in the construction of sauna stoves, but its performance characteristics are quite suitable for these purposes. The main advantage of ceramics is the preservation of all properties even when exposed to very high temperatures. Also, a ceramic chimney will not lose its shape and is not afraid of rust. The service life of this design is about 30 years. But there are also disadvantages - massiveness, complexity of installation, and quite high price compared to previous options.
Finishing the stove in the bathhouse - choosing material for decorative cladding
High-quality finishing of a sauna stove must meet basic operational requirements: withstand high humidity, temperature changes, ensure durability and safety of the surface.
The lined stove should quickly heat the bath rooms and create a comfortable microclimate inside. Lining a stove in a bathhouse has a number of advantages, including the following:
- fast and uniform heating of rooms;
- heat accumulation for a long time;
- minimal risk of getting burned from a heated oven;
- the air does not dry out;
- simplicity and accessibility of maintenance of finished cladding;
- attractive appearance of heating equipment;
- resistance to mechanical damage and deformation.
In addition to the fact that the stove is the main heating equipment, it also performs an aesthetic function.
The cladding of the sauna stove is made using practical and durable decorative materials:
- ceramic tiles;
- refractory bricks;
- artificial and natural stone;
- decorative plaster;
- tiles;
- frame made of metal plates.
All materials are distinguished by high performance characteristics and installation features.
The best material for lining a sauna stove is ceramic tiles. It is easy to install, affordable and durable.
The following types of tiles are used for facing work:
- Clinker room. It is made from red clay with the addition of fireclay, melting agent and dye.
- Majolica. Material with a pressed base, covered with a protective glaze layer. This type of tile is distinguished by its rich color scheme, decorative patterns and ornaments.
- Terracotta. A facing material whose performance characteristics are similar to majolica. Important differences are the porous structure and the absence of a protective glaze. Terracotta is characterized by durability, increased strength and resistance to mechanical damage. This type of tile is made in a round shape.
- Marble. This material is distinguished by its increased wear resistance, practicality and ease of installation, and is devoid of almost all disadvantages.
When choosing this type of finishing, stove owners ask themselves the important question of which tiles are best for covering heating equipment. Experts believe that the best option is a material that has a minimum coefficient of thermal expansion and a dense structure - clinker tiles.
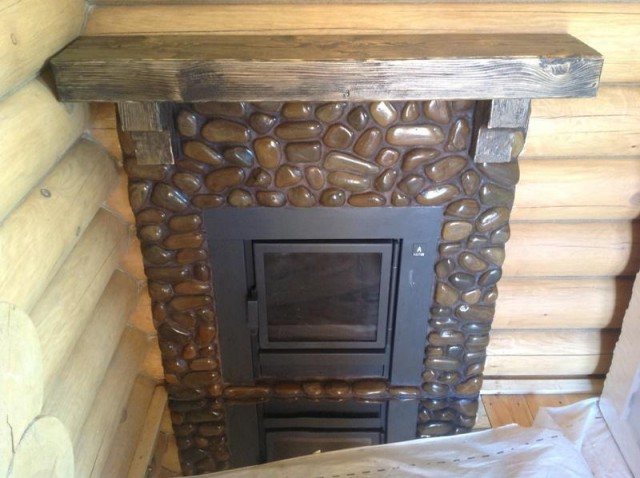
Decorating a sauna stove with brick is the simplest and most budget-friendly option for owners who decide to do the cladding themselves.
The material has a number of advantages:
- fast and safe heating;
- accumulation and maintenance of heat for a long time;
- resistance to high moisture;
- low cost and ease of installation.
Work on lining the stove in a bathhouse with bricks consists of arranging a reliable decorative screen around the entire perimeter of the equipment. To increase aesthetics and attractiveness, it is allowed to combine materials of different colors.
To fill the joints, it is recommended to use grout that is resistant to high moisture and temperature changes.
The main advantage of cladding with decorative stone is the creation of a noble and attractive appearance. High strength, durability, environmental friendliness, resistance to high temperatures, a variety of color palettes and textures allow the material to be used for finishing bath rooms.
The following types of stones are used for facing work:
- granite;
- marble;
- coil;
- porcelain stoneware;
- soapstone;
- jade.
Decorative stones can withstand an unlimited amount of heating; they accumulate thermal energy well and maintain a given temperature for a long time. In addition, this material is resistant to acids and alkalis.
In terms of their performance characteristics, artificial elements are not inferior to natural stones. With their help, you can qualitatively line a stove in a steam room or a fireplace in your home.
The technology for laying stones is simple and therefore does not require additional preparation. Non-standard shapes of elements can cause some difficulties during the fitting process, so before installation it is recommended to lay out the material on a flat base. The stones are numbered and fixed on the surface of the furnace using an adhesive composition.
A simple option for lining a Russian stove is plastering the surfaces. Over time, the decorative and protective properties of the plaster composition decrease, which will require frequent renewal of the cladding.
Plastering a stove in a bathhouse is simple; all work is performed in the following order:
- the surface is cleaned of dust, debris and remains of the connecting solution;
- the seams are cleared to a depth of 10 mm;
- Before the cladding begins, the oven warms up;
- a mesh of metal rods is installed on the surface with wire fixation;
- the surface is moistened and a primary layer of plaster mixture is applied;
- After the plaster has hardened, a second layer is applied.
The thickness of each subsequent layer does not exceed 6 mm. The plaster solution is applied using a trowel and leveled over the surface with a spatula. When plastering the surface, it is necessary to avoid the appearance of defects - air bubbles and sagging.
After hardening, the top layer is thoroughly cleaned until a smooth surface is obtained.
The use of tiles is an ancient method of cladding stove equipment for a bath. Tiles are tiles made from pottery plastic clay by firing in a kiln at a temperature of more than 1000 degrees. On the back of the tile there are pumps designed to fix the material on any surface. Tiles are presented in several categories:
- with a smooth surface;
- majolica;
- with glazed surface;
- with a relief surface.
Tiles are distinguished by high performance characteristics - durability, practicality, strength and high heat transfer.
The work of tiling should be entrusted to professionals who will do a good job of installing the material on the surface of the stoves.
A sauna stove can be lined with a metal frame, which is installed on top of the device and covered with protective shields. The steel frame provides reliable protection for the furnace portal and an optimal level of heating of the air in the room.
This type of cladding has the following advantages:
- accumulates released thermal energy;
- quickly heats the air and walls in the room;
- It is distinguished by its affordable price and ease of installation.
We suggest you familiarize yourself with What is the best way to insulate the roof of a bathhouse?
A serious drawback of such cladding is the likelihood of burns upon direct contact with the surface. Therefore, experts do not recommend installing metal frames for stoves in bathhouses in order to avoid possible injuries.
A competent choice of decorative material for cladding and adherence to the technological process will ensure the correct operation of the sauna stove and the creation of a comfortable microclimate in the premises.
During the heating of the bath, the surface of the stove heats up to 300-400°C. At the same time, it begins to emit infrared rays and itself becomes a source of heating. The coming heat is distributed throughout the steam room, but first of all it hits the walls adjacent to the stove. If the walls are wooden, then under the influence of high temperatures their charring begins.
According to fire safety rules, the arrangement around stoves, fireplaces and fuel boilers must be done using fire-resistant special materials, which can simultaneously protect a residential or ancillary building (bathhouse) from possible fire hitting the walls, and at the same time not cause harm to health.
To create a favorable home atmosphere, any stove or fireplace becomes very hot and generates intense heat, which in turn can be a source of ignition or fire. Therefore, it is important to carefully select the right materials when arranging a heat source in a house, bathhouse or basement, if we are talking about a fuel boiler.
Refractory materials can be roughly divided according to the method of heat transfer:
- Heat reflective – aimed at reflecting infrared radiation into the room;
- Preventing loss due to its physical and chemical properties.
But all of them can also differ in the type of raw materials from which they are produced:
- With organic components, for example, polystyrene foam materials, although their fire resistance is very low, they are best suited for walls near stoves with low heat;
- Inorganic is a broad class of non-combustible materials for insulating walls of a wide variety of fire resistance, including very flammable ones, such as wooden floors. These include stone and basalt wool, pressed into large slabs, fiberglass wool, lightweight cellular concrete slabs with fire retardant impregnations, honeycomb plastics, foamed perlite or vermiculite, and polypropylene. However, such a beautiful decorative thing as Leroy Merlin sheet plastic is definitely not suitable.
- Mixed type - these include asbestos-cement refractories, asbestos-lime or silica, foamed from a variety of inorganic substances.
Many country buildings are built from wood, be it a cylindrical or frame house; without a stove or fireplace it is difficult to survive a frosty winter, so their arrangement is approached very carefully, and the materials placed around the stoves are chosen so that they are:
- Effectively and reliably prevented any attempted fires;
- Environmentally friendly, so that when heated they do not release harmful substances into the home air.
But what are the dimensions of a standard oven brick can be seen here.
You may also be interested in learning about what kind of brick is used for laying stoves.
