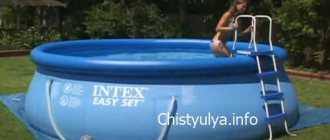
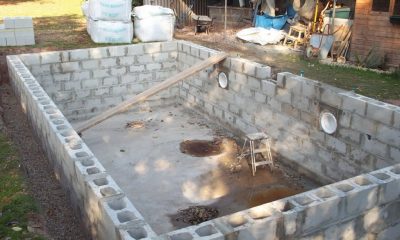
Specifics of building a brick pool
The average cost of a finished swimming pool in a construction center can reach several thousand dollars. Therefore, in the hope of saving money, developers decide to build a permanent brick pool with their own hands. To implement such a project, it is not at all necessary to be a licensed builder and have many years of experience working on a construction site. However, you shouldn’t count on quick and easy results. There will be many technological nuances in the developer’s work, the observance of which is necessary in order to ensure that the pool meets a number of requirements:
1. Protection of the building from groundwater
Flooding of a brick bowl with groundwater can lead to its premature destruction. In view of this, it is important for the developer to achieve sealing of the bowl from their influence.
2. Sealing the bowl from the inside
Water will have a destructive effect on the wall material from the inside, so it is important to work on insulating the walls with special materials.

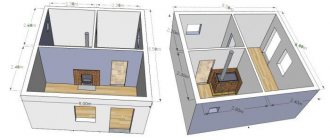
Pool design diagram
3. Focus on durability
A considerable volume of water will exert pressure on the walls of a brick pool (we are talking about 12-18 cubic meters of liquid, which a medium-sized bowl can hold). The developer must take this point into account and correctly calculate everything at the project development stage.
4. Soil heaving
The brickwork from which the walls of the bowl are built is also influenced by soil heaving forces. Therefore, if there are any defects or if the brick laying technology is not followed, the wall may collapse.
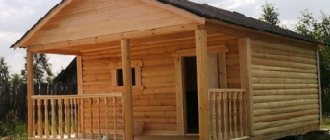
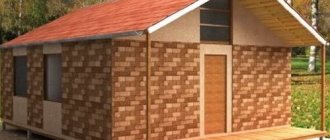
Project of a foam block bathhouse with a swimming pool: choosing a construction site
In our country, the bathhouse has been considered a favorite vacation spot for our people since ancient times. And really, what can compare with throwing yourself into cold water after a steam room and pleasant languor in the relaxation room with a mug of hot tea.
That is why any owner of a summer cottage thinks about building this building for relaxation with family or friends.
The photo shows an example of a bathhouse project
Choosing a bathhouse construction site
But before you begin construction, you need to complete a number of preparatory measures that will protect you from mistakes and problems in the future. First of all, this is the place where the foam block bathhouse was built. To do this, you must choose a foam block bathhouse project or at least decide on the basic dimensions of your building.
The place for the bathhouse should be chosen carefully
When choosing a site for construction, you should be guided by the following parameters:
- Choose a construction site that is not too far from the house or main communications;
- If the bathhouse is supposed to have a swimming pool, then it is better to place it on a hill . This is due to the fact that a fairly deep pit will be required to construct a pool. And for high-quality water drainage, you will need to have at least a minimum slope of the water drainage system.
- Do not locate the building above laid water supply or drainage networks . If they break, this can lead to serious problems associated with their repair;
- Your projects for building a bathhouse made of foam blocks should take into account the inadmissibility of construction near gas pipelines . So, according to SP 62.13330.2011, the minimum permissible distance to the building should be 2 meters for low pressure pipelines and 4 meters for medium pressure;
- Also, the building should not be located near power lines . So, according to the PUE, the distance from the house to the power line with voltage up to 20 kV should be at least 2 meters. For cable lines of all voltage classes this distance is the same.
Steam room project
The most important place in any bathhouse is the steam room, so when choosing a design for a foam block bathhouse with a relaxation room, you should first think about this room. To do this, first of all you need to decide what you want. This could be a sauna or a Russian bath.
If you prefer a sauna and decide to create it yourself, you must remember that the volume of the room and the calorific value of the stove must match. Therefore, in saunas, ceilings are usually kept small, up to 2.1 meters, otherwise drafts may form.
The size of the sauna must correspond to the power of the heat generator
Based on these dimensions, the size of the shelves for sitting is also taken. So the top shelf should be about 1 meter below the ceiling. Each subsequent one should be 40–45 cm smaller. It is this distance that ensures a comfortable position and allows the legs to rest on the lower bench.
Please note! This arrangement of steps assumes that the first step will be 55 - 65 cm high. This is quite acceptable, since in most cases they sit there with both feet on the bench.
There are also children sitting there, calculating the steps for which is quite problematic.
If you are considering a ready-made bathhouse project made from Russian-type foam blocks, then low ceilings, on the contrary, can become a serious problem for preparing steam. This is due to the fact that the finished steam rises and accumulates there. If the ceiling is low, then a sufficient amount of steam will not be able to accumulate there and a few strokes of the broom will completely dispel it.
How to build a brick pool with your own hands? Technological aspects
If all the difficulties do not frighten the individual developer, he can roll up his sleeves and begin work on building a brick pool bowl. It consists of several main stages:
1. Construction of a pit
Once the size, shape and configuration of the pool are approved and the design is drawn up, developers begin work on the site. It begins with marking the area for digging a pit. Use a measuring tape to measure the boundaries of the pool, and then mark them with pegs and rope.
After marking, a pit is dug. Its dimensions should be 50-80 centimeters greater than the width and length of the pool, and 30-40 centimeters greater than its depth. The walls of the pit are carefully leveled, and the bottom is thoroughly compacted manually or using special vibrating equipment.
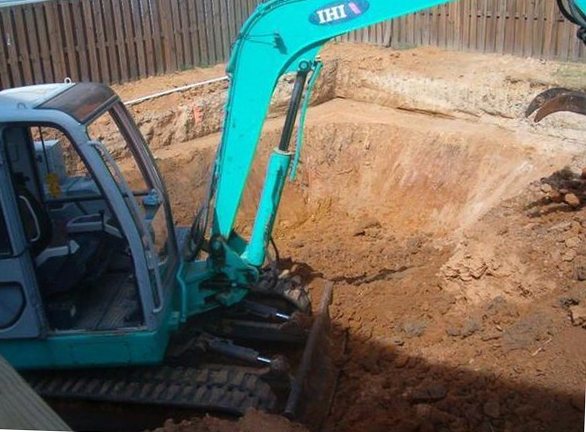
Digging a pit
2. Digging a pit for laying communications
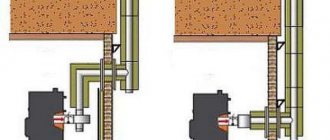
Do not forget that communications will have to be connected to the pool in the future. This is a water supply and drainage system, as well as pumping and filtering equipment. These units are placed in a pit, which is dug next to the pit. The pit and pit should be connected by a ditch into which the pipes will be laid in the future.
DIY pool with walls made of polystyrene foam blocks
Do-it-yourself pool with walls made of polystyrene foam blocks Which owner of a private house does not dream of having his own pool in the garden? But for many, the implementation of the plan seems too complicated and expensive. However, with the help of a construction and installation system kit, you can build a pool yourself. In the warm season, your own pool in the garden can give a lot of joy, freshness, health and pleasure from swimming to the whole family. Why not build it yourself? Even the walls of residential buildings are successfully erected from expanded polystyrene blocks, so building a pool bowl from them will not be difficult. It is from these large-format blocks (XXL size) that the pool bowl measuring 8 x 4 x 1.5 m is built. The impressive dimensions and light weight of the blocks make it quick and easy to lay out the walls. The concrete mixture is used only after the completion of laying the walls: it fills the cavities of the blocks, concreting the wall to its entire height. The construction and installation system kit includes fastening and reinforcing elements, embedded parts, a facing film and a protective non-woven fabric, a ladder for going into the water, a sand filter, a pump, a skimmer, two nozzles, fittings and pipes. The special shape of the pool is due to the presence of so-called Roman steps for descending into the water. Expanded polystyrene serves not only as a structural material, but also as a heat-insulating material. 1. The foundation for the pool is ready. The package contains a custom-made Roman staircase. 2. The blocks are large in size, light weight and tongue-and-groove fastening, which simplifies the construction of the pool walls. 3. You can cut the blocks to size and cut technological holes in them using a hand hacksaw. 4. Reinforcement bars are inserted into the voids of the blocks and tied together for subsequent concreting. 5. Top view: the fittings and the pipe passing through the wall for connecting the nozzle are visible. 6. At the point where the pipe exits, the joint between it and the pool wall is sealed with sealed self-hardening foam. 7. A built-in element for placing a skimmer is installed in the upper part of the wall, and fittings are laid on top. 8. A “Roman” ladder made of fiberglass reinforced polyester is installed in the prepared recess. 9. Then they begin concreting the walls, filling the cavities of the blocks with concrete mixture using a pump. 10. The walls and bottom of the bowl are lined with facing film and the pool is filled with water. Decorative slabs are laid around the perimeter.
Wall formwork installation
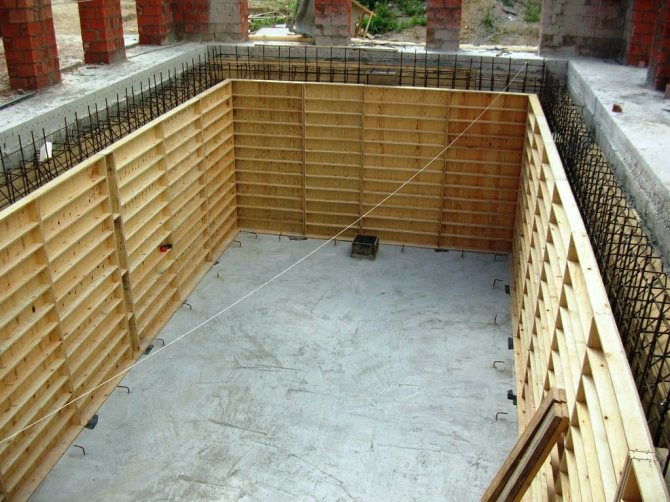
Pool wall formwork
Formwork consists of panels made of any sufficiently strong sheet material (usually plywood from 18mm thick). The shields are placed along the perimeter of the pit to the full height on the outer and inner sides of the pit.
The surface of the formwork panels facing the concrete wall should be as flat and smooth as possible (you can use oil to treat the surface of the plywood).
The reinforcement cage is located inside the formwork. The pool wall is usually at least 200 mm thick. This is due to the protective layer and the cross-section of the reinforcement.
Important!!! Before installing the wall formwork, you need to install the embedded elements.
The shields are sewn together into a single fabric. Particular attention should be paid to fastening the formwork. When pouring concrete mixture into the cavity between the panels, large loads arise, which must be compensated by timber stops, jacks and studs.
Pool concreting
It is not recommended to make concrete for the pool yourself using a concrete mixer. It is better to order ready-mix concrete M 350 with hydrophobic additives.
During the concreting process, it is necessary to compact the mixture using an internal vibrator. Leveling the concrete mixture of the floor should be carried out before setting; after drying, additional grinding can be done. Usually this is about 6 hours from the moment concreting begins, as soon as the concrete can support a person.
Removing formwork
It is recommended to remove formwork panels no earlier than after 7 days. The setting of the concrete mixture depends on the air temperature. During frosts, fresh concrete walls should be covered with insulation. In hot weather, it is recommended to water the walls daily to ensure uniform maturation of the concrete.
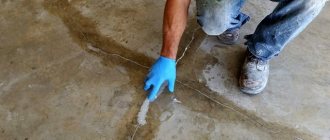
Subsequent work on concrete can be carried out after 4-7 days. First of all, the evenness of the walls and diagonals is checked and, depending on the result, plastering work is carried out.
Important!!! An experienced team performing monolithic work fills the bowl without subsequent plastering.
Next, the installation of embedded parts for water treatment and attractions is carried out. Usually it is planned to leave technological openings using polystyrene foam.
When installing embedded parts, special attention should be paid to sealing the joints.
Internal waterproofing of the pool bowl and finishing
There are two main types of interior finishes for a concrete pool:
- Various types of tiles, mosaics, natural stone
- PVC film
Depending on this, waterproofing work varies. Regardless of the type of waterproofing, a number of measures are required:
- Leveling the concrete surface. Sagging in the joints of plywood is removed, shells on the walls are covered.
- Plastering on beacons, if the previous measures are not enough;
Concrete pool with PVC film finish
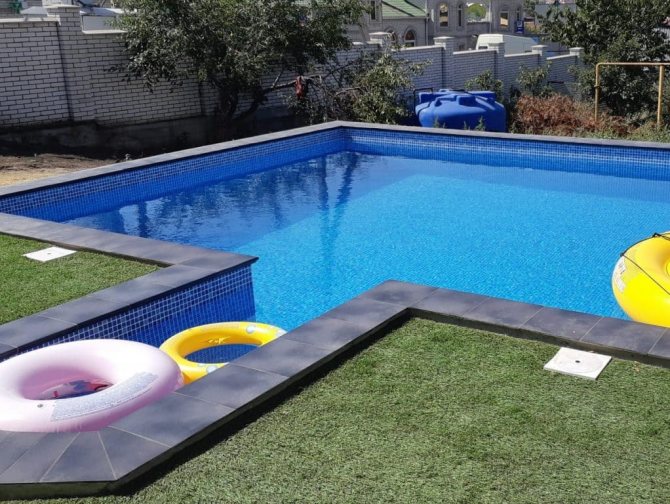
Concrete pool with PVC film finish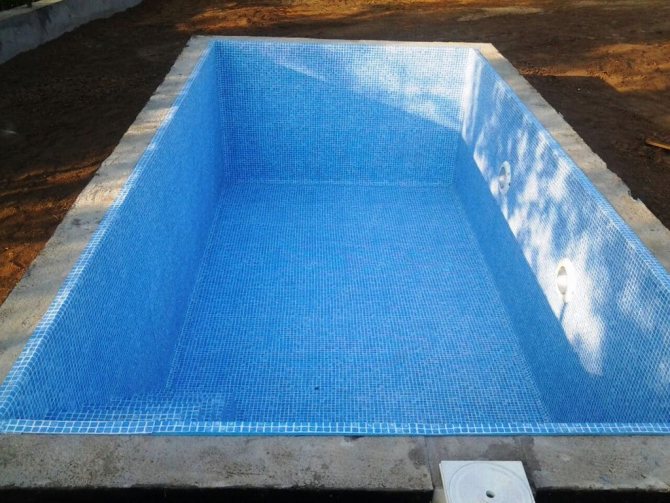
Finishing the pool bowl with PVC film
The internal waterproofing of the bowl and finishing material is PVC film. In most cases, an excellent choice, there are many color options. Maintainability is excellent.
You can install the film yourself only if you have experience and the appropriate tools. A hairdryer for welding film costs about 30 thousand rubles, additionally nozzles and a roller are required.