Material selection
In order for the manufactured structure to be durable and of high quality, the choice of material from which it will be made must be approached with all responsibility. Let's consider the main criteria for choosing wood:
- for the hanger in the dressing room, it is imperative to use wood so that the clothes and wet linen that are hung on them are not stained by rust that has arisen on the metal structure;
The hanger in the bath must be wooden
- choose wood that has low thermal conductivity. This is necessary to protect the skin from possible burns, because the temperature in the bathhouse is very high;
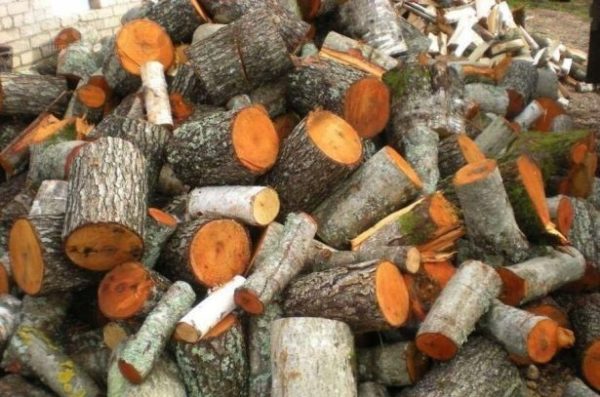
- It is advisable to use hardwood to make the hanger. They are more suitable for use at high temperatures;
- all wooden elements must be processed so that there are no irregularities or burrs on the surface;
- for work you will need only high-quality boards that do not have even the slightest traces of rotting;
- If possible, use hardwood to make the hanger. They are more durable and can last much longer.
Give preference to hard wood
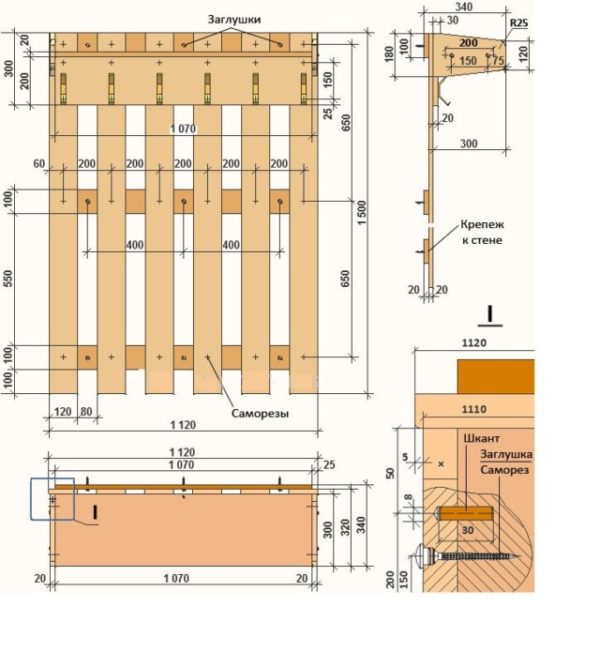
Diagram of a simple wooden hanger
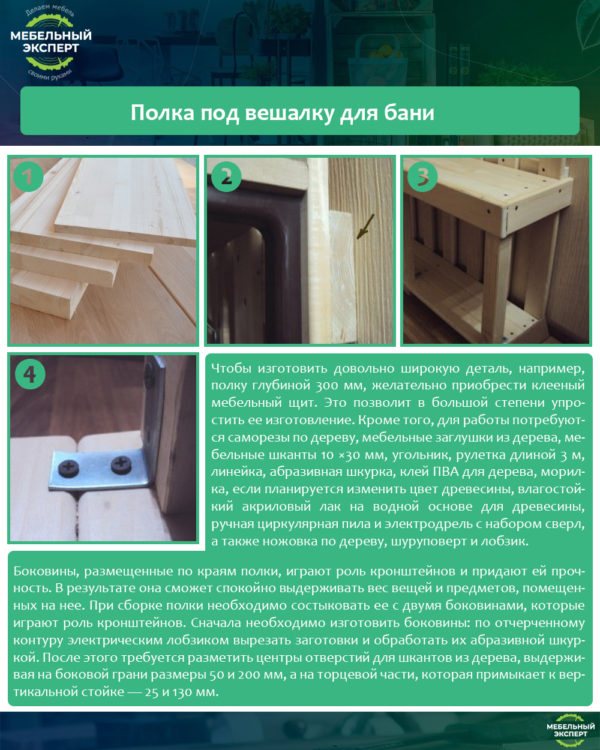
Shelf for a bath hanger
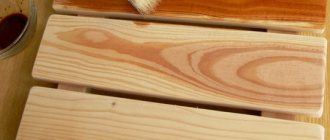
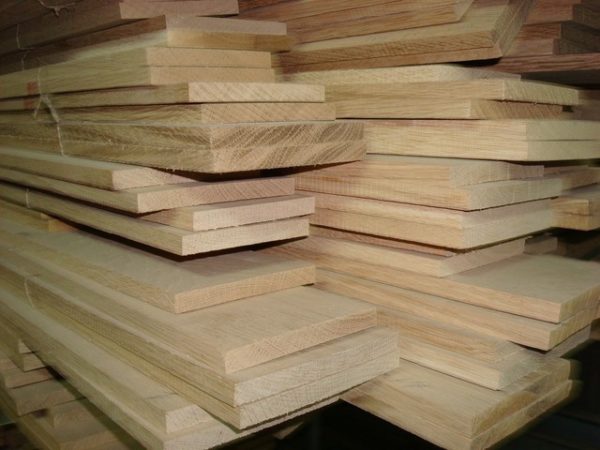
Construction boards
What do you need for work?
Since the hanger is made of wood, pre-planed hardwood boards should be used as the main material. The number and thickness of the boards will depend on the type of hanger and the pattern according to which it will be made.

What tools may be required for the job?
The work will also require the following tools and materials:
- dowels (chops) for furniture assembly;
- set of self-tapping screws;
- special wood plugs;
- glue;
- stain and acrylic varnish;
- electric drill;
- set of drills;
- hacksaw or circular saw (if available);
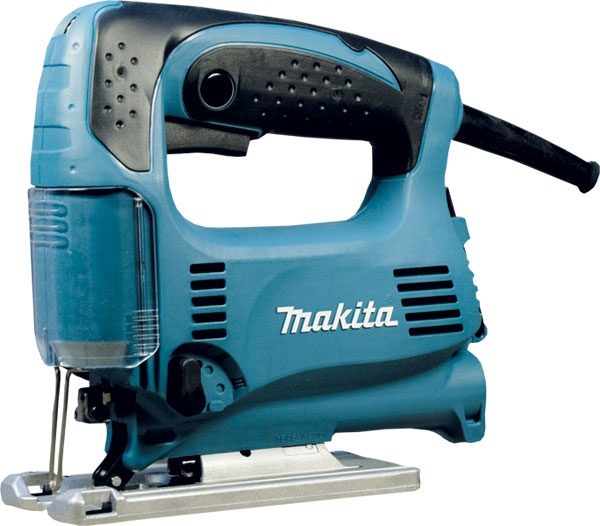
- jigsaw;
- Phillips screwdriver or screwdriver;
- hammer;
- ruler;
- roulette;
- sandpaper with varying degrees of abrasiveness;
- square
Moisture-resistant wood glue
Bathroom wall hanger
Even if a ready-made diagram is used for the work, it can always be slightly adjusted by adding or removing hooks. This will allow you to adjust the product to the size of the bathhouse, or more precisely, to the width and height of the room where the hanger will be installed. Below is a step-by-step instruction with which you can make a wooden hanger without any experience working with wood.
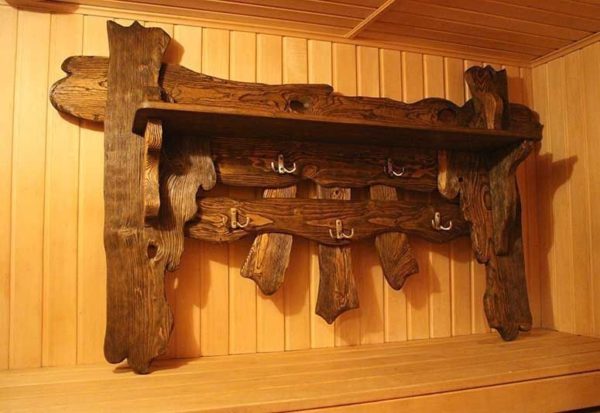
Beautiful wall hanger for a bath
Table. Making a wooden hanger for the bathhouse.
We suggest you familiarize yourself with Installation of a sandwich chimney through the roof
| Steps, photo | Description of actions |
| Step one | Buy several small hammers from the store to make special hooks. In this case, 5 identical hammers are used. |
| Step two | Prepare the main material for the hanger – boards. Cut out the required pieces and sand them with sandpaper. If desired, you can varnish the boards. |
| Step three | Make small holes in the top of the board to eventually connect them together at right angles. The recommended distance between holes is 10 cm. |
| Step four | Screw a self-tapping screw into each hole. The work does not require long fasteners, so self-tapping screws 4 cm long will be sufficient. |
| Step five | Connect two boards at right angles. This is the basis for the future hanger. The junction of the boards must be sanded so that the surface is perfectly smooth. |
| Step six | Place squares around the edges of the wood structure to strengthen it. This can be done using a special plate bent at a right angle. Install it at the junction of the boards and secure with additional screws. |
| Step seven | Trim the previously prepared hammers, leaving a small part of the handle. All parts must be identical so that the appearance of the finished structure is not compromised. |
| Step eight | Drill a small hole in each handle using an electric drill. The depth of the hole made should be approximately 3-4 cm. |
| Step nine | Make the same holes in the board in those places where, as planned, there should be hooks for clothes. The diameters of the holes in the handle and the board must be the same. |
| Step ten | After making a hole in each hammer, prepare long screws. With their help, the products will be attached to the board. |
| Step eleven | Screw all the hammer hooks into place. Make sure they are all in the same position. Of course, instead of hammers, you can use something else, such as wooden hooks. |
| Step twelve | Once the structure is ready, attach it to the wall in the bathhouse. Now it can be used for its intended purpose. |
Water-based acrylic varnish for wood
DIY hooks for things
You don't have to go to the store to find new accessories and home decor. Perhaps you already have everything you need at hand to make not only functional, but also original things.
Today we will talk about wall hooks.
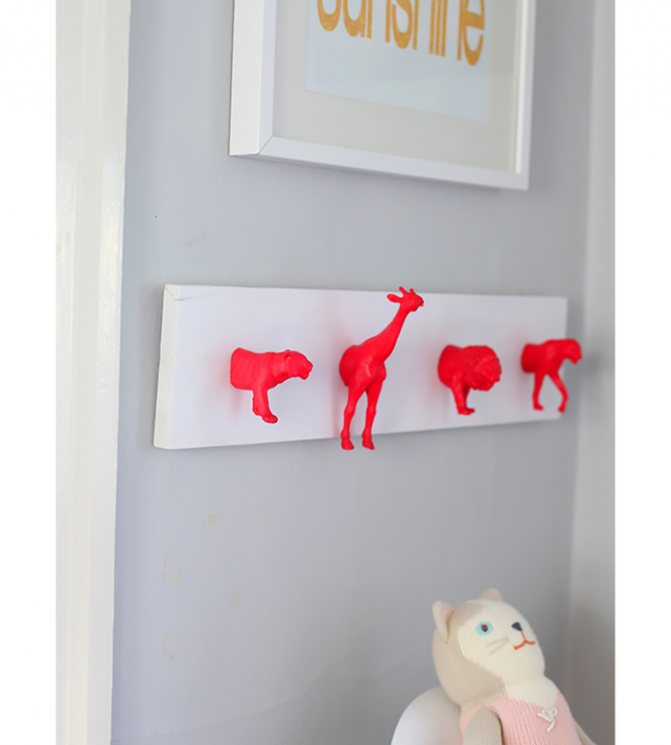
From toys
From old or broken children's toys you can make not only handles for a chest of drawers or cabinets, but also hooks for not very heavy things. Such a hanger would be especially appropriate in a nursery, and how to make it using a glue gun and a couple of screws, read on the Say Yes blog.
From perfume caps
An idea for perfume lovers and for those who simply like to keep bottles of their favorite perfume as souvenirs. Now you can not clutter up your house, but leave only the lid of the jar, and even adapt that for your needs. How - read on Ooh blog.

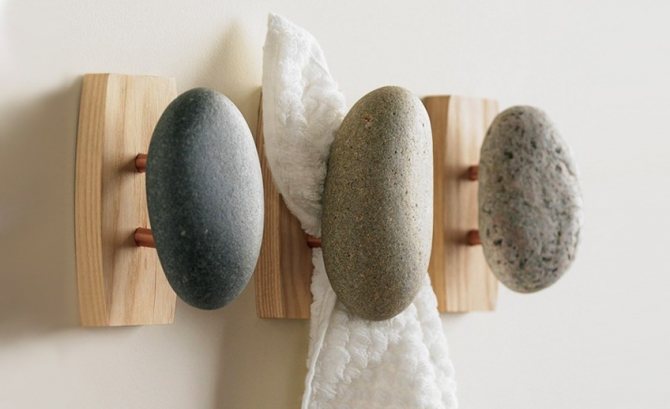
From pebbles
Not only perfume caps, but also other memorabilia can be put on hangers. For example, sea pebbles, which we usually bring from the sea and then don’t know where to put, will look very stylish on the wall. Unfortunately, we did not find a master class or at least the author of this idea, but we can advise how to make such a hanger. Take a couple of screws and metal cylinders (they should be a little wider or a little shorter). Insert screws into the cylinders and screw into the base boards. Apply universal glue to the screw heads and glue the stones to them.
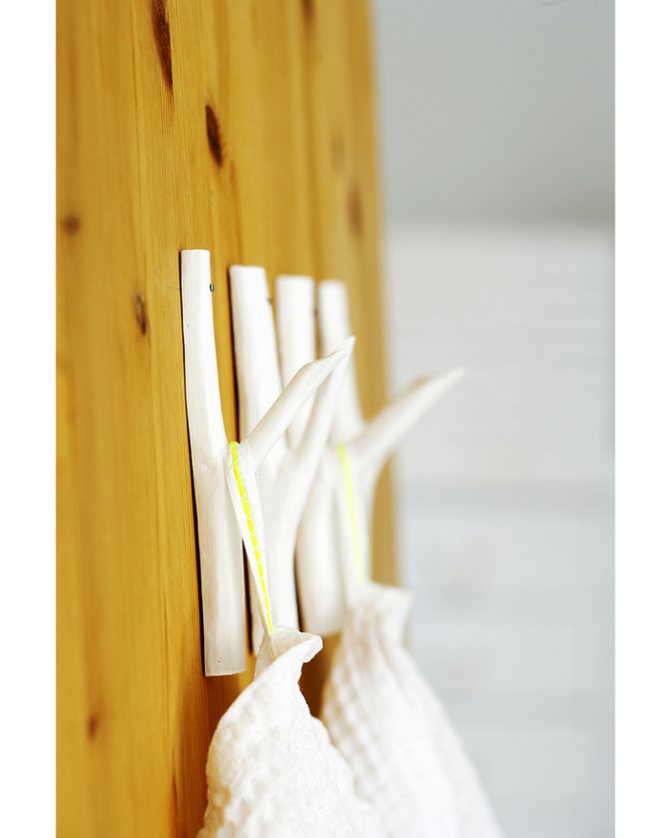
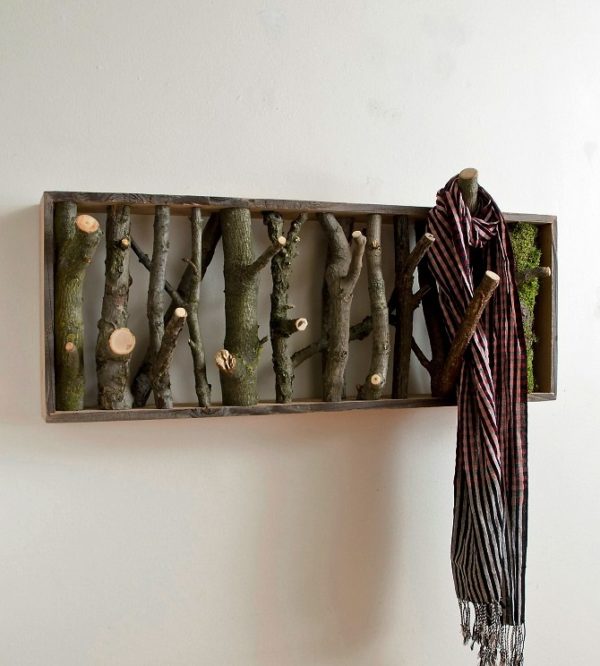
From the branches
Hooks in a Scandinavian and at the same time ecological style can be made from thick forked branches or thin trunks with knots. You can find them in your local park (or in your yard after trimming the trees), and if you need instructions on how to turn them into decorative items, look for them here.
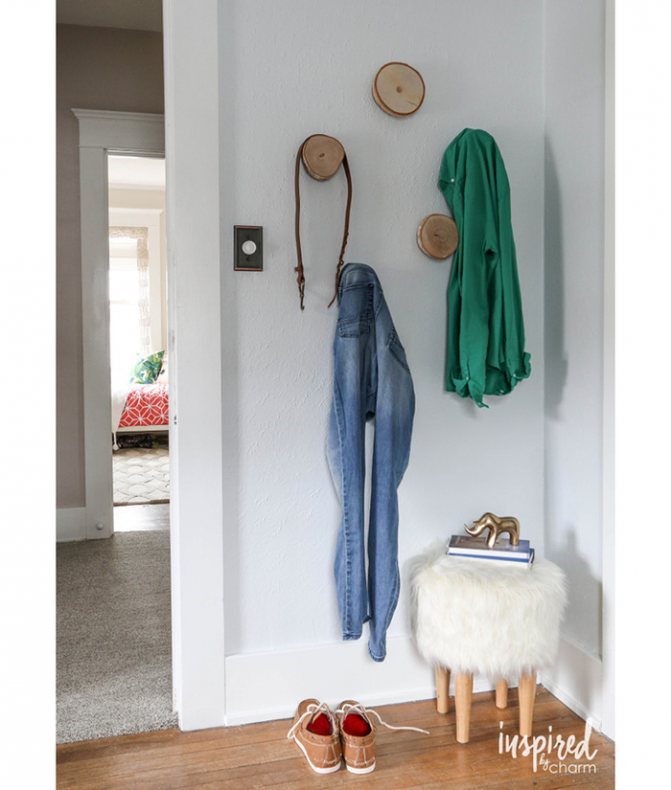
From a cut tree
Round cuts of tree trunks can be found in stores for handicrafts or for those who like to carve wood, but if you have a garden, then there will be no problems with raw materials. Read the master class on the blog Inspired by charm.
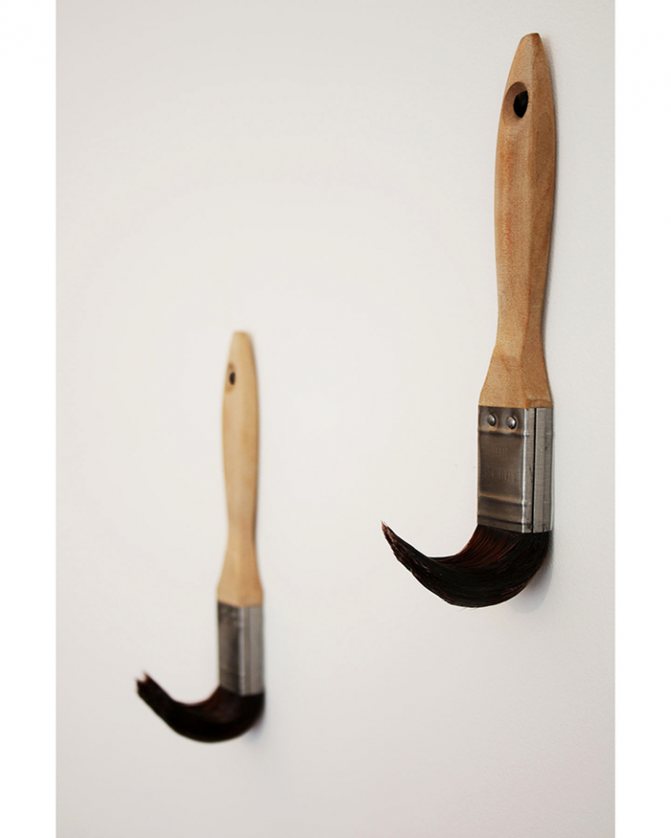
From tassels
The idea to make hooks from brushes came to designer Dominic Wilcox when he remembered leaving painting tools in paint after work, only to find them frozen and unusable the next day. Well, brushes with curved bristles can still serve in the household. To make these, you'll need curing paint or some reliable glue.
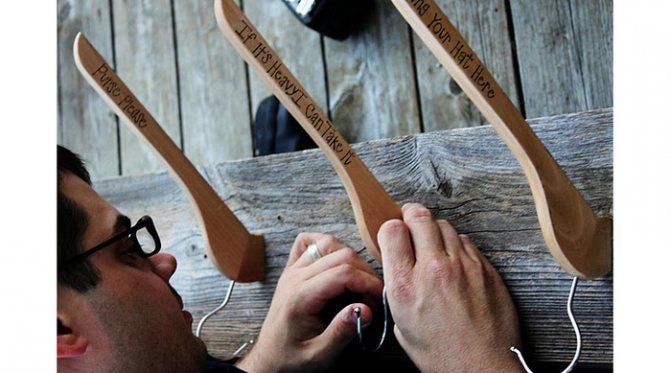
From hangers
Have you done some spring cleaning, thrown things out, and find that you have too many hangers in your closet? You can also make hooks from them, and it will be especially convenient to hang scarves and hats on them. Watch the master class here.
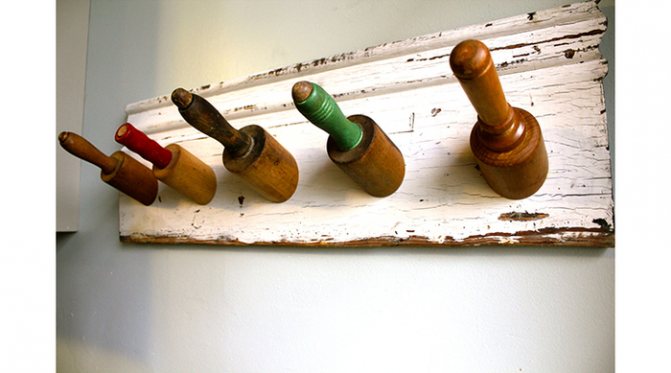
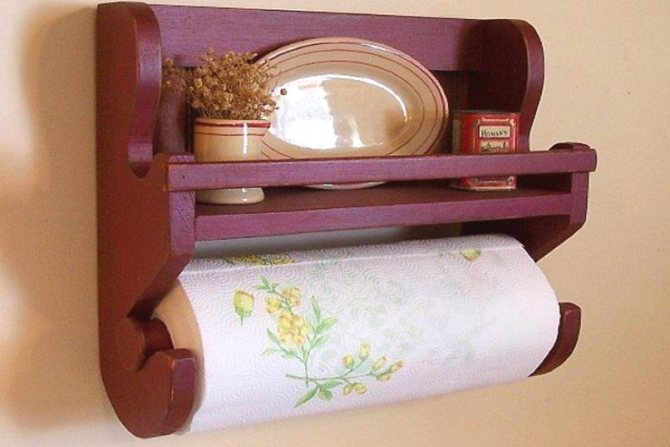
From rolling pins
We actually found this hanger for sale on Etsy, but it's super easy to make yourself: all you need is a small hacksaw and some nails. You can make as many hooks as you like (you will still get an even number of them, two each from a rolling pin), and paint the entire structure to your liking.
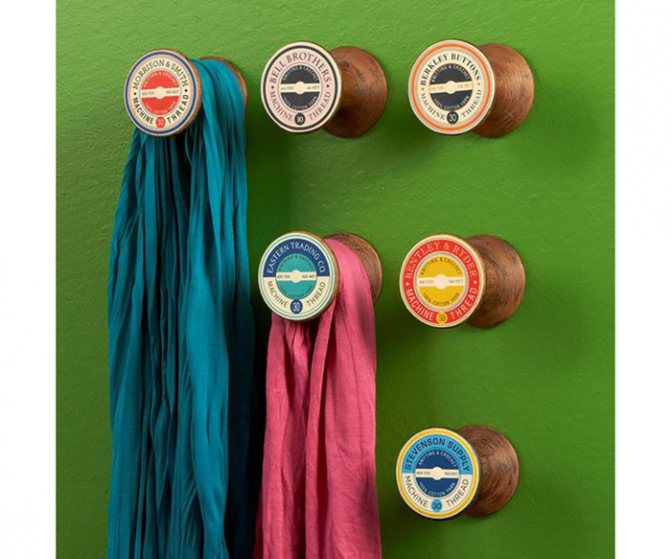
From spools of thread
Google did not save the source of this idea, but there is no need for a master class here: nothing is easier than choosing the right screws to attach wooden spools to the wall. And yes, grandma’s thread reserves have probably already decayed, so feel free to cut them off and give the spools a new life.
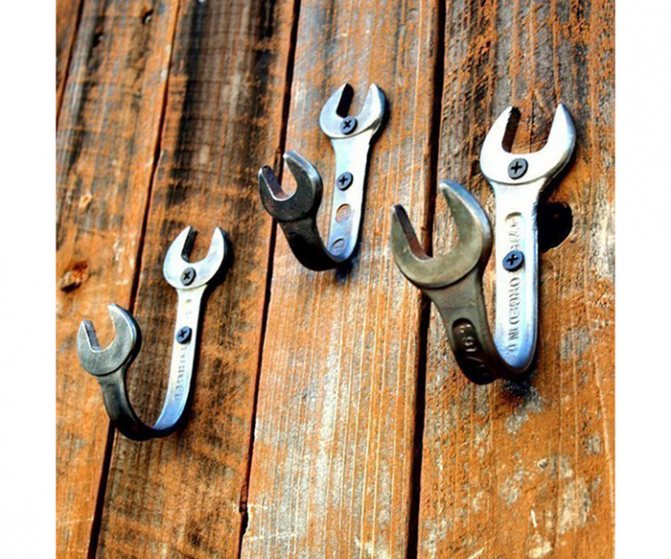
From wrenches
Another type of hook that we found on Etsy and which, frankly, is difficult to make yourself: the authors write that the keys must be red hot to bend. But we will still leave this option here: suddenly you have keys lying around made of softer metal that can be turned into hangers without the help of blacksmiths.
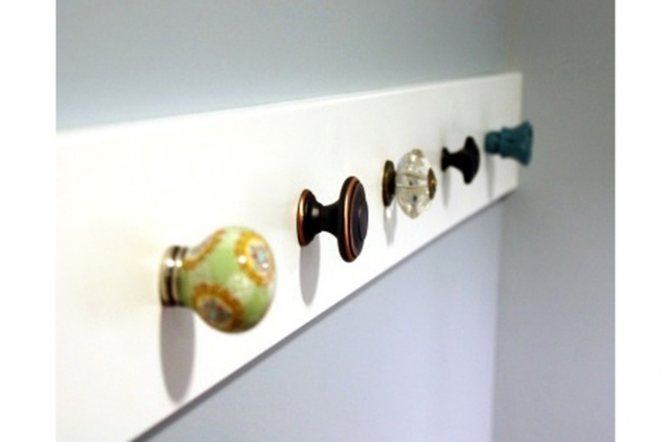
From door handles
To avoid hanging things on doors, make a special hanger from pretty door handles. It's easy to make, and it's also an excuse to buy all those cute little pens that otherwise would have nowhere to go.
Knot hanger
If you don’t want to use hammers to make a hanger, you can try to assemble a structure from a board and small knots that are used as hooks. The assembly process is simple, you just need to follow the sequence.
Hanger made from knots
- Collect several branches and leave them to dry. Once the wood is dry, carefully remove the bark.
- Remove all irregularities on future hooks by treating their surface with a rasp and sandpaper.
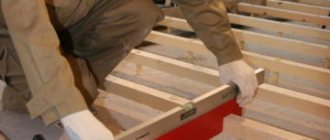
- Prepare a board no more than 4 cm thick. If desired, you can make a shape from the support board using an electric jigsaw. Sand the cut areas so that there are no irregularities or burrs.
Jigsaw - Make marks on the hanger for later installation of fasteners, and then make holes in them. The same holes must be drilled in the knots.
- Carefully press the knots into the board of the future hanger and secure them with dowels. As an addition, you can use special wood glue. Do the work with each knot.
- Once the structure is assembled, coat all its elements with a water-repellent compound. This will extend the life of the hanger.
It’s easy to make such a hanger with your own hands.
Jigsaw
We suggest you familiarize yourself with How to build a sauna in your home with your own hands
Photo ideas for homemade hangers
Wood and building materials based on it are best processed. From them you can create many hangers of different sizes and shapes.
Manufacturing
Creating a standard hanger will not take much effort or time. Before starting work, it is advisable to understand the upcoming design, the manufacturing procedure, and the list of necessary materials. Draw a scale sketch of the proposed design.
Place a board, a sheet of plywood, or chipboard on a stable platform. In accordance with the sketch, mark the board and sheet. Use a saw or jigsaw to cut out the load-bearing part of the structure. Clean the cut plane and the edges of the workpiece with sandpaper.
The processing stage is the moment of giving the product the desired appearance. At this stage, the product can be lightly burned with a blowtorch, covered with stain, and the design can be burned out. Once finished, paint and varnish the finished parts.
We invite you to familiarize yourself with a DIY brick pipe for a chimney
The hanger can be hung freely or placed with emphasis on the floor. In the first case, hanging on the wall can be done on special external or internal hinges or through special holes in the base of the product. With the second option, the stability of the structure increases.
In the final part of the work, metal and plastic hooks are attached. They are located on the frame as desired by the manufacturer. Attached in various ways. The most reliable way is to screw it with self-tapping screws, which allows you to hold your outerwear. Less practical is the use of adhesive bases, magnets, and vacuum suction cups. Such hooks are capable of holding light items and hats.
The quality of fastening the hooks in the first option corresponds to the method of fixation on wooden rods. To implement this, rods up to 100 mm long and 10-12 mm thick are manufactured. Holes with a depth of at least 15 mm are drilled according to their diameter on the frame. The base of the rods is lubricated with glue and firmly installed in the holes. After the glue has dried, the hanger is ready for use.
Wooden block hanger
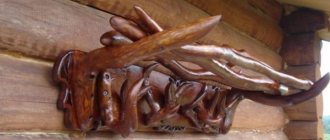
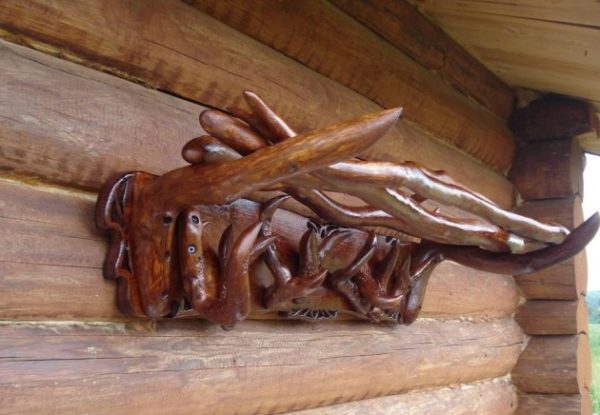
Hangers are also made from maple or oak logs, always with knots. To create such a hanger, just find a photo of the finished product, and then use it as a visual aid. The procedure is simple, so if you correctly follow all the steps described below, you can make such a hanger without experience or special skills.

Cute wood hanger
- Choose a small log with branches that will resemble the hooks of a future hanger. The shape and dimensions of the sample can be arbitrary.
- Carefully cut the log into two parts so that knots remain on one half.
- Using a plane, process the surface of the workpiece, making it as smooth and even as possible. In other words, give the product a noble look.
- Make several of these hangers and coat each of them with varnish. The number of hangers that can be installed in the bathhouse is unlimited.
- Attach the hangers to the wall of the bathhouse with nails, although it is better to do this with self-tapping screws.
Use oak or maple logs
Each of the small hangers should be original and not similar to other products. Of course, you don’t need to take huge blanks to make them, because they will take up a lot of space in a cramped room.
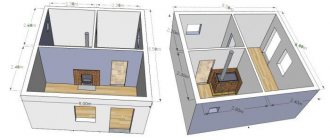
Towel rack: work progress
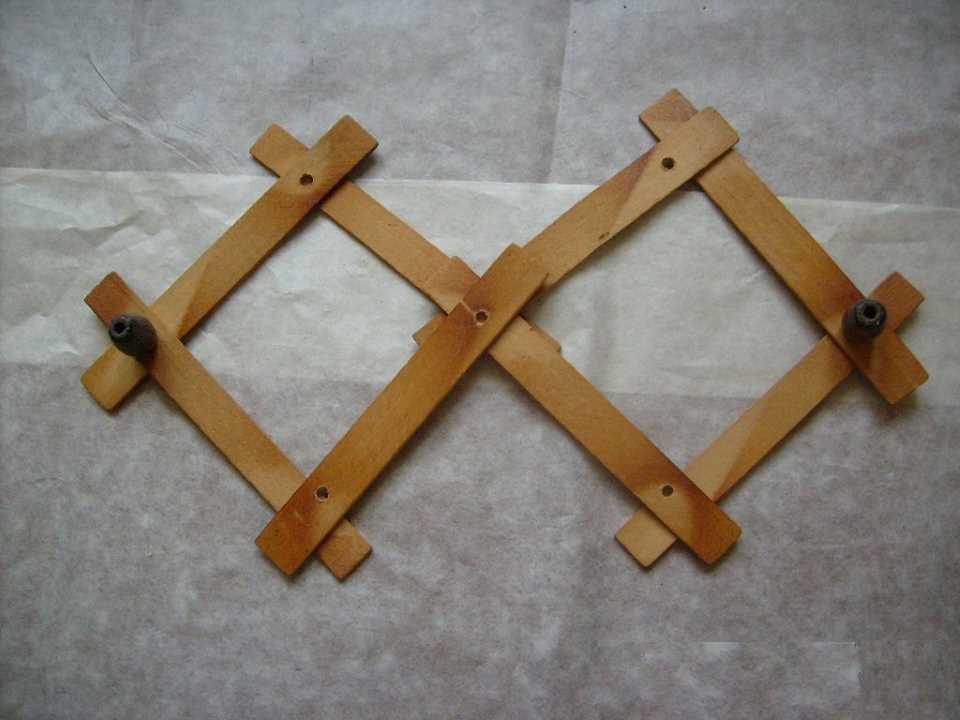
1. Designing a future hanger. We fold the boards into two diamond shapes and mark the points of contact with a pencil.
For a perfectly even joint, measure the distance between the “bird” on the sides of the diamonds. Then screw pin beads into these places. This way we will have strong support for further actions.
2. Assembling the middle. We lay out four planks with a cross, and connect them with a large screw and several beads. Lay the boards on top of each other as evenly as possible to avoid curvature in the finished work.
3. Assemble the remaining sides. Similarly, screw the screws with beads into the free spaces, while leaving the two corners unconnected - the spaces will serve as fastenings to the wall.
4. Attach a hanger for kitchen utensils. We try on the thing and screw it to the wall, not forgetting to attach the beads. Paint over the ugly screw head or put on a special decorative cover.
The job is done and is pleasing to the eye. Now the towel and potholders will find their “home”. And we suggest looking at several other photos of towel racks that you made yourself.
Additional recommendations
To avoid making mistakes when making a wooden hanger, you need to follow the recommendations of experienced specialists:
- all holes for dowels must be made in stages, that is, gradually;
Cedar bath hanger
- to mark centers as accurately as possible, use thin nails;
- be sure to treat the wooden structure with water-based varnish to extend its service life;
- Regardless of the type, the hanger can be made in almost any size. You just need to follow the assembly algorithm;
- You can complement the interior with a wooden bench installed under the hanger. This will make the room more cozy and comfortable.
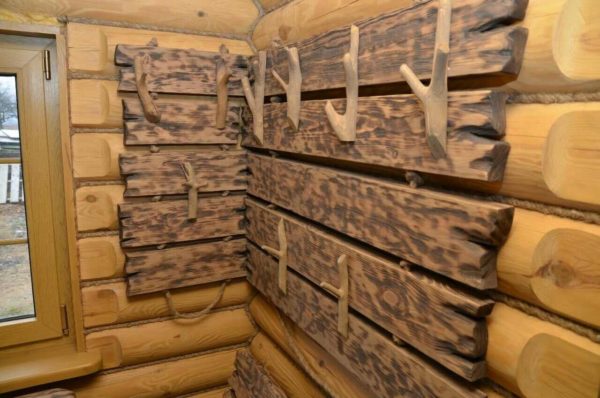
Sign-hanger for a bath
Having studied all the above instructions in detail, you can forever discard the idea of coat hooks that are simply nailed to the wall in the bathhouse. They can be replaced with a unique hanger made by yourself.