Proper protection of the crown of a house takes into account that it must meet three main parameters: reliability, durability and minimal thermal conductivity.
These parameters are interrelated with each other, and if, for example, the house is not properly insulated, it will not only be cold, but will also collapse in the next few years. The lower crown is most susceptible to damage due to its proximity to the ground, accumulation of rainwater and condensation.
Therefore, it is necessary to take care to protect this vulnerable link in order to extend the life of the house.
Features of the problem
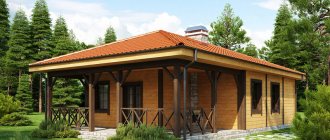
The wooden Russian bathhouse is considered a classic version of this structure. In such a structure, wooden floors look the most practical and natural. It is wooden floors that have been laid in bathhouses for a long time, which is facilitated by the numerous advantages of the material: good heat capacity, manufacturability, and naturalness. An increased tendency to rot is a phenomenon that can be classified as a serious disadvantage of wood.
Wood has a fairly low resistance to moisture, which easily penetrates into the material
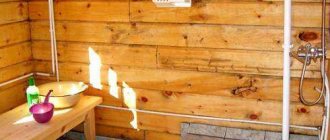
Why does the bathhouse floor rot? At its core, rotting is the destruction of cellulose under the influence of the vital activity of special fungi and microorganisms that actively develop at a humidity of at least 17-18% and elevated temperature. Wood has a fairly low resistance to moisture, which easily penetrates into the material. If you constantly dry it after getting wet, then rotting will develop extremely slowly, but bath conditions imply constant high humidity, and this is caused by both liquid and heated saturated steam. Elevated temperature accelerates biochemical processes. Constant moisture stimulates the development of mold and fungi. Thus, when a wooden floor is being erected in a bathhouse, enhanced measures must be taken to prevent it from rotting.
Constant moisture stimulates the development of mold and fungi
What actually slows down the process of wood decay? Under normal conditions, external coatings (paint, varnish) perform an excellent protective role. However, in a bathhouse, especially in a steam room, this method turns out to be ineffective. Moisture in the form of steam penetrates under the coating and accumulates in the material, and heating the paint layer only adds unpleasant emissions and an unpleasant “aroma” to the room.
On a note! A fairly effective way to combat wood rot is to impregnate it with special compounds.
This composition penetrates deeply into the material and provides antiseptic protection against microorganisms. Impregnation is considered a mandatory condition for the construction of any permanent wooden structures. However, in aggressive bath conditions, such protection alone is sometimes not enough.
The service life of wooden building elements significantly depends on the design used and construction methods
Finally, the service life of wooden building elements depends significantly on the design used and construction methods. The following areas are distinguished in the construction factor: waterproofing, vapor barrier, ventilation. Particularly noteworthy is the fact that wood-destroying fungi and microorganisms do not cause damage if there is good air access, i.e. availability of ventilation.
Properties of protective materials
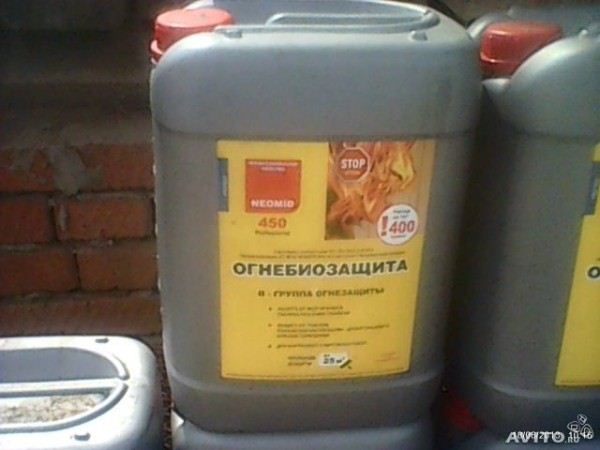
Amateur photo of a special material designed specifically for baths, saunas and rooms with high humidity
First of all, it should be noted that these compositions have a number of features. At the same time, standard impregnation of a bathhouse for shelves usually only protects the surface from moisture, although experts advise choosing materials with enhanced properties.
Effects of moisture on wood
Types of impacts
- The most important factor that affects wood in a bathhouse is humidity. It causes the material to rot and quickly collapse.
- Also, as a result of dampness, fungus or mold may appear on the surface of the bathhouse. That is why bath floor impregnation usually contains antibacterial substances. They are able to destroy existing deposits and prevent the formation of new deposits.
A fungus harmful to the human body that forms on unprotected wooden surfaces
- Special attention is paid to protection from harmful insects. The fact is that parasites that feed on wood have access to the material from the outside, so the material must be protected from them as well.
- It is worth noting that the bathhouse is a structure in which high temperatures and open fire are constantly present. That is why wood, as a substance susceptible to fire, must be protected. However, it is worth noting that the price of compositions with fire-fighting properties is quite high, which means that they should only be used to treat those areas that are most susceptible to this effect.
Advice! Professional craftsmen recommend using such impregnations for baths and saunas. which can provide comprehensive protection. This solution will be the most practical and will even save money.
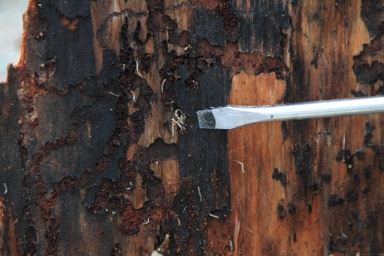
Appearance of wood damaged by insects
Surface application
- All manuals that tell you how to impregnate the inside of a bathhouse, first of all, involve mechanical processing of the material. The fact is that this way the surface will get rid of the fleecy structure, which will absorb all the moisture and significantly increase consumption.
- Typically, the installation instructions suggest using sandpaper with a fine corundum fraction for pre-treatment. However, to make the work easier, it is worth using special grinders or drill attachments.
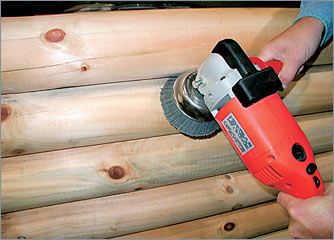
Sanding wood allows you to get rid of the fleecy structure
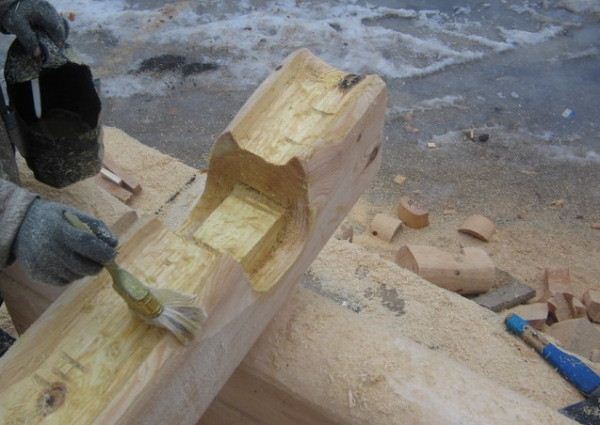
- At the next stage, the surface is covered with a uniform layer of the selected material. This is done with your own hands, using a paint brush or roller as a tool.
- It is worth noting that for such work, liquid compositions with high fluidity are used.
Material that protects wood from fire
- The fact that impregnation for log bathhouses is most often made colorless also deserves special attention. That is why, when working in a room with poor lighting, it is difficult to determine where the treated surface is and where the raw wood is.
- Given these features, bath impregnation is often mixed with a small amount of dye. It will give the surface a certain contrast and help distinguish the treated areas.
After the composition has dried, it is quite difficult to distinguish the treated surface from ordinary wood.
- It must be taken into account that in this type of room there is always a high temperature. Therefore, many manuals that talk about how to impregnate a log bathhouse recommend selecting compositions that do not emit harmful substances when heated. On the packaging of some materials there are special notes indicating that they are designed specifically for these buildings.
- If the question arises about how to impregnate the lower crown of the bathhouse, the best option would be to use ordinary bitumen or mastic based on it. The fact is that it is considered the most reliable protection, although it does not have a very good appearance.
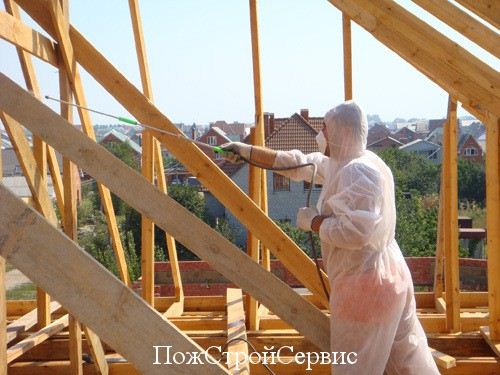
To facilitate the process of applying the composition to the surface, you should use a sprayer, and in small areas you can use a brush or roller
- It is worth noting that professional craftsmen recommend using the same material when asked how to impregnate the floor in a bathhouse sink. However, it is worth creating a topcoat or laying pallets.
Advice! Surfaces that do not have direct contact with water can be treated once, while in a wash room several layers should be used.
By adding a dye to the impregnation composition, you can give the final product a certain color, emphasizing its structure
Construction nuances of the fight against rotting
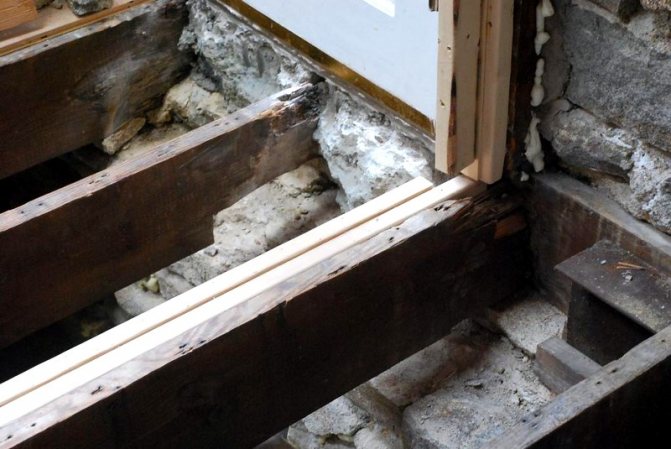
How to build correctly so that the floors in the bathhouse do not rot? The practice of building Russian baths distinguishes two designs of rot-resistant floors: pouring structures and insulated screed on the ground. However, before considering these options, you should think about the impact of foundation type. The optimal type is considered to be a strip type with different depths, and for small buildings a slab on the ground is best suited.
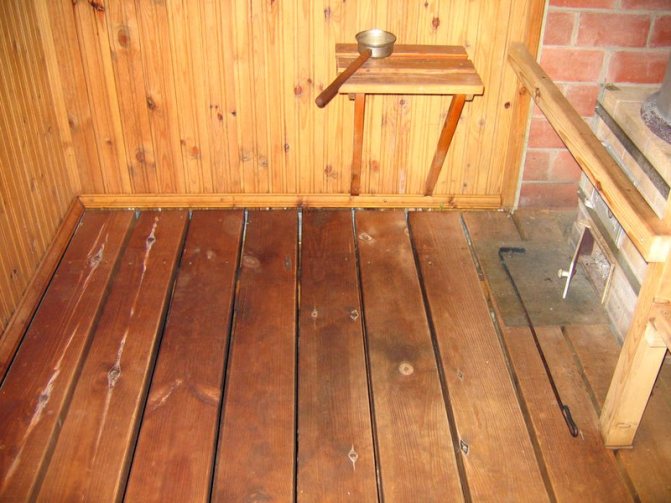
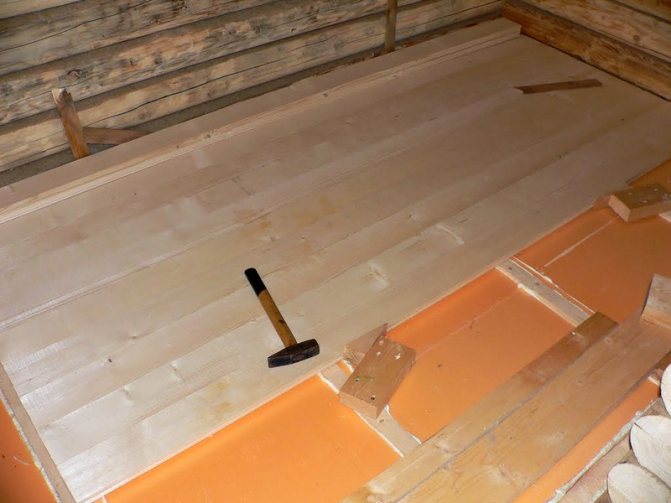
The traditional Russian bathhouse had a so-called pouring floor. The principle of such a system is based on the free drainage of water between the boards into the ground or drainage system. To do this, the following structure is set up: boards are laid on the logs with a gap of about 3-5 mm. Water easily penetrates through such cracks. Direct discharge into the ground is undesirable, because with low groundwater levels, soil moisture will accumulate, which will ultimately lead to rotting from below. So sometimes the floor in the bathhouse rots along with the basement crowns of the log house.
On a note! An underground drainage system provides good protection against rotting in a flooded field.
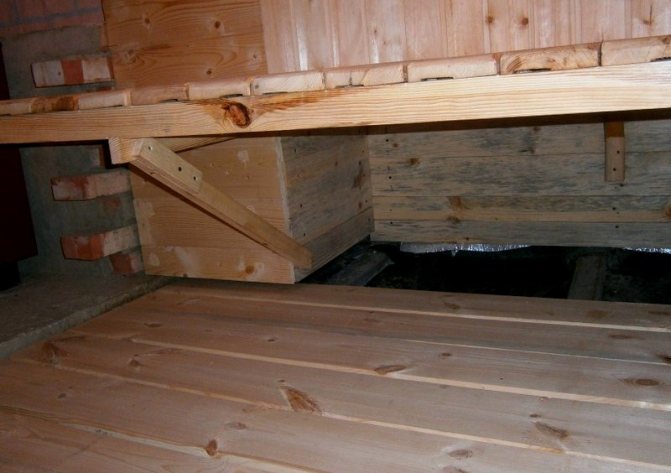
The drainage of water outside the building is ensured by a screed, gutters and a drain pipe. The pouring system is effective because it easily provides ventilation. To do this, a gap is left between the screed (foundation or soil) and the boards, and air from outside is directed into it through vents. These holes are opened only temporarily to dry the floor.
For any wooden floor design in a bathhouse, all its elements must be impregnated with a special antiseptic composition
In modern baths, the steam room and washing room are equipped with an insulated screed and then covered with ceramic tiles. This design does not use wood, but provides increased reliability and comfort. In principle, in a sauna where dry steam is used, the floor over a concrete insulated screed can be made of wood. In this case, it has the following design: subfloor, vapor barrier, mineral wool insulation, waterproofing, finished plank floor.
How to protect a bathhouse from rotting
How to protect a bathhouse from rotting? Is it necessary to cover the floor, walls, ceiling and sun loungers in the steam room with protective compounds? These two questions plague almost everyone who has decided to get their own bathhouse. And this is not surprising. After all, a bathhouse is a place where there is not only high humidity, but also where wooden structures have direct contact with water.
First, you need to make a reservation right away. That no measures or “magic” compositions will help protect the bathhouse from rotting 100%. All of the measures listed below will only help delay the appearance of the fungus. How long it will be a year, two, 5 years or ten depends on the quality of the materials and the performance of the work.
Now straight to the answers. In order to protect the bathhouse from rotting, the following measures must be taken: correctly close the structure's contour, properly perform thermal insulation and cover the surface with protective compounds.
Closing the bath circuit
The circuit is considered closed correctly if its tightness is ensured , i.e. when the roof does not leak and the windows do not leak. In addition, the roof slope must have sufficient extension beyond the outer walls in order to achieve this. so that during strong winds drops of water do not fall on their surface. The length of the extension depends on the height of the building. So, for one-story baths it is advisable to make it at least 300 mm. Another option to solve the problem is to carry out organized drainage through pipes. But in any case, it is necessary to make a blind area to avoid undermining the foundation.
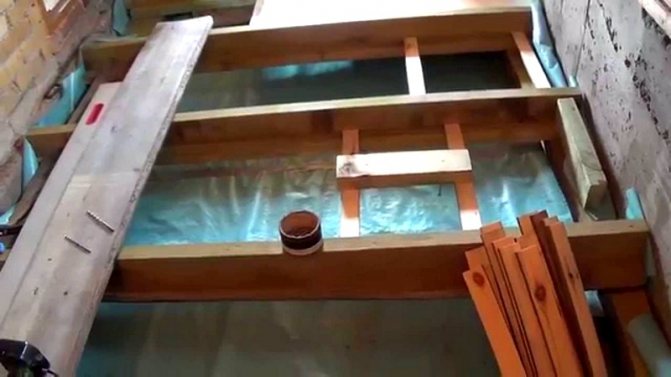
Performing thermal insulation of a bath
The implementation of thermal insulation depends on the structures of the roof, walls and floor. Insulation of bathhouse roofs is usually carried out using thermal insulation materials (expanded polystyrene, mineral wool, etc.). The walls can be made either using frame technology using the listed insulation materials, or from rounded logs or timber. As for the floor, it is usually not insulated, and its boards are laid with gaps of 2-5 mm in size for unhindered water drainage. If it is planned to be insulated, then in this case it is necessary to organize water drainage using trays.
The main thing you need to know when using thermal insulation materials in bathhouses (and not only in them) is that their thickness should be selected according to thermal engineering calculations in order to avoid the formation of condensation on the inner surface of the walls. Because condensation is water. And water is a fungus that destroys structures, especially wooden ones. Therefore, when calculating the thickness of the insulation, it is necessary to ensure that the “dew point” is inside this material. Also, when using heat-insulating material, do not forget about the vapor barrier, which should be installed on the inner surface of the insulation. In other words, the wall design should look like this:
- 1 layer - outer cladding (board, slabs, plywood, etc.);
- 2nd layer - insulation;
- 3rd layer - vapor barrier;
- Layer 4 - internal cladding (board, gypsum plasterboard, gypsum board, etc.).
As for the roof, the “pie” here looks like this:
- 1 layer - roofing material (metal tiles, ondulin, corrugated sheets, etc.);
- 2nd layer - waterproofing;
- 3 layer - insulation;
- 4th layer - vapor barrier;
- Layer 5 - inner lining.
Protective compounds
Today, there are a large number of compounds that can protect wood from rotting. The most effective of them are: Wooden healer, Biox, Biosept, Aquatex, Pinotex, Elkon, compositions from Tikkurila, Dulux and Allicator.
As for the question of the advisability of covering wooden bathhouse structures with protective compounds , in fact, everyone decides for themselves. So, some believe that any protective composition is a chemical, and therefore, when exposed to high temperatures, it will certainly be released into the atmosphere and negatively affect human health. Others simply cannot allow their work and invested money to become covered with fungus.
The golden mean can be treating only the waiting room and sunbeds with protective compounds . And the resulting fungus on other structures can be removed using folk remedies: 5% potassium bichromate mixed with 5% sulfuric acid, vinegar and soda, 100 grams of copper sulfate dissolved in 10 liters of water, dissolved in 5 liters of water, 50 grams of boric acid and 1 kg of salt .
In addition to the listed methods of protecting a bathhouse from rotting , you should not neglect one more. Namely, for the construction of a bathhouse, it is advisable to use wood that was harvested in winter. This will allow you to get rid of problems such as cracking of wood during drying and obtaining lumber with fungus already formed on it.
Share this article with your friends:
Application of protective compounds
With any design of a wooden floor in a bathhouse, all its elements must be impregnated with a special antiseptic composition during the construction process. These products do not allow fungi and microorganisms to develop in the wood. They will be effective if they penetrate as deeply as possible into the material and are evenly distributed over the entire area of the wooden elements.

Biox prevents mold formation
Currently, many different products for this purpose are offered, but you should not save much on them, because... You can purchase a low-quality product that will be of no use. All compositions are divided into 2 main types: water-soluble and solvent-based.
Attention! For bath conditions, especially in a steam room, the choice of product should be based on an important requirement: at high temperatures, substances hazardous to the human body should not be released.
Taking this into account, when purchasing a product, you should read the instructions - it should indicate the possibility of use for baths and saunas.
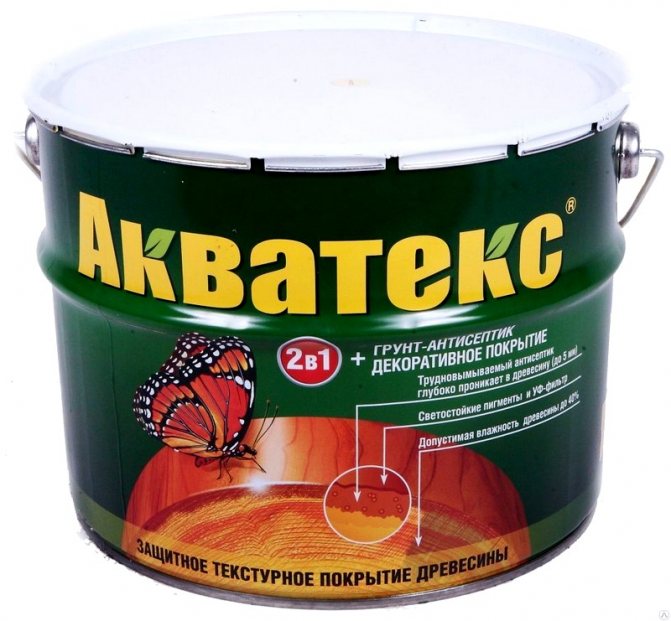
Aquatex provides long-lasting protection against rotting
The following wood impregnation products are popular:
- Biox: prevents the formation of mold, protects against fungi;
- Sotex: has excellent antiseptic abilities, has biocidal additives;
- Aquatex: long-term protection against rotting, has high permeability into wood;
- KSD: capable of penetrating deeply into wood, does not wash out in sauna conditions.
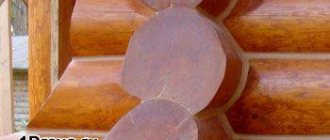
Processing and laying the crown
One of the common mistakes is treating the crown of the house with used motor oil. It can protect against insects, but not against mold. If funds allow, use high-quality protective compounds. The products of well-known Finnish manufacturers are designed for different conditions, so they will withstand any test of our weather, although their cost is quite high.
There are alternative, cheaper means: antiseptic “Neomid 430” together with water-repellent impregnation “Kuzbasslak”. It is necessary to impregnate with liquid products not in one layer, but at least in two.
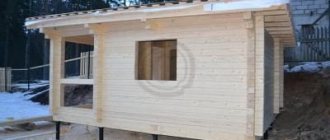
There is another option to prevent damage to the log house - make the two lower crowns from larch. This type of wood is remarkably resistant to rot and provides good heat retention. From ancient times to this day, entire bathhouses and houses have been built from larch wood; such structures last a very long time, their preservation is ensured by the properties of this tree.
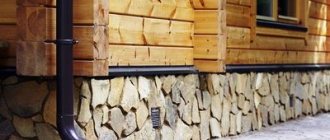
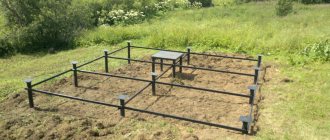
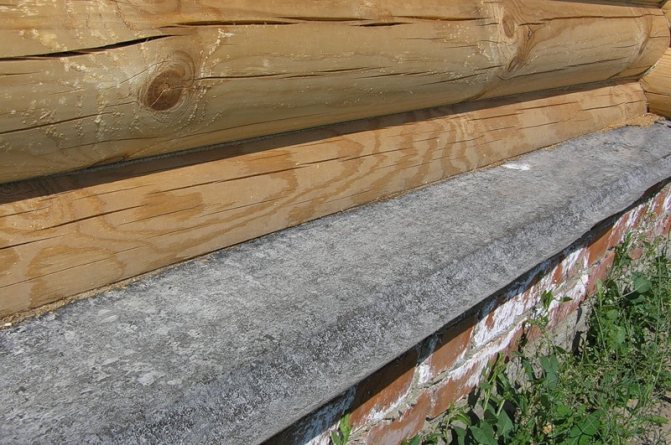
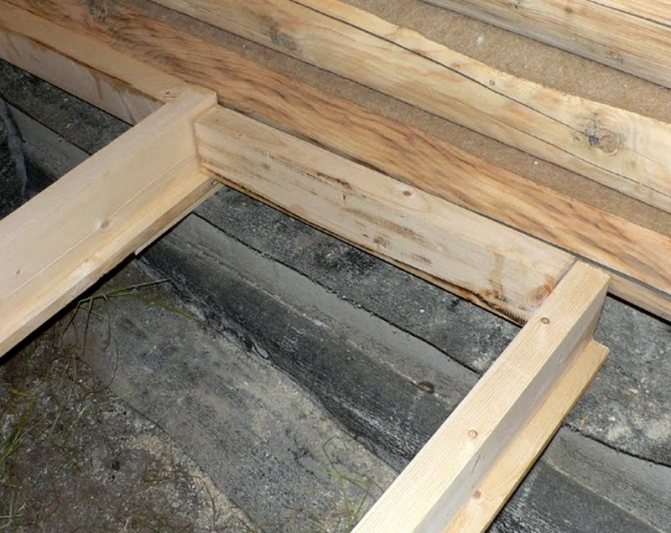
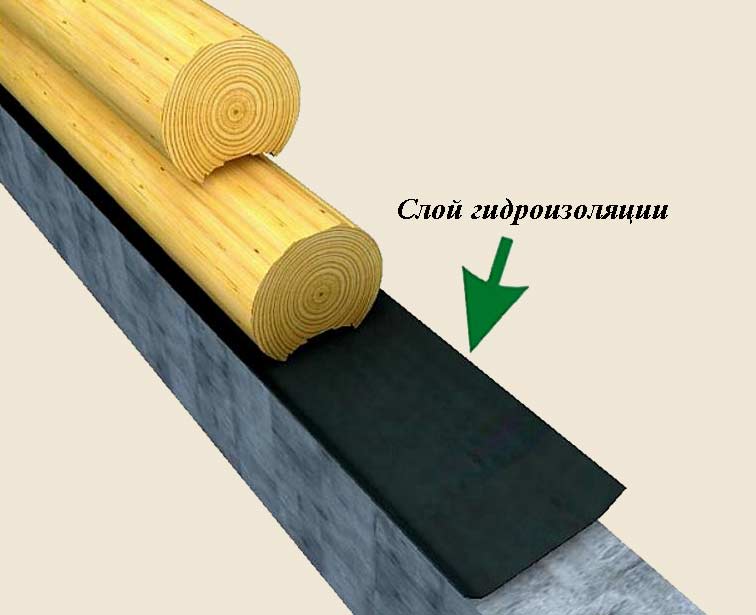
For proper waterproofing, lay 2-3 layers of roofing felt or other rolled materials that prevent moisture from entering on top of the foundation, with a layer of bitumen mastic. Only after this is the lower crown applied, pre-treated with an antiseptic and impregnation.
If the lower crown of the house is already rotting, a specialist will tell you what to do after a visual inspection. Basically, either partial or complete replacement of the crown using a powerful jack is used. But it is always better to prevent rotting than to deal with the destructive consequences.
Wood preparation
Quite often, the floor in the bathhouse rots due to the fact that low-quality wood was used, or it did not undergo the necessary preparation before use. To prevent wood rotting, it is very important to approach the preparatory stage responsibly. You should start with the correct preparation of the material. The optimal harvesting season is winter, because... During this period, sap does not circulate through the trunk, which means that the wood has low humidity.
Quite often the floor in the bathhouse rots due to the fact that low-quality wood is used.
The most critical stage is drying the material. The best way is natural drying in the open air, but under a canopy. The tree must be protected from precipitation and atmospheric moisture and at the same time be well blown by the wind.
What crown treatments are best to use?
There are traditional ways to treat the lower crown of a bathhouse and modern compounds such as: Senezh, Belinka, Tikkurila.
For greater savings, it is better to use folk and proven means, but the appearance of the treatment in this case will not be the best. For something more decorative, traditional ones are suitable.
The second option is recommended by professionals, as it is safer and more proven. Of course, when purchasing expensive coverage, no one is immune from fakes, the quality of which is not worth talking about. For this reason, most people prefer the old-fashioned methods of processing the first link of a bathhouse and building a house from laminated veneer lumber. Let's talk about both in more detail.
Folk remedies
Use a solution of copper sulfate. To do this, place a log of natural moisture on its end, and tie a bag with a rag heavily soaked in copper sulfate on top. The rag should be in contact with the end of the beam. Under the influence of natural movements of juices inside the wood, the timber will be saturated with salt solution and protrude from below. The rag must be soaked all the time so that it does not dry out. After this, it is well dried under a canopy. Craftsmen suggest soaking the log in a bath of copper sulfate. Let us immediately make a reservation that this method is not safe for health. When heated, copper sulfate releases toxic fumes to humans.
- Treat the lower crown of a bath or at home with propolis and oils, then rub with wax. The method looks a little fantastic, but it is used in villages and is time-tested, although labor-intensive.
- A famous processing method in the West and among the Finns. It is prepared from ingredients available to everyone: flour (rye or wheat) - 750-800g, copper sulfate - 1.5 kg, table salt - 400 g, lime (slaked) - 1.5 kg, diluted in 10 liters of water. Cooking: Add water to the flour, stirring constantly until it becomes sour cream. 5 liters of water are heated not to a boil and added while stirring.
- Then everything is mixed and filtered. The finished mixture is heated, stirring constantly, adding vitriol and salt. Slaked lime is added last. You need to cover the crown with a warm composition in 2 layers, after the first one has completely dried. Experts say that such treatment at home is enough for 10-15 years. With this composition you can even treat the bottom of the floor in a bathhouse and completely build a house from profiled timber.
- Coniferous timber is the least susceptible to rotting and can be treated with birch tar or spruce resin. Such compositions will protect the wood from bugs, but have a strong unpleasant odor; in addition, spruce resin is sticky. After this treatment, the crowns of the house cannot be painted or sanded. This is also a fire hazard, since these substances are highly flammable. Therefore, it is customary to treat with such compounds the part that comes into contact with the ground.
- In rural areas, the lower link of a log bathhouse can be treated with motor oil treatment. The biggest advantage of this treatment is its low cost.
- Apply it in a heated or cooled state in several layers, allowing the previous one to be well absorbed. 90% of this composition consists of mineral oils, and they repel water well.
- The soot contained in the used oil protects the logs from the sun and is an antiseptic. But it has already been proven that impregnation in this way is not of sufficient quality, since it does not penetrate the wood evenly. In addition, this coating has a mourning color.
- The method of treating timber with bitumen or tar has not become a thing of the past. Underground structures are treated with such compounds heated and mixed with diesel fuel. Today, manufacturing companies offer modern bitumen impregnations and mastics.
- Drying oils and oils, they can only conditionally be classified as folk, since these compositions are the basis of varnishes and modern paints. Lasts for a long time, does not peel or crack. For deeper penetration, it is better to apply warm. This way they will be more fluid.
- Moisture penetrates best from the ends of the link; to prevent this, the ends are “riveted.” To do this, tap the ends of the bathhouse logs with a rubber or wooden hammer. This treatment will help the wood stay dry longer and prevent it from cracking.
- Burning the surface of the timber with a blowtorch. This method is not safe, but a thin layer of burnt wood serves as a good antiseptic and destroys the capillaries through which moisture enters the wood.
Traditional processing agents
This type of treatment includes all kinds of drying oils, impregnations, and coatings. Let's talk about some of them in more detail.
"Senezh"
Produced by SENEZH-Preparaty LLC. Has been tested and certified by Rospotrebnadzor of the Ministry of Health and Social Development of the Russian Federation. Fire-retardant composition produced in polyethylene canisters of 5, 10, 65 and 1000 kg. Acts as a comprehensive protection for wood, including the lower crown. Do not use after varnish, drying oil or any other water-repellent composition. Included in group 2 for the effectiveness of fire protection according to NPB 251-98. The protection period is up to 20 years. Does not change the color of wood, does not interfere with air penetration. Has no smell. It has penetrating properties and accumulates in the inner layers of wood, preventing the penetration of moisture and fungi.
Treatment: Apply to cleaned wood with a roller, brush or spray at a temperature not lower than +50C. You need to apply 2-3 layers, allowing the previous one to dry for 20-40 minutes. Do not treat a frozen link or mix it with other impregnations. Must be mixed before application. Consumption: 600 g/m2 (1.6-1.7 m2/kg).
"Belinka"
Produced by Australian. Has certificates from the Australian Institute of Holzforschung. To protect the crown use Belinka Base.
Impregnation – Belinka primer is a deeply penetrating composition of alkyd resin and biocides. Protects wood from fungus, pests, blue stains, and moisture. Creates a protective biocidal layer on the surface. Unlike other formulations, it has several types of biocides, which increases the level of protection several times. Available in containers of 1, 2.5, 5 and 10 liters.
Treatment: Apply with a roller or brush to a cleaned surface in 2 layers. Drying time for each layer is 6-12 hours. Application temperature from +10C. It can also be used at sub-zero temperatures, but it will take more than 12 hours to dry. Consumption: 1l / 5-10m2.
"Tikkurila"
Finnish manufacturer. The company has been working in the industry of paints and varnishes and antiseptics for more than 100 years. To treat baths and wooden houses from moisture, blue fungi and mold, the Tikurilla “Vinha” and “Valti” product lines are used. These lines are specially designed for unfavorable climatic conditions. They can be used for both external and internal work.
Products that form a protective film on wood are produced under the names “Color Extra” and “Color Satin”. Absorbing protective lines “Aqua Color”, “Color”, primer “Pochjuster”.
Each of the listed coatings are antiseptics and protective agents against moisture and rot. All of them can be colored or coated with wood paints. Available in 2.5, 5, 10, 15, 20, 25, 50, 100 liters. The protection period is 5-10 years.
Treatment: Apply to a cleaned surface using a brush or roller in 2-3 layers. Application temperature from +50C. Each layer should dry for 2-3 hours.
What to do if the floor is rotting
If the bath floor is significantly rotten, repairs will have to be made. It includes the following main steps:
- Damage assessment. A thorough inspection of each floor board is carried out, and then they are carefully dismantled and the condition of the logs, embedded beams and the plinth of the log house is checked.
- Lifting the structure. In case of severe damage, you will have to lift the entire structure using jacks in order to get to the backfill beam and all support points.
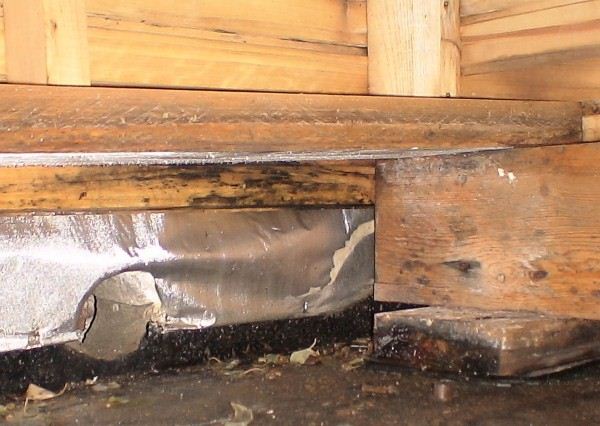
- After lifting, a major overhaul of the floor base is carried out. If necessary, repair damage to the foundation and screed. On the embedded beam, rotten areas are removed using a hacksaw. It is advisable to replace these beams completely. After replacing the damaged elements, antiseptic treatment is carried out and new insulation is installed.
- After completing the installation of the repaired layer, it is recommended to install an external protective apron made of sheet metal. The best option is lead.
If the bath floor is significantly rotten, repairs will have to be made.
Bath conditions are extreme, which can cause fairly rapid destruction of the wood. Wood has a tendency to rot, but with proper preparation of the material, taking into account a number of construction nuances and the use of protective compounds, it is possible to ensure long-term operation of wooden floors in a bathhouse without major repairs.
Replacing parts of rotten logs in a log house
Question:
Good afternoon. This is the problem - I got a wooden house and am doing major renovations. Apparently the old owners had a leaking roof at the junction of the house and the veranda and as a result, the two top logs rotted, but not along the entire length, but in one place - can this be somehow corrected with fresh inserts. Help.
Alexander, Krasnogorodsk.
Answer:
Hello, Alexander from Krasnogorodsk!
What should my help be? Send your familiar shabashniks to the Pskov province? Or would you like to explain in principle how this is done?
The first is not very acceptable for a number of reasons, but if the second, then you need to pay attention to a number of main points and show your creative imagination to correct the situation.
Inspect the site for future work to replace sections of rotted logs. If necessary, dismantle the section of the roof that is located above the problem area. Both above the main house and above the veranda, where they meet. Naturally - in the absence of rainy weather.
Measure the replacement sections of logs to make exactly the same new ones. Make them from a suitable blank. In such cases, the ends of the logs at the joints are made not just cut, but into a claw, overlapping, etc. to increase the mounting area.
See also the articles : “Replacing logs in a log house”, “Replacing logs eaten by insects”, “Replacing the lower crown of a timber frame”, “Replacing the lower crowns in a house”, “Replacing the upper rotted crown of a log house”, “Replacing the lower crowns of a bathhouse”.
In the event that elements of the rafter system rest on these places, then additional work is carried out to avoid their displacement. Which is determined by location and with the necessary precautions. Otherwise, all this may collapse.
Cut out damaged areas and install new inserts in their place. Place the entire rafter and roof structure in its original position using the necessary fasteners (staples, nails, screws, studs, bolts, etc.). If necessary, replace the roofing material to prevent future water leaks.
Carry out a sprinkler check, or, more simply, pour several buckets of water over the repaired area of the roof. If water does not leak through the roofing material, then honor and respect to you. If it leaks, fix the leak.
All.
Naturally, saying all of the above is much easier than doing it, since words are words, and deeds are deeds. But there is no other option.
Good luck!
Construction in Moscow and Moscow region
We work with a guarantee! Wide range of construction services.
Foundation, walls, ceilings, roofing, turnkey! +7 (905) 797-20-34
luxurycomfort.ru
Other questions on the topic of log houses:
Replacing logs in log houses
- Cost of replacing the top rims of a log house
- Rotten crowns in the middle of the wall
- Replacing a log frame with a brick or block
- Replacing the lower crowns of a log house
- Replacing rotten crowns with bricks
- How to strengthen a corner in a log house
- When you need a fifth wall in a log house
- Vibrations in the log house
- Remove the three lower crowns of a log house
- Replacing a wall in a log house
- Replacing the lower crown with brick or foam blocks
- Joining logs of different diameters
- Replace the corner of a log frame with sleepers
- Replacing the lower crowns of a log house with a concrete wall
- Rotten log in a log house
- Restoration and cladding of a timber frame
- Reconstruction of an old log house
- Replacing a rotten corner of a house
- Repair of rotten beams in a log house
- Replacing the lower crowns of a log house with blocks
- Replacing rotten logs of a log house
- Replacement of the lower crown of the house
- Replacement of a main wall made of timber
- Transfer of logs in height in a log house
- Alignment and replacement of the lower crown of the log house
- Replacing rotten logs under the window with blocks
- 2 corners rotted at the level of the log house windows
- Cost of work to replace the top rims of a log house
- The log house is rotting next to the vent
- The wall near the log house in the five-wall building has rotted
- Repair of old logs
- Replacing a log house wall with a foam block
- Replacing the lower crown in a wooden house
- Replacing logs in a log house
- Replacing logs eaten by insects
- Replacing the lower crown of a timber frame
- Replacing the lower crowns in the house
- Replacing the top rotted crown of a log house
- Replacement of the lower crowns of the bath
About caulking log houses
- Caulking log corners
- Cold corners in a log house
- Caulking and insulation of a log house
- Caulking a log bathhouse over old moss
- How to caulk a log house covered with clapboard
- Should tow for a log house smell?
- How to fix a chopped pediment
- Re-caulking of a log house
- Caulking and log processing
- Re-caulking the bathhouse with moss
- Calculation of the amount of jute for caulking a log house
- Caulking of a log house lined with bricks
- Caulking tight logs
- Dismantling inter-crown insulation
- Log caulking
- Log house for three years in the open air without a roof
- Re-caulking of a log house
- The basics of caulking a log house
- Caulking and sanding of a log house
- Caulk of a log house from the inside
- Do-it-yourself log caulk
- Caulking of a log house made of rounded logs
- Sanding timber
All about log houses
- Log house made of logs or timber?
- Estimate for finishing the log house
- The first crown of a log house made of oak
- Insulation of the stone base of a log bathhouse
- Overcut in the house
- Basement and blind area for an old shrunken log house
- Uneven shrinkage of the frame
- Repair of an old 2-story log house
- What kind of foundation for a 6 by 8 log house?
- How long does it take for a log house to shrink on a pile foundation?
- Increase the height of the log house without removing the roof
- Wind protection between the foundation and the log house
- Problems when lifting an old log house
- Insulation of a log house with sawdust and lime
- How to lay a log house from timber of poor geometry
- Pouring a concrete floor in a log house
- Interfloor ceiling in a log house
- Waterproofing the log house from the foundation
- Renovation of an old log house
- Repair of an old brick-lined log house
- How to strengthen a log house
- When to put a roof on a freshly assembled timber frame
- When to cover a log house with natural humidity
- Support under the log and shrinkage of the log house
- Beetles in logs
- Door in the end wall of a log house
- A team for the construction of a log bathhouse
- The cut of the log on the outriggers of the log house darkens
- Rot on the lower crown of a log house
- Vertical log house
- Which finishing plaster for clay to choose
- Mushrooms on a log house
- Log house without frame and floor beams on slab
- Dry rot of the lower crown of a timber house
- The upper corner of the frame has been removed
- Demolition of a log house wall
- Displacement of profiled timber in a log house
- How to build up log extensions of a log house for a veranda
- The log house was mowed down
- Installing a shrinkage compensator in a finished log house
- Twisted the logs of the log house before assembly
- Log house with nails instead of dowels
- How to protect a log house without a roof from rain
- A set of works on the external finishing of a log house made from central fiber boards
- Repair of a log house after a fire
- Is it possible to put a roof on a log house for the next year?
- Warm joint with sealant for log house
- Insulation and cladding of a log house made of corrugated timber
- Insulation of a log house from the inside
- Concrete floors in a log house
- Shrinkage of log walls old and new
- The procedure for finishing a log house
- How to preserve timber from spring to winter
- What comes first: flooring or door casing
- Dismantling half of an old log house
- Types of beam connections
- Sealing the joint between the roof and the frame from OCB
- Cleaning a log house from old paint
- Connection of two log houses
- Support column in a log house on stilts
- The difference in the shrinkage of a log house between winter and summer felling
- Dismantling and moving a house made of profiled timber
- Supporting floor beams in a log house
- Preparing a log house for winter
- Guarantees when cutting a log house on a plot
- Chop into a bowl or warm corner
- How to lower the ceiling in a log house
- The timber turned blue in the rain
- Preservation of the log house in a non-temporary gathering place
- Consultations on a timber house
- Sheathing of a house made of cylinders without insulation
- Scheme of a log house with outlets and a ridge roof
- How to lay a carriage while lying down
- Reinforced concrete slab on a log frame
- How to assemble a log house from twisted timber
- Repair of a cut in a log house
- Installation of a log house on a columnar foundation
- The chopped gables of the log house are shaking
- Fastening beams in a log house
- The top beam in the log house was driven into the screw
- How to cover a timber façade
- Waterproofing the frame of an old house from the foundation
- A log house without nails is being pulled apart
- Sheathing a log house
- Cutting the lower crown in the log house
- Settlement of a log house made of used timber
- The log house rotted in the castles
- The corners of the log house are rotting
- How to strengthen a log house
- Work plan for interior finishing of the log house
- Log processing procedure
- How to lay a log house in the rain
- Cut the lower crowns of the log house
- Sheathing a log house immediately after construction
- Heating and windows in a new log house
- Processing the crown of an already built house
- Painting a timber house
- Blind area and shrinkage of the log house
- How to enlarge a house made of timber
- Connecting a timber house with a brick extension
- Finishing a timber frame with jute rope
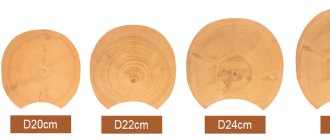
- Diameter of a log for a permanent home
- Treating the log house with an antiseptic during assembly
- Reconstruction of a wooden house
- Connecting timber in cuttings
- Protection of the ends of the timber at the corners of the log house
- How to connect two log houses together
- Cutting a balcony doorway in a log house
- When to casing a newly assembled log house
- Insulation of gables made of lining
- Gaps between the logs of the log house pediment
- How to preserve logs before cutting a log house
- Raise the frame to increase the ceiling height
- Methods for joining timber in the walls of a log house
- Raise a log house to increase the underground floor
- Cladding a log house with clapboard before shrinking in winter
- When to remove the compensating jacks of a log house
- Log house for three years in the open air without a roof
- How to make a cut in a log house
- Make a house from an old bathhouse (timber)
- Moving the log house to another location
- Log house hanging on dowels
- The fifth wall in a log house made of smaller timber
- Should I paint the backing board in a log house?
- Remove mats to increase log ceilings
- The log house does not match the foundation
- Ceiling mats in the log house
- Construction from fire monitors
- How to remove bark from an already assembled aspen log house
- Transporting an old log house
- Connecting internal timber walls with external ones
- How to repair cracks in a log
- Gap between log and foundation
- Alignment of the first crown of the log house
- Stages of arrangement of the assembled log house
- Treatment of the log house after installation in the summer
- Processing the ends of the frame from the outside
- The log house floated - the walls moved
- An old wooden house sank
- Leveling the crowns when assembling a log house
- How to close the opening between the log house and the foundation
- How to straighten a log house
- Sheathe a log house with protrusions with corrugated sheets
- How to process the ends of a log house
- Collecting the first crowns of a timber frame
- Riser frame
- Preservation of the log house during assembly in rainy times
- Forgot to waterproof the log house from the foundation
- Installation of log shrinkage compensators
- Interventional gaps in a house made of profiled timber
- Gaps between logs in a house
- Communications and finishing in a timber house
- Precision when cutting log houses
- Which log house will be warmer?
- Log house made of timber 200 by 120
- Old log house - reconstruction or demolition
- Partitions in a log house
- Internal partition in a log house
- Beginning of finishing of shrunken timber frame
- Double timber construction technology
- Processing the log house from the outside
- Log shrinkage process
- The walls of the log house collapse during shrinkage
- Insulation of a log house from the inside
- How to build a house from sleepers
- The logs were kicked out of the log house
- Supports (pillars) instead of crosscuts in a 9x10 house
- Do-it-yourself timber log house without experience
- Preservation of a house made of rounded logs for the winter
- Embed additional beams into the frame
- Backing crown - installation tricks
- Log house on brick walls
- Sequence of work in the log house
- How to make a load-bearing partition in a log house
- The log house got wet during assembly
- How to seal cracks in a log house
- Align the vertical wall of a log house
- Vents in timber on foundation
- Timber 200 by 200 construction nuances
- The log house turned blue, what should I do?
- How to seal cracks in cutouts from the outside
- You can live on the second floor of a log house for shrinkage
- Replace rotten logs with mortar
- A non-load-bearing log has shrunk
- Replacing logs with boards in a house project
- Vertical supports in a log house for shrinkage
- Does a large log house need recutting?
- Metal tiles on a non-shrunken log house
- Permissible gaps between timber crowns
- Gaps in log beams
- Replacing parts of rotten logs in a log house
- The logs of the log house are shaking
- The log house was poorly assembled
- The gap between the log log and the foundation
- Protect an unfinished log house for the winter
- How to save a log house without a roof
- Log finishing service
- Assembling a profiled log house in the rain
- Gaps when fastening profiled timber
- Sealing cracks in a bathhouse
- Processing timber with a blowtorch
- Butt beam - is it reliable?
- The wall of the log house is littered
- How to align protruding ends in a built timber house
- Transferring beams in a log house in height
- The corners of the log house disappear from the timber during assembly
- The log house is wet, what should I do?
- Does a log house need a fifth wall?
- How to assemble a log house 10 by 11
- Restoring a log house after a fire
- Processing of a log house made of rounded logs
- Extension of a log house when replacing the roof
- Sand under the crowns for insulation
- Methods for lifting a bath to replace the crowns
- Impregnation of the log house inside and out
- The façade of the log house leaned
- Log shrinkage - problems
- Treatment of timber against bugs
- The smell in the house is from sleepers
- How to preserve the light color of a fresh log house
- Estimate for a house made of timber 7 to 9
- Treatment of exposed ceiling beams
- Strengthening the corner of a log house
- What is the dowel pitch?
- Protection of the lower crown of the log house
- How to check the diagonals of a log house
- Which timber to choose, square or rectangular?
- Spruce and pine log house
- Sequence of work when finishing a timber house
- Insulate an aspen log house from the outside
- How to install a casing on a log house
- What to put between the crowns
- Should I trim the paws of a log house?
- What is the best way to impregnate a log house?
- Window opening in a log house - how to seal it
- Gaps in the assembled frame
- Support pillars in a timber house
- How to move the 5th wall in a log house
- Ants and the lower crown of the house
- Sanding and processing of the log house after installation
- Barked or planed log for log house
- Repairing the corner of a log house of an old wooden house
- Should window openings in a log house be closed when it is in storage?
- Consultation on the size and shape of the log house
- Questions about construction from profiled timber
- Log house and foam block on a single slab
- Preparing an unfinished log house for winter
- Longitudinal cuts in a log house
- Cracks in the ends of logs
- Should I paint a log house with tikuril?
- Strengthening the corners of the log house
- How to secure a cross beam in a log house
- Ventilation gap between insulation and frame
- Moss or tow for building a log house
- Shrinkage of a timber house
- Fifth wall in the log house
- How to raise a 6 by 6 log house
- Distance from the corner of the frame to the windows or doors
- How to cut off the protrusions of the corners of a log house
- Log house without nails
- How to clean a linden bathhouse from darkening
- Impregnation of a log house with fire-bioprotection
- Velo log house
- Questions about cutting a bathhouse after installation
- Painting a log house
- Blackness between the crowns of the log house
- Types of cutting corners of half beams or carriages
- Attaching beam supports to a log wall
- Strengthening logs in a log house 7 meters long
- How to sort through the log gables of a log house
- The beam was squeezed out of the wall
- Is a matitsa needed in a 3 by 3 m bathhouse?
- Priority work after installing the log house
- Entrance door in a log house
- Maintaining the level when assembling the log house
- The corner of the log house and the lower log have rotted
- The sequence of finishing a timber frame
- Insulation of a settled log house
- Restoring a burnt larch frame
- Quality of a 40-year-old oak log
- Permanent roof on a newly assembled log house
- Cracks in logs
- What time of year is it better to cut a log house for a bathhouse?
- What and how to make partitions inside a log house
- Ceiling beams in a timber frame
- Installation of a metal door in a log house
- The crown molding of a log house
- Questions about assembling a log house at home
- Turnkey log house for a season - is it possible?
- Arrangement of the subfloor in a rounded log house
- Common roof for a new log house and its extension
- Ventilation system in the log house underground
- How much does it cost to change the lower crowns of a house?
- Finishing the log house after shrinkage
- Reinforcement as a dowel for a log house
- What to rest the floor joists on in a log house
- Attaching timber to a log frame
- Cover an old house with a new frame
- Extension made of foam blocks to a house made of timber
- Wet lower rims of a new timber frame
- House made of sleepers
- How to cover a log house on screw piles with bricks
- How to strengthen the motherboard in a log house
- Birch log house
- Sauna log - pine or aspen
- The lower crowns of a larch frame as a plinth
- Adjusting anchors for shrinkage of the log house
- How to properly assemble a log house
- Octagonal timber frame
- Is a fifth wall needed in a log house?
- An alternative to dowels when assembling a log house
- Problems after shrinkage of the log house
- What to make partitions from in a log house
- Tongue-and-groove slabs as walls in a log house
- Insulation of the log house inside
- How to strengthen floor joists in a timber frame
- Log houses in Kolomna
- House made of timber or frame house
- Insulation of a log house from the inside
- Work plan after shrinkage of the log house
- Squeezed logs out of the log house
- Where to start after installing a log bathhouse
- Rounded log with Finnish profile
- The timber frame is spreading
- How to align the geometry of a log house
- Large gaps between logs
- Are dowels needed for profiled timber?
- Is it worth overpaying for profiled timber?
- Repairing the corners of a log house
- How to cover an unfinished log house for the winter
- The beam bends out of the log house
- Construction of a log house in the rain
- Processing and insulation of external walls of a log house made of timber
- How far can the outer ends of the logs be trimmed?
- Ceiling beams 7.5 m in a house made of timber
- How to attach a room attached to a house
- Technology for assembling a log house from timber
- Waterproofing log walls outside
- Replacement of the lower crown of an old house
- Interior finishing of the corners of the log house in the paw
- Dry brown rot in log timber
- Shrinkage of timber frame
- Roof on only installed log house
- How to fill the gaps between the log house and the outbuilding
- When to install a log house for a house
- How far can the ends of logs be trimmed?
- When should a log house be treated with impregnation?
- Cutting the end corners of the log house
- Leveling timber in a log house
- Protection of the log frame from the outside
- Replacing log walls with stone
- How to seal the gaps between the foundation and the log house
- How to cover a timber house
- How and with what to seal the gap between the foundation and the log house
- Bark on logs - to remove or not?
- Sandwich panel or log house?
- Preservation of log wood
- How to change the lower crown
- Settlement of a log house made of laminated veneer lumber
- Log house repair
- What kind of foundation is needed for a log house made of 9 by 12 m timber?
- How much timber is needed for a log house 9 by 12 meters
- Foundation for a log house with chopped gables
- When to put a roof on a log house
- How to seal cracks in a timber frame
- Log house on the spring
- Preparing a log house for winter
- Oak backing for the lower crown of the log house
- Log house repair
- Photo of a chopped log house
Construction in Moscow and Moscow region
We work with a guarantee! Wide range of construction services.
Foundation, walls, ceilings, roofing, turnkey! +7 (905) 797-20-34
luxurycomfort.ru
Construction in Moscow and Moscow region
We work with a guarantee! Wide range of construction services.
Foundation, walls, ceilings, roofing, turnkey! +7 (905) 797-20-34
luxurycomfort.ru
Construction in Moscow and Moscow region
We work with a guarantee! Wide range of construction services.
Foundation, walls, ceilings, roofing, turnkey! +7 (905) 797-20-34
luxurycomfort.ru
Log houses and their maintenance
All questions to Semenych about construction
Semenych (author of materials)
Our site is regularly updated with interesting and unique materials and articles on the topics of lumber, building materials and works, the author's opinion and knowledge of a real coven with more than 15 years of experience are provided. There is a section - funny stories of shabashniks. If you would like to receive information about this, subscribe to our website's newsletter. We guarantee that your address will not be shared with third parties.
Apartment renovation in Moscow and Moscow region
We work with a guarantee! Wide range of repair work.
Professional craftsmen. +7 (905) 797-20-34
luxurycomfort.ru
| Country house | Bath |
| For the dacha | Tool |
| Materials | Tales |
| Foundation | Log houses |
| Roofs | Insulation |
| Walls | Siding |
| Floors | Cellars |
| Attics | Doors windows |
| Stairs | Extensions |
| Wells | Toilets |
| Balconies | Loggias |
| Condensate | Flooding |
| Fences | Kennels |
| Sidewalk | Birdhouse |
| Adobe | Carts |
| Garages | Barn |
| Greenhouses | Bath |
| Swing | Brazier |
| Shower |
| Horizontal bar |