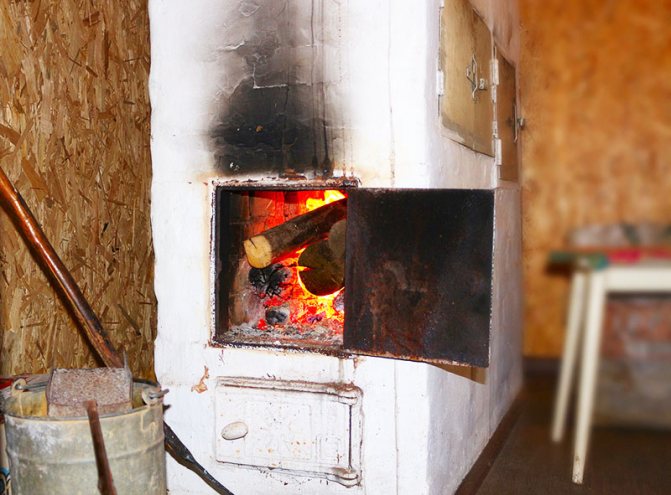
It is necessary to have initial skills in preparing a mixture for masonry, to know how it is used and what are the methods for mixing it. After all, the proportions must be chosen extremely accurately. Experienced masons sometimes do not always cope with this procedure.
The reason for this is that the main element holding the blocks together for construction is clay, unlike mortar for masonry walls, where this function is performed by cement. Proportions of ingredients for preparing mortar for bricklaying.
Based on this, it is necessary to carefully select the components for the construction of furnaces. Taking into account average statistical calculations, the required proportion for the construction of a furnace structure is: 200 bricks per 6 buckets of clay solution, which in its physical and chemical properties is similar to the composition for making red brick, which gives them the same ability to withstand thermal loads when firing the furnace.
There is an opinion among professionals that it is necessary to use clay for masonry as little as possible. Joints in masonry should be no more than 5 mm. This fact suggests that an increase in brick space will first lead to overheating of the clay, its cracking, and subsequently critical damage, which will result in a malfunction of the kiln structure.
The ratio of clay mortar for laying a furnace
As already mentioned, the finished mortar for adhesion of bricks must have excellent strength and ductility. For a simple clay solution, the normal ratio should be one to one or one to two, that is, water and clay should be taken in almost equal quantities. Before mixing clay with water, it must be thoroughly tested. To do this, you need to take 2-3 equal portions of clay, for example, 0.5 or one spoon. When water is added to them, the consistency is in the form of a tight dough. Then we leave the first portion as is, and pour sand into the others - therefore 10, 25, 75 and 100%. And if your clay is very oily, then sand should be added up to 50, 100, 150 and 200%. All portions must be mixed well with constant addition of water until the clay is distributed throughout the solution and there is a homogeneous mass. After a few minutes, add water and sand to these portions of clay, then mix everything well until the consistency of a stiff dough. And then we check all portions of the clay solution for sticking the bricks together using methods such as “ball”, “paddle” and “flagellum”. After the second or third test, these methods can achieve clay with medium plasticity, which is most suitable for sticking bricks when laying a furnace.
A ready-made clay solution with medium plasticity can withstand heating even up to 1000 degrees. It is also very durable and does not release various toxins. The general heating temperature indicator coincides with the brick indicator. This means that when heated and cooled, the mortar changes in volume in the same way as a brick. The structure itself cannot crack. Having selected and checked all the components, you can safely prepare the solution for laying the stove. With the correct calculation, 100 bricks require 1.5 - 2 buckets of sand and 2 - 2.3 buckets of clay. From this you need to know that the smoother the brick for laying the stove, the more dense the cells in the sieve are used to strain the mortar and the thinner the seams are made, the less mortar you will need. The drawing for any furnace, in addition to the instructions, must indicate all the proportions of sand and clay for preparing the mixture. But these proportions are generally indicated only approximately. The exact amount of required components for the adhesive mortar for laying out the stove depends on the professionalism of the stove maker, the installation method and, of course, the quality of the binders used. If during laying the seams are made as thin as possible, the structure will be stronger. And to make such thin seams, you need to sift all the ingredients for the mixture separately before mixing. And then the finished solution is filtered through a sieve.
Ready-made mixtures and features of their selection
In order not to bother yourself with choosing ingredients and assessing their quality, you can buy ready-made fireproof mortar for laying stoves and fireplaces. High-quality products in this segment at affordable prices are offered by Russian companies, TERRACOT, Makarov Stove House, Pechnik, Scanex, SPO.
The recipe is simple: you only need to add water
The product range includes: masonry and plaster mixtures, grouts, reinforced compositions for fireclay fireboxes, mastics for restoration and repair, adhesives for facing tiles. If desired, you can find a special solution for a sauna stove that is resistant to high humidity.
It is important to remember that the safety of the home depends on the quality of the stove solution. A bad mixture will not provide the necessary tightness and will not protect against carbon monoxide leakage. Any doubts about your own skills are a serious reason to entrust the preparation of the solution and construction to a professional craftsman.
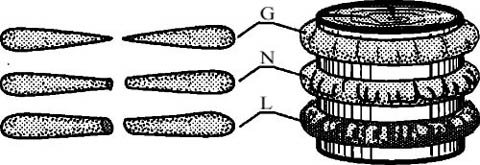
Preparation of clay mixture using the “ball” method
From all ready-made clay portions you need to form balls with a diameter of no more than five centimeters. Then we separate two balls from each type and make small cakes about 3 cm thick from them. Next, we put the cakes in a dry, sunny place and dry them for about 12 days at home temperature. When drying cakes, do not open the windows to avoid drafts. After 12 days, carefully inspect the edges of the cakes. If you notice that some of the cakes have cracks, this means that it is better not to use such a solution when laying the stove. Dry balls of clay, if thrown from a height of one meter, should not break. On cakes made from a thin clay solution, cracks never appear, but if you press on them with your finger, they easily crumble.
Cracks on the stove: why do they appear?
In fact, there are a lot of reasons for the appearance of cracks, ranging from mistakes made during its laying to the oversight of the home owner and improper operation. Therefore, before starting a review of various compositions for their removal, it makes sense to figure out how to prevent their appearance or at least extend the period between furnace repairs.
Stoves in private homes are gradually becoming a thing of the past
Difference in temperature expansion of masonry materials
This reason is quite common. For example, if the stove is made of natural stone, and cement-based mortar is used for the bond. Such cracks are harmless and can be easily repaired. However, you should not run them. It is necessary to correct the situation immediately as such cracks appear.
But if the stove maker who made the masonry wanted to annoy the owner or he himself did not understand the issue well and used red, refractory or refractory bricks along with stone (or maybe all at once), expect from the heart of the house that it will maintain warmth in the home for a long time time, not worth it. Such a stove will fall apart in a few years without the possibility of its restoration.
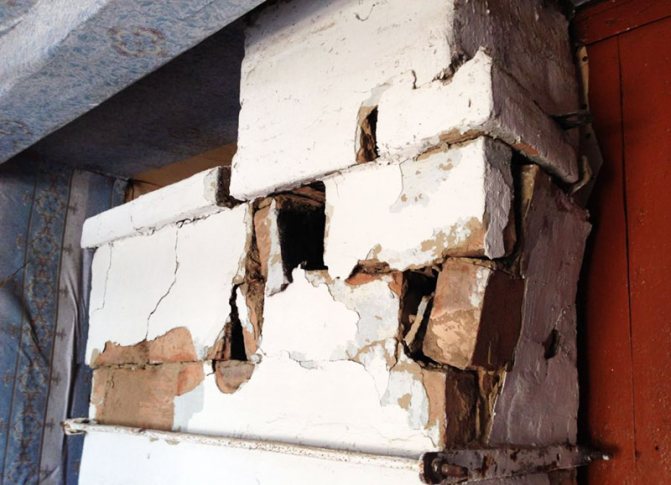
No repairs will help here; you’ll have to completely rebuild the stove
A few more reasons that are not so dangerous
Uneven heating of the walls during heating. This reason is also more often attributed to the mistakes of the master. But the mistakes of the home owner include heating and warming up the stove until the binder solution has completely dried. This also includes operation in the off-season, when in the spring it is already warmer outside. After the snow melts, the stove must be thoroughly heated and the walls dried. Otherwise, cracks will definitely appear.
In the spring, it is necessary to thoroughly heat the stove so that the walls dry out.
The listed problems are quite unpleasant, but can be completely solved with the help of various refractory coatings, solutions, and finishing materials.
Preparation of clay mortar using the “paddle” method
Pour water into the container with the prepared solution and stir until a mass of semi-thick sour cream forms. Next, mix this solution with a flat spatula. If a thin layer of clay up to 1 mm appears on the shoulder blades, then this solution is thin and you need to add fatty clay to it. And when clay appears on the blades in the form of clots, and the clay layer on the blade is 2 mm, then such a solution has normal plasticity. And if a very thick adhering layer of mortar appears on the blade, then the clay is oily and plastic.
Preparation of clay solution using the “flagella” method
Take one portion from the finished mass and knead it well in your hands until it sticks to them and you get a homogeneous composition. Next, we make figures from clay in the form of rollers 1.5 cm thick and 20 cm long, which need to be stretched a little. The roller becomes thin and stretches easily, and thin ends appear at the break point - this means that it is made of oily clay. Good medium-plastic clay at the point where the roller breaks has a thickness of no more than 3 mm. With thin clay, the roller will not stretch well, and the break point will be uneven.
Supplements
Salt and cement are added at your discretion. The standard composition of the mortar for laying the furnace does not provide for their addition.
However, if you decide to make a complex mixture, the proportions are as follows (per 10 kg of clay): salt 150 g, cement M400 1 kg. And also: clay 2 buckets, sand 2 buckets. This quantity is enough to lay 100 bricks.
Sequence of work:
- clay is poured into a trough, poured with a small amount of water and allowed to soak for 6 hours to 2 days; stir it regularly during this time (you can put on rubber boots and trample the clay); in total you will need 1/4 of the total volume of clay; add sifted sand and mix with a shovel; if the mixture slowly slides off the shovel, this is its optimal consistency.
Determination of the plasticity of the finished mixture is carried out in the following way: a flagellum 1.5 cm thick and 20 cm long is molded.
Connect it into a ring around a wooden piece with a diameter of 5 cm. The flagellum should stretch evenly. If it breaks, the ends of the tear should be sharp.
The absence of cracks on the fold means that the mixture is too oily; if multiple ruptures occur, the solution is thin. In the first case, sand is added, in the second - clay. It is necessary to achieve the formation of several small cracks on the bend.
Preparation of a mixture of sifted sand and clay
Such a solution must be prepared only from sifted and unsifted raw materials. If you want to prepare a clay solution from sifted raw materials, then all dry binders, for example, gypsum or cement, must be sifted through a special sieve. We do the same with clay, only we sift it through a sieve with 3 by 3 mm cells; the solution itself can be sifted through the same sieve. Also, after sifting, pour the clay into tin boxes and fill it with water. Break up all the large pieces, mix well, cover with a lid and let stand for 2-3 days. After three days, strain it into a clean bucket. It should have the consistency of sour cream. In the required proportions, pour a little sand into the container, and then pour clay, which we cover with sand. If there is water on top, there is not enough sand. Mix this mixture well and strain through a sieve. If the finished solution passes well through your fingers, and your fingers feel a rough layer with small speckles, then this is a high-quality solution. And the consistency of a high-quality solution has the appearance of thick sour cream.
Mixture for laying a stove made of unsifted clay
For such a solution, you do not need to sift the clay, but simply soak it for several days. Next, we take a special impact shield made of wood and pour the required amount of sifted sand onto it. Along this length we make a hole into which we place the required portion of clay. We pour sand onto the clay from the edges, and then mix everything. If the mixture is very difficult to stir, then you need to pour a little water into it. Lumps that are too large must be broken up during mixing. We collect the finished mixture in a pile and divide the solution into several parts. It will be more convenient to separate with a shovel or oar. This method of preparing clay mortar does not make it possible to remove all pebbles and lumps, so they will have to be removed when laying the stove. With such a solution, the thickness of the seam can be made 1 cm. While working, you can even prick your hands. For this reason, it is recommended to pass the solution through a sieve. For greater strength, you can add 1 liter of Portland cement or 250 g of ordinary salt to one bucket of mortar. Before adding these substances to the solution, they must be diluted in water. But you cannot pour more cement, because cracks may appear at the seams of the furnace. In addition to strength, cement greatly facilitates work and also increases the percentage of plasticity of the solution.
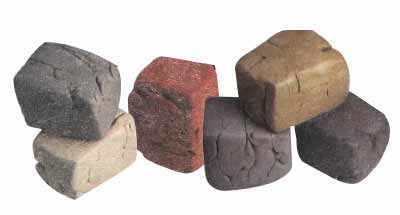
Types of clay, its characteristics
It comes in different colors: blue, white, red, red, gray, black. White or kaolin was formed during the destruction of granite, juicy red contains metallic impurities, gray consists of kaolinite minerals, the composition of the black mass is the same.
Based on the presence of the main component (clay minerals), there are several types:
- Fat;
- Medium fat content;
- Skinny (non-fat).
In fact, there is no fat in it and it is impossible to determine its presence. But high plasticity allows us to talk about the softness, slipperiness and soapiness of the material, and this almost always correlates with the presence of fat.
Determination of clay fat content
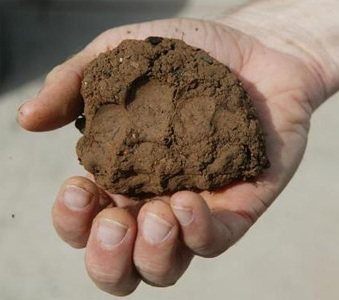
How to determine the fat content of clay yourself? This is necessary in order to know how the finished mass will behave. And how to improve its qualities. Initially, it already contains some amount of sand, and it is this that affects the fat content. If there is too much of it, then the clay is skinny. To check, you can conduct a small experiment.
You should soak it, you can soak the whole mass, because it is pre-soaked to prepare the solution. After a couple of days, roll 2 small balls, leaving fingerprints on them, dry them and carefully look at what happens. If your lumps have shrunk in size and cracked, you have a fatty variety. If the lumps crumble, then this is a skinny version of the material. If the lump has not crumbled, but there are no fingerprints or are hard to see, then the clay is thin. And if your product does not have cracks and has not crumbled, then it is an almost ready-made masonry mortar. Having established the level of fat content, you can independently prepare clay mortar for laying stoves.
Experts say that a mixture oversaturated with fatty clay will not affect the quality of the heating structure. But too much sand in the solution can have a negative effect: the dried solution will crumble and crumble. Clay and sand should be mixed in the required proportions. High-quality clay is the main condition for the durability of the structure being built. One of the main requirements is plasticity. Plasticity is the ability to take any shape, without the appearance of cracks, tears or seams, and the “ability” to maintain these shapes due to aggressive environmental influences.
Plasticity of clay
Each type of clay has plasticity to a greater or lesser extent; due to the presence of this quality, it comes in three types:
- highly plastic;
- medium plasticity;
- low plasticity.
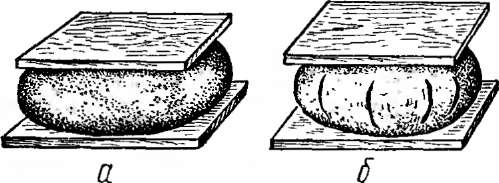
How to determine plasticity at home? By the way, plasticity is directly related to fat content. This means that you can independently increase or decrease the plasticity of the solution. So, knead it, roll it into a tight ball the size of a small fist, then press it between two boards. Press until cracks appear. If cracks appeared under low pressure, then the material is thin and low-plasticity; if cracks appeared after passing half the radius (close to the cake), then it is a highly plastic building material. The appearance of cracks at 1/3 of the compression height indicates medium plasticity.
There is another way: roll up flagella with a diameter of about 20 mm and a length of more than 20 cm and bend them into an arc. Flagella from low-plastic varieties will break when slightly bent. And the fatter the product, the more it will bend without cracking; this type can be bent to the point of a ring or a ball. Based on the experimental results, the composition can be enriched (by adding clay) or depleted (by adding sand). A mixture mixed based on accurate data about the individual components will be of high quality.
Lime mortar for laying a furnace
This solution is mainly prepared using lime paste, water and sand. It is used for laying the foundation and stove pipe. The quality depends entirely on the quality of the lime paste. The dough is made from slaked lump or powdered lime. The slaked lime needs to sit for 1 month, and then make a solution from it. Here's how to prepare the solution: strain the lime dough through a fine sieve with 3 by 3 mm cells. If the dough is very thick, then it can be diluted with water. Pour sifted sand into the dough and mix everything. Pour sand from 0.5 to 5 full parts onto one part of the lime dough. The portion of sand depends on how fatty the dough is. Dough with medium fat content is quite suitable for the solution. The fat content of lime paste can be checked in this way: mix the prepared solution for 3 minutes with a planed spatula, and then remove it from the solution. If the spatula is clean, then the solution is thin. And if there is a 3 mm thick solution left on the blade or it sticks around it in clumps, then this is a good solution. If there is a lot of solution on the shoulder blade, then it is greasy. Sand is added to very fatty solutions, and lime paste is added to thin solutions. The prepared solution is suitable for use only for a few days.
The best solution for stove masonry
The consistency of the solution for stoves and fireplaces should resemble thick sour cream. To mix the masonry composition on oily clay, add two parts of sand, and for normal clay, maintain a one-to-one ratio.
To check the quality of the finished mass, just hold two bricks together, wait about 5 minutes and lift the structure by the top brick. Ideally, the ligament should withstand several lifts. If adhesion does not occur, the reason most likely lies in thin clay.
This is what an ideal masonry material looks like
Some stove makers add table salt for strength at the rate of 150 grams of salt per 10 kg of clay. You can also add a kilogram of M400 cement to this volume.
To lay a section of the chimney that rises above the roof, instead of clay compositions, it is better to use a moisture-resistant lime-sand mixture prepared from three parts sand and one part lime paste, or a composition mixed from one portion of quicklime and three volumes of water.
Cement and complex mortar for laying a furnace
This is one of the most durable mortars because it contains cement, sand and water. It is mainly used for the foundation of the furnace. You need to work with this solution after an hour from the moment of preparation. And if it stands for a longer time, this leads to a decrease in strength. It is prepared like this: take the required amount of sifted sand and pour it out in the form of a bed. Then they take the required amount of sifted cement and pour it onto the sand. Everything is mixed well until smooth. These mixed substances are poured with water and stirred again. The complex solution contains 2 binders and 1 filler. Basically, a complex mortar is made from lime paste, cement and sand. Everything is diluted with water. A complex solution is used for laying pipes and foundations on damp soils. And in conclusion, each solution has its own composition and the most important thing is to prepare it correctly and use it in a short time, otherwise it will not give any result.
Mortar, mixture for masonry
To build a stove, for its laying, you need to prepare an appropriate and, importantly, high-quality solution. It is a mixture that is formed by combining a binder with aggregate components and water. When laying stoves, clay mortar is most often used, since its composition is most suitable for ceramic bricks. To build a chimney foundation, a mixture with a different composition is required, for example, lime or concrete. They are more durable and do not crack from collecting condensate.
Preparation of clay solution:
The condition and service life of the stove directly depends on the quality level of the mortar and the thickness of its seams. The most important requirement for it is that the frozen solution should not crack or crumble. For the stove to function well, the seams must be thin. The solution must be prepared exclusively from clean and high-quality materials. The following types of solutions can be used to build a stove:
- Clay
- Lime
- Cement
- Clay mortar
Clay solutions are characterized by their fat content. Their ductility, resistance to high temperatures, strength and shrinkage depend on this. Clay solutions can be: fatty, which have good plasticity, but crack greatly when dried; skinny ones, which have non-plastic and fragile properties, crumble when dried; normal ones are plastic, almost do not crack when dry, and shrink slightly. For reliable brickwork, a normal level of mortar plasticity is required, since it can withstand temperatures of 100 degrees.
To prepare the solution, we collect materials:
- Water
- Clay
- Sand
Preparation is carried out with clean, slightly mineralized water that does not contain silt. If there is a lot of mineral salt dissolved in the water, there is a greater likelihood that stains will appear on the surface of the stove plaster that appear through non-disposable whitewash. In ancient times, rainwater was traditionally used to build stoves. Clean the sand from gravel, grass, and roots by sifting it through a sieve. Sifted fine sand will ensure a thin masonry seam. The amount of sand required for mixing the solution depends on the quality of clay used. The plasticity of clay can be determined in several ways, which will be described later in the article. Sift the clay through a sieve so that it has a uniform consistency and is free of debris.
Options for preparing the solution.
Let's look at several ways to prepare masonry mortar.
First way
We soak the clay a day before laying, then add water, bringing it to the thickness of sour cream. Strain the solution, add sand and mix thoroughly. Puddles of liquid clay should not appear on the solution, and if they do, add sand and mix again.
Second way
We make mortar for laying bricks. Mix chamotte sand with refractory clay in equal proportions, then add water, which makes up a quarter of the clay, and mix thoroughly. This is a very easy method to perform.
Third way
You can make a mortar for laying a stove from loam. To get the correct ratio of components, mix ten variants of the solution (each in a matchbox). The first option is ten parts of loam, one part each of sand and cement; the second - nine parts loam, 2 parts sand, one part cement, and so on until the tenth option - one part loam, a tenth sand, one part cement. We fill the boxes with solutions and dry them for a week. Then we choose a solution that is not cracked and has more clay. This solution dries quickly and burns when heated. By sintering a clay-sand mixture, ceramics are formed. This solution can withstand temperatures up to 600 degrees. At higher temperatures it is destroyed. You can use it to build fireboxes that will burn wood or peat.
Fourth method
If the clay is clean and has no stones, add sifted fine sand and ¼ volume of water to it. In this case, it is necessary to thoroughly mix the clay and sand. The clay solution should be creamy thick, not spread, and slide off the shovel well. For strength, you can add salt or cement. Add 100 - 250 grams of salt to a bucket of mortar, and ¾ liter of cement. We dissolve the salt in water, and fill the cement with water until it becomes thick with sour cream, and then add it to the solution. A high-quality mortar will ensure good adhesion of the masonry and fill the unevenness of the brick, which will make the seam dense and gas-tight.
Checking the plasticity of clay
To test clay for quality, we recommend several proven methods: The first method is based on clay of different plasticity, which shrinks differently on a wooden surface. Pour ten liters of water into a bucket and add clay until a creamy solution is obtained, stirring it with a cleaned board. If a thick layer of clay remains on it, then the solution is too plastic. It is necessary to add sand at the rate of one liter jar per bucket of solution until it reaches normal plasticity. The solution is considered to have normal plasticity when a layer of clay of 2 millimeters remains on the board and sticks to it in clumps. If the board is covered with a thin layer of 1 millimeter, then the solution is low-plastic.
The second method is to mechanically test the solution after drying. We clean the clay from large pieces and measure out five even portions in a 1-liter jar. Add sand to medium-plastic clay in proportions: leave the first without sand, mix the second with ¼ of a jar, add ½ of a jar to the third, add a whole jar to the fourth, and 1.5 jars of sand to the fifth. We dilute each mixture with water so that the clay does not stick to our hands, but kneads well. Balls are molded from the resulting solutions, which then need to be crushed into cakes. These cakes must dry, the main thing is not to confuse which solution is which. Those with little sand will crack, and those with too much sand will crumble. The optimal composition is considered to be the one from which the cake is dense and not cracked.
For the third method, it is necessary, as for the second, to prepare balls. After they dry, two planed boards are taken. The ball rests on one of them, and the second one is pressed down on top. Where the optimal composition of the solution is, it will begin to crack when it is compressed by 1/3 of its diameter. A greasy solution will crack halfway across the diameter, while a thin solution will crumble almost immediately. Checking the quality of the mortar In order for the brickwork of the furnace to hold up well, the mortar must be prepared with high quality in the optimal ratio of components.
As mentioned above, the amount of sand depends on the level of plasticity of the clay. In this regard, it is necessary to determine how much sand needs to be added. Five separate jars of fatty clay must be mixed with sand in the following proportions: leave the first portion, add half a jar of sand to the second, one jar to the third, one and a half to the fourth, and two to the fifth. Mixing clay with sand, water is added to each portion. The solution should not stick to your fingers. Then, from each type of solution, five balls are rolled, with a diameter of three to five millimeters. You need to take two balls of each mixture, make thin cakes out of them and leave them to dry for 12 days indoors. Using dried balls and cakes, we carry out the test in this way: we take the balls and cakes, and throw them one by one from a height of one meter. If the balls and cakes do not crack or break when dropped, then this is a high-quality solution. The main thing is to remember what mixture each ball is made from.
You can check the clay solution using strands made from it. We roll out the clay, make ropes with a diameter of about one and a half centimeters and a length of fifteen to twenty centimeters. Then we stretch the strands and wrap them around a wooden round stick with a diameter of five centimeters. If the rope breaks off when the thickness decreases by fifteen to twenty percent of the original diameter, then it is made of good clay.
Preparation of clay solution:
The clay mixture is not suitable for the construction of a chimney and stove foundation. Condensation collects in the part of the chimney that is located above the roof. Because of it, the clay can crack. When building a foundation, clay mortar is not strong enough. It is best to use lime paste as a base for such purposes. This dough is made by mixing water and quicklime in a 3:1 ratio. It is not recommended to make it yourself, as this can lead to injury to the skin and respiratory tract. It is better to purchase ready-made lime dough at any hardware store. To prepare the solution, you need to sift the sand and rub the dough through a sieve. Then you need to mix one part of the dough with three parts of sand. Add water to obtain the required consistency. To increase the strength of brickwork, you can use lime-cement mortar.
To prepare it, we take one part of cement, two parts of lime paste, and ten parts of sand. First, mix sand and cement. Dilute the dough with water until it becomes viscous. Then add a mixture of sand and cement to the milk of lime and mix. If necessary, add water again in small portions. Cement mortar Cement mortar is also used to construct the chimney and foundation for the furnace. It is characterized by high strength and fast hardening. It is prepared by mixing sand and cement. Initially, dry sand must be sifted so that it is clean and crumbly. Then we take sand and cement. The ratio depends on the brand of cement. Mix them well so that there are no cement lumps. Before use, add water to the mixture until the required thickness is achieved. The solution should not slide off the shovel, but be mobile.
The cement mortar must be used within one hour because it quickly sets and becomes unusable. When building a kiln, the quality of the brickwork mortar is very important. If you cook it incorrectly, a Russian stove can leak smoke, have poor draft, crack and fall apart. In this regard, in order for the heating device to successfully perform its direct function and not create problems, its construction should be carried out carefully and accurately.