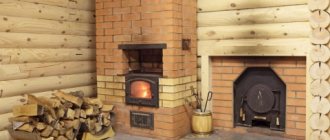
What causes cracks to form on the stove?
A careful visual examination allows you to detect a large number of small cracks on the stove walls, which appear due to different rates of thermal expansion of brick and masonry mortar. These cracks can be easily repaired using a stove coating mixture.
If heating occurs unevenly in different parts of the furnace, the result is rupture of the masonry joints. This problem can also be solved simply by covering the crack with a new solution.
Cracks can form as a result of improper operation, when only the folded stove begins to be fired. However, even in this case, the problem of how to cover the stove is solved with the help of masonry mortar and plaster.
If there is no heating in winter, not only the stove, but also the walls of the house crack. This happens due to temperature changes. With the arrival of the warm season, it is necessary to heat the stove, dry the walls and masonry, prepare a new mortar and cover the cracks that have formed with it (about
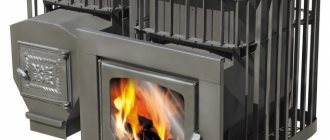
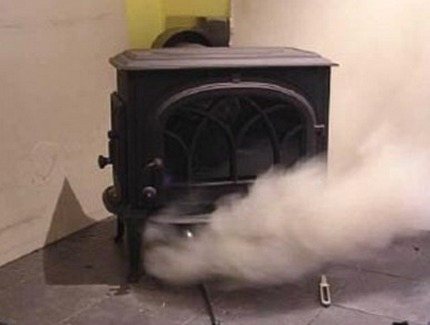
Causes of smoke in a cast iron stove
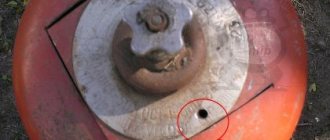
One of the vulnerable parts of the oven is the door. The curvature of its shape can lead to a decrease in draft and the penetration of smoke into the room. Eliminate the defect by leveling the surface with a special tool or replacing it with a new one.
The chimney or pipe is clogged
Why a potbelly stove smokes through the door or cracks is not always obvious. The reason may lie in significant accumulations of soot on the inner walls of the outlet pipes. The working opening of the chimney narrows, unable to cope with the volume of exhaust gases.
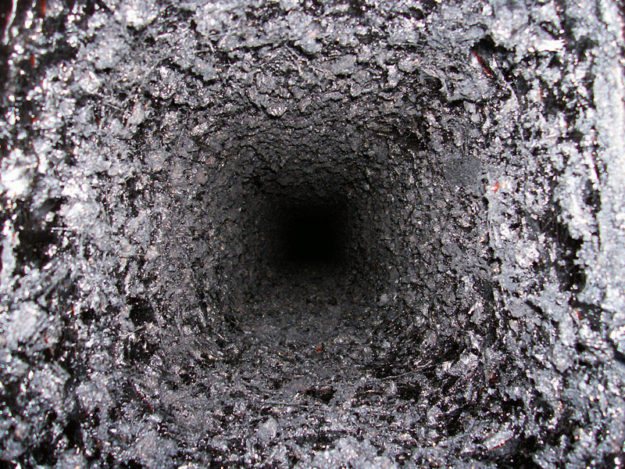
Soot accumulation
In such cases, even insulation with basalt wool or two-layer structures cannot save you from low draft. A thick layer of combustion waste is provided by low-quality, unsuitable or cheap material for the firebox. Stainless steel pipes of small thickness are especially vulnerable when using damp and resinous firewood.
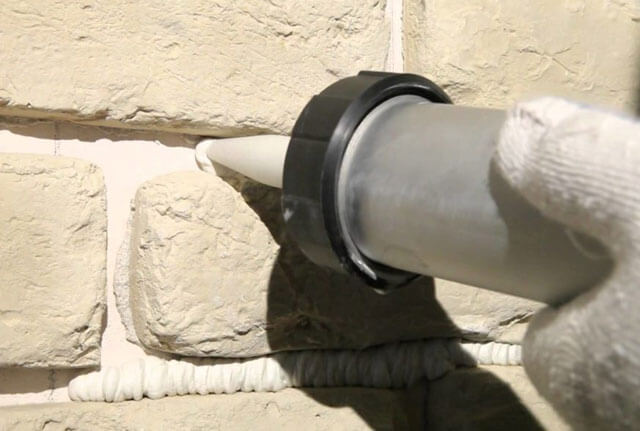
To eliminate the causes:
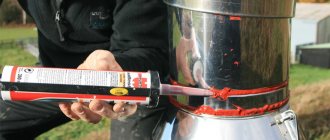
- the cracks are cleaned and treated with a high-temperature sealant designed for 300 degrees;
- The chimney is cleaned - mechanically or using special chemicals.
- cleaned of soot: ash drawer, ash pan, interior of the firebox;
- The firewood is dried and a shed or woodshed is created for storage.
Professionals recommend using weights on a cable, twine or a brush as cleaning devices. Chemical reagents should be treated with caution. They are suitable if the plaque does not exceed 2 mm and for certain grades of acid-resistant steel. High combustion temperatures, over 1000 degrees, can deform or completely damage the structure. This is especially important if the potbelly stove is made with your own hands from randomly selected materials.
It is prohibited to use aluminum pipes; they will simply melt under the influence of high temperatures. Stove makers recommend using alloy steel with a special protective layer against the effects of oxides.
There is special equipment for cleaning exhaust pipes, which creates a strong stream of water that sweeps away dried soot in its path.
Incorrect chimney dimensions
The discrepancy between the proportions of the chimney pipe and the combustion chamber is also the reason why a potbelly stove smokes when the door is opened. It is necessary to take measurements and check the calculations.
The chimney diameter (mm) should be within the range of 2.5 to 3 times the volume of the firebox. More often, the average value used for calculations is 2.7.
For firebox size:
- 70 cm – the chimney has a diameter of about 182 mm;
- 40 cm – 106-110 mm.
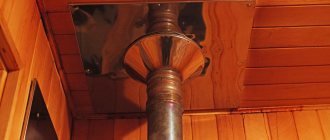
According to the rules, the outer pipe rises above the roof by 1.5-2 m.
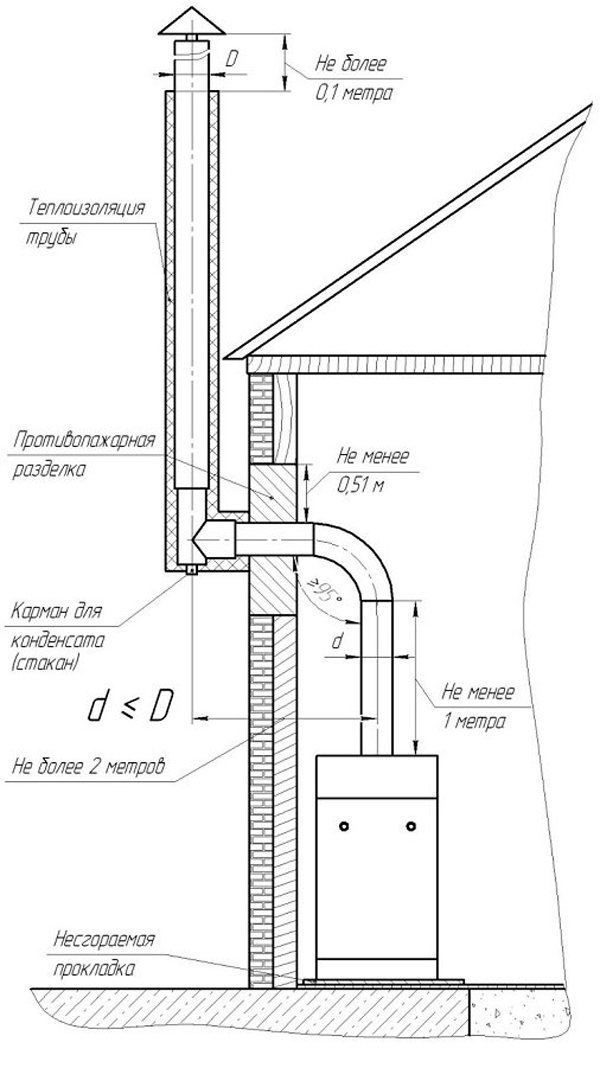
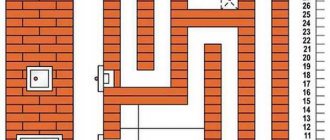
Chimney diagram
A discrepancy between the parameters of the pipe above the ridge of a building or a slope, a decrease or increase in size causes suppression of draft or swirling winds.
Bends and horizontal parts of the chimney reduce draft. You should adhere to the maximum permissible lengths of horizontal elements specified in the technical data sheet of the potbelly stove model.
Causes of design errors affecting draft in the furnace:
- a large number of “knees”;
- the presence of horizontal parts, without tilting to the place of attachment with the stove;
- small length of elements;
- incorrect docking;
- lack of a windproof cap;
- heat extraction from pipes: batteries, water circuits and other “economizers”.
Kindling in cold air
The smoke from the potbelly stove may not come out due to cracks or ruptures in places of poorly performed welding or other connecting parts of the pipes. In these cases, an air lock from cold air is formed, which disrupts optimal traction.
To fix the problem:
- A candle or rolled-up burning paper is brought to the chimney. They must heat the air throughout the entire volume of the pipe. Kindling should be done gradually, first burning highly flammable and quickly burning materials: dry brushwood, wood chips, paper. You can use special liquids to start a fire.
- At the first opportunity, it is important to seal cracks or replace failed parts with new ones. This will ensure that hot air moves up the chimney pipes, and cold air into the vent.
Smoke during reverse thrust
If the air temperature in the house is lower than outside, reverse draft occurs in the system. The potbelly stove will probably smoke until the system is completely warmed up.
The “smokeless” version of the kindling is provided by the valves with which modern models are equipped. First, both open: the main one and the summer one. After a while, the summer one is gradually closed, checking the constant draft in the firebox. If smoke from a potbelly stove enters the room, it is reopened for a while. When the stove is fully warmed up and the summer operation is closed, the draft remains even and the noise in the firebox decreases.
If the potbelly stove does not have a summer valve, heating is carried out through the cleaning door behind the outlet channel at the bottom of the chimney. The process is similar to removing an air lock.
In windy weather, smoke may occur due to a violation of the position of the deflector cap, or its absence. The direction of air movement on the leeward side is enhanced by the steep slope of the roof of the house. It is not recommended to fix this problem in bad weather; you should wait for the right moment and take into account the direction of the wind rose when creating and attaching windproof elements.
How can I cover and seal stove cracks?
One of the options for solving the question of how to repair cracks in a stove is tiling. Moreover, you can use clinker tiles, porcelain stoneware, terracotta or tiles. If you follow all the subtleties of working with these materials, you can forget about stove repair for a long time.
However, this option is not available to everyone, since such finishing materials are quite expensive. Therefore, there is a budget finishing option - plastering the surface. Moreover, it is very important to know how to rub the stove so that it does not crack.
Plastering without cracks is possible only if a certain sequence of work is observed, and this applies to both the initial application of the solution and repairs:
- The installed stove must stand for at least 6 months for complete shrinkage and drying.
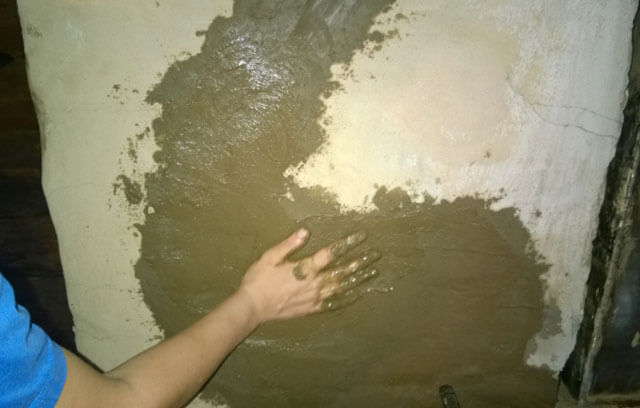
- Before covering the stove with clay, it is recommended to warm it up thoroughly. This will expand the volume of the masonry and prevent the formation of cracks immediately after coating.
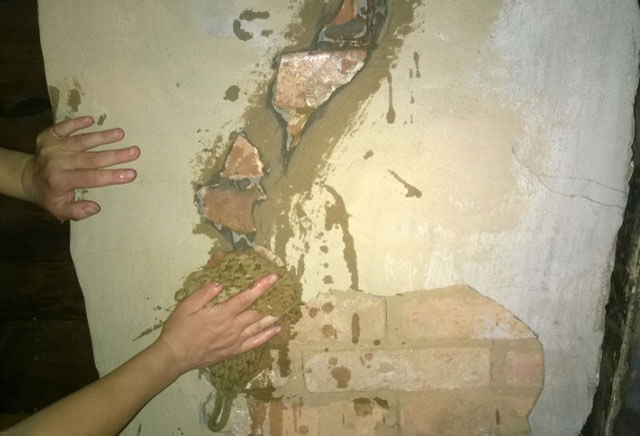
- Before coating the oven with clay, the surface must be thoroughly prepared. To do this, remove the old coating, widen and deepen the cracks, and smooth out the sagging.
- The prepared surface of the stove walls is covered with a thin layer of liquid mortar and left to dry.
- Next, burlap or a metal mesh with small cells is fixed to the wall. This will make the plaster layer more durable. Before laying, the burlap should be soaked in a liquid plastering solution. The metal mesh is secured with nails, which are driven into the masonry joints.
- For spot repairs, it is enough to cover the cracks with a thick layer and cover with burlap.
- The plaster itself is applied in two layers, the approximate thickness of each layer should be about 5 mm. Thicker applications may result in uneven and unstable coverage (pro
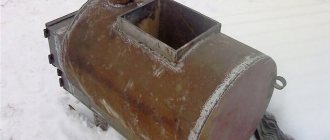
The potbelly stove smokes into the room when the firebox door is opened.
XKent wrote: This is such a terrible chimney, I feel like they are booing, but the peculiarities of the room forced it to be made just like that...
they will definitely shoot
Zubr56 wrote: The length of the horizontal section is allowed up to ONE METER. Anything larger creates a problem with traction. This is where the problem lies.
6*. Chimneys must be vertical, without ledges. It is allowed to slope chimneys from the vertical up to 30′ with a sideways deviation of up to 1 m, provided that the cross-sectional area of the inclined sections of the chimney is not less than the cross-section of the vertical sections. 7. To remove combustion products from restaurant stoves and other non-household gas appliances, it is allowed to provide horizontal sections of chimneys with a total length of no more than 10 m. It is allowed to provide chimneys in the ceiling with a fire-prevention cutting device for combustible ceiling structures. 8. Connection of gas water heaters and other gas appliances to chimneys should be provided with pipes made of roofing steel. The total length of connecting pipe sections in new buildings should be no more than 3 m, in existing buildings - no more than 6 m. The slope of the pipe should be no less than 0.01 towards the gas appliance. On smoke exhaust pipes it is allowed to provide no more than three turns with a radius of curvature no less than the diameter of the pipe. Below the connection point of the smoke exhaust pipe from the appliance to the chimneys, a “pocket” device with a hatch for cleaning must be provided. Smoke exhaust pipes laid through unheated rooms must, if necessary, be covered with thermal insulation. 9. The distance from the connecting smoke exhaust pipe to the ceiling or wall made of non-combustible materials should be at least 5 cm. To wooden plastered ceilings and walls - at least 25 cm. It is allowed to reduce the specified distance from 25 to 10 cm, provided that wooden plastered walls or ceilings are covered with roofing steel on an asbestos sheet 3 mm thick. The upholstery should protrude beyond the dimensions of the chimney by 15 cm on each side. 10. When connecting one device to the chimney, as well as devices with draft stabilizers, dampers are not provided on the smoke exhaust pipes. When connecting several appliances to a common chimney: restaurant stoves, boilers and other gas appliances that do not have draft stabilizers, dampers (dampers) with a hole with a diameter of at least 15 mm must be provided on the smoke exhaust pipes from the appliances. 11. Dampers installed on chimneys from boilers must have holes with a diameter of at least 50 mm. 12. Chimneys from gas appliances in buildings must be installed: above the boundary of the wind pressure zone, but not less than 0.5 m above the roof ridge when they are located (counting horizontally) no further than 1.5 m from the roof ridge; in level with the roof ridge, if they are spaced at a distance of up to 3 m of the roof ridge; not lower than a straight line drawn from the ridge down at an angle of 10° to the horizontal, when the pipes are located at a distance of more than 3 m from the ridge of the roof. In all cases, the height of the pipe above the adjacent part of the roof must be at least 0.5 m, and for houses with a combined roof (flat roof) - at least 2.0 m. Installation of umbrellas and deflectors on chimneys is not allowed.
Sukhov wrote: We must try to reduce the size of the door to a minimum, or turn off the grate and switch to bottom combustion. I’m very interested in the result (I have a bathhouse of the same architecture in operation)
it won't help. Removing the door will help)))) it definitely won’t smoke
Methods for filling cracks - coating mixtures
When deciding what to coat the stove with to prevent it from cracking, it is important to carefully consider all the options.
If a clay solution was used for laying bricks, then it is recommended to cover up the cracks with it too.
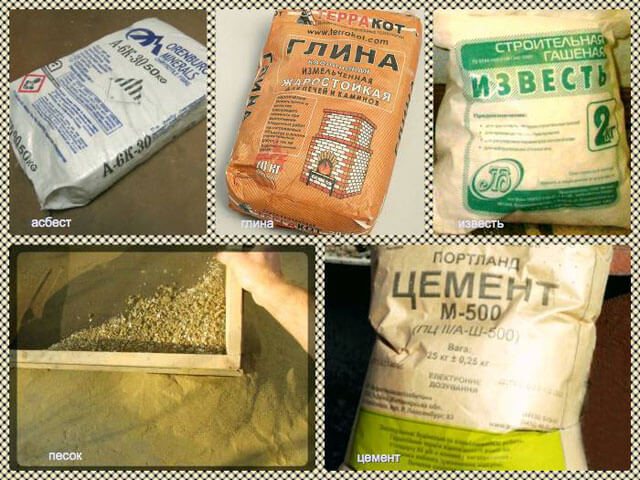
To prepare the solution, you need to take clay and sand, and in different situations different proportions of materials are used.
Most often, sand and clay are taken in a 1:1 ratio, but depending on the type of clay, the proportion may vary.
To choose the correct answer to the question of how to cover the cracks in the oven, you need to prepare several solutions and make cakes and balls from them. After drying naturally for a certain time, select the least cracked cake.
The next experiment is carried out with clay balls, which are thrown from a height of about a meter. And again they choose the strongest figure.
The most suitable solution for solving the question of how to coat a brick oven is a mortar from which the figurines are not cracked or crumbling.
When preparing the solution, remember that a large amount of sand reduces the strength characteristics. However, the solution shrinks slightly.
In the question of how to dilute clay to putty a stove, the amount of water in the solution is also of great importance: with an increase in the amount of liquid, the risk of cracking decreases.
A high-quality solution has a homogeneous structure, so it is necessary to sift the sand and strain the clay before adding it to the solution.
If you plan to add asbestos to the putty for the stove for strength, then the fibers should be thoroughly ground. It is also worth remembering that this material requires careful use, as it poses a danger to human health.
Additives in the form of wood ash, salt, gypsum, lime and cement help increase the strength of the solution.
Ready-made putty for stoves is used if the masonry mortar was mixed on a similar basis.