What options for using a gas cylinder have we not considered? This is both a barbecue and a pizza oven, but we still haven’t figured out one of the most expected results, namely a heating stove from a gas barbecue. Actually, this topic will be expanded upon in our article. Indeed, a gas cylinder can very successfully replace a small stove, because the actual housing for it already exists. All that remains is to install the door, remove the pipe, install the chimney regulator - damper, and think about the ventilation holes. So, this is all about this, but we will tell you in order in our article.
The process of making a stove from a gas cylinder (Option 1)
If you notice an ownerless cylinder in your household, and there is nowhere to use it, however, a heating device is so necessary, then with a little “magic”, the cylinder can be turned into a stove. The stove will be like a potbelly stove, with a smooth chimney and without a developed area on the walls, like a Breneran. This means that the efficiency of the stove is not high, but this is a very good option for a small country house or for use in a garage. At least the costs for such a stove are minimal, and production is not so problematic, as you will see by reporting now. So, we take a cylinder and, first of all, get rid of explosive gases. It is best to unscrew the valve with a gas wrench and then fill the cylinder with water. Afterwards, you can drain the water and begin mechanical processing of the cylinder. We cut a hole at one end for the door. It is better to first purchase the door on the market (in a store) in order to know what size to cut the cylinder to.
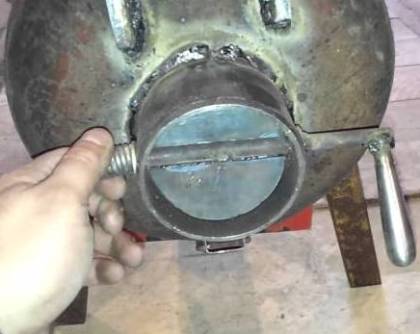
Now on the opposite side you need to make a hole for the chimney or, more simply, for the pipe. In order to contain the heat at least a little, after the stove is heated, it is necessary to introduce a damper. There is also no point in making such a damper yourself; it is easier to find it in trade structures. So, in the end opposite to the door, we cut a hole for the damper in the pipe. Since the shape is a circle, it would be best to first drill a hole for installing a jigsaw, and then using a special blade for metal, cut out this very sphere from the end of the cylinder.
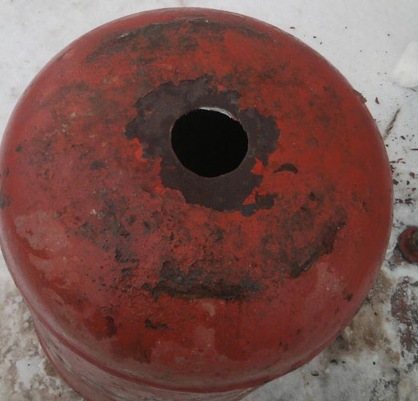
We weld the door. If the door is made of cast iron, then the metals must first be heated. In a heated state, high-carbon alloys can be welded with an ordinary welding machine.
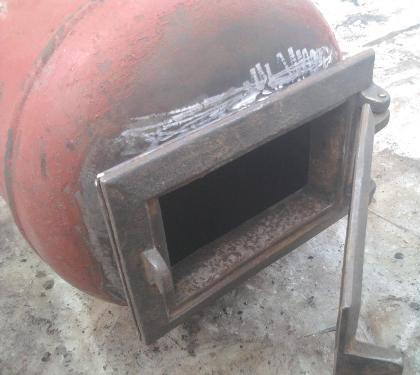
Now you can weld the pipe with the damper.
Now there is very little left. Initially, you need to think about the fact that the stove should stand above the supporting surface. It is better to finally implement this using rods by welding its legs. In order for the firewood to burn better, and also to prevent ash and embers from interfering with the combustion process, it is necessary to provide gaps through which the combustion food would spill out of the wood burning chamber. It is necessary to place a tray under these cracks, into which the ashes will be poured.
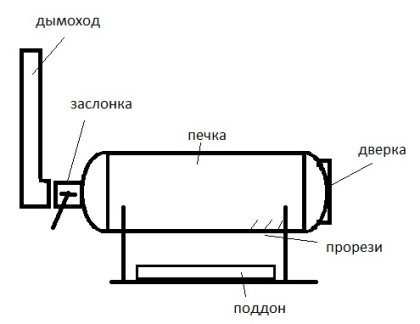
Now all that remains is to install the chimney pipe, connecting the elbows together, fortunately this is not a problem now. Chimney fittings are sold in a variety of sizes and shapes. Afterwards you can begin the actual process of operation. As we have already said, the heat capacity of this stove cannot be compared with the “Russian” stove, but its advantages are its small size, quick heating and the ability to make it from a gas cylinder without any problems, with your own hands.
Useful video on how to make your own
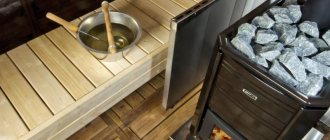
This video allows you to clearly see the process of arranging a sauna stove with your own hands using an ordinary barrel.
A DIY gas cylinder sauna stove has the following advantages:
- Easy to assemble - it takes 8-12 hours to create;
- Cheap - these structures are made from inexpensive and commonly available materials;
- Compactness - a stove in a bathhouse from a gas boiler can easily fit even into tiny rooms;
- Reliability – there are no seams in the body of the metal container. This significantly increases the overall reliability of the design.

Sauna stoves made from a gas cylinder are easily transported, disassembled and moved to other places. They operate on a variety of solid fuels (wood, coal, briquettes, waste) and have a relatively long service life (3-5 years or more). Their production is not as problematic as laying a brick structure or installing a long-burning system. To successfully create a furnace, you only need basic tools and experience working with metal.
At the same time, small stoves made from a small cylinder have the following disadvantages:
- They have low efficiency - they consume a lot of fuel, producing relatively little heat;
- Cool quickly after wood or coal burns out. To ensure the desired level of heat, the flame must be constantly maintained;
- They have relatively low power - it is impossible to heat a large bathhouse with their help;
- They burn oxygen - hot metal reduces the amount of air in the room. This problem is solved by additional ventilation.
Let's summarize: a gas cylinder sauna stove is a simple, budget-friendly and compact version of the heating system. It is well suited for owners of small steam rooms, people on a limited budget and home owners who only enjoy the sauna from time to time. If you are looking for an economical, durable and powerful source of heat, we advise you to pay attention to brick and metal long-burning devices.
Stove for a bathhouse made from a metal gas cylinder with a boiler (Option 2)
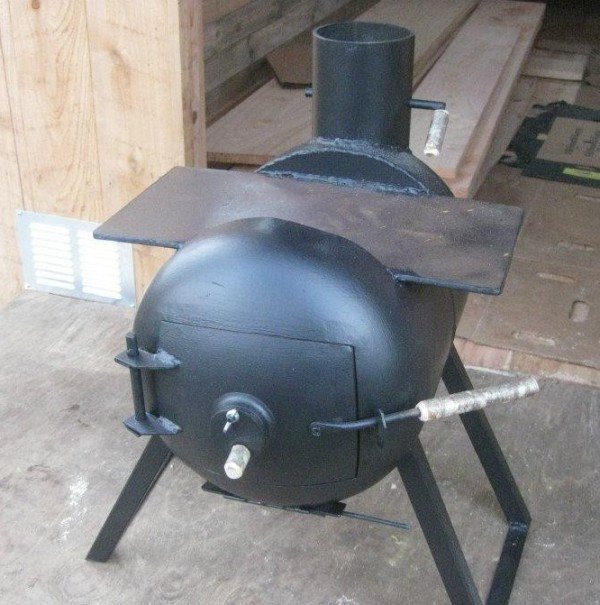
Another version of a stove made from a metal gas cylinder will even be quite interesting, and there are reasons for this. Firstly, more detailed instructions for making the stove will be provided here. Secondly, this stove can be used not only as a stove, but also as a boiler, although it will be necessary to build a small prefix with a copper pipe, a coil and a tank, where the heated water will be poured. Wanting less words and more action, let’s begin to explain how you can make a stove for a bathhouse with a boiler from a gas cylinder. First of all, we take the cylinder, open all the caps and pour water into it to displace the explosive gas. In principle, it was necessary to do the same in the first case. Then we drain the water and the cylinder can be cut. Cut out the door from the end of the tank.
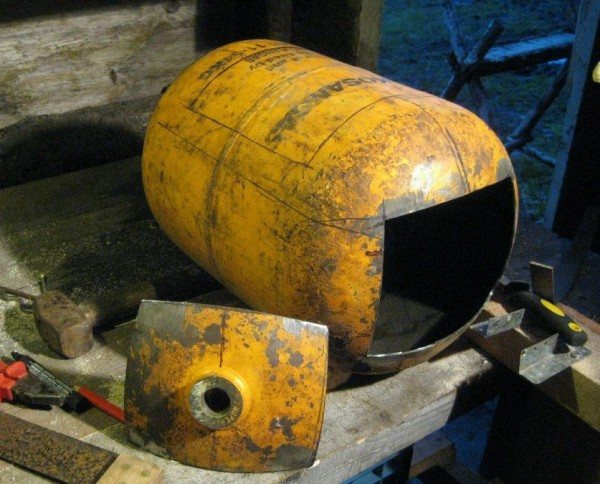
Next we use tires, which we insert from the back side and weld to the tank. The reason for these tires is clear: to reduce the gaps, or better yet, to clean them up altogether while the door is closed.
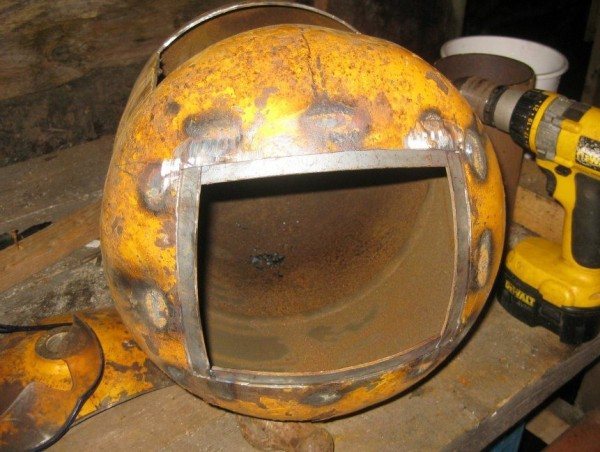
Now we sculpt the hinges for the door. You can buy ready-made loops, but if you do everything yourself, then the loops will go there too. We use 4 hinges, two for the doors...
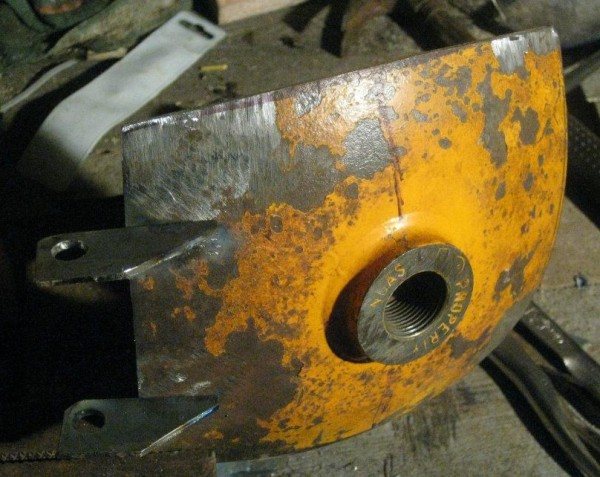
...and two on a gas cylinder.
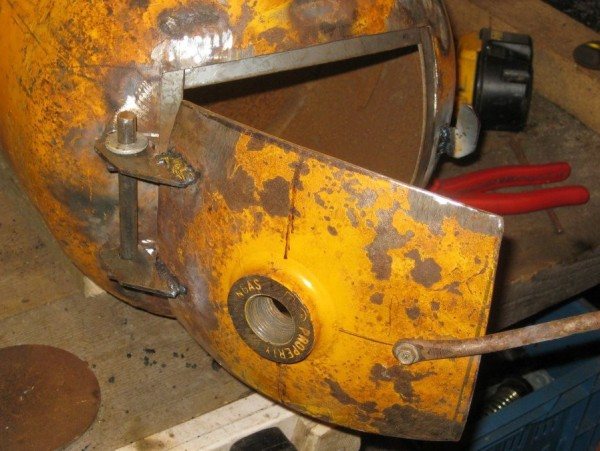
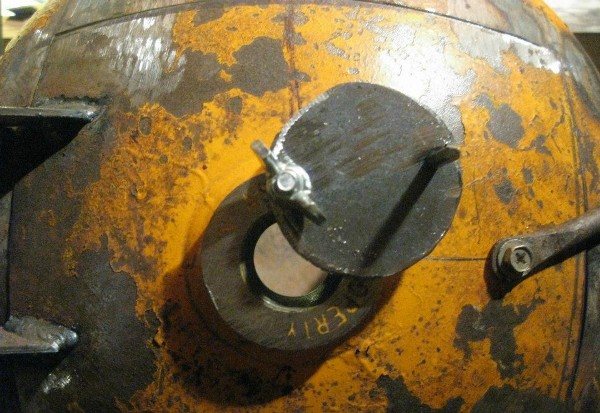
We weld them and install a rod against which the door will open. We install the door, and do not forget about the handle, with the support of which the stove door will open and close. At the same time, the handle rotates, like a putter on a gate, so that the door can be locked in the closed position. We will use the small hole on the door as a viewing window. To do this, we cut out a metal plate and attach it to the flange on the door.
Let's start processing the balloon from above. Here we will make a platform so that you can put a ladle or bucket of water on it to heat them up. To do this, you need to cut off the body of the cylinder. Insert the plate upward and close the hole at the ends with curly parts.
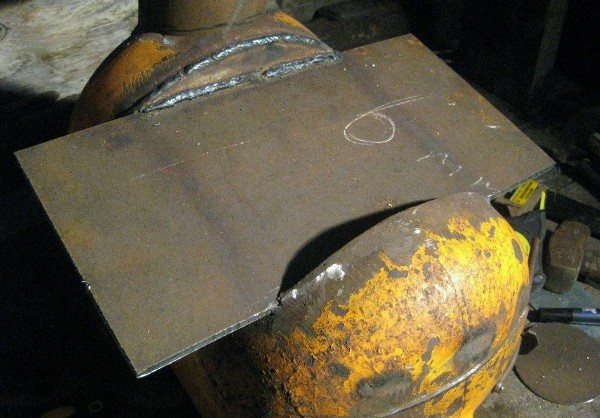
Don't forget about the chimney. Where would we be without it in the oven?
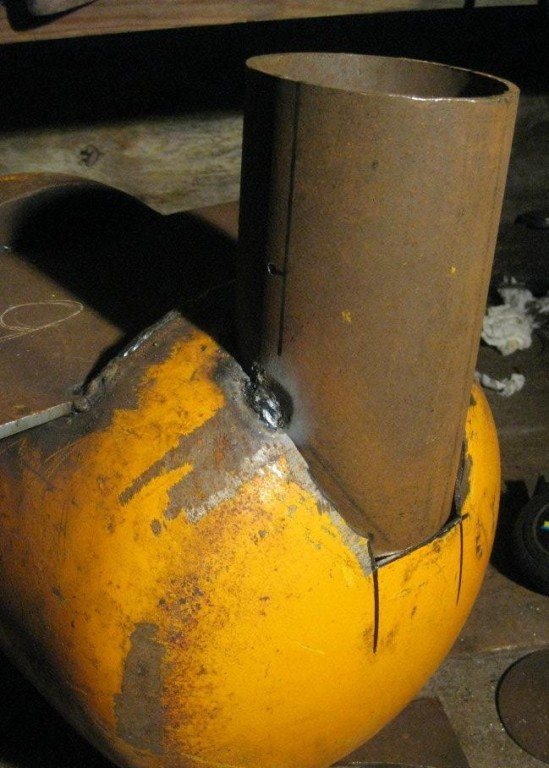
The pipe is a body of rotation, and the angle grinder cuts along straight lines. This means it will be difficult, but nothing is impossible.
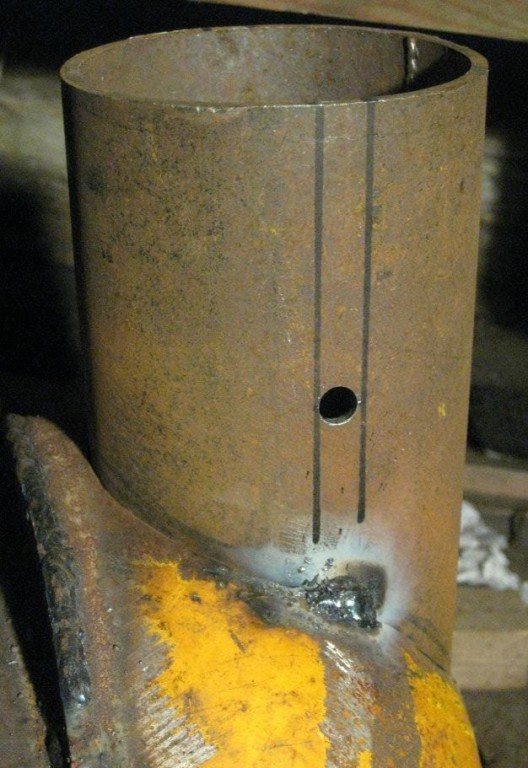
We cut the cylinder body in such a way that a chimney pipe can be inserted from the opposite end of the cylinder. We make a rotary view in the outlet pipe.
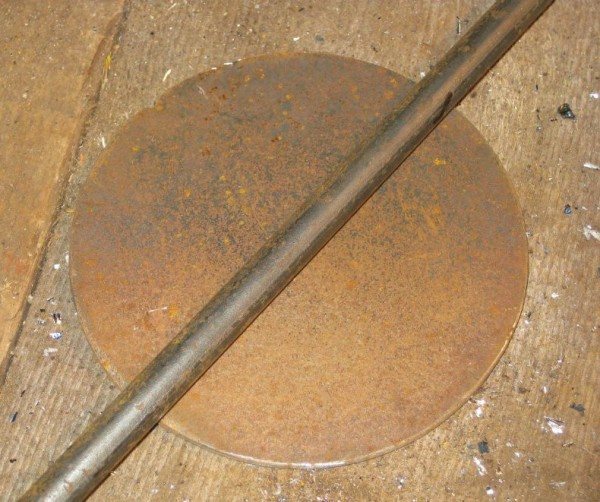
It will rotate in the body of the pipe and close after the stove is heated.
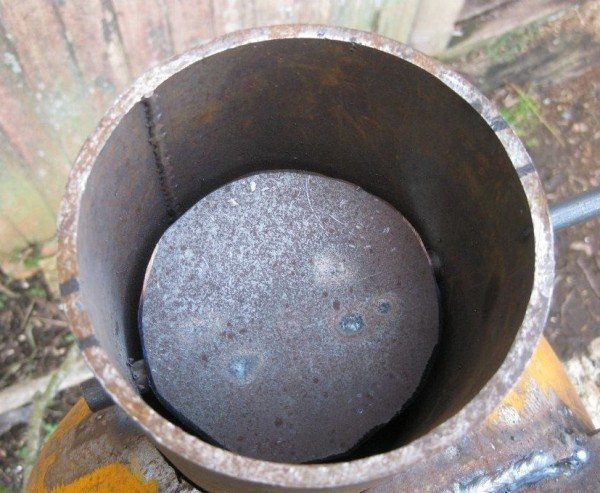
Now it is necessary to thoroughly boil all the cracks so that burnt gases are not drawn into the room and so that they do not disperse in the near future. This work is scrupulous, but necessary and important, so do your best.
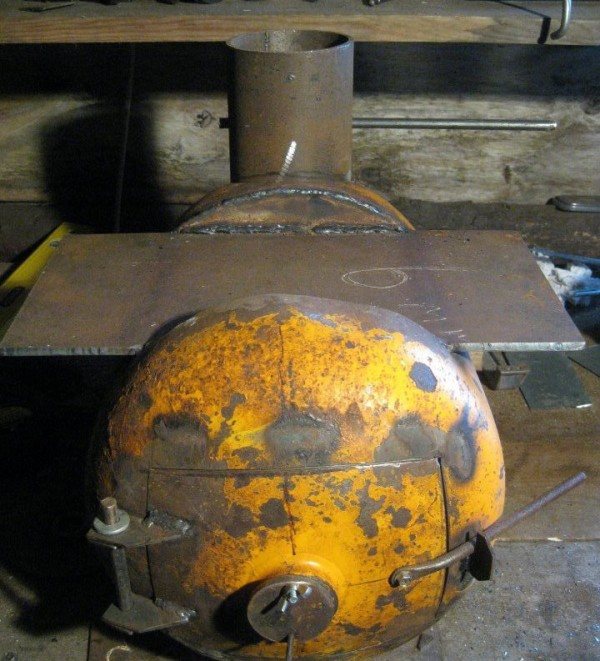
It's time to put our gas cylinder stove on its feet. We use a square pipe and a shredder. At the ends of the pipe we set the angle at which the legs will stand, and from below we fasten them with a shredder.
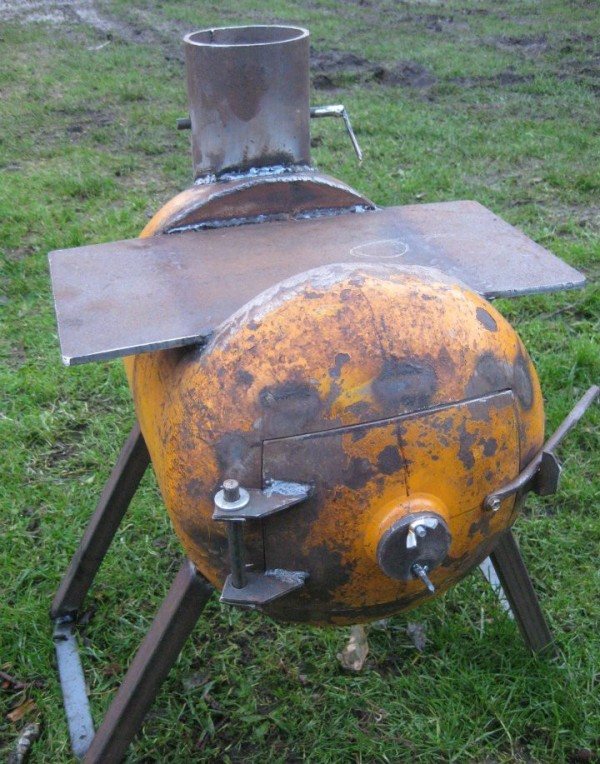
Now you can try lighting our stove, preferably somewhere in the garden. In this case, we will burn the paint off the body, and secondly, we will observe where the smoke will escape so that, if necessary, we can weld the cracks again.
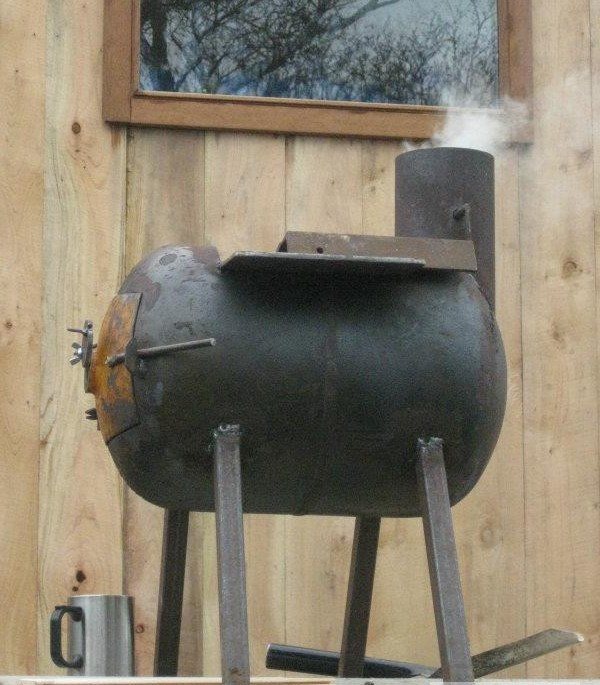
After the stove is heated, we clean off the remaining paint and apply heat-resistant paint.
And we begin the production of the boiler. The boiler will be remote, that is, it will stand separately from the stove, on a shelf that is attached to the wall. In this case, the water will not be heated according to the usual pattern. That is, not due to the fact that the bottom of the tank heats up the flame, but due to the intake of cold water, heating it from the pipe and supplying hot water back to the tank.
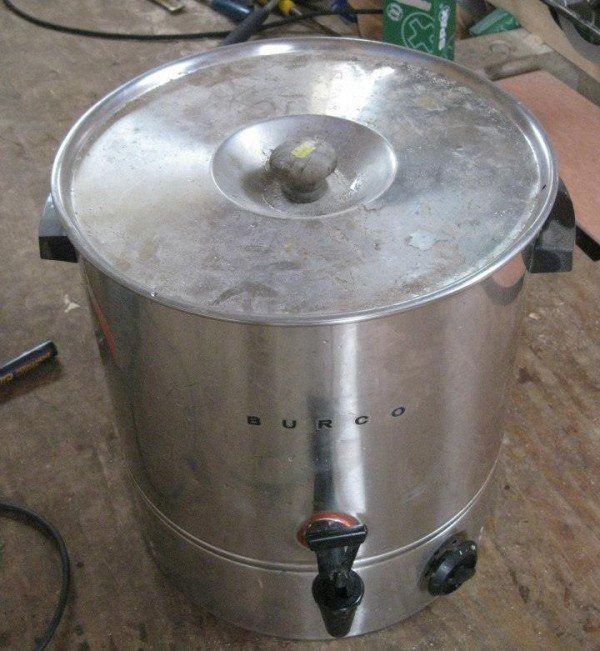
This is a cyclic random thermal pump. The water will circulate due to the fact that the heated liquid will rise up, and therefore pour into the tank through the top tube, while cold water from the tank will naturally be sucked into the body tube. A similar circulation process will occur constantly while the stove is heating and the temperatures of the pipe and water in the coil will be significantly different.
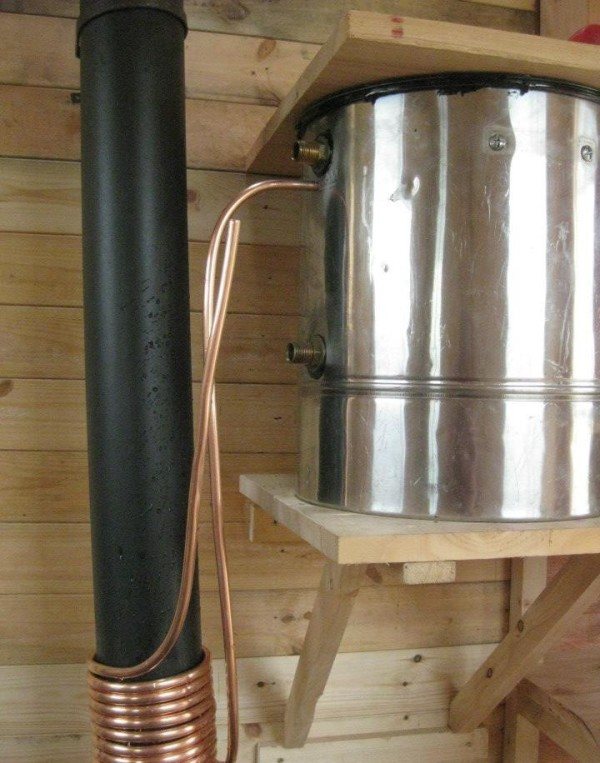
After we have understood the principle of operation of heating from a pipe, we begin to implement this project. To do this, we need a tube, preferably made of metal with excellent thermal conductivity. In our case it is a copper tube. We leave straight sections for connecting to the tank, we wind the rest onto the pipeline, simply wrapping the coil around the chimney. Now all that remains is to connect the tube to the tank.
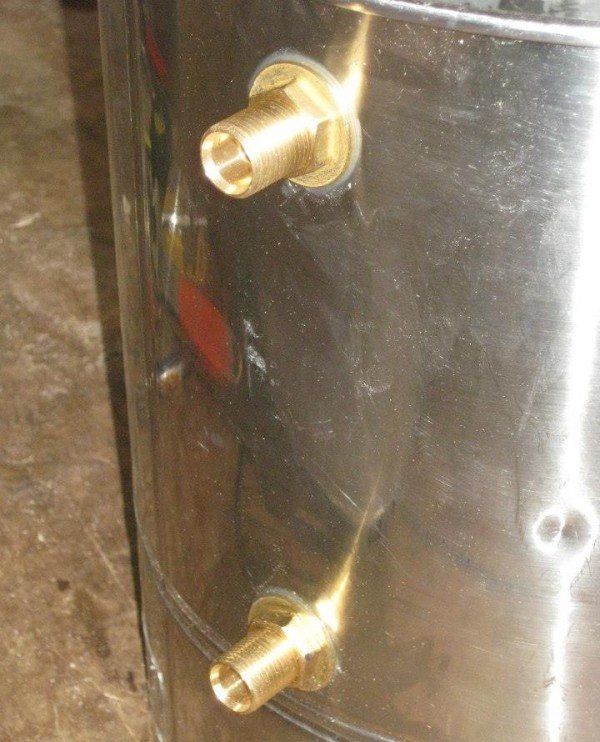
To do this, we put on union nuts and flare them onto the tube - coil and screw everything to the tank.
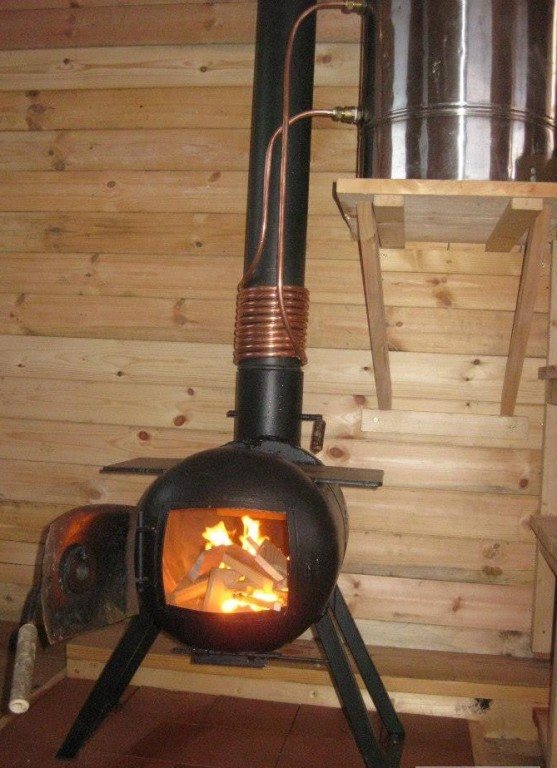
That's all. The cylinder stove is ready, the boiler is functioning. At the same time, there is still an item left for something that can be placed directly on the stove. Here you can organize a heater to heat up the heat. After all, what would it be like to go to the bathhouse without it! We have given you two examples of how you can make a stove from a gas cylinder and use it for various needs. Whether it's heating a small garden house, or using a stove for a bath. Either option is quite accessible, pragmatic and worthy of attention. So now it's all up to you. What do you choose based on your needs and goals, what will be the best option for you, based on your goals, budget, desires and strengths.
Similar articles:
Improvements for a homemade sauna stove from a cylinder
The designs of such furnaces may differ slightly. Someone welds a metal plate in the upper third, increasing the path that the smoke travels, someone welds grates inside from fittings, or makes a heater - outside or inside. In general, there are a sufficient number of ways to modernize the design of a stove, which in its simplest form is simply a potbelly stove. It is these improvements that turn a potbelly stove into a sauna stove.
We install a grid for stones on the body
Firing a homemade stove from a gas cylinder showed that very strong heat was coming from the body. There are two options: make a large mesh for stones on top or cover the stove with a brick screen. It was decided to make a heater on top. It was welded using 14-diameter reinforcement.
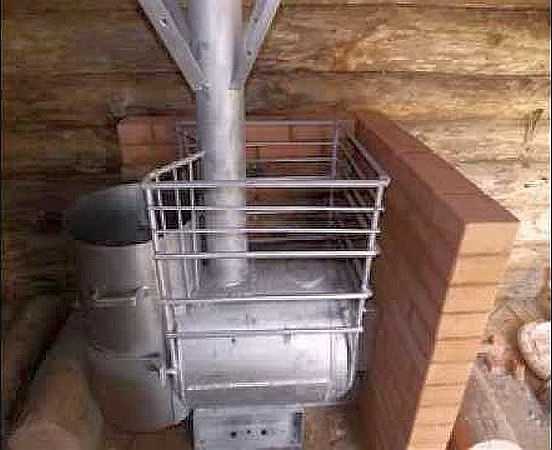
Mesh for stones on a sauna stove made from a gas cylinder
As you can see, in order to protect the log wall from heat, they built a half-brick brick wall. Its height is not lower than the laying of stones.
Removing heat from the pipe
Even with a heater on top, the chimney becomes very hot during combustion. There are also options for this:
- Make a mesh for stones on the chimney. This will increase the inertia of the stove; after the wood burns out, the bath will remain warm for a long time. Hard heat will also be removed, and the temperature of the flue gases will become lower, and this will increase fire safety. The design is visible in the photo; you can use a mesh with a wire thickness of 3-4 mm or weld it from a thin rod.
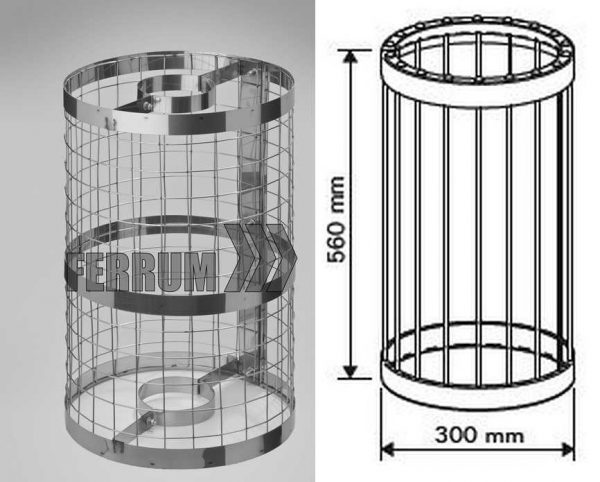
Design of a mesh for stones on a pipe
- Make a heat exchanger on the pipe. It can be in several versions:
- Water jacket. Make a sealed tank around the pipe with two pipes, which are connected to an external water tank (you can power a couple of water heating radiators).
- Just a heat exchanger to increase heat removal. Another cylinder is simply welded around the pipe, only a long and narrow oxygen cylinder. Due to the larger area, heat transfer increases.
- Use the pipe as a steam generator. If your pipe is made of high-quality stainless steel, you can splash water on it and get excellent steam. Its temperature is often around 500°C, which is enough to produce good steam.
- The furnace manufacturer Feringer has a great idea. They pour boiling water into their convector on a pipe. When the furnace is fired, it, of course, evaporates. The steam passes along the pipe through the air ducts, simultaneously cooling the pipe and quickly warming up the steam room (humid air can carry more heat than dry air).
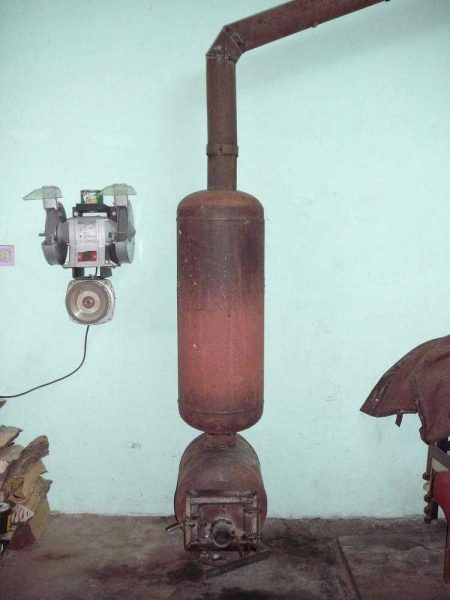
The second cylinder is for greater heat removal and better heating of the room. Coil on a pipe. Instead of a water jacket, you can wind several turns of a pipe, preferably copper, around the pipe, through which you can run water to the remote tank.
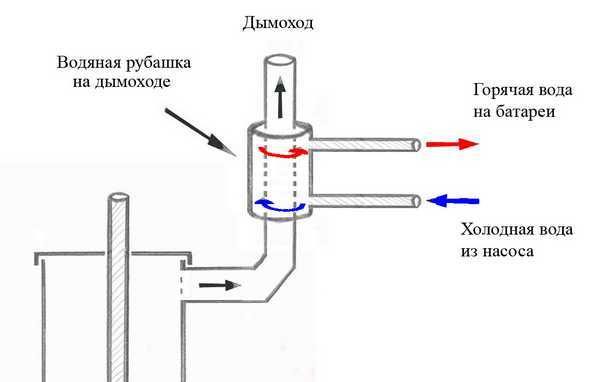
The principle of operation of a water jacket on a pipe
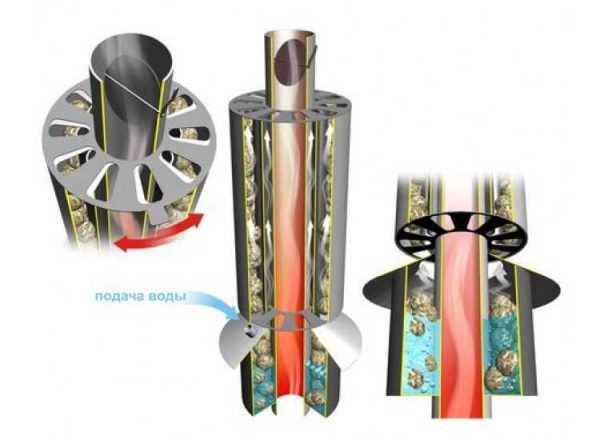
The principle of operation of a convector on a pipe by Fehringer
Make a retractable ash pan and a built-in body exchanger
An ash pan in a design as described above is inconvenient: you will have to clean it with a poker, scooping out the coals into some container. Not the best option. A retractable one is more convenient in this regard. It is also used as a combustion intensity regulator. The temperature is raised with the ash pan open, combustion is active. After reaching the specified parameters, the ash pan is pushed in, little air flows in, and the combustion almost dies out.
If you need hot water in the bath, you can install a heat exchanger inside the firebox (in the photo above it is shown as a rectangle). The heat exchanger can be made in the form of a tube, bent in the shape of the letter U or C - whichever “fits” best. This is a simpler option. Sometimes it is made in the form of a small flat box with welded pipes. The option is more complex, high requirements for the quality of steel and seams: if installed, as in the figure, in the rear part of the firebox, it will be exposed to high temperatures (the “hottest” zone) and the strength of the steel and the reliability of the seams must be high.
How to install a cast iron door on a metal cylinder
When making a sauna stove from a gas cylinder with your own hands, it is easier to attach a ready-made casting than to weld the door yourself. But it’s not clear how to join two different metals. It's really simple. Buy the cast iron door you like or the size that suits you. It comes with a frame. The same frame is welded from a metal corner of a suitable size. It is welded to the cylinder, and the cast iron door is bolted to it.
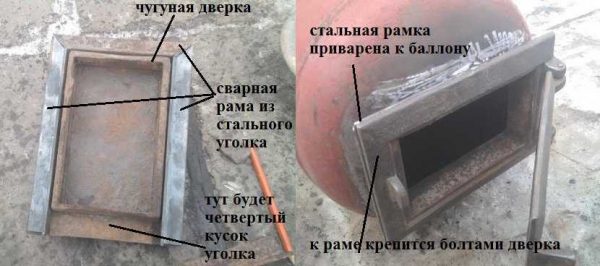
How to attach a cast iron door to a gas cylinder
To seal between the frames, you can lay a layer of asbestos or mineral wool cardboard (just make sure that it can withstand high temperatures - up to 1200°C minimum). You can do it differently - weld a small edge of 1-2 cm onto the metal frame, which will cover the gap.
