A good broom will help enhance the effect of visiting a Russian bath. And in order for the indispensable attribute of the steam room to be fragrant and of high quality, it must be dried properly. The process of preparing brooms is not at all complicated. All you need is to cut the branches in time, put them in bundles and dry them. To do this, take the advice of experienced bath attendants who know all the rules on how to dry a bath broom.
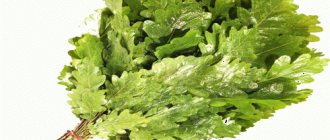
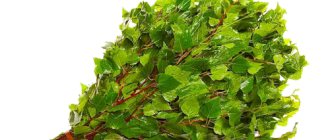
Birch broom
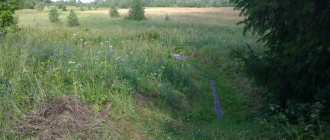
It is believed that the most appropriate time to collect birch branches is late spring or early summer. At this time, the foliage had already covered the branches, but had not yet had time to harden. During this period, we will go with you somewhere to the suburbs, to look for a birch grove.
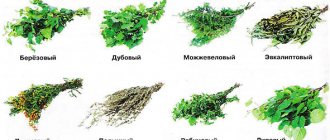
Almost any tree is suitable for a broom, but you should take into account the height at which the branches are located, the possibility of access to them, and the age of the tree (from the point of view of not destroying the tree).
Let's say we have selected the right birch tree. What's next? And then we choose the least traumatic method for cutting branches - sawing.
We select several branches with a lot of foliage and cut them down. If you want to use the “services” of the tree next year, then the cut areas must be covered. A garden varnish that can be purchased at any garden supply store is quite suitable for these purposes.
So, the branches are cut. We collect them and take them to where we will actually knit brooms. Some people do this on the spot, but it is more convenient and profitable to do it directly near the subsequent storage site. And the remains of branches are quite suitable after drying for firewood for a bathhouse or barbecue.
We take an ax and pruning shears. The ax is useful for chopping thicker branches, and with the pruning shears we directly separate those branches that will make up the broom. These are branches from half a meter to 70-80 cm long. Cut off several of these branches, put them in one hand and try to knock on your back with this kind of broom. If it is convenient for you to work like this, then this is your optimal length, if not, choose one that is convenient for you, shortening or, on the contrary, cutting off longer branches.
By cutting off all the branches suitable for assembling a broom in this way, we get the finished result: a broom of the required length with a thick handle that fits comfortably in the palm of your hand. If you don’t choose the length and thickness to suit your needs, then when used in the steam room, the broom will tear our skin with its handle, rub our palms and cause other troubles. The result of our work should be a broom with slightly protruding, not yet cut off branch tails. Using the manipulations described above (to determine the length of the branches), we also select the length of the handle.
After this, it is necessary to bandage the broom to give it a finished look and so that it does not crumble in our hands. There are many options here, ranging from electrical tape (always blue) to nylon ropes (which tend to unwind and are often inconvenient) and even wire.
How to properly dry birch brooms for a bath
So, if you have already cut tree branches, now you can start making broom blanks and drying it. To do this, cut branches must be laid out on burlap in a cool, dark place. This can be done right on the ground. These branches need to be covered with some kind of natural fabric, for example, cotton fabric, or burlap, or, in extreme cases, just newspapers. Under no circumstances cover the branches with polyethylene or film, otherwise the leaves will become steamed and the quality of your future broom will remain low; it may simply be unsuitable for bath procedures.
Important! You can sprinkle the branches with a little salt before drying, so they will retain the maximum amount of beneficial properties. Don’t be afraid, you can shake off the salt later and it won’t remain on your brooms.
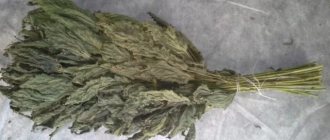
After your branches have been left for several days (usually 2 - 3 days), they become wilted and are easier to work with further. Now you can arrange the brooms themselves; for this you need to select the most suitable branches in terms of length and texture, and then put them together. Where there is a bend in the branch, it is better to direct it inward. The broom should be quite voluminous, but this is according to your taste and bathing preferences. Moreover, you should take into account that the leaves of the branches you collect must be healthy and undamaged, otherwise the quality of your broom will leave much to be desired, it will quickly crumble and become useless. Next, the handle of the broom folded in this way must be prepared; for this, the ends of the folded branches should be processed, excess knots should be trimmed, and foliage should be torn off. The length of such a handle should be approximately 10 cm. After this, the handle must be tied with canvas thread. To do this, you need to wrap a thread around the handle of your future broom in several places in a circle and tie it tightly. Note that this must be a thread, but in no case a wire. Next, you need to evenly trim the edges of the handle with a knife or pruning shears so that no unnecessary knots stick out from it, then it will be convenient to steam with a broom, and use the handle to massage, pressing through the bones.
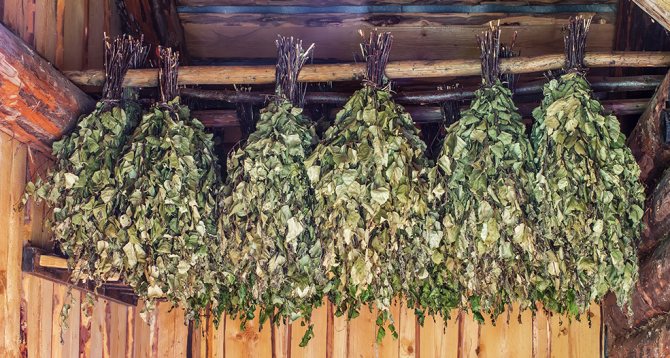
The semi-finished broom is ready, now you need to dry the broom well. To do this, you need to find a dark, cool, well-ventilated place for further drying. It is strictly forbidden to hang brooms in a damp place, in a draft, in direct sunlight, otherwise the broom will dry out, lose its beneficial properties and be completely useless in the bathhouse. A cool shed is best for drying. It is necessary to hang birch brooms by the handles, with the massive part down, at some distance from each other, then such bath accessories will be dried as evenly and correctly as possible. How to dry bath brooms if you live in an apartment and don’t have such sheds - your balcony is quite suitable for these purposes. The main thing is to protect your brooms from direct sunlight and drafts. On the balcony, brooms can also dry quite normally. There is another way to dry birch brooms: lay them on the ground at some distance from each other. But it is necessary to dry not just on damp ground, but on a spread burlap. At the same time, it is necessary to turn the birch brooms over to the other side from time to time for uniform drying. Brooms should be dried in moderation; they should not be over-dried, otherwise they will quickly crumble and become useless. So, we have looked at how to properly dry birch brooms for a bath. But one more very important question remains: how to store ready-made bath brooms?
How to store bath brooms
There are several ways to store bath brooms.
- Method No. 1: using vacuum packaging. In this case, air will not get into the bag, and accordingly the broom will retain its original image. Note that the packages in this case should also be kept in the shade and cool, under no circumstances in direct sunlight, otherwise the broom will still dry out and become useless.
- Method number 2 . Leave for storage in a cool, dark, well-ventilated barn, first covering it with a haystack and covering the brooms with hay. With this method of storage, the brooms will acquire even more useful properties, while the hay will prevent the brooms from drying out.
- Method number 3 . Store finished brooms hanging by the handles in the attic. But this method sometimes becomes dangerous for brooms due to the fact that attics are often very dry and hot, and this harms bath brooms.
- Method number 4 . If you live in an apartment, then you can hang the finished brooms in the cellar or on the balcony, but taking into account the temperature and light conditions in the room.
As you can see, there are a lot of ways to store bath brooms, the main thing is to create optimal conditions, and then it’s a matter of technique. Let us note that brooms made on your own are only good for a year, since for more than a year the essential oils from the foliage evaporate, the brooms dry out, and are no longer useful in the bathing business. Collecting, drying and storing birch brooms is only part of the entire bathing procedure. Proper steaming of brooms is also very important here. There are two ways to steam birch brooms: quick and gradual. The most gentle method is the gradual steaming method, thanks to which the broom can last more than once, but even several times. But the quality of production of brooms also determines their service life. The essence of gradually steaming a broom is that first the broom is placed in a basin with warm water and placed on hot stones in a bathhouse. Then add boiling water to the cup and shake off the broom. Thus, the broom does not warm up immediately, but gradually. The essence of the quick method of steaming a broom is that you immediately put it in boiling water, then take it out, shake it and place this cup of water on the hot stones in the bathhouse. Thus, you can already steam with a ready-made broom. Please note that there is no need to pour out the water in which you steam the broom after bath procedures. This water contains many essential oils and microelements beneficial for skin and hair. Therefore, you need to douse yourself with this water after bathing procedures and your skin will always look young. So, today we looked at how to properly dry birch brooms for a bath. A ready-made broom purchased will not bring you as much pleasure as one assembled and dried by yourself with your own hands. Carry out your bath procedures with benefit and pleasure, and the broom will always be your faithful friend and helper.
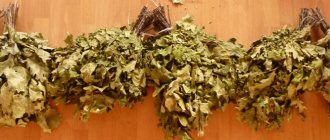
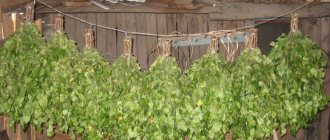
The process of drying birch brooms
And now our brooms are ready. But these are not quite brooms yet. Of course, no one is stopping us from using them on the day they are made, but we prepare them not for one day, but for the whole season, which is why the brooms need to be dried. For this, the best place would be a dry, dark room where you can place ropes and brooms.
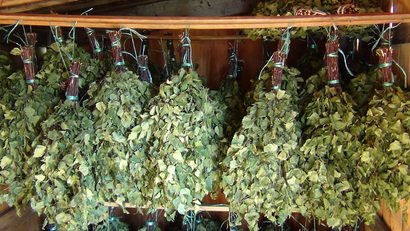
Next, we hang ropes in the selected room, and with hooks made of wire, or with short pieces of rope, we hook our brooms to a large rope. The most convenient way to do this is with hooks in the places where we tied the handle. You need to hang the brooms so that there is at least a small distance between them, otherwise there is a risk of getting rot and sadness about the discarded brooms.
Alternative methods
Unfortunately, not all Russian bathhouse lovers have suitable premises and conditions for drying. Therefore, people have come up with several alternative methods that can completely replace drying:
- Freezing is the most common method after drying. The broom is placed in the freezer and quickly frozen at a temperature of -18 degrees. Before going to the steam room, you just need to defrost the accessory; you don’t have to steam it, just douse it with hot water.
- Vacuum packaging replaces the standard method of storing brooms for many city residents. The dried accessory is placed in plastic film or a special bag, preventing air from entering it.
The brooms obtained in this way are no worse than ordinary ones; they completely retain their nutrients and healing properties.
To make a bath with a broom not only pleasant, but also healthy, you must follow all the rules and technologies. You need to know how to properly assemble, tie, dry brooms, you need to store them correctly, you need to know how to soak them, and, of course, you need to know how to use them. Only completing the entire complex will lead to a healthy body and cheerful spirit!
Preparing a broom for use in a bathhouse
And now, friends, after long but joyful preparations, we are finally in the bathhouse.
But don’t rush, it is at this moment that there is a high risk of being left without a broom and pleasure. Before using a birch broom, you need to soak it!
You dried it, dried it, and now wet it? However, if this is not done, the broom will fly around like dust after the first blows and you will thresh each other with bare branches.
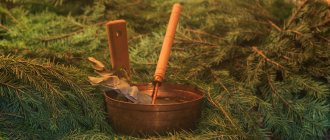
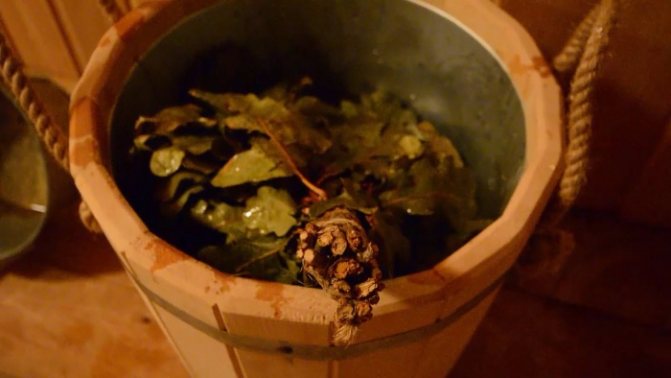
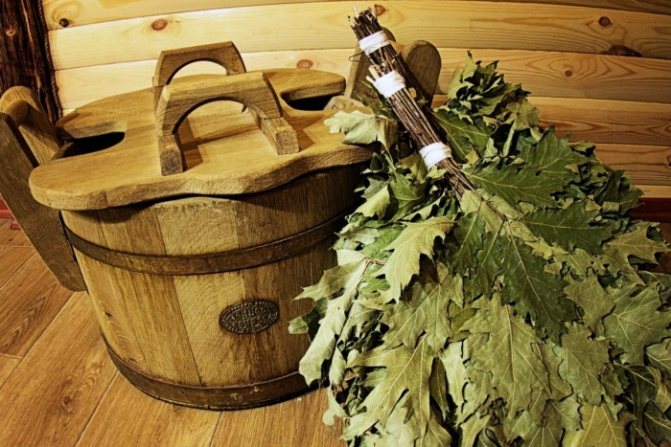
We fill a tub full of boiling water and lower the brooms into it. And we go to the shower. And then to the steam room. These 15-20 minutes are enough for the leaves to regain their former softness. Oddly enough, this procedure must be carried out even if you took a freshly cut broom. Soaking in boiling water seems to strengthen the broom and the leaves stay on it longer, and not on you or on the floor.
It is also recommended to soak brooms in boiling water after each entry into the steam room to wash off sweat, salt and everything else that you leave in the steam room.
Blank
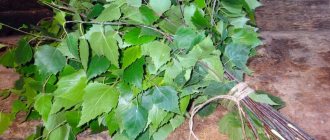
A high-quality bath broom has matte green foliage without black spots. It's fluffy, flavorful, and comfortable. During use, leaves practically do not fall off. To obtain just such a copy, certain nuances must be observed. One of these aspects is compliance with the deadlines for the preparation of branches.
Folk tradition claims that branches can be broken after Trinity. However, you should not delay the collection for too long. You only have 2 weeks to do everything. To ensure that the harvested material gives longevity and relieves diseases, cut branches from healthy and strong plants. Make sure they are not wet. Make cuts after the dew has completely disappeared from the foliage. Try to keep the branches no longer than 50–80 cm.
If you prefer to steam with brooms made from deciduous plants, when preparing, pay attention to the recommendations presented below.
- Before drying, carefully clean the cut branches from knots, twigs and leaves in the part that will be the broom handle.
- Fold the branches so that the front side of the leaves faces one way, and the broom itself is shaped like a fan.
- Tie the handle in two places: just under the leaves and 5 cm above the edge of the handle. It is advisable to tie birch brooms in the middle as well.
- To make the bath attribute more fragrant, add a couple of juniper, eucalyptus or currant branches to the bundle.
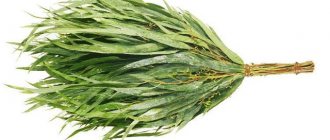
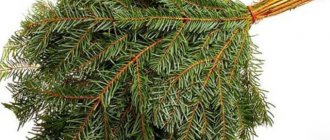
Those who like to steam with coniferous branches may not be puzzled by how to dry such brooms for a bath. Harvesting conifers can be done all year round. This is especially true for juniper, fir and spruce paws. Fresh pine broom contains essential oils that have a beneficial effect on health.